Prendre en main Notification Hubs à l’aide de Baidu
Le service de transmission Push dans le cloud de Baidu est un service cloud chinois que vous pouvez utiliser pour envoyer des notifications Push à des appareils mobiles.
Comme Google Play et FCM (messagerie Cloud Firebase) ne sont pas disponibles en Chine, il est nécessaire d’utiliser des magasins d’applications différents et des services à transmission de type push. Baidu est l’un d’eux, et celui qui est actuellement utilisé par le Hub de notification.
Prérequis
Ce didacticiel requiert les éléments suivants :
- Kit de développement logiciel Android SDK (nous supposons que vous utilisez Android Studio), que vous pouvez télécharger à partir du site Android
- Kit de développement logiciel (SDK) Android pour transmissions Push Baidu
Notes
Pour suivre ce didacticiel, vous avez besoin d'un compte Azure actif. Si vous ne possédez pas de compte, vous pouvez créer un compte d’évaluation gratuit en quelques minutes. Pour plus d’informations, consultez Essai gratuit Azure.
Pour commencer, suivez les étapes ci-dessous :
- Créez un compte Baidu.
- Créez un projet Baidu de transmission Push dans le cloud et prenez note de la clé API et de la clé secrète.
Configurer un nouveau hub de notification
Connectez-vous au portail Azure.
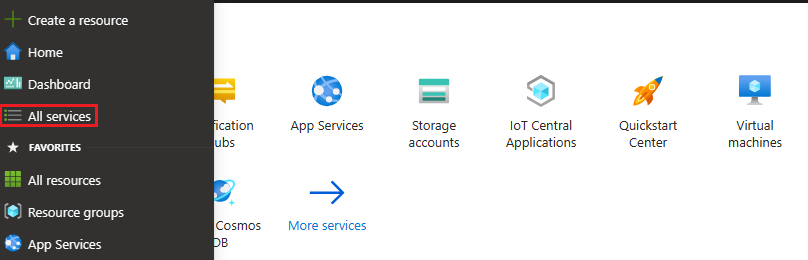
Sélectionnez Tous les services dans le menu de gauche.
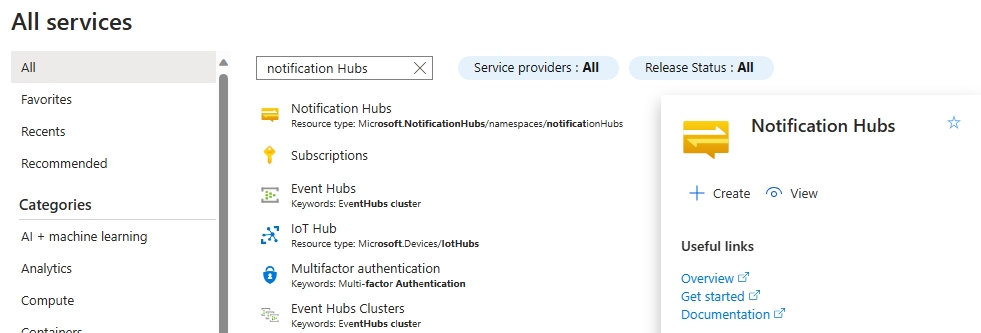
Saisissez Notification Hubs dans la zone de texte Services de filtre. Sélectionnez l’icône d’étoile en regard du nom du service pour l’ajouter à la section FAVORIS dans le menu de gauche. Sélectionnez Notification Hubs.
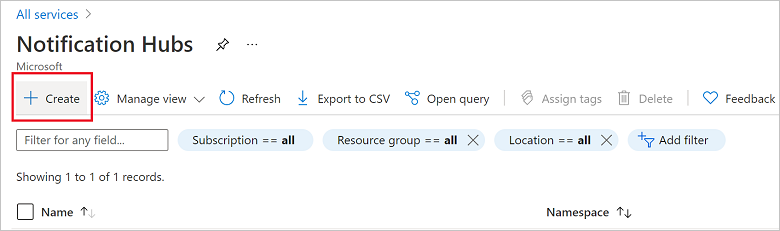
Dans la page Notification Hubs, sélectionnez Créer dans la barre d’outils.
Sous l’onglet Informations de base de la page Notification Hub, effectuez les étapes suivantes :
Dans Abonnement, sélectionnez le nom de l’abonnement Azure que vous souhaitez utiliser, puis sélectionnez un groupe de ressources existant ou créez-en un.
Entrez un nom unique pour le nouvel espace de noms dans Détails de l’espace de noms.
Un espace de noms contient un ou plusieurs hubs de notification, donc tapez un nom pour le hub dans Détails du hub de notification.
Sélectionnez une valeur dans la zone de liste déroulante Emplacement. Cette valeur spécifie l’emplacement où vous voulez créer le hub.
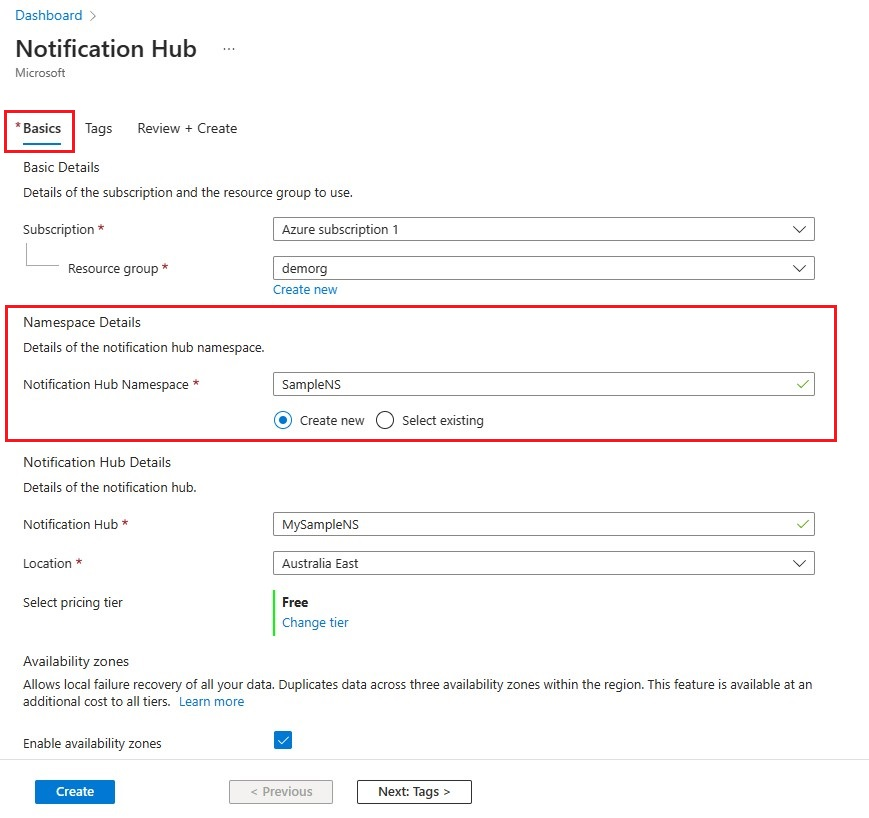
Examinez l’option Zones de disponibilité. Si vous avez choisi une région contenant des zones de disponibilité, la case à cocher est sélectionnée par défaut. Les zones de disponibilité étant une fonctionnalité payante, des frais supplémentaires sont ajoutés à votre niveau.
Choisissez une option de Récupération d’urgence : Aucune, Région de récupération jumelée ou Région de récupération flexible. Si vous choisissez Région de récupération jumelée, la région de basculement s’affiche. Si vous sélectionnez Région de récupération flexible, utilisez la liste déroulante pour choisir parmi une liste de régions de récupération.
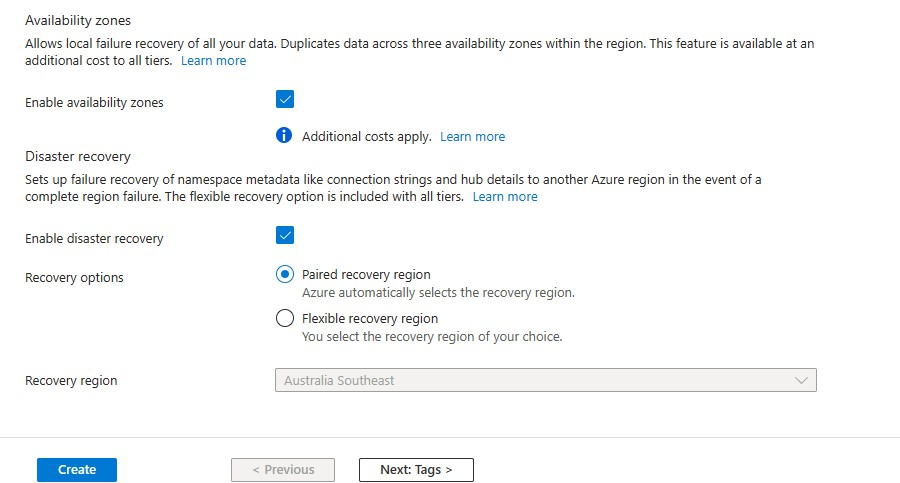
Sélectionnez Create (Créer).
Une fois le déploiement terminé, sélectionnez Accéder à la ressource.


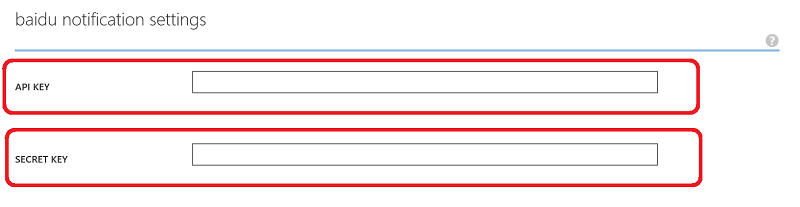
6. Dans le hub de notification, sélectionnez Notification Services, puis Baidu (Android China).
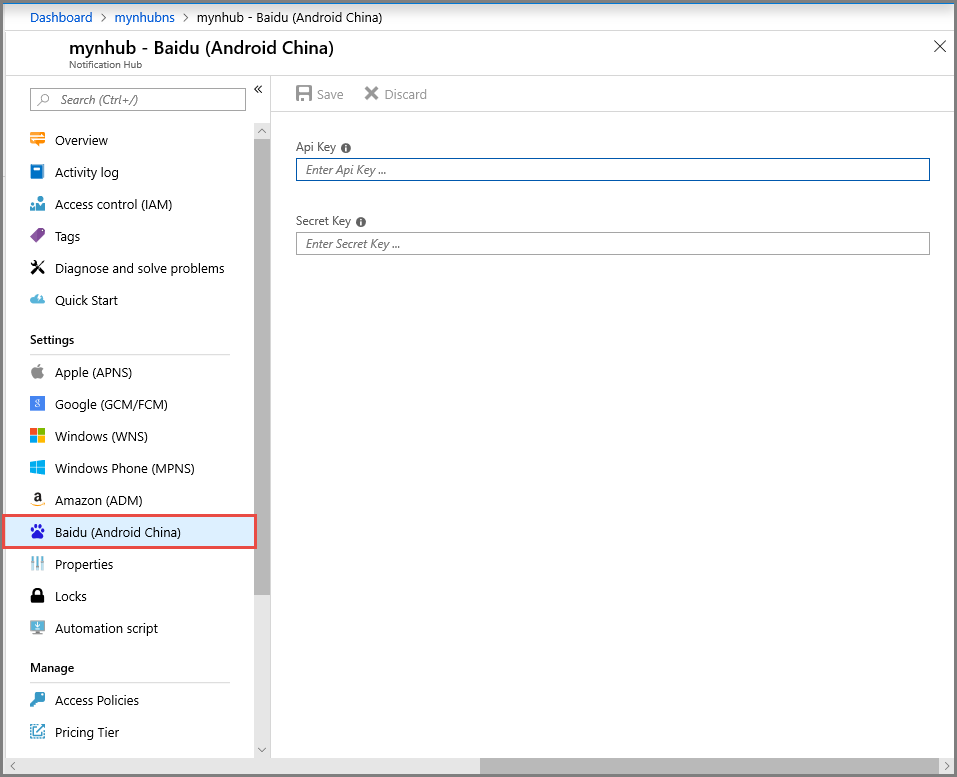
7. Faites défiler jusqu'à la sectiondes paramètres de notification Baidu. Entrez la clé API et la clé secrète que vous avez obtenues à partir de la console Baidu, dans le projet push cloud Baidu. Cliquez ensuite sur Enregistrer.
Votre Notification Hub est désormais configuré pour fonctionner avec Baidu. Vous avez également les paramètres de connexion pour enregistrer votre application afin d’envoyer et de recevoir des notifications Push.
Prenez note de DefaultListenSharedAccessSignature et DefaultFullSharedAccessSignature à partir de la fenêtre d’informations de connexion Accès.
Connexion de votre application au hub de notification
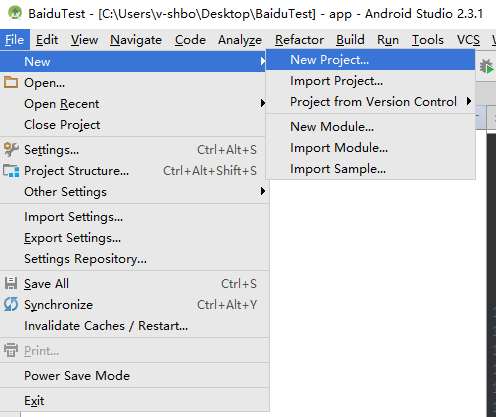
Dans Android Studio, créez un nouveau projet Android (Fichier > Nouveau > Nouveau projet).
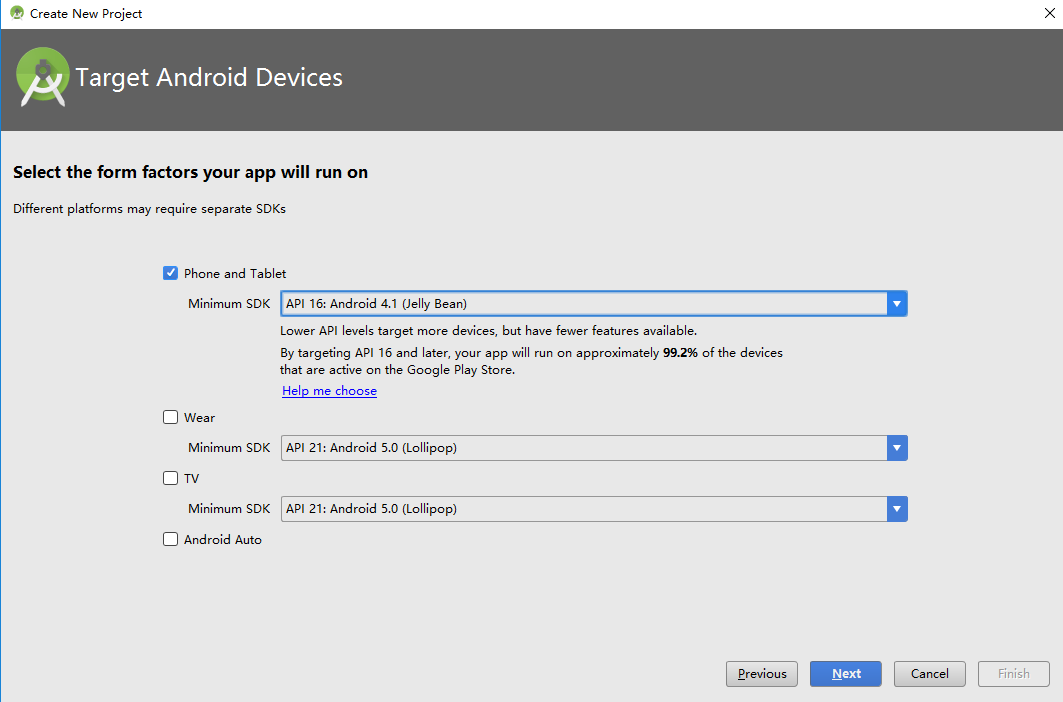
Entrez un nom d’application et vérifiez que la version minimale nécessaire du kit SDK est définie sur API 16: Android 4.1. Vérifiez également que le nom de votre package (应用包名) est identique à celui du portail push cloud Baidu

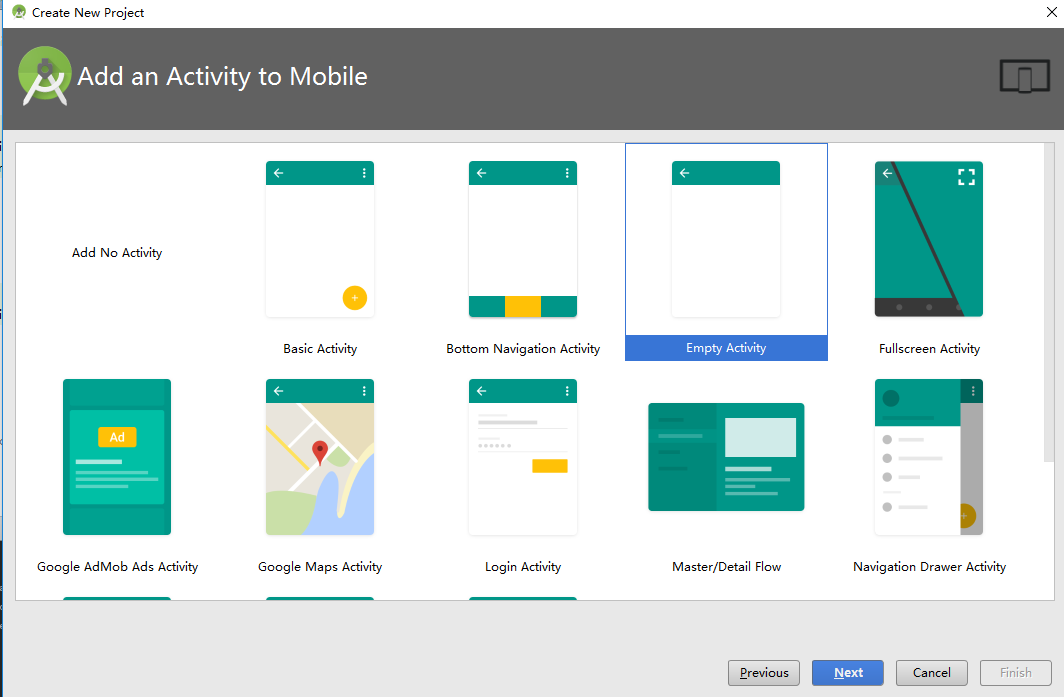
Cliquez sur Next et continuez à suivre l’Assistant jusqu’à ce que la fenêtre Create Activity s’affiche. Assurez-vous que l’option Empty Activity est sélectionnée, puis cliquez sur Finish pour créer une nouvelle application Android.
Assurez-vous que la cible de génération du projet est définie correctement.
Ajoutez ensuite des bibliothèques Azure Notification Hubs. Dans le fichier
Build.Gradlede l’application, dans la section dépendances, ajoutez les lignes suivantes.implementation 'com.microsoft.azure:notification-hubs-android-sdk:0.6@aar' implementation 'com.microsoft.azure:azure-notifications-handler:1.0.1@aar'Ajoutez le référentiel suivant après la section dépendances.
repositories {
    maven {
        url "https://dl.bintray.com/microsoftazuremobile/SDK"
    }
}
Pour éviter le conflit de List, ajoutez le code suivant dans le fichier
Manifest.xmldu projet :<manifest package="YOUR.PACKAGE.NAME" xmlns:tools="http://schemas.android.com/tools" xmlns:android="http://schemas.android.com/apk/res/android">puis, dans la balise
<application/>:<application tools:replace="android:allowBackup,icon,theme,label">Téléchargez et décompressez le Kit de développement logiciel (SDK) Android pour transmissions Push Baidu. Copiez le fichier
pushservice-x.y.z jardans le dossier de bibliothèques. Puis copiez les fichiers.sodans les dossierssrc/main/jniLibs(créer un nouveau dossier) de votre application Android.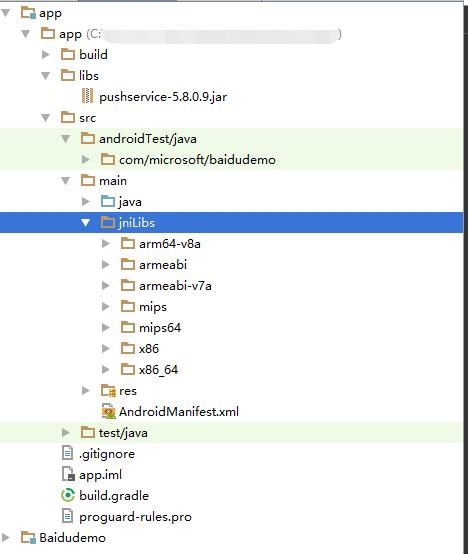
Dans le dossier
libsdu projet, faites un clic droit sur le fichierpushervice-x.y.z.jar; sélectionnez Ajouter en tant que bibliothèque pour inclure cette bibliothèque dans le projet.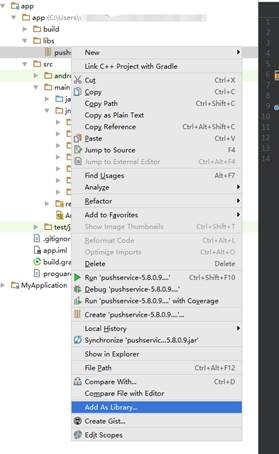
Ouvrez le fichier
AndroidManifest.xmldu projet Android et ajoutez les autorisations nécessaires au kit SDK Baidu. RemplacezYOURPACKAGENAMEavec le nom de votre package.<uses-permission android:name="android.permission.INTERNET" /> <uses-permission android:name="android.permission.READ_PHONE_STATE" /> <uses-permission android:name="android.permission.ACCESS_NETWORK_STATE" /> <uses-permission android:name="android.permission.RECEIVE_BOOT_COMPLETED" /> <uses-permission android:name="android.permission.WRITE_SETTINGS" /> <uses-permission android:name="android.permission.VIBRATE" /> <uses-permission android:name="android.permission.WRITE_EXTERNAL_STORAGE" /> <uses-permission android:name="android.permission.DISABLE_KEYGUARD" /> <uses-permission android:name="android.permission.ACCESS_COARSE_LOCATION" /> <uses-permission android:name="android.permission.ACCESS_WIFI_STATE" /> <uses-permission android:name="android.permission.ACCESS_DOWNLOAD_MANAGER" /> <uses-permission android:name="android.permission.DOWNLOAD_WITHOUT_NOTIFICATION" /> <uses-permission android:name="android.permission.EXPAND_STATUS_BAR" /> !! <uses-permission android:name="baidu.push.permission.WRITE_PUSHINFOPROVIDER.YOURPACKAGENAME" /> !!<permission android:name="baidu.push.permission.WRITE_PUSHINFOPROVIDER.YOURPACKAGENAME" android:protectionLevel="normal" />Ajoutez la configuration ci-après dans l’élément application après l’élément d’activité
.MainActivityen remplaçant yourprojectname (par exemple,com.example.BaiduTest) :<activity android:name="com.baidu.android.pushservice.richmedia.MediaViewActivity" android:configChanges="orientation|keyboardHidden" android:label="MediaViewActivity" /> <activity android:name="com.baidu.android.pushservice.richmedia.MediaListActivity" android:configChanges="orientation|keyboardHidden" android:label="MediaListActivity" android:launchMode="singleTask" /> <!-- Push application definition message --> <receiver android:name=".MyPushMessageReceiver"> <intent-filter> <!-- receive push message--> <action android:name="com.baidu.android.pushservice.action.MESSAGE" /> <!-- receive bind,unbind,fetch,delete.. message--> <action android:name="com.baidu.android.pushservice.action.RECEIVE" /> <action android:name="com.baidu.android.pushservice.action.notification.CLICK" /> </intent-filter> </receiver> <receiver android:name="com.baidu.android.pushservice.PushServiceReceiver" android:process=":bdservice_v1"> <intent-filter> <action android:name="android.intent.action.BOOT_COMPLETED" /> <action android:name="android.net.conn.CONNECTIVITY_CHANGE" /> <action android:name="com.baidu.android.pushservice.action.notification.SHOW" /> <action android:name="com.baidu.android.pushservice.action.media.CLICK" /> <action android:name="android.intent.action.MEDIA_MOUNTED" /> <action android:name="android.intent.action.USER_PRESENT" /> <action android:name="android.intent.action.ACTION_POWER_CONNECTED" /> <action android:name="android.intent.action.ACTION_POWER_DISCONNECTED" /> </intent-filter> </receiver> <receiver android:name="com.baidu.android.pushservice.RegistrationReceiver" android:process=":bdservice_v1"> <intent-filter> <action android:name="com.baidu.android.pushservice.action.METHOD" /> <action android:name="com.baidu.android.pushservice.action.BIND_SYNC" /> </intent-filter> <intent-filter> <action android:name="android.intent.action.PACKAGE_REMOVED" /> <data android:scheme="package" /> </intent-filter> </receiver> <service android:name="com.baidu.android.pushservice.PushService" android:exported="true" android:process=":bdservice_v1"> <intent-filter> <action android:name="com.baidu.android.pushservice.action.PUSH_SERVICE" /> </intent-filter> </service> <service android:name="com.baidu.android.pushservice.CommandService" android:exported="true" /> <!-- Adapt the ContentProvider declaration required for the Android N system, and the write permissions include the application package name--> <provider android:name="com.baidu.android.pushservice.PushInfoProvider" android:authorities="com.baidu.push.example.bdpush" android:exported="true" android:protectionLevel="signature" android:writePermission="baidu.push.permission.WRITE_PUSHINFOPROVIDER. yourprojectname " /> <!-- API Key of the Baidu application --> <meta-data android:name="api_key" !! android:value="api_key" /> </application>Ajoutez une nouvelle classe nommée
ConfigurationSettings.javaau projet.public class ConfigurationSettings { public static String API_KEY = "..."; public static String NotificationHubName = "..."; public static String NotificationHubConnectionString = "..."; }Définissez la valeur de la chaîne
API_KEYavec l’API_KEY à partir du projet cloud Baidu.Définissez la valeur de la
NotificationHubNamechaîne avec le nom de votre hub de notification à partir du portail Azure, puisNotificationHubConnectionStringavecDefaultListenSharedAccessSignatureà partir du portail Azure.Ouvrez MainActivity.java et ajoutez le code suivant à la méthode onCreate :
PushManager.startWork(this, PushConstants.LOGIN_TYPE_API_KEY, API_KEY );Ajoutez une nouvelle classe appelée
MyPushMessageReceiver.javaDemoApplication.java et ajoutez-lui le code suivant. Il s’agit de la classe qui gère les notifications Push reçues à partir du serveur push Baidu.package your.package.name; import android.content.Context; import android.content.Intent; import android.os.AsyncTask; import android.text.TextUtils; import android.util.Log; import com.baidu.android.pushservice.PushMessageReceiver; import com.microsoft.windowsazure.messaging.NotificationHub; import org.json.JSONException; import org.json.JSONObject; import java.util.List; public class MyPushMessageReceiver extends PushMessageReceiver { public static final String TAG = MyPushMessageReceiver.class .getSimpleName(); public static NotificationHub hub = null; public static String mChannelId, mUserId; @Override public void onBind(Context context, int errorCode, String appid, String userId, String channelId, String requestId) { String responseString = "onBind errorCode=" + errorCode + " appid=" + appid + " userId=" + userId + " channelId=" + channelId + " requestId=" + requestId; Log.d(TAG, responseString); if (errorCode == 0) { // Binding successful Log.d(TAG, " Binding successful"); } try { if (hub == null) { hub = new NotificationHub( ConfigurationSettings.NotificationHubName, ConfigurationSettings.NotificationHubConnectionString, context); Log.i(TAG, "Notification hub initialized"); } } catch (Exception e) { Log.e(TAG, e.getMessage()); } mChannelId = channelId; mUserId = userId; registerWithNotificationHubs(); } private void registerWithNotificationHubs() { new AsyncTask<Void, Void, Void>() { @Override protected Void doInBackground(Void... params) { try { hub.registerBaidu(mUserId, mChannelId); Log.i(TAG, "Registered with Notification Hub - '" + ConfigurationSettings.NotificationHubName + "'" + " with UserId - '" + mUserId + "' and Channel Id - '" + mChannelId + "'"); } catch (Exception e) { Log.e(TAG, e.getMessage()); } return null; } }.execute(null, null, null); } @Override public void onMessage(Context context, String message, String customContentString) { String messageString = " onMessage=\"" + message + "\" customContentString=" + customContentString; Log.d(TAG, messageString); if (!TextUtils.isEmpty(customContentString)) { JSONObject customJson = null; try { customJson = new JSONObject(customContentString); String myvalue = null; if (!customJson.isNull("mykey")) { myvalue = customJson.getString("mykey"); } } catch (JSONException e) { e.printStackTrace(); } } } @Override public void onNotificationArrived(Context context, String title, String description, String customContentString) { String notifyString = " Notice Arrives onNotificationArrived title=\"" + title + "\" description=\"" + description + "\" customContent=" + customContentString; Log.d(TAG, notifyString); if (!TextUtils.isEmpty(customContentString)) { JSONObject customJson = null; try { customJson = new JSONObject(customContentString); String myvalue = null; if (!customJson.isNull("mykey")) { myvalue = customJson.getString("mykey"); } } catch (JSONException e) { // TODO Auto-generated catch block e.printStackTrace(); } } } @Override public void onNotificationClicked(Context context, String title, String description, String customContentString) { String notifyString = " onNotificationClicked title=\"" + title + "\" description=\"" + description + "\" customContent=" + customContentString; Log.d(TAG, notifyString); Intent intent = new Intent(context.getApplicationContext(),MainActivity.class); intent.putExtra("title",title); intent.putExtra("description",description); intent.putExtra("isFromNotify",true); intent.addFlags(Intent.FLAG_ACTIVITY_NEW_TASK); context.getApplicationContext().startActivity(intent); } @Override public void onSetTags(Context context, int errorCode, List<String> successTags, List<String> failTags, String requestId) { String responseString = "onSetTags errorCode=" + errorCode + " successTags=" + successTags + " failTags=" + failTags + " requestId=" + requestId; Log.d(TAG, responseString); } @Override public void onDelTags(Context context, int errorCode, List<String> successTags, List<String> failTags, String requestId) { String responseString = "onDelTags errorCode=" + errorCode + " successTags=" + successTags + " failTags=" + failTags + " requestId=" + requestId; Log.d(TAG, responseString); } @Override public void onListTags(Context context, int errorCode, List<String> tags, String requestId) { String responseString = "onListTags errorCode=" + errorCode + " tags=" + tags; Log.d(TAG, responseString); } @Override public void onUnbind(Context context, int errorCode, String requestId) { String responseString = "onUnbind errorCode=" + errorCode + " requestId = " + requestId; Log.d(TAG, responseString); if (errorCode == 0) { // Unbinding is successful Log.d(TAG, " Unbinding is successful "); } } }
Envoi de notifications à votre application
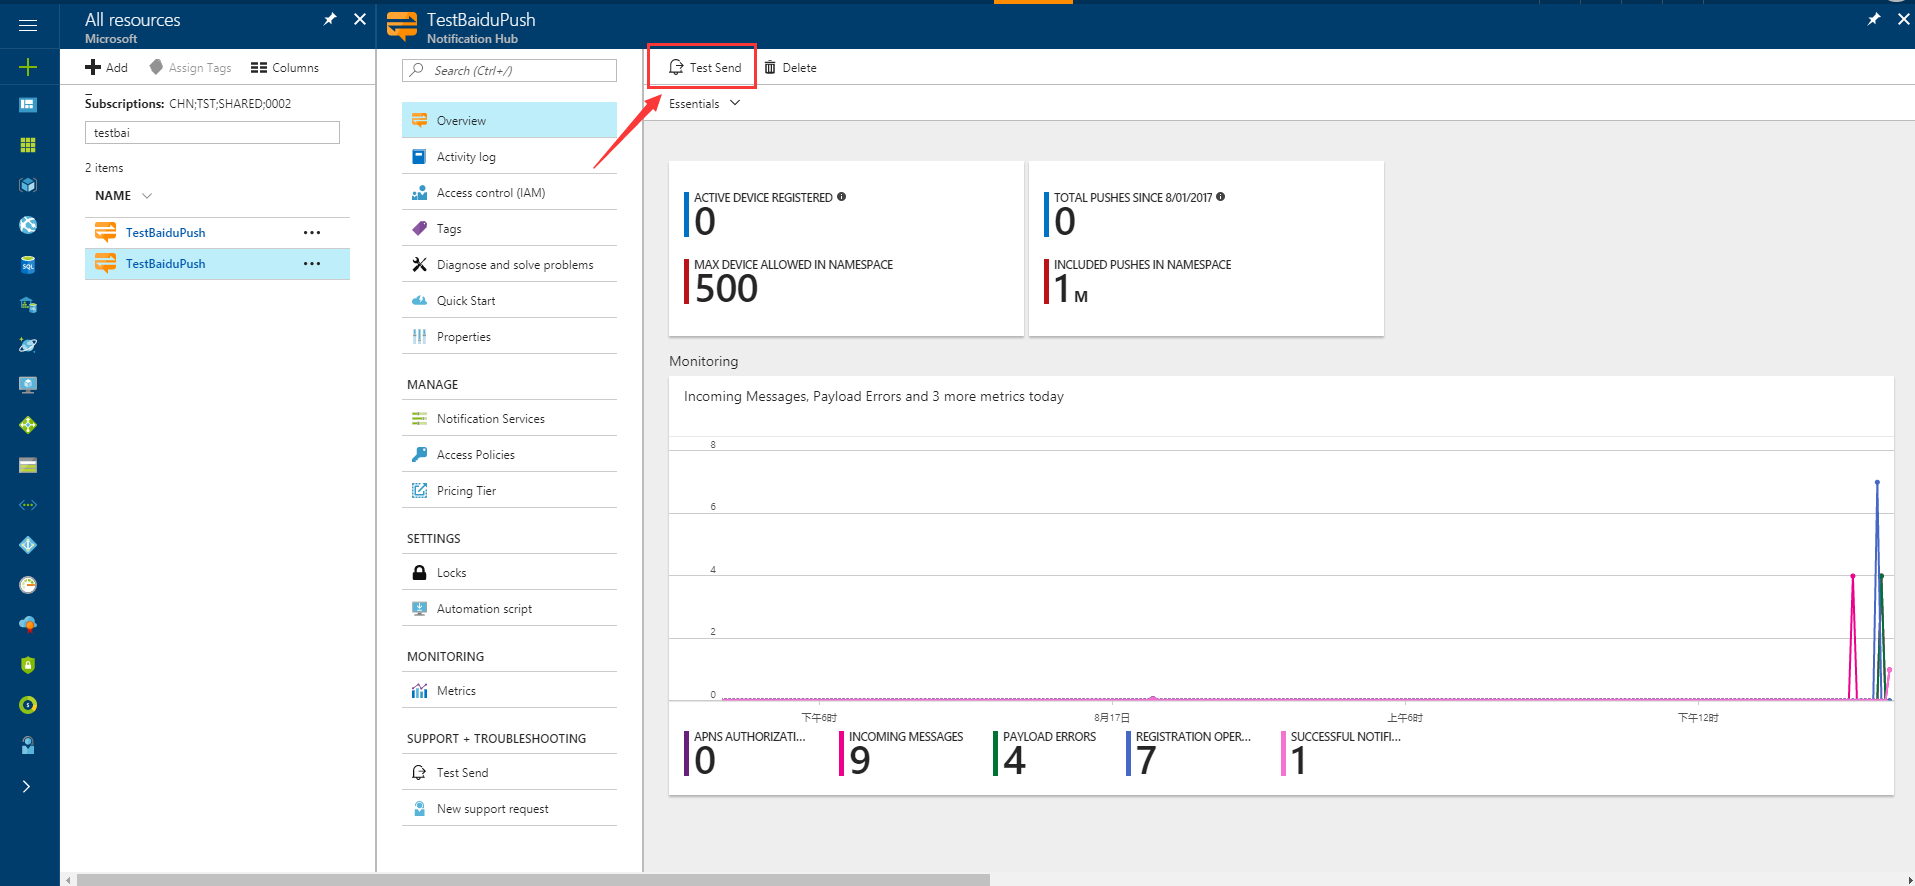
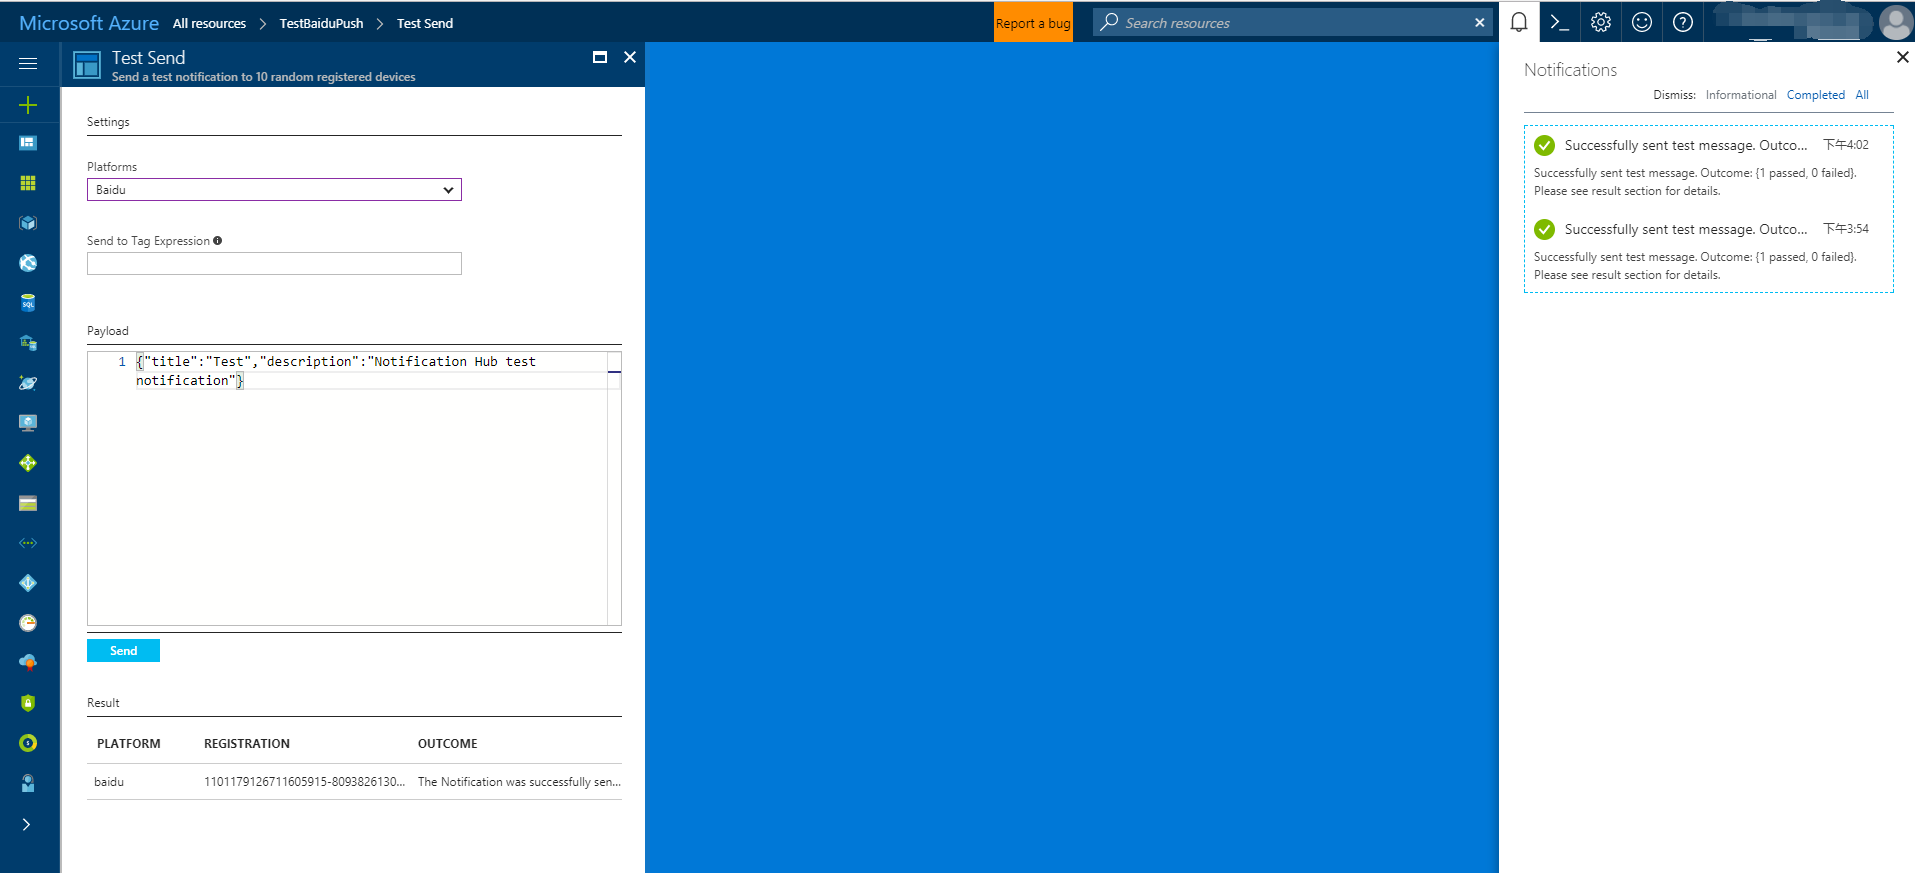
Vous pouvez rapidement tester la réception des notifications du portail Azure via le bouton Envoyer dans l'écran de configuration du hub de notification, comme illustré dans les écrans suivants :
Les notifications Push sont normalement envoyées dans un service principal tel que Mobile Services ou ASP.NET à l’aide d’une bibliothèque compatible. Si une bibliothèque n’est pas disponible pour votre serveur principal, vous pouvez utiliser l’API REST directement pour envoyer des messages de notification.
Par souci de simplicité, ce didacticiel utilise une application console pour la démonstration de l’envoi d’une notification avec le kit de développement .NET. Toutefois, nous vous recommandons de consulter le didacticiel Utiliser Notification Hubs pour envoyer des notifications Push aux utilisateurs comme prochaine étape pour envoyer des notifications à partir d’un serveur principal ASP.NET.
Voici les différentes approches d’envoi de notifications :
- Interface REST: vous pouvez prendre en charge les notifications sur n’importe quel serveur principal à l’aide de l’ interface REST.
- Kit SDK .NET Microsoft Azure Notification Hubs : dans le Gestionnaire de package Nuget pour Visual Studio, exécutez Install-Package Microsoft.Azure.NotificationHubs.
- Node.JS : Guide pratique pour utiliser Notification Hubs à partir de Node.js.
- Applications mobiles Azure : pour découvrir un exemple de la procédure d’envoi de notifications à partir d’une application mobile Azure intégrée à Notification Hubs, consultez l’article Ajout de notifications push à votre application mobile.
- Java/PHP : pour voir un exemple d’envoi de notifications au moyen des API REST, consultez « Utilisation de Notification Hubs depuis Java/PHP » (Java | PHP).
(Facultatif) Envoi de notifications à partir d’une application de console .NET.
Dans cette section, nous montrons comment envoyer une notification à l’aide d’une application console .NET.
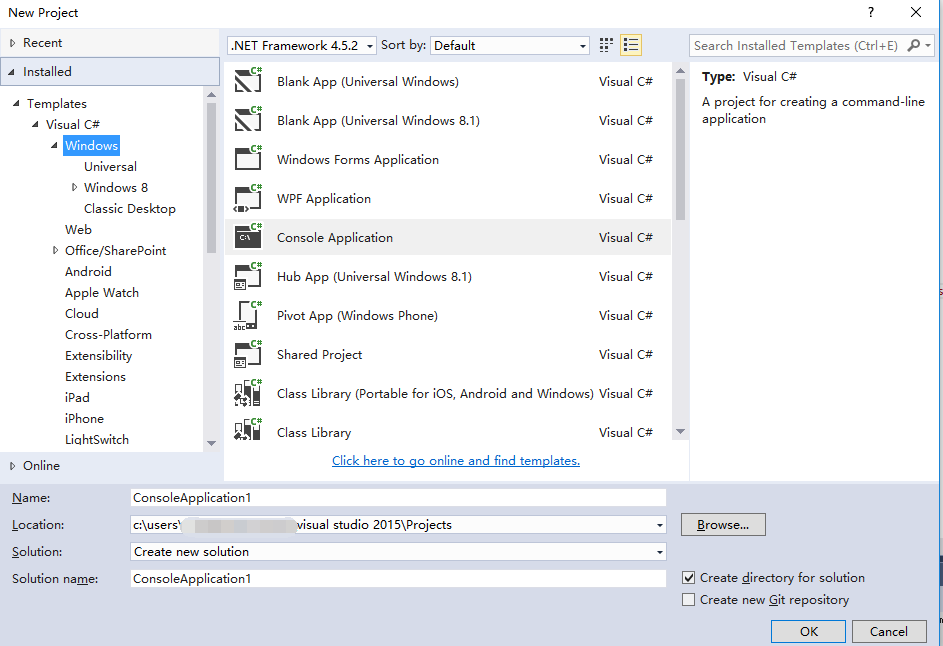
Créez une application console Visual C# :
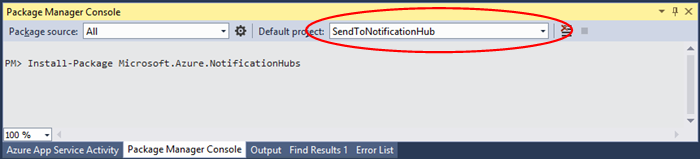
Dans la fenêtre Console du gestionnaire de package, choisissez Projet par défaut comme nouveau projet d’application console, puis exécutez la commande suivante dans la fenêtre de console :
Install-Package Microsoft.Azure.NotificationHubsCette instruction ajoute une référence au Kit de développement logiciel (SDK) Azure Notification Hubs à l’aide du package NuGet Microsoft.Azure.Notification Hubs.
Ouvrez le fichier
Program.cset ajoutez l’instruction suivante :using Microsoft.Azure.NotificationHubs;Dans votre classe
Program, ajoutez la méthode suivante et remplacezDefaultFullSharedAccessSignatureSASConnectionStringetNotificationHubNameavec les valeurs que vous avez.private static async void SendNotificationAsync() { NotificationHubClient hub = NotificationHubClient.CreateClientFromConnectionString("DefaultFullSharedAccessSignatureSASConnectionString", "NotificationHubName"); string message = "{\"title\":\"((Notification title))\",\"description\":\"Hello from Azure\"}"; var result = await hub.SendBaiduNativeNotificationAsync(message); }Ajoutez ensuite les lignes suivantes dans votre méthode
Main:SendNotificationAsync(); Console.ReadLine();
Test de l'application
Pour tester cette application avec un téléphone réel, connectez simplement le téléphone à votre ordinateur à l’aide d’un câble USB. Cette action charge votre application sur le téléphone attaché.
Pour tester cette application avec l’émulateur, dans la barre d’outils supérieure d’Android Studio, cliquez sur Run, puis sélectionnez votre application : elle démarre l’émulateur, puis charge et exécute l’application.
L’application récupère les paramètres userId et channelId à partir du service de notification push Baidu et s’inscrit auprès du hub de notification.
Pour envoyer une notification de test, vous pouvez utiliser l’onglet de débogage du Azure portal. Si vous avez intégré l’application de console .NET, appuyez sur la touche F5 dans Visual Studio pour exécuter l’application. L’application envoie une notification qui s’affiche dans la zone de notification supérieure de votre appareil ou de l’émulateur.