자습서: Azure Notification Hubs를 사용하여 특정 iOS 디바이스에 푸시 알림 전송
개요
이 자습서에서는 Azure Notification Hubs를 사용하여 iOS 앱에 속보 알림을 브로드캐스트하는 방법을 보여줍니다. 완료하면, 관심이 있는 속보 범주를 등록하고 해당 범주의 푸시 알림만 받을 수 있습니다. 이 시나리오는 RSS 수집기, 음악 애호가를 위한 앱 등 이전에 관심을 보인 사용자 그룹에 알림을 보내야 하는 많은 앱에 공통된 패턴입니다.
브로드캐스트 시나리오를 사용하려면 알림 허브에서 등록을 만들 때 하나 이상의 태그를 포함하면 됩니다. 태그에 알림이 전송되면 태그에 대해 등록된 디바이스에서 알림을 받게 됩니다. 태그는 단순히 문자열이므로 사전에 프로비전해야 할 필요가 없습니다. 태그에 대한 자세한 내용은 Notification Hubs 라우팅 및 태그 식을 참조하세요.
이 자습서에서 수행하는 단계는 다음과 같습니다.
- 앱에 범주 선택 추가
- 태그가 지정된 알림 보내기
- 디바이스에서 알림 보내기
- 앱 실행 및 알림 생성
필수 조건
이 항목은 자습서: Azure Notification Hubs를 사용하여 iOS 앱에 알림 푸시에서 만든 앱을 기반으로 합니다. 이 자습서를 시작하기 전에 자습서: Azure Notification Hubs를 사용하여 iOS 앱에 알림 푸시를 이미 완료해야 합니다.
앱에 범주 선택 추가
첫 번째 단계는 기존의 스토리보드에 사용자가 등록할 범주를 선택할 수 있도록 하는 UI 요소를 추가하는 것입니다. 사용자가 선택한 범주는 디바이스에 저장됩니다. 앱을 시작하면 디바이스 등록이 선택한 범주와 함께 태그로서 알림 허브에 생성됩니다.
MainStoryboard_iPhone.storyboard의 개체 라이브러리에서 다음 구성 요소를 추가합니다.
"Breaking News" 텍스트가 포함된 레이블
"World", "Politics", "Business", "Technology", "Science", "Sports" 범주 텍스트가 포함된 레이블
범주당 하나씩인 6개의 스위치는 각 스위치 상태를 기본적으로 Off(꺼짐)가 되도록 설정합니다.
"Subscribe" 단추
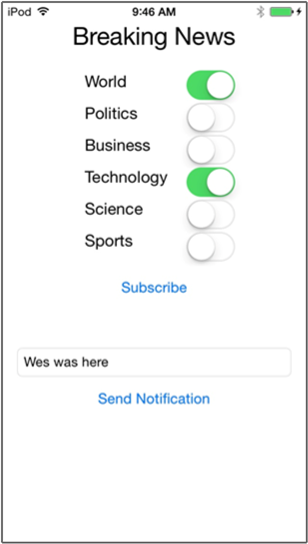
스토리보드는 다음과 같이 표시됩니다.

단말기 편집기에서 모든 스위치에 대한 콘센트를 만든 다음 "WorldSwitch", "PoliticsSwitch", "BusinessSwitch", "TechnologySwitch", "ScienceSwitch", "SportsSwitch"로 지정합니다.
subscribe이라는 단추에 대한 작업을 만듭니다.ViewController.h에 다음 코드가 포함되어야 합니다.@property (weak, nonatomic) IBOutlet UISwitch *WorldSwitch; @property (weak, nonatomic) IBOutlet UISwitch *PoliticsSwitch; @property (weak, nonatomic) IBOutlet UISwitch *BusinessSwitch; @property (weak, nonatomic) IBOutlet UISwitch *TechnologySwitch; @property (weak, nonatomic) IBOutlet UISwitch *ScienceSwitch; @property (weak, nonatomic) IBOutlet UISwitch *SportsSwitch; - (IBAction)subscribe:(id)sender;Notifications라는 새 Cocoa Touch 클래스를 만듭니다. 다음 코드를 Notifications.h 파일의 인터페이스 섹션에 복사합니다.@property NSData* deviceToken; - (id)initWithConnectionString:(NSString*)listenConnectionString HubName:(NSString*)hubName; - (void)storeCategoriesAndSubscribeWithCategories:(NSArray*)categories completion:(void (^)(NSError* error))completion; - (NSSet*)retrieveCategories; - (void)subscribeWithCategories:(NSSet*)categories completion:(void (^)(NSError *))completion;다음 import 지시문을 Notifications.m에 추가합니다.
#import <WindowsAzureMessaging/WindowsAzureMessaging.h>다음 코드를 Notifications.m 파일의 구현 섹션에 복사합니다.
SBNotificationHub* hub;

- (id)initWithConnectionString:(NSString*)listenConnectionString HubName:(NSString*)hubName{

    hub = [[SBNotificationHub alloc] initWithConnectionString:listenConnectionString
                                notificationHubPath:hubName];

    return self;
}

- (void)storeCategoriesAndSubscribeWithCategories:(NSSet *)categories completion:(void (^)(NSError *))completion {
    NSUserDefaults* defaults = [NSUserDefaults standardUserDefaults];
    [defaults setValue:[categories allObjects] forKey:@"BreakingNewsCategories"];

    [self subscribeWithCategories:categories completion:completion];
}

- (NSSet*)retrieveCategories {
    NSUserDefaults* defaults = [NSUserDefaults standardUserDefaults];

    NSArray* categories = [defaults stringArrayForKey:@"BreakingNewsCategories"];

    if (!categories) return [[NSSet alloc] init];
    return [[NSSet alloc] initWithArray:categories];
}

- (void)subscribeWithCategories:(NSSet *)categories completion:(void (^)(NSError *))completion
{
    NSString* templateBodyAPNS = @"{\"aps\":{\"alert\":\"$(messageParam)\"}}";

    [hub registerTemplateWithDeviceToken:self.deviceToken name:@"simpleAPNSTemplate"
        jsonBodyTemplate:templateBodyAPNS expiryTemplate:@"0" tags:categories completion:completion];
}
이 클래스는 로컬 스토리지를 사용하여 이 디바이스에서 받을 뉴스의 범주를 저장하고 검색합니다. 또한 템플릿 등록을 사용하여 이러한 범주에 등록하는 메서드도 포함되어 있습니다.
AppDelegate.h파일에서Notifications.h에 대한 import 문을 추가하고Notifications클래스의 인스턴스에 대한 속성을 추가합니다.#import "Notifications.h" @property (nonatomic) Notifications* notifications;AppDelegate.m의didFinishLaunchingWithOptions메서드에서 메서드 시작 부분에 알림 인스턴스를 초기화하는 코드를 추가합니다.
HUBNAME및HUBLISTENACCESS(hubinfo.h에 정의됨)는<hub name>및<connection string with listen access>자리 표시자를 알림 허브 이름과 앞서 얻었던 DefaultListenSharedAccessSignature의 연결 문자열로 바꿉니다.self.notifications = [[Notifications alloc] initWithConnectionString:HUBLISTENACCESS HubName:HUBNAME];참고 항목
클라이언트 앱과 함께 배포되는 자격 증명은 일반적으로 안전하지 않기 때문에 클라이언트 앱과 함께 listen access용 키만 배포해야 합니다. Listen access를 통해 앱에서 알림을 등록할 수 있지만, 기존 등록을 수정할 수 없으며 알림을 전송할 수도 없습니다. 안전한 백 엔드 서비스에서 알림을 보내고 기존 등록을 변경하는 데에는 모든 액세스 키가 사용됩니다.
AppDelegate.m의didRegisterForRemoteNotificationsWithDeviceToken메서드에서 디바이스 토큰을notifications클래스에 전달하는 다음 코드로 메서드의 코드를 바꿉니다.notifications클래스는 범주를 사용하여 알림에 대해 등록을 수행합니다. 사용자가 범주 선택 항목을 변경하는 경우 구독 단추에 대한 응답으로subscribeWithCategories메서드를 호출하여 범주 선택 항목을 업데이트합니다.참고 항목
APNS(Apple Push Notification Service)에서 할당하는 디바이스 토큰은 언제든지 변경될 수 있으므로 알림 실패를 피하려면 알림을 자주 등록해야 합니다. 이 예제에서는 앱이 시작될 때마다 알림을 등록합니다. 자주(하루 두 번 이상) 실행되는 앱에서는 이전 등록 이후 만 하루가 지나지 않은 경우 대역폭 유지를 위한 등록을 건너뛸 수 있습니다.
self.notifications.deviceToken = deviceToken;

// Retrieves the categories from local storage and requests a registration for these categories
// each time the app starts and performs a registration.

NSSet* categories = [self.notifications retrieveCategories];
[self.notifications subscribeWithCategories:categories completion:^(NSError* error) {
    if (error != nil) {
        NSLog(@"Error registering for notifications: %@", error);
    }
}];
이때
didRegisterForRemoteNotificationsWithDeviceToken메서드에 다른 코드가 있어서는 안 됩니다.다음 메서드는 Notification Hubs 시작 자습서를 완료할 때부터
AppDelegate.m에 있어야 합니다. 그렇지 않은 경우 메서드를 추가합니다.- (void)MessageBox:(NSString *)title message:(NSString *)messageText { UIAlertView *alert = [[UIAlertView alloc] initWithTitle:title message:messageText delegate:self cancelButtonTitle:@"OK" otherButtonTitles: nil]; [alert show]; } - (void)application:(UIApplication *)application didReceiveRemoteNotification: (NSDictionary *)userInfo { NSLog(@"%@", userInfo); [self MessageBox:@"Notification" message:[[userInfo objectForKey:@"aps"] valueForKey:@"alert"]]; }이 메서드는 단일 UIAlert를 표시하여 앱이 실행 중일 때 수신된 알림을 처리합니다.
ViewController.m에서AppDelegate.h에 대한import문을 추가하고 XCode 생성subscribe메서드에 다음 코드를 복사합니다. 이 코드는 사용자 인터페이스에서 사용자가 선택한 새 범주 태그를 사용하도록 알림 등록을 업데이트합니다.#import "Notifications.h" NSMutableArray* categories = [[NSMutableArray alloc] init]; if (self.WorldSwitch.isOn) [categories addObject:@"World"]; if (self.PoliticsSwitch.isOn) [categories addObject:@"Politics"]; if (self.BusinessSwitch.isOn) [categories addObject:@"Business"]; if (self.TechnologySwitch.isOn) [categories addObject:@"Technology"]; if (self.ScienceSwitch.isOn) [categories addObject:@"Science"]; if (self.SportsSwitch.isOn) [categories addObject:@"Sports"]; Notifications* notifications = [(AppDelegate*)[[UIApplication sharedApplication]delegate] notifications]; [notifications storeCategoriesAndSubscribeWithCategories:categories completion: ^(NSError* error) { if (!error) { UIAlertView *alert = [[UIAlertView alloc] initWithTitle:"Notification" message:"Subscribed" delegate:self cancelButtonTitle:@"OK" otherButtonTitles: nil]; [alert show]; } else { NSLog(@"Error subscribing: %@", error); } }];이 메서드는 범주의
NSMutableArray를 만들고Notifications클래스를 사용하여 로컬 스토리지에 목록을 저장하고 알림 허브에 해당 태그를 등록합니다. 범주가 변경되면 새 범주로 등록이 다시 생성됩니다.ViewController.m에서viewDidLoad메서드에 다음 코드를 추가하여 이전에 저장한 범주를 기반으로 사용자 인터페이스를 설정합니다.// This updates the UI on startup based on the status of previously saved categories. Notifications* notifications = [(AppDelegate*)[[UIApplication sharedApplication]delegate] notifications]; NSSet* categories = [notifications retrieveCategories]; if ([categories containsObject:@"World"]) self.WorldSwitch.on = true; if ([categories containsObject:@"Politics"]) self.PoliticsSwitch.on = true; if ([categories containsObject:@"Business"]) self.BusinessSwitch.on = true; if ([categories containsObject:@"Technology"]) self.TechnologySwitch.on = true; if ([categories containsObject:@"Science"]) self.ScienceSwitch.on = true; if ([categories containsObject:@"Sports"]) self.SportsSwitch.on = true;
이제 앱은 앱이 시작할 때마다 알림 허브에 등록하는 데 사용한 디바이스 로컬 스토리지에 범주 집합을 저장할 수 있습니다. 사용자는 런타임 시 범주 선택 사항을 변경하고 subscribe 메서드를 클릭하여 디바이스에 대한 등록을 업데이트할 수 있습니다. 다음으로 앱 자체에서 직접 속보 알림을 보내도록 앱을 업데이트합니다.
(선택 사항) 태그가 지정된 알림 보내기
Visual Studio에 액세스할 수 없는 경우 다음 섹션으로 건너뛰고 앱 자체에서 알림을 보낼 수 있습니다. 또한 알림 허브에 대한 디버그 탭을 사용하여 Azure Portal에서 적절한 템플릿 알림을 보낼 수 있습니다.
이 섹션에서는 .NET 콘솔 앱에서 태그가 지정된 템플릿 알림으로 속보를 보냅니다.
Visual Studio에서 다음과 같이 새로운 Visual C# 콘솔 애플리케이션을 만듭니다.
- 메뉴에서 파일>새로 만들기>프로젝트를 선택합니다.
- 새 프로젝트 만들기의 템플릿 목록에서 C#용 콘솔 앱(.NET Framework)을 선택하고 다음을 선택합니다.
- 앱의 이름을 입력합니다.
- 솔루션의 경우 솔루션에 추가를 선택하고 만들기를 선택하여 프로젝트를 만듭니다.
도구>NuGet 패키지 관리자>패키지 관리자 콘솔을 선택한 다음, 콘솔 창에서 다음 명령을 실행합니다.
Install-Package Microsoft.Azure.NotificationHubs이 작업은 Microsoft.Azure.NotificationHubs 패키지를 사용하여 Azure Notification Hubs SDK에 대한 참조를 추가합니다.
Program.cs 파일을 열고 다음
using문을 추가합니다.using Microsoft.Azure.NotificationHubs;Program클래스에서 다음 메서드를 추가하거나 이미 있으면 바꿉니다.private static async void SendTemplateNotificationAsync() { // Define the notification hub. NotificationHubClient hub = NotificationHubClient.CreateClientFromConnectionString("<connection string with full access>", "<hub name>"); // Apple requires the apns-push-type header for all requests var headers = new Dictionary<string, string> {{"apns-push-type", "alert"}}; // Create an array of breaking news categories. var categories = new string[] { "World", "Politics", "Business", "Technology", "Science", "Sports"}; // Send the notification as a template notification. All template registrations that contain // "messageParam" and the proper tags will receive the notifications. // This includes APNS, GCM/FCM, WNS, and MPNS template registrations. Dictionary<string, string> templateParams = new Dictionary<string, string>(); foreach (var category in categories) { templateParams["messageParam"] = "Breaking " + category + " News!"; await hub.SendTemplateNotificationAsync(templateParams, category); } }이 코드는 문자열 배열에 있는 6개의 각 태그에 대한 템플릿 알림을 보냅니다. 태그를 사용하면 등록된 범주의 알림만 디바이스에서 받습니다.
위의 코드에서
<hub name>및<connection string with full access>자리 표시자를 알림 허브 이름과 알림 허브의 대시보드에서 얻은 DefaultFullSharedAccessSignature의 연결 문자열로 바꿔야 합니다.Main()메서드에 다음 줄을 추가합니다.SendTemplateNotificationAsync(); Console.ReadLine();콘솔 앱을 시작합니다.
(선택 사항) 디바이스에서 알림 보내기
일반적으로 백 엔드 서비스에서 알림을 보내지만 속보 알림은 앱 자체에서 직접 보낼 수 있습니다. 이렇게 하기 위해 Notification Hubs 시작 자습서에 정의한 SendNotificationRESTAPI 메서드를 업데이트합니다.
ViewController.m에서 범주 태그에 대한 매개 변수를 허용하고 적절한 템플릿 알림을 보내도록 다음과 같이SendNotificationRESTAPI메서드를 업데이트합니다.- (void)SendNotificationRESTAPI:(NSString*)categoryTag { NSURLSession* session = [NSURLSession sessionWithConfiguration:[NSURLSessionConfiguration defaultSessionConfiguration] delegate:nil delegateQueue:nil]; NSString *json; // Construct the messages REST endpoint NSURL* url = [NSURL URLWithString:[NSString stringWithFormat:@"%@%@/messages/%@", HubEndpoint, HUBNAME, API_VERSION]]; // Generated the token to be used in the authorization header. NSString* authorizationToken = [self generateSasToken:[url absoluteString]]; //Create the request to add the template notification message to the hub NSMutableURLRequest *request = [NSMutableURLRequest requestWithURL:url]; [request setHTTPMethod:@"POST"]; // Add the category as a tag [request setValue:categoryTag forHTTPHeaderField:@"ServiceBusNotification-Tags"]; // Template notification json = [NSString stringWithFormat:@"{\"messageParam\":\"Breaking %@ News : %@\"}", categoryTag, self.notificationMessage.text]; // Signify template notification format [request setValue:@"template" forHTTPHeaderField:@"ServiceBusNotification-Format"]; // JSON Content-Type [request setValue:@"application/json;charset=utf-8" forHTTPHeaderField:@"Content-Type"]; //Authenticate the notification message POST request with the SaS token [request setValue:authorizationToken forHTTPHeaderField:@"Authorization"]; //Add the notification message body [request setHTTPBody:[json dataUsingEncoding:NSUTF8StringEncoding]]; // Send the REST request NSURLSessionDataTask* dataTask = [session dataTaskWithRequest:request completionHandler:^(NSData *data, NSURLResponse *response, NSError *error) { NSHTTPURLResponse* httpResponse = (NSHTTPURLResponse*) response; if (error || httpResponse.statusCode != 200) { NSLog(@"\nError status: %d\nError: %@", httpResponse.statusCode, error); } if (data != NULL) { //xmlParser = [[NSXMLParser alloc] initWithData:data]; //[xmlParser setDelegate:self]; //[xmlParser parse]; } }]; [dataTask resume]; }ViewController.m에서 다음 코드에 표시된 것처럼Send Notification작업을 업데이트합니다. 그러면 개별적으로 각 태그를 사용하여 알림을 보내고 여러 플랫폼으로 보냅니다.- (IBAction)SendNotificationMessage:(id)sender { self.sendResults.text = @""; NSArray* categories = [NSArray arrayWithObjects: @"World", @"Politics", @"Business", @"Technology", @"Science", @"Sports", nil]; // Lets send the message as breaking news for each category to WNS, FCM, and APNS // using a template. for(NSString* category in categories) { [self SendNotificationRESTAPI:category]; } }프로젝트를 다시 빌드하고 빌드 오류가 없는지 확인합니다.
앱 실행 및 알림 생성
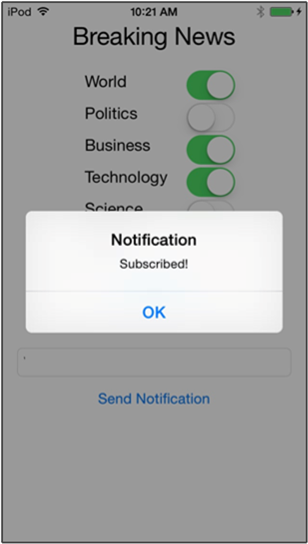
실행 단추를 눌러 프로젝트를 빌드하고 앱을 시작합니다. 구독할 속보 옵션을 선택하고 구독 단추를 누릅니다. 알림 구독을 나타내는 대화 상자가 표시됩니다.
구독을 선택하면 앱은 선택한 범주를 태그로 변환하고 알림 허브에서 선택한 태그에 대한 새로운 디바이스 등록을 요청합니다.
속보로 보낼 메시지를 입력하고 알림 보내기 단추를 누릅니다. 또는 .NET 콘솔 앱을 실행하여 알림을 생성합니다.
속보를 구독하는 각 디바이스에서 방금 보낸 속보 알림을 받게 됩니다.
다음 단계
이 자습서에서는 범주에 등록한 특정 iOS 디바이스에 브로드캐스트 알림을 보냈습니다. 지역화된 알림을 푸시하는 방법을 알아보려면 다음 자습서를 계속 진행합니다.