Exercise - Publish a simple Azure Function
The Publish wizard in the Azure Functions template provides the most straightforward way to deploy Azure Functions, especially for testing purposes.
In the luxury watch online website scenario, you decided to use Visual Studio 2022 to deploy functions to an Azure Function App in the cloud. First, you create an Azure Function App, and then use the Visual Studio Publish wizard to deploy the functions you create.
Here, you use the Azure portal to create an Azure Function App. Then, you deploy the WatchInfo function using the Visual Studio project that you created in a previous exercise. Lastly, you verify that your function is correctly deployed by testing it.
Create an Azure Function App using the Azure portal
Sign into the Azure portal using the same account you used to activate the sandbox.
From the resource menu or the Home page, select Create a resource.
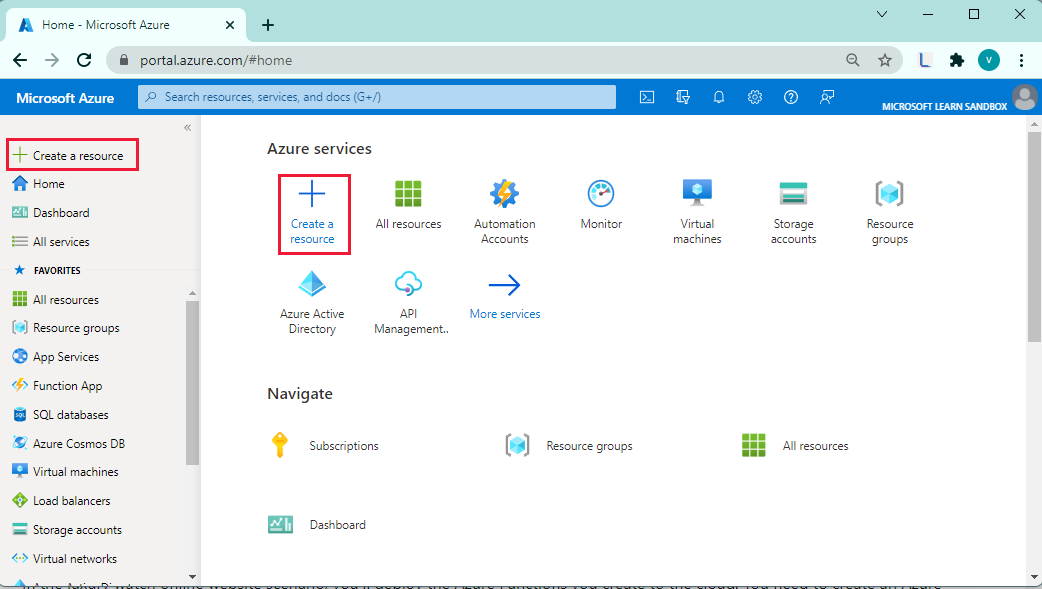
The Create a resource pane appears.
In the Create a resource menu, select Compute, and then search for and select Function App. Select Create.

The Create Function App pane appears.
On the Basics tab, enter the following values for each setting.
Note
Your function app must have a name unique to Azure. We suggest using something like <your initials>watchfunctions. Use this name wherever you see <your-function-app-name> in the remainder of the exercise.
Setting Value Project Details Subscription Concierge Subscription Resource Group From the dropdown list, select [Sandbox resource group] .Instance Details Function App name <your-function-app-name> Publish Code Runtime stack .NET Version 6 Region Accept the default location. Operating system Operating System Windows Plan Plan type Consumption (Serverless) Select Next : Storage.
On the Storage tab, enter the following values for each setting.
Setting Value Storage Storage account Accept the default value. Select Review + create, and then select Create. The deployment shows the resources that are created for the Function App.
When deployment completes, select Go to resource. The Function App pane for <your-function-app-name> appears.
Deploy the WatchInfo function to the Azure Function App
On your desktop, return to Visual Studio.
In the Solution Explorer window, right-click the WatchPortalFunction project, and then select Publish.
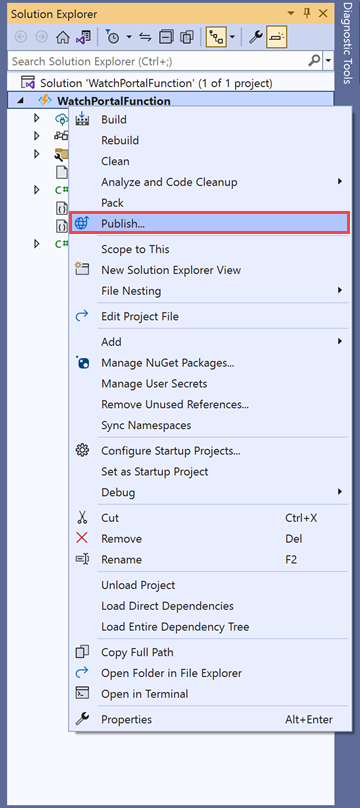
The Publish pane appears.
Select Azure, and then select Next.
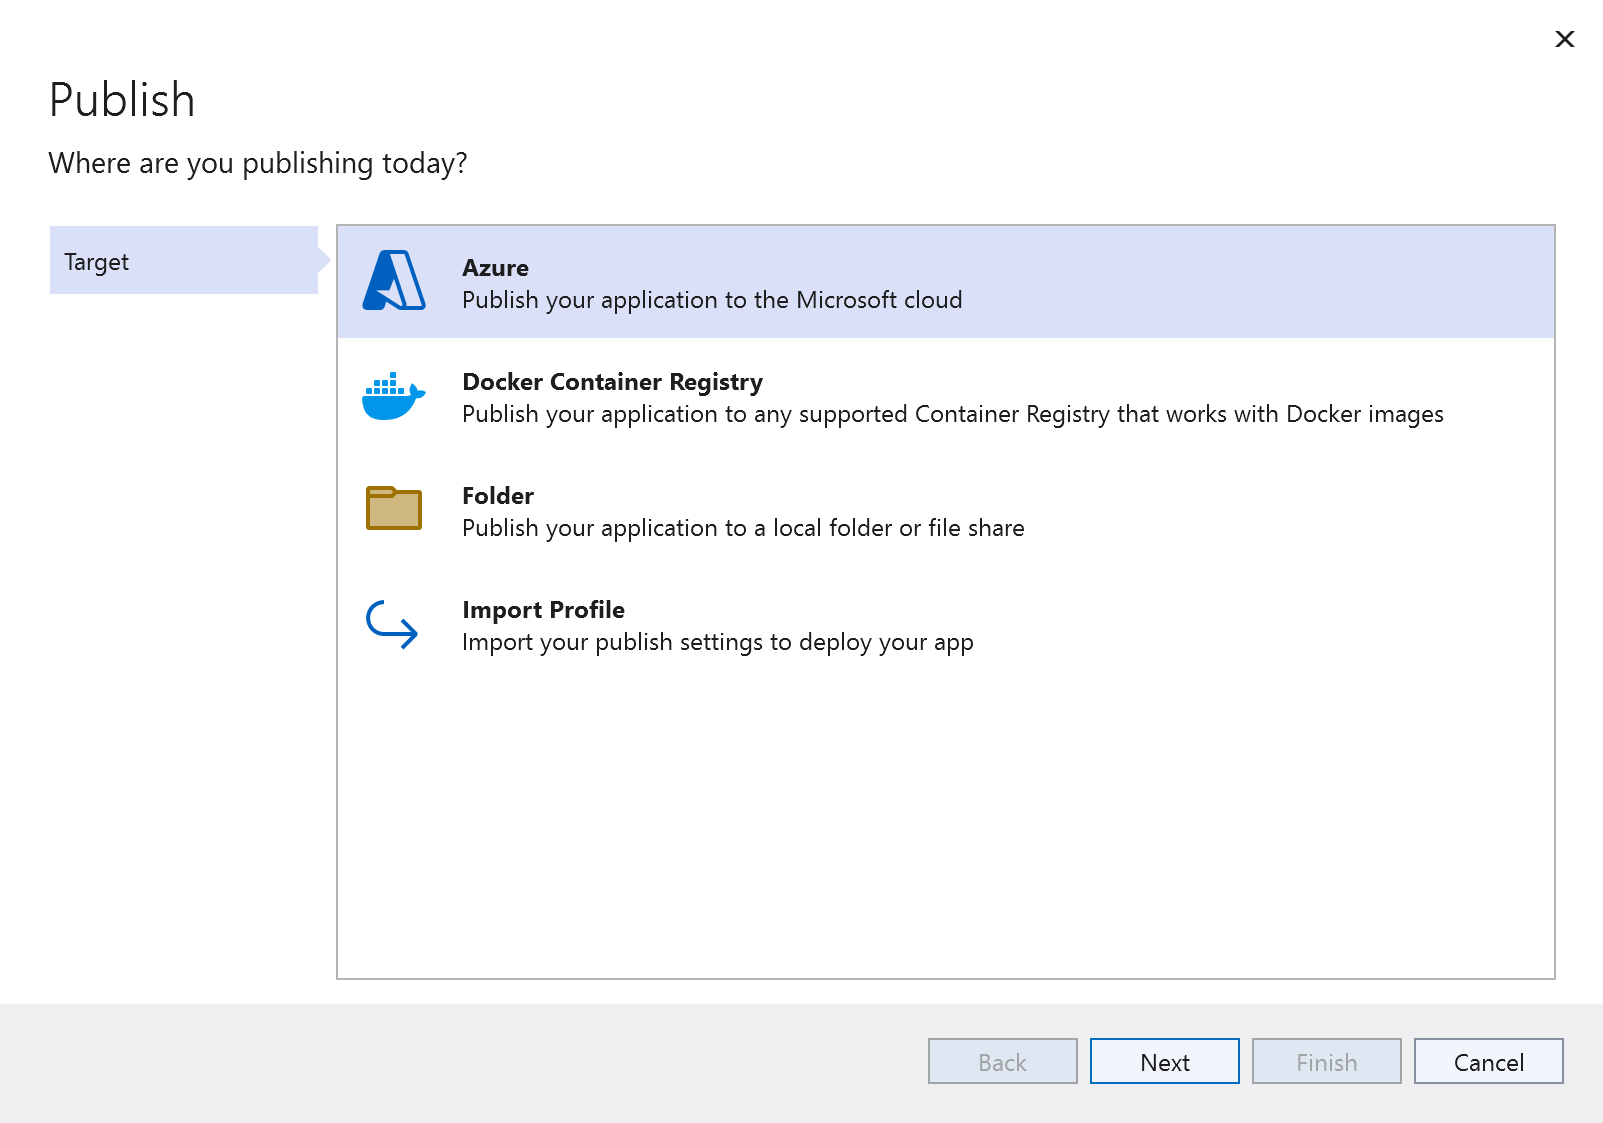
The Publish pane updates with the new information.
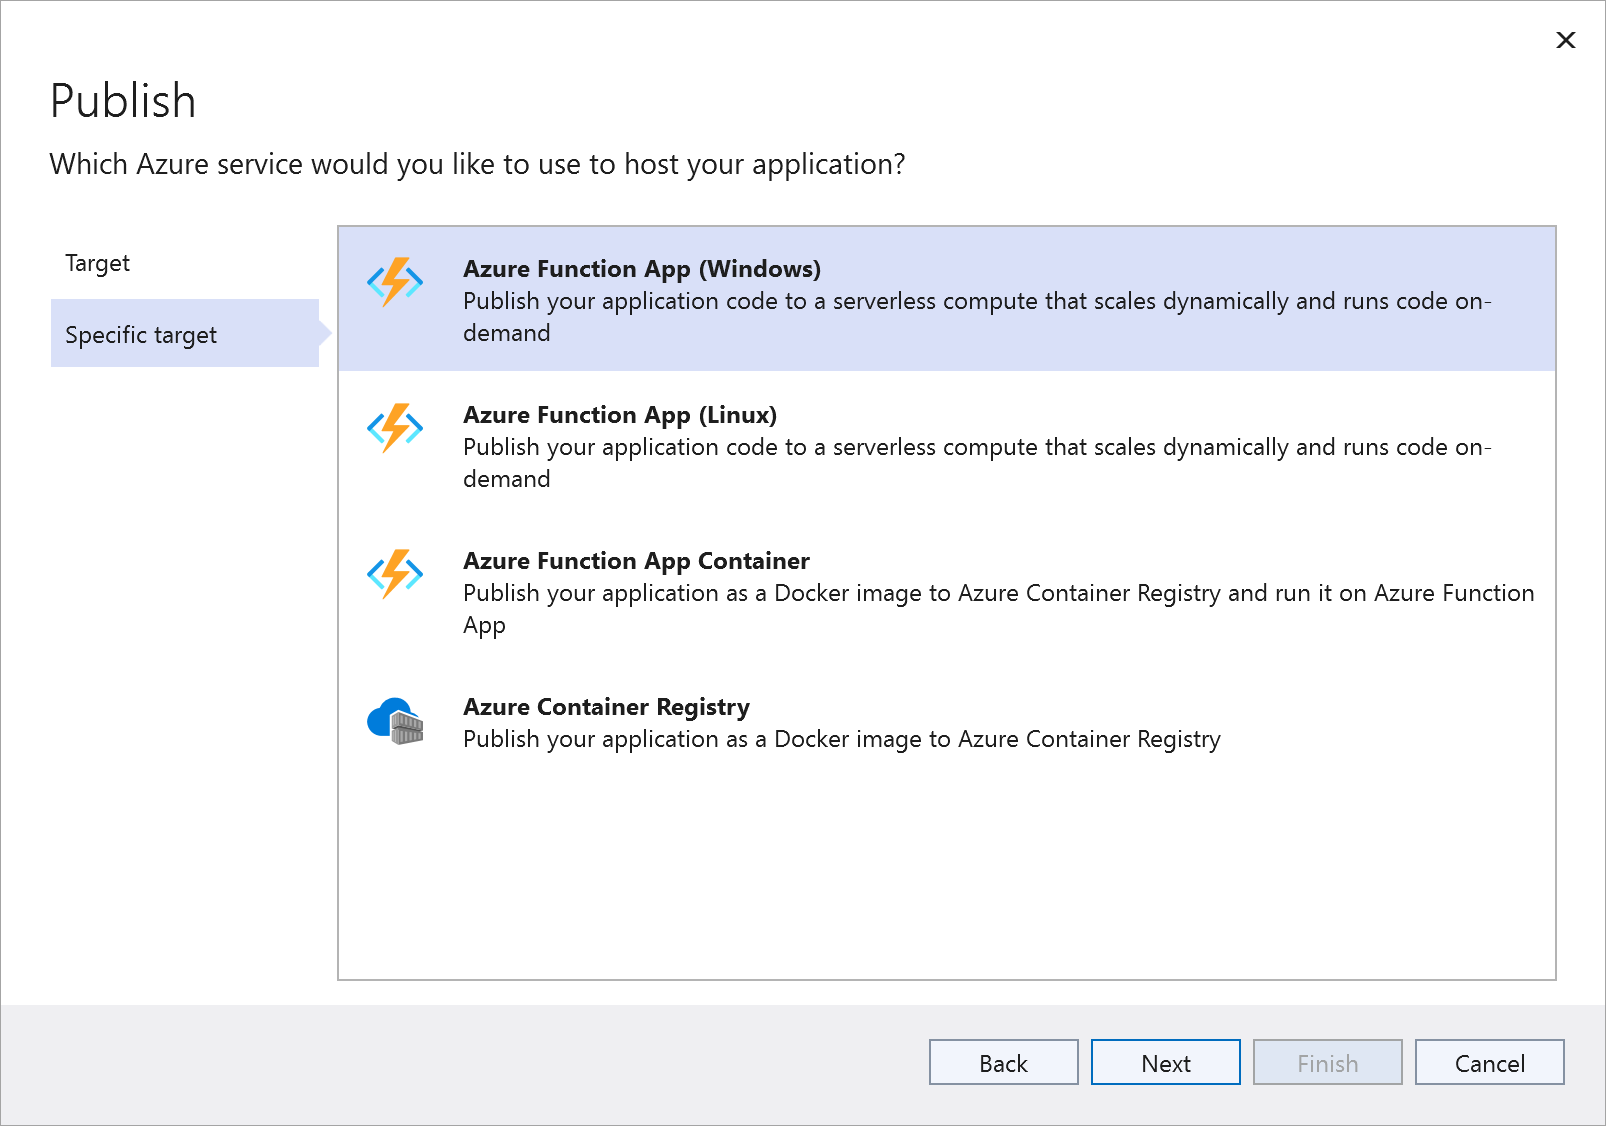
Select Azure Function App (Windows), then select Next.
In the Subscription name dropdown list, select Concierge Subscription. Expand the
[Sandbox resource group] folder, then select your Function App. Select Finish.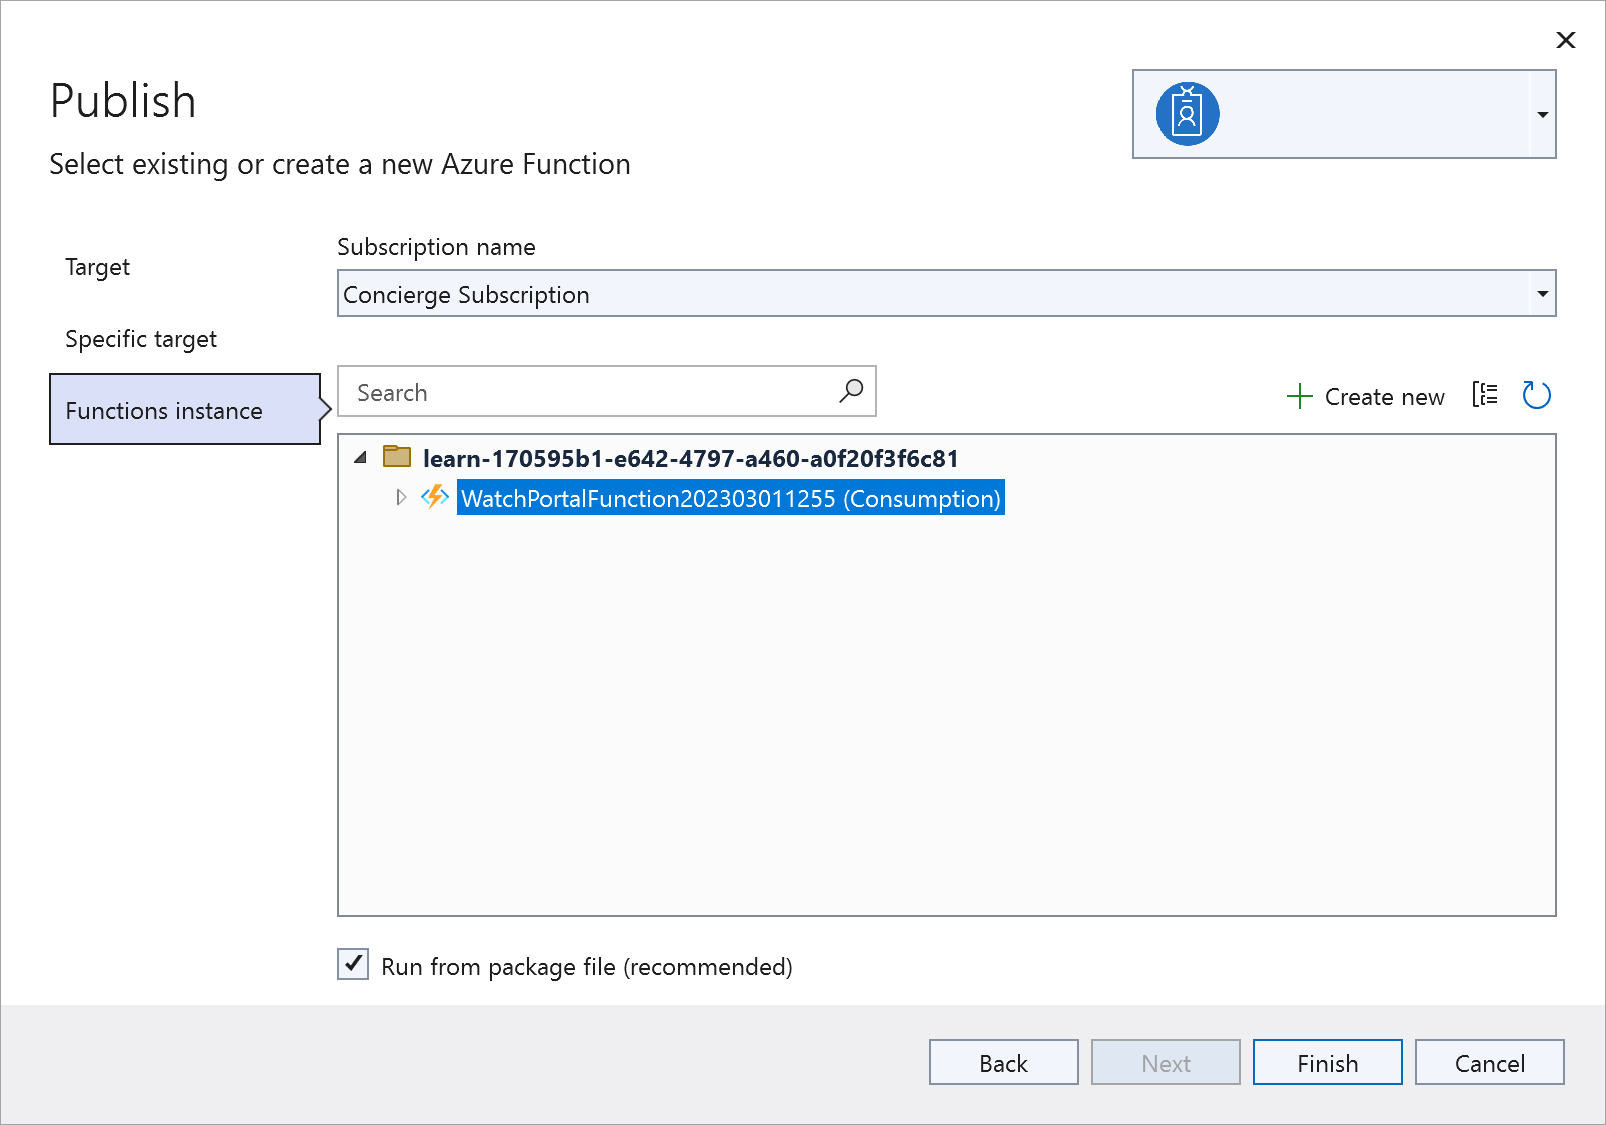
Select Publish.
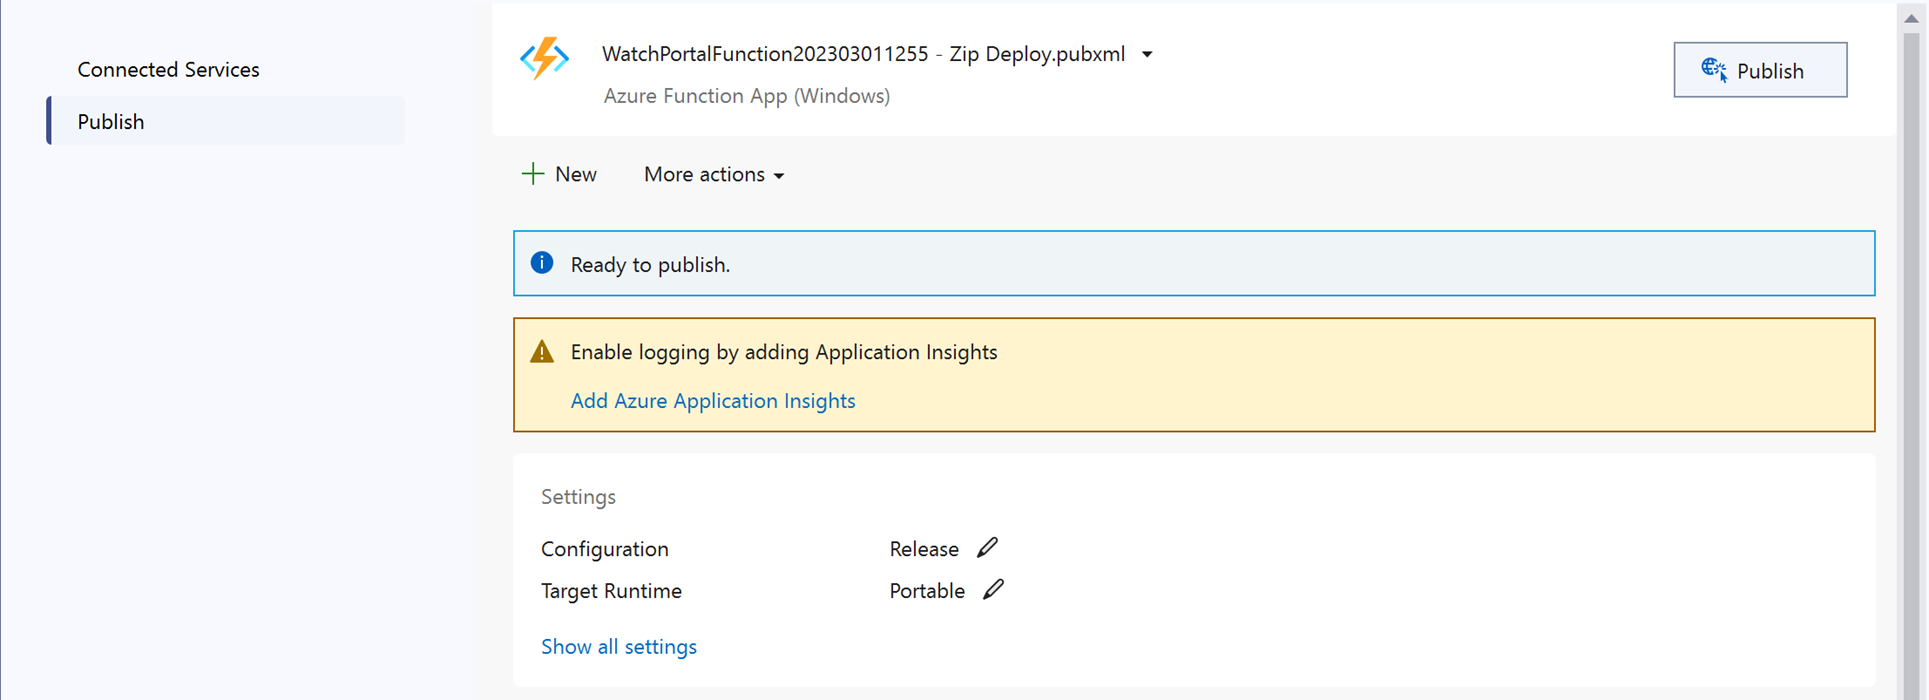
Wait for your functions to be deployed. The Output window in Visual Studio shows the progress of the build and publish processes. If everything works, you should have one successful Build and one successful Publish.

Verify the functions are deployed
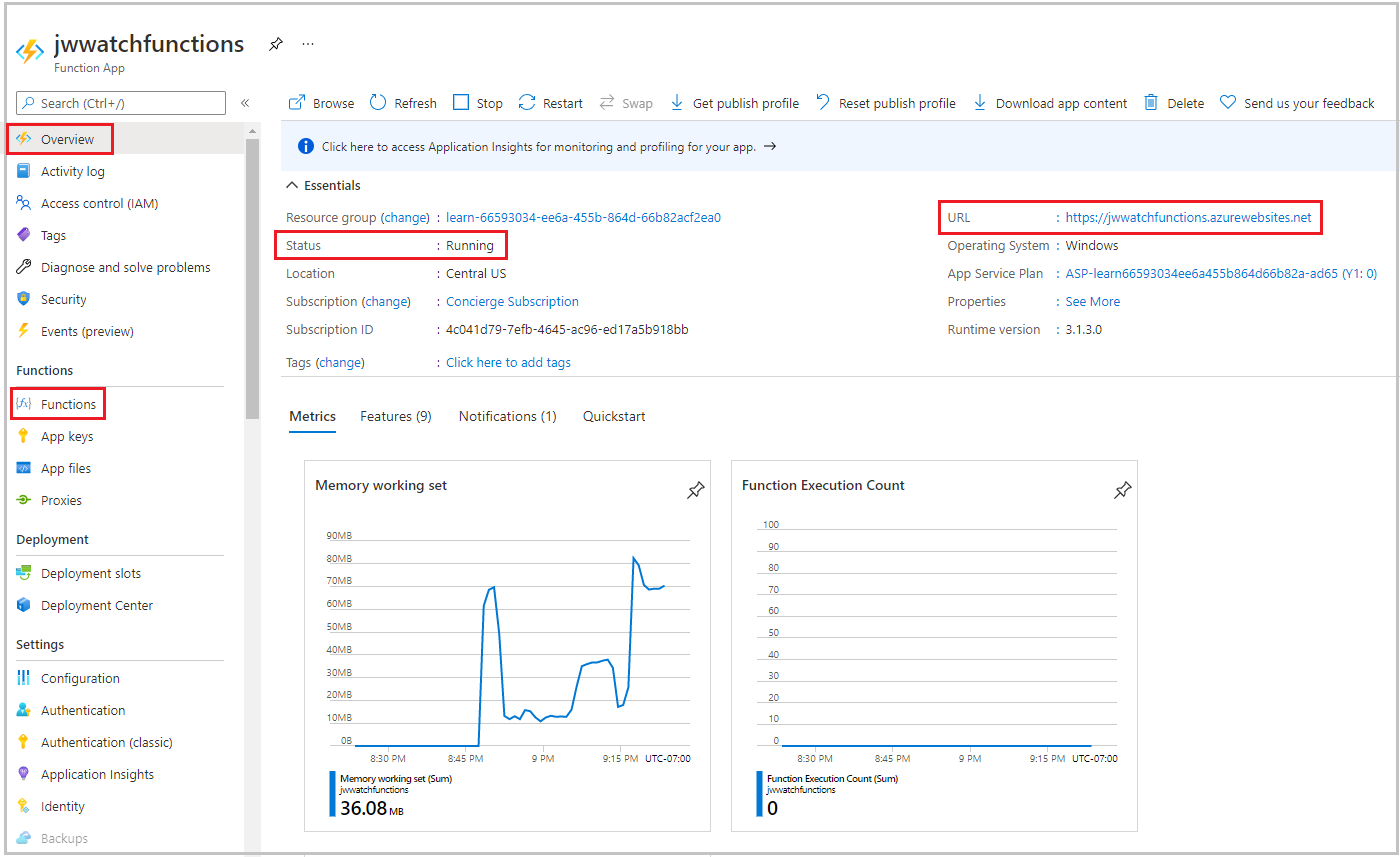
Return to the Azure portal. The Function App pane appears with your function app.
In the Function App menu, under Functions, select Functions. The Functions pane appears for your function app.
Verify that the Function1 and WatchInfo functions are listed.
In the Function App menu, select Overview and check that the Status of the Azure Function App is listed as Running.
Note
The functions are marked as Read Only. You cannot modify their settings or configuration from the Azure portal because you published them from Visual Studio. If you need to update either of these functions, make the changes in Visual Studio and publish them again.
In the Function App pane, select the URL (highlighted in the previous image). A browser window opens, and confirms that the function app is up and running.

Append the URL of the WatchInfo function,
/api/watchinfo, to the URL in the browser to invoke the WatchInfo function without a query string. You might need to refresh the browser to see the error message Please provide a watch model in the query string.
Add the query string
?model=abcto the URL and refresh the browser window. This time, you see the details of the watch model returned by the function.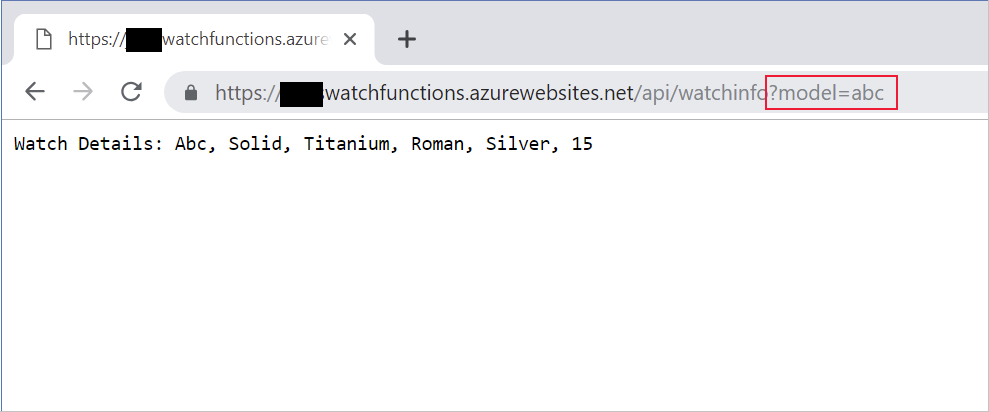
In this exercise, you created an Azure Function App in the cloud, and published your functions to this app from Visual Studio.