Extend menus
With finance and operations apps, you can connect menu items by changing existing menus with extensions.
Customizing an existing menu provides users with a more natural appearance and behavior because the new menu is like others that users interact with. You can create menu extensions in Microsoft Visual Studio.
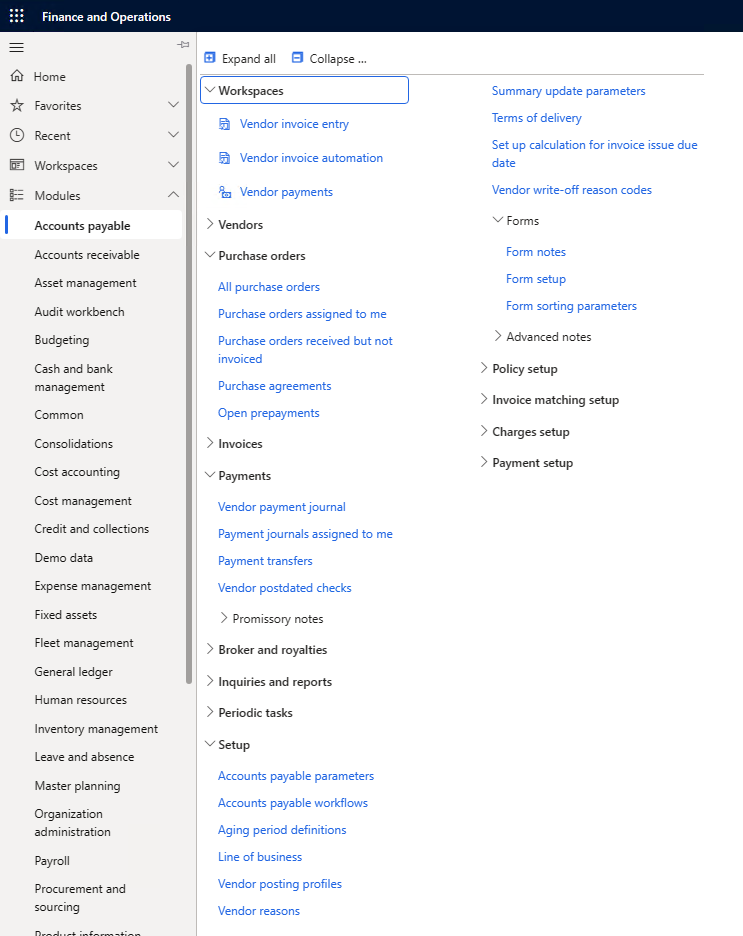
In finance and operations apps, you can expand the Modules menu in the navigation pane and the menu for the module, as shown in the following screenshot.
Add menu extensions to a project
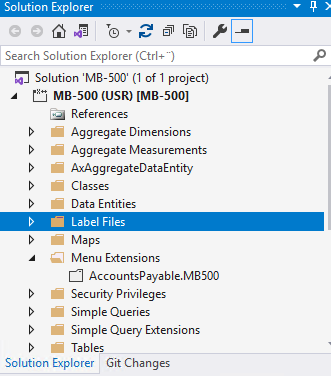
You can add menu extensions to a project by using the Solution Explorer window. Locate the applicable menu in Application Explorer, right-click or activate the context menu, select the menu, and then select Create Extension. The system adds a menu extension to the project by using the same menu name and appending the model name, as shown in the following screenshot example.
As another example, if you’re creating a menu extension for Accounts Payable for model MB500, you’d add a number to the postfix. Additionally, you can complete the following actions:
- Create extensions for standard menus. However, in the extended menu, you can’t change any property of the parent menu, except tags.
- Modify the Label and Visible properties in the extended menu for child menus.
- Change the Visible property of the MenuElementMenuItem node in the menu extension.
- Add a new item to a menu after extending it. This approach helps distinguish a newly created form, such as report or class, in the UI of finance and operations apps.
- Set a property’s view to false. However, you can’t remove menu or submenu items.
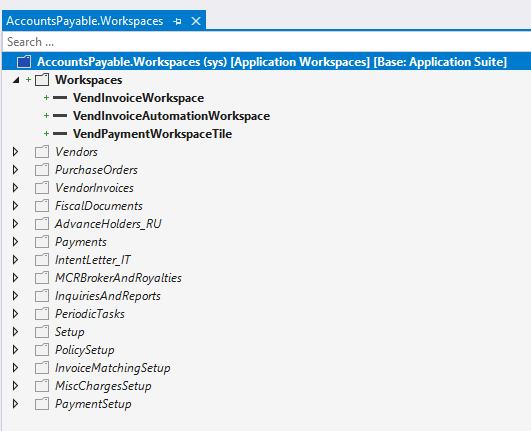
In the Designer view, modifications to menu extensions are indicated with bold font, as the following screenshot shows.
You must build menu extensions before they can be active and available for use.


