Exercise - Create a Microsoft Dataverse table
In this unit, you create a table and then customize key components. You learn how to:
Create a custom table.
Add custom columns to your table.
Customize a view.
Customize a form.
The tutorial follows the Contoso company, which is a pet grooming business that grooms dogs and cats. Contoso needs an app for client and pet tracking that employees can use on various devices.
Create a custom table
Follow these steps to create a new custom table.
Sign in to the Power Apps maker portal.
In the left navigation pane, select Tables, select the New table dropdown, and then select Set advanced properties.

In the Properties table of the New table pane, enter the following values:
Display name: Pet
Description: Track pets for pet grooming

Select the Primary Column tab and enter the following values:
- Display name: Pet Name

At the bottom of the pane, select Save.


Add and customize columns
When the table is finished creating, your display shows the table properties and your blank table in the section called Pet columns and data. Note here that Pet Name is the only column on display and next to that is +18 more and next to that is + to add a new column. There's also an Edit button in the upper-right corner of this section that also allows you to edit, but in this case, we do the editing within this window.

Let's add a new column by selecting the New > Column button from the command bar.
In the New column pane, enter the following values:
- Display name: Species
- Data type: Choice

Create the choice values:
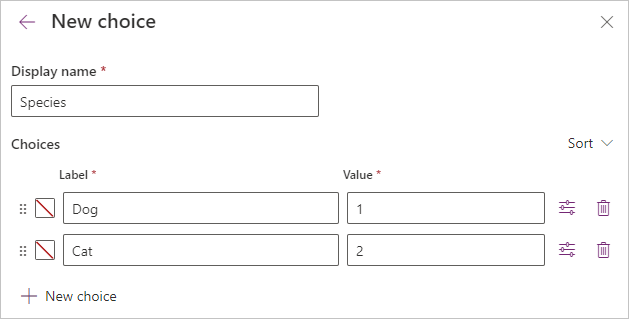
Select New choice and you see the New choice pane appears.
In the Display name field, enter Species.
Under Choices you see two entry fields titled Label and Value. Enter Dog under the label. Don't worry about the values, Dataverse assigns them automatically.
Select New choice under the Dog entry and make Cat the new entry for Label.
Select Save. You've created a new choice option set that will be available in this environment for other tables.
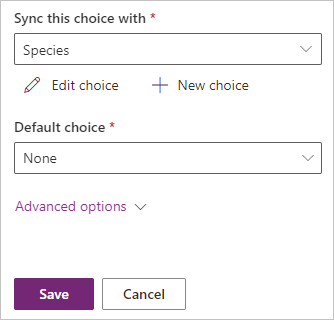
To make the Species choices that you just created the designated choices for this column, search for and select Species from the drop-down list under Sync this choice with and then select Save.
Let's add another column. Select New > Column from the command bar.
In the New column pane, enter the following values, and then select Save:
Display name: Breed
Data type: Single line of text (this value is the default)
Add one more column by selecting New > Column from the command bar.
In the New column pane, enter the following values, and then select Save:
Display name: Appointment date
Data type: Date and Time


Customize a view
Navigate to Views by selecting Views from within the Data experiences pane.

The list of views for the Pet table is displayed.
Select Active Pets to open the view designer.
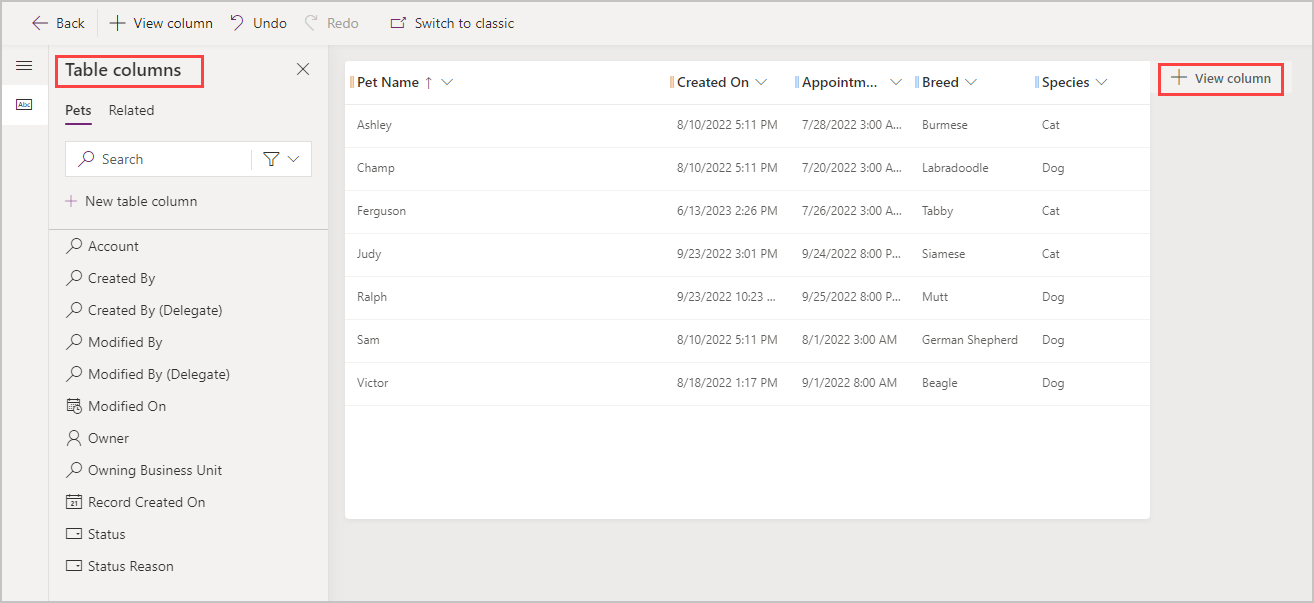
In the view designer, you'll see two columns already in the view including Pet Name and Created On. You can select other columns you want to display in your view by clicking on the column name under the Table columns panel on the left side of the screen. Simply selecting the column adds it to the right of the Created On column. You can also drag and drop columns into the view header, but the quickest way is just to select the column name to add it. Alternatively, you can select View Column to the right of the Created On column and select the columns you wish to display. Add the following columns to your table:
Appointment date
Breed
Species (you need to scroll down or search for this column)
You can remove columns from your view by selecting the name in the header of the view, and then Remove from the dropdown. Remove the Created On column.
To arrange the columns, drag them by the header in the order you want them. Move Species to the left of Breed.
Select Save and publish from the right side of the command bar, and wait for the view to publish.
Navigate back to your Pet table.

Customize the main form
Navigate to the Forms list for your table by selecting Forms from the Data Experiences pane.
The list of forms for the Pet table is displayed.

Select the Main form (under Form type) and select Edit to open the form editor.
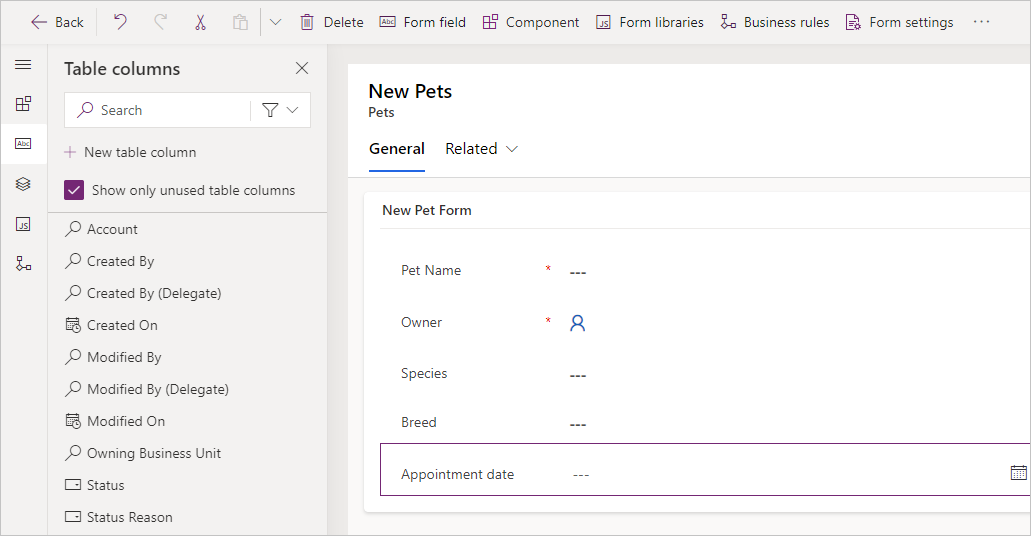
In the form editor, add the Species, Breed, and Appointment date columns to the General section of the form canvas. If you make a mistake, notice the Delete button on the command bar. Deleting that field merely removes it from the form and places that column back under the Table Columns list. When your form is complete, it should resemble this screenshot.
Select Save and publish.
Return to your Pet table once Dataverse is complete with publishing.
At this point, it's possible to add data directly to your table. Under Pet columns and data, you can begin entering as many rows as you want. It's good practice to include some test data to be able to view how it appears in your views/forms.


It's also possible to import data into your table. We'll show you how to do that in the next exercise.