Build a basic bot
This unit introduces you to basic elements of Azure Health Bot. Everything in the service can be built simply by dragging scenario elements onto a canvas. After you understand the practical use of each scenario, you can then design more complex applications.
Let's start building a basic bot that can be deployed at the entrance of a hospital or healthcare organization to provide information about the offered services. In the introduction module to this learning path, we created a custom scenario. Let's continue from there.
Ask what the user wants
Because our aim is to create an informative bot, let's first greet the user and take input on what the user wants to do.
Set up a prompt and branches
We start by using the prompt block. Select Add element > Conversational elements > Prompt.
The following image shows what a prompt selection looks like:
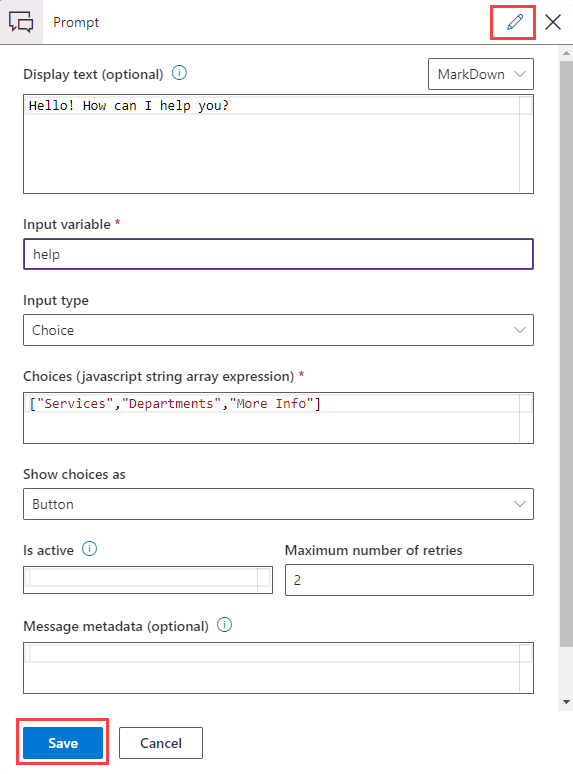
Label: The label defaults to the name of the block type. To change the label, select the edit button that looks like a pencil. For this block, change the label to Greeting.
Display text: Enter a block display name that helps you differentiate between the blocks. Because we're creating a greeting block, let's use Hello! How can I help you?.
Input variable: Because the healthcare bot uses some programming concepts, you need give the name of the variable to store the input from the user. A variable is simply a container that temporarily holds the data. The name is case-sensitive. We use help in our example.
Input Type: Choose the type of data to store in the variable. Important data types include string, number, Boolean, time, choice, multiple choice, attachment, and object. Because the help that we're providing to the user through the bot can have many options, select choice (choice).
Choices: An array of choices or multiple choices. An array is a systematic collection of like objects. Provide the required choices.
Show Choices as: The way we want the GUI to look. Let's choose a button. Depending on the variable type, you need to change the upcoming boxes. The rest are set to defaults.
Select Save after you've entered the information. Congratulations! You've completed the first step. Now let's head to the next step.
After the user enters the data, we have to move according to those choices. That means we're branching from this point. We could use either the switch block or the branch block.
For this exercise, you're going to use the branch block. Select Add element > Flow control elements > Branch.
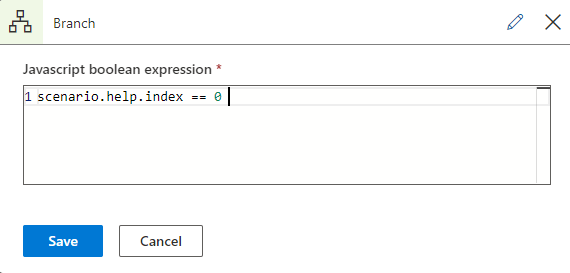
JavaScript Boolean Expression: This field recognizes the command. We know that the counting in a computer starts from zero index. So zero is the first position in the computer. If we choose the option one in the array, then it corresponds to the zero index. We have to feed this array with a simple line of code:
scenario.help.index == 0
We call the objects by using the following syntax:
Syntax: "[name].[variable name].[index] == [index position]"
Because the first branch is for the first object of the array, we have to branch the first object to one side and the rest of the objects to the other side. That's why we've taken the zero index. Note the usage of == and not =. The single equal sign is for assigning a value. The double equal sign is to check the value.
The following image shows how our first branch block should look:
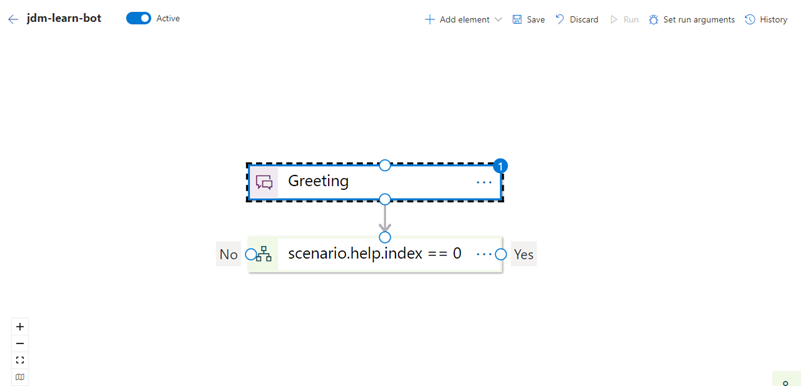
Select Save, and then connect the prompt and branch blocks. The result should look something like this:
Display available services
We have two paths now:
- If the condition is true: yes
- If the condition is false: no
Set up a prompt and a switch
Let's do the first (yes) path.
Because our first option said Services, if the user selects Services, we have to display the available services. After the user selects a service, we need to show just the data related to that. You're free to continue the process and make the bot even more interactive. But the scope of this unit is to just introduce you to the bot interface. So, we're keeping it simple.
We have to display the services to the user and take an input. Which block do we use? Yes, it's the prompt block again. Select Prompt from the Add elements menu and fill it in as shown in the following example.
The string for Choices is:
["Emergency and Trauma Section","ICU and CCU","Pharmacy","Microbiology and Research Wing","OPD"]
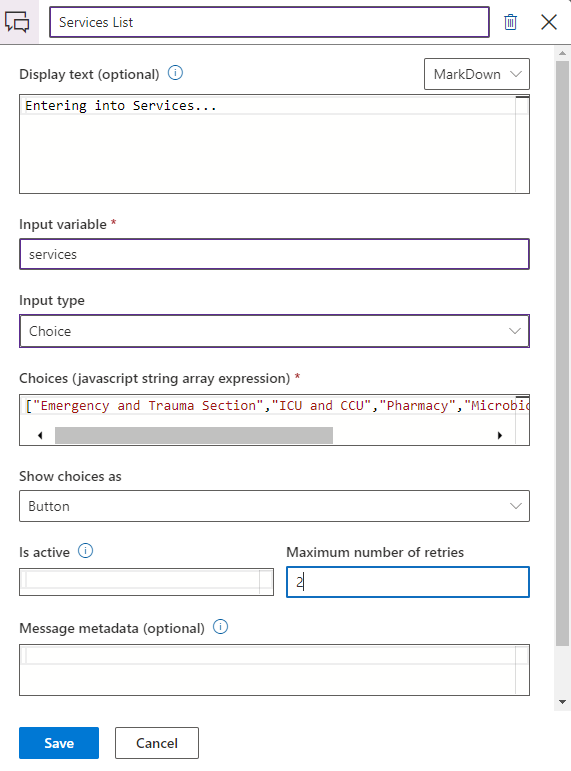
We have already gone through the parameter details.
Our example hospital offers many services, so there are multiple branchings now. In such cases, we use the switch block.
Select Add element > Flow control elements > Switch.
This method is like the classic switch case that we use in any programming language. If the option matches, then it flows through that option. If it doesn't match, then it enters the default value.
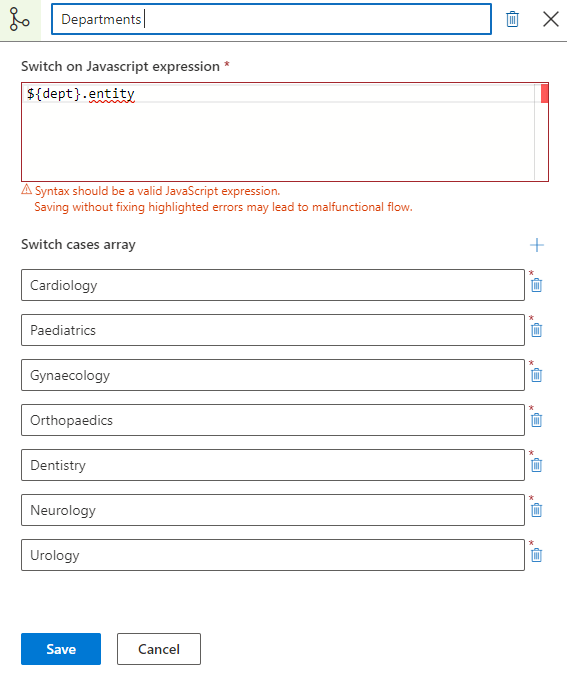
Fill in the switch details. The variable name goes in the brackets after the dollar ($) sign. The period (.) refers to the call. Then provide all the choices that we have in Switch cases boxes. Select the + to add more cases, and then select Save when you're finished.
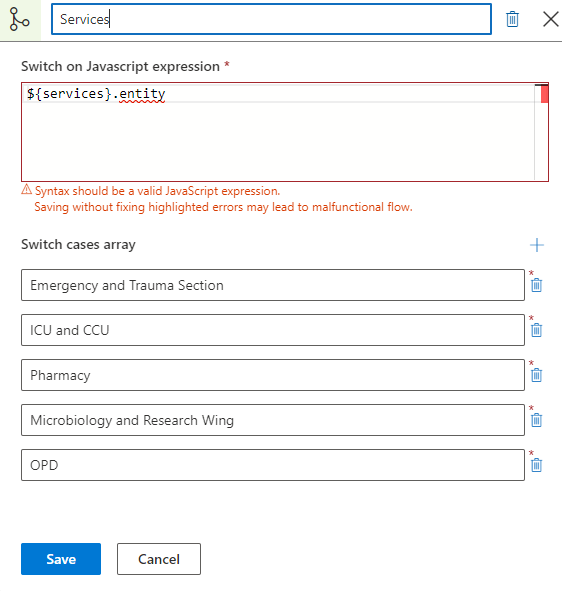
Note
You might see a warning about syntax display when you create or edit a switch block, as shown in the previous image. This warning won't affect your bot in this scenario and you can ignore it.
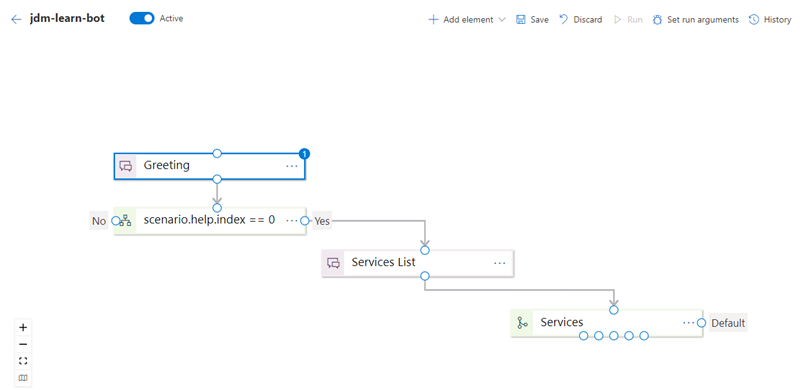
Connect the prompt and switch blocks as shown in this example:
Display information about the service
Let's assume that the user selects any service. We can provide the information to the user.
Set up statements
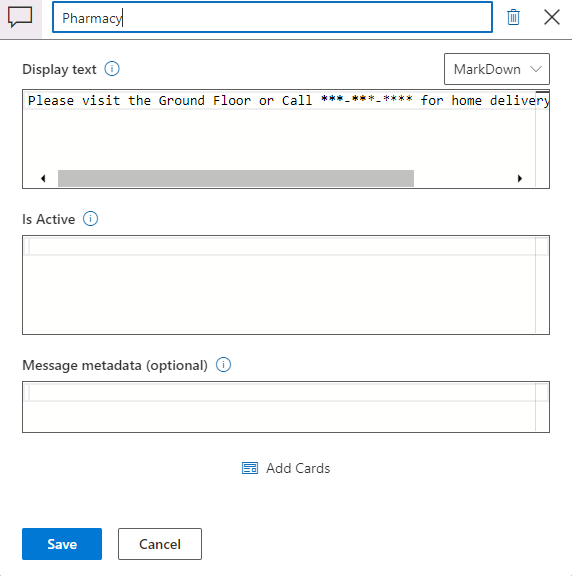
Displaying information is basically giving an output. To display information, we use the statement block.
Select Add element > Conversational elements > Statement.
Display text: This field is the information that we want to display to the user. Enter the following text in the Display text box:
Please visit the Ground Floor or Call ***-***-**** for home delivery. Thank you!
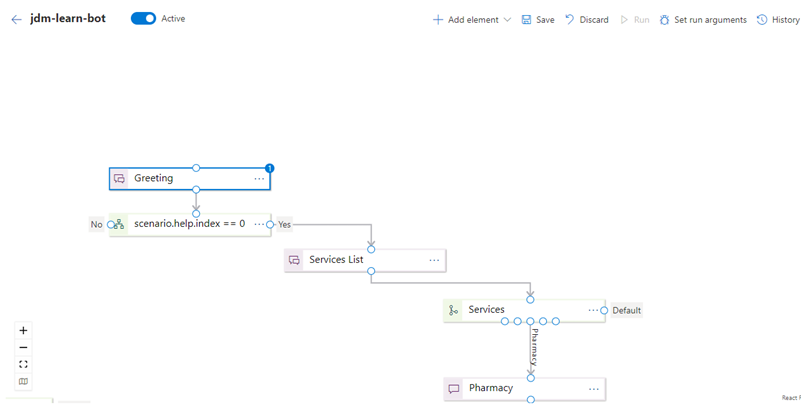
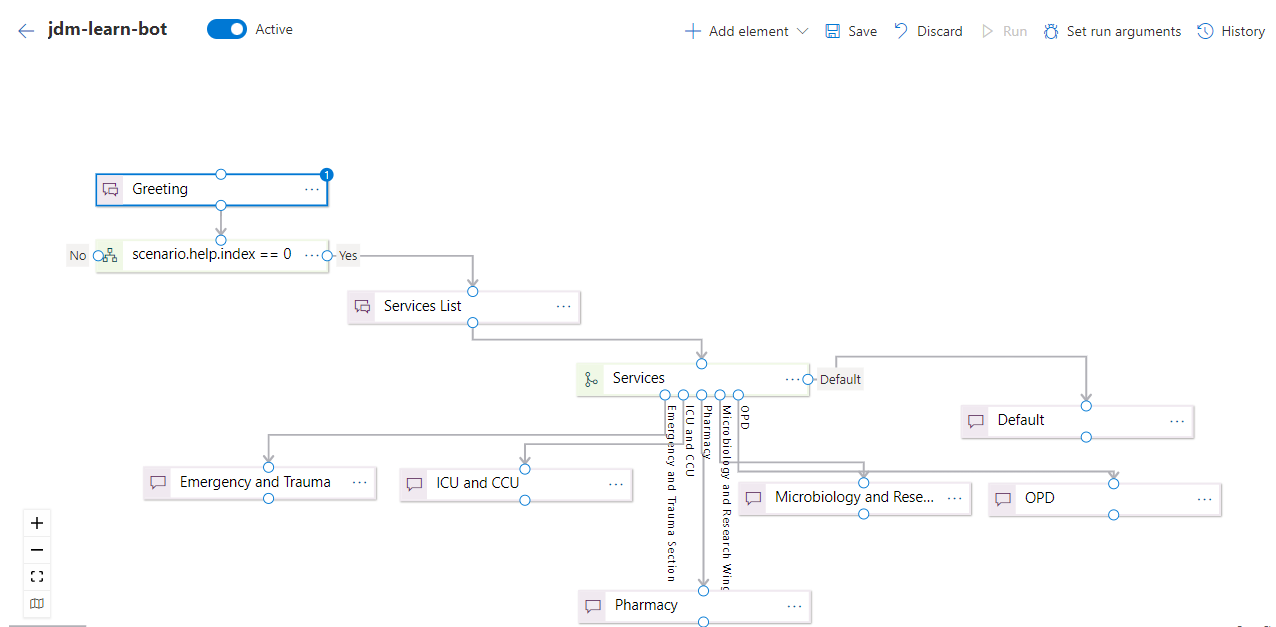
Select Save and then connect the statement block. The basic bot should now look similar to the following image:
Fill in the other switch cases with statement blocks. After you fill in everything, the bot should look something like this:
Set up another branch
Let's go back to the first branching that we set up. If the user chooses the other option instead of the services, it's the no path.
The next thing we had in the list was the departments and more information. Let's configure the bot for the next branching.
We know that the yes path refers to the department selection, and the no path refers to the selection of more information. This step is unlike the previous step, where we had two options inside the no path. The bot is directly branching here, so select a branch block, label it Departments, and then configure the JavaScript boolean expression as follows:
scenario.help.index === 1
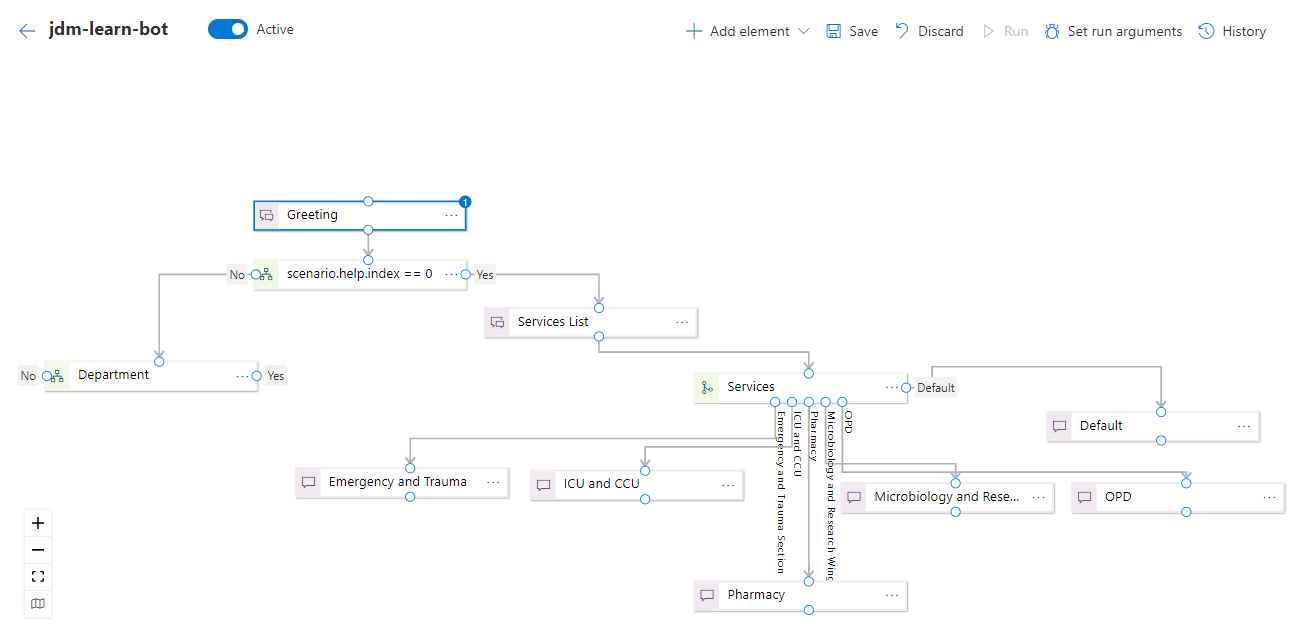
Then connect the branch block as follows:
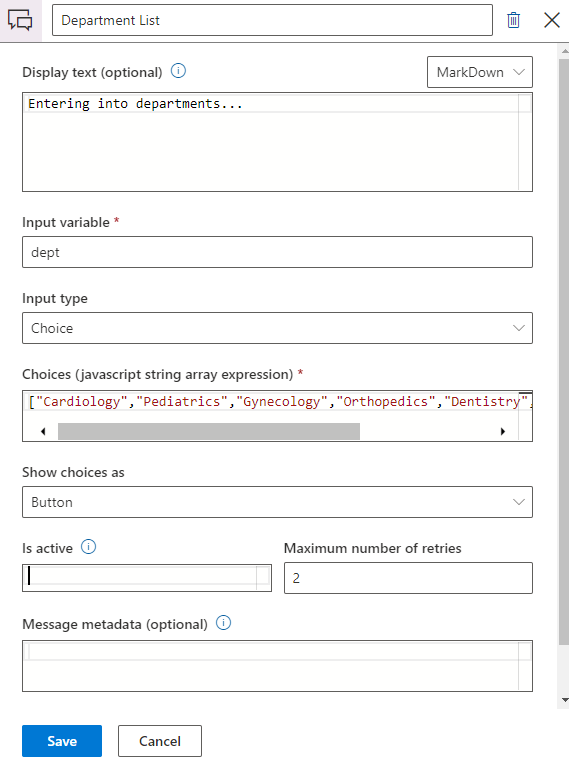
Set up a prompt, switch, and statement for departments
For the departments, follow the same steps that we used for the services prompt. The string for Choices is:
["Cardiology","Pediatrics","Gynecology","Orthopedics","Dentistry","Neurology","Urology"]
Configure a switch as follows:
Add the statement blocks as we did previously:

Because the choice of more information is just a simple statement that we want to display, let's use a statement block. Finally, the bot should look something like this:

Congratulations! You've completed the bot. Now save and run it. The Web Chat section of the page can help you to test the bot.