Outlook integration
Enable app for Outlook
For users to be able to use the Dynamics 365 App for Outlook with your environment you must complete some preliminary work. In many deployments, you will need to coordinate with one or more system administrators of the applications to successfully enable the app for users.
The following are the high-level steps to enable the app for users:
Confirm the minimum requirements to use the app
Ensure users have required privileges in their security roles assigned
Complete any customization of the App for Outlook for your deployment
Push the app to some or all the users in your organization or allow them to install as needed.
Requirements
In order to use the app, the deployment must have synchronization of e-mails through server-side synchronization configured and enabled for the users. You must also have Dynamics 365 for Customer Engagement apps version 9.0 or later in the Microsoft Dataverse environment you are configuring. Users must have either the Outlook desktop app, Outlook for iOS, Outlook for Android, or they can use Outlook Web Access via one of the supported browsers. If you are configuring an Exchange Online deployment using the current versions of the above, no special considerations are required. For on-premise Exchange deployments or specific older version support details review the in-depth version requirements for Deploy Dynamics 365 App for Outlook.
Security privileges required
Access to the Dynamics 365 App for Outlook is controlled primarily by the Use Dynamics 365 App for Outlook security role privilege. Many of the default security roles that ship with Dynamics 365 apps have this enabled by default. If you are working with custom security roles or a default role with the privilege not enabled, you will need to ensure this is enabled for users you wish to use the app. The privilege is located on the Business Management tab as you can see in the following image.

Users that do not have this will see the following error “You haven’t been authorized to use this app. Check with your system administrator to update your settings”
Additionally, if you are using custom security roles or a default role not already configured for the app you need to ensure the following access rights are also provided to users.
Business Management tab: Mailbox table user level read/write access
Customizations tab: User Application Metadata table user level read/write access
Customizations tab: table, column, Model-driven App, Relationship, System Application Metadata, System Form and View must have user level read access.
If you have many custom security roles you can also consider creating a specific targeted one e.g. App for Outlook Access that has these security entitlements configured and then assign that role in addition to your existing custom roles.
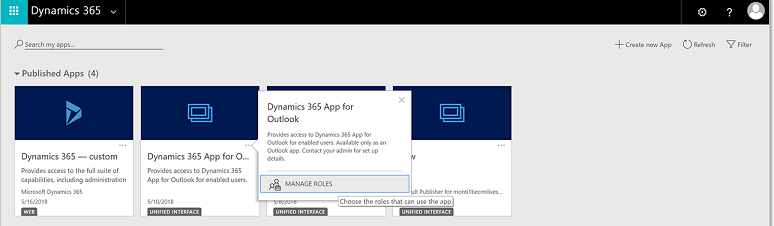
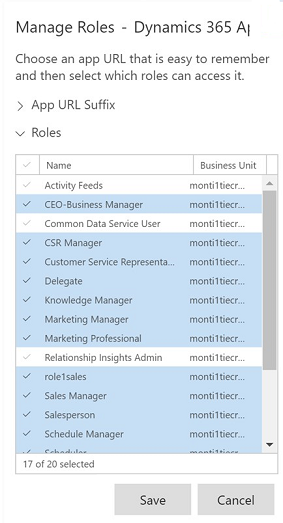
The Dynamics 365 App for Outlook app module is also configured to restrict visibility of the app to users that have one of the Security Roles configured on the app module roles list. The app is initially configured to include the security roles that have the Dynamics 365 App for Outlook privilege enabled. If you are using a different security role, you will need to enable it for the app module. You can do this by clicking Manage Roles from the app as you can see in the following image. You can reach this list at instanceurl/apps.
On the list of security roles for the app, locate your security role and ensure it is checked.
Customize the app for Outlook
The app that that user interacts with in Outlook is simply a Power Apps model-driven app that is hardwired to show in the context of the Outlook app. You may find that the default configuration isn’t ideal for your deployment because it shows too many things or doesn’t show the right things for your users. You can customize this app module using the same app designer you use to build other model-driven apps. You can choose to do this customization at any time, often it is desired to be done prior to enabling the app for users. We will be covering this in more detail in a separate topic in this module.
Enable the app for users
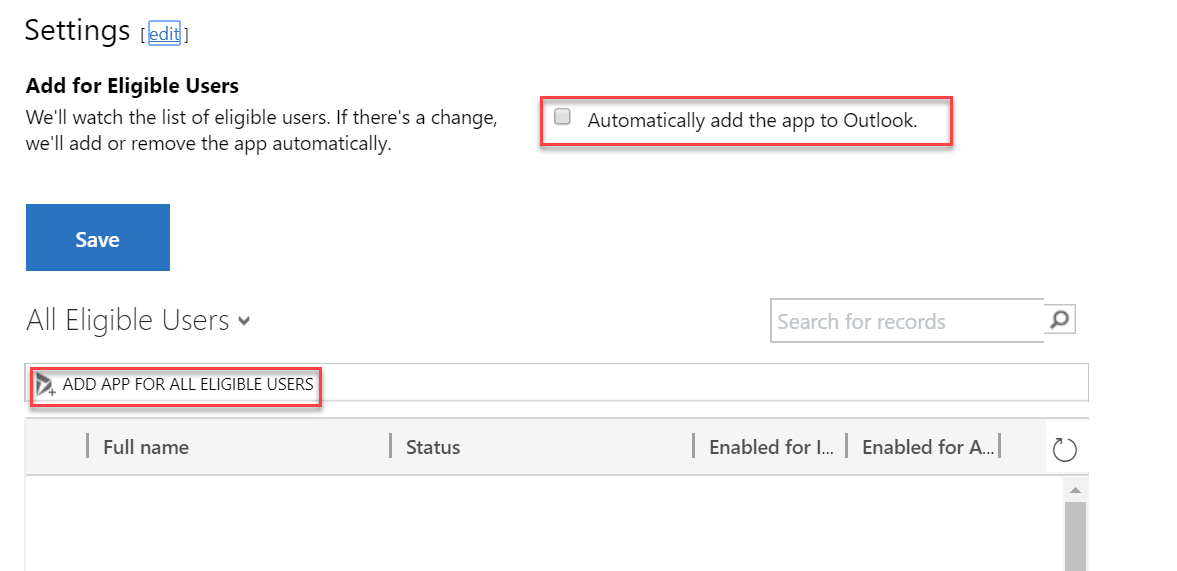
Once you have ensured the basic requirements have been met and intended users have the required security entitlements the next step is to push the apps to users if you want. This is done via Settings -> Dynamics 365 App for Outlook. From here you can do the following
Enable auto install of the app for eligible users – this ensures new users automatically get setup
Push the app to all eligible
Select eligible users from the list and push the app specifically to them.
It is not required to push the app to users, they can add the app via manage add-ins in Outlook if they are eligible.
Configure Outlook addin
The Dynamics 365 for Outlook is an Outlook add-in that is physically installed on a client machine that is running the Outlook desktop client. This add-in uses older integration technology to work with Outlook. This differs from the Dynamics 365 App for Outlook that was covered in the prior topic that uses the modern Outlook integration technology. The Dynamics 365 for Outlook discussed in this topic will continue to be supported but will not receive of the new features.
Review the Continued support for Outlook add-in for more details.
New deployments should use the new Dynamics 365 App for Outlook where possible.
In this topic, we will cover some of the things to be aware of if you are working on a deployment with the Dynamics 365 for Outlook.
The Dynamics 365 for Outlook allows access to the Customer Engagement app from within the context of the Outlook application. Additionally, it provides support for tracking email, appointments and tasks without having server-side synchronization installed. Offline support for Dynamics 365 data is also a key feature. Dynamics 365 for Outlook also enables Microsoft Word mail merge with Dynamics 365 data.
Installing Dynamics 365 for Outlook
Dynamics 365 for Outlook must be installed on each user’s computer and then needs to be configured. To perform the installation on the computer you must have the ability to log on to the computer as a local administrator. In addition to the installation using the installer, you can also install from the command prompt or using System Center Configuration Manager (SCCM).
Configuring
After the install completes you will see the following dialog box prompting to configure the app.
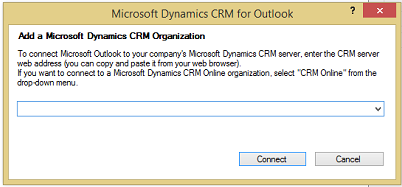
You can cancel at this point and run the configuration later. You can also configure additional eligible Dataverse environments by re-running the Configuration Wizard. You can do this from Start -> All Programs ->Microsoft Dynamics 365 for Customer Engagement Apps, and then click on the Configuration Wizard.
User security permission requirements
To perform different actions with Dynamics 365 for Outlook, users must have appropriate security privileges on their assigned security roles. Many of the default Dynamics 365 security roles come pre-configured with the required permissions for the Dynamics 365 for Outlook. If you are using only custom security roles, please see Permissions required for Dynamics 365 for Outlook tasks.
Configuring synchronization
Dynamics 365 for Customer Engagement uses synchronization filters to determine which rows to synchronize with Outlook or Exchange (when server-side synchronization is used). In Dynamics 365 for Outlook you can configure the settings via File -> Dynamics 365 for Customer Engagement apps - > Options. This will launch the following dialog that allows you to configure the filters.
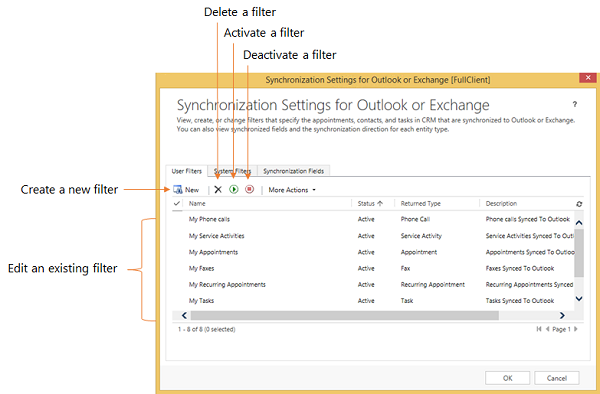
From here you can configure user filters, or if you have administration permissions you can configure System Filters and control the columns that synchronize. System Administrators can modify organization-wide filters using the SDK or community tools.
In addition to these settings, you can also configure additional system settings related to synchronization. These can be accessed from System Settings - > Synchronization tab. These settings control the rules for the entire organization for Appointments, Contacts and Tasks.
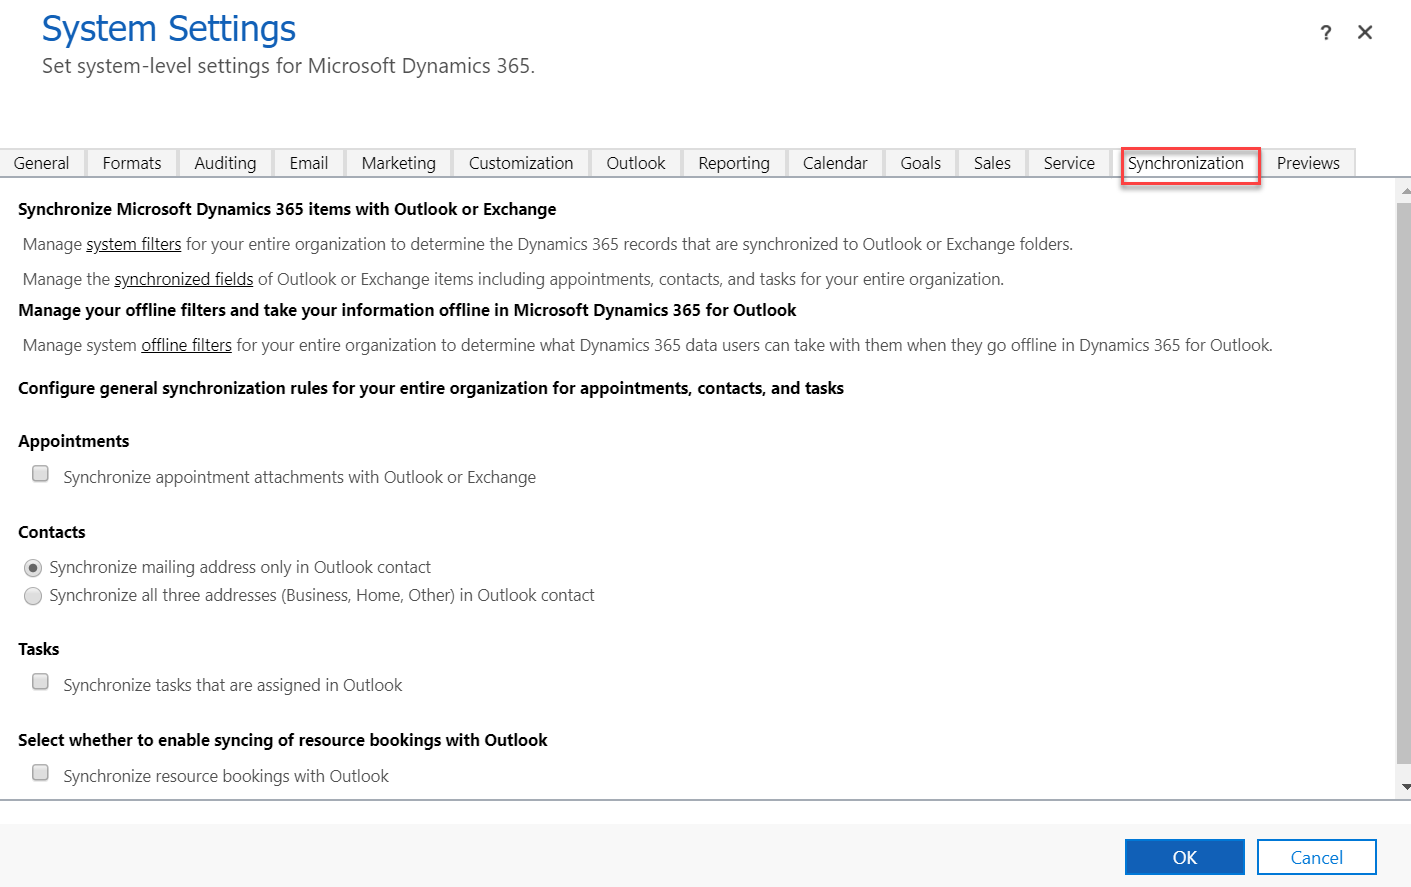
Please see System Settings dialog box - Synchronization tab for more information.
Working offline
Dynamics 365 for Outlook has the ability to take a subset of the overall data offline. Changes to the offline data are tracked and played back when the user connects to the server. To use this feature, you must define what data to take offline and the user must have the Go Offline privilege. To define the subset of data Offline Filters are configured for the user.
If you have users working offline be aware that any automation you have configured to run will not trigger until the user connects back to the server and the row changes are applied.
Customize the app for Outlook
Dynamics 365 App for Outlook is a Power Apps model-driven app pre-configured to run in the context of Microsoft Outlook including Outlook Web Access. You may find that the default configuration isn’t ideal for your deployment because it shows too many things or doesn’t show the right things for your users. You can customize this app using the same app designer you use to build other model-driven apps. You can choose to do this customization at any time, often it is desired to be done prior to enabling the app for users.
The following are the common types of customizations that are supported:
Remove default entities from the app that aren’t used
Enable a custom table to show up in the app
Configure which views appear in the App for Outlook
Configure searching on custom columns
Customize the track regarding card.
The following customizations are not currently supported and may result in an unstable app:
Customization of the site map for the App for Outlook app module
Changing the App for Outlook default dashboard.
Controlling what entities appear in the app
From the list of Apps in your environment locate the Dynamics 365 App for Outlook app and select edit. Once the app has loaded in the designer you should see something like the following image:
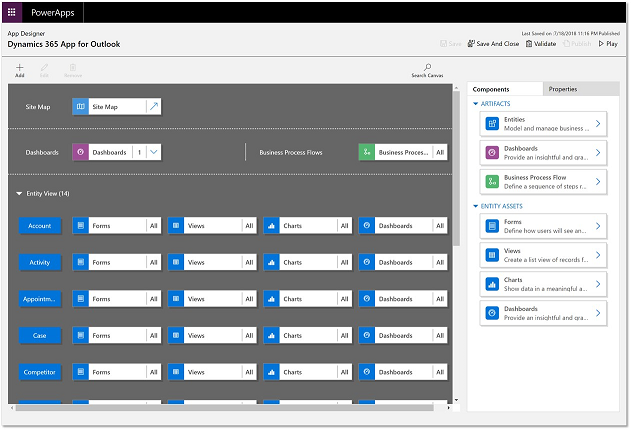
Selecting Entities in the right Components panel you can see the list of what is included and what is not and make the edits necessary for your requirements.
The most important thing to remember is this app is shared with all users so any change you make impacts all users in that environment. For example, if you have some users that need access to an table and others that don’t, app customization is not appropriate tool and you would be better off using security roles to control table visibility.
If you are adding new custom entities to show in the quick create list make sure the table has Quick Create enabled and there is a properly configured quick create form.
In order for custom entities to appear in the Regarding lookup of a tracked item you must have the custom table enabled for Activities.
Configuring views
To increase the app usability, remove the items the users don’t need or use. Many times applications have several views that are available but not all of them make sense in the context of working with the App for Outlook. By locating the table in the main canvas of the designer and clicking on Views you can configure which views are included in the App for Outlook.

Configure custom column searching
The App for Outlook uses the Lookup View to determine which columns it searches for when you do a search to set the regarding on the activity. For custom columns on an table you must edit the Lookup view that is generated and add any custom columns you want searched to the view.