Manage Azure Stack HCI VMs
As Contoso transitions to the new operational model that uses the capabilities of Azure Stack HCI, you want to determine how to streamline the most common operational tasks. You've to document standard operating procedures for the IT staff and would like to avoid installing and using multiple administrative and diagnostics tools. You want to determine whether you can accomplish this by using Windows Admin Center.
Advantages of Windows Admin Center
Windows Admin Center is the recommended tool for managing Windows Server and Azure Stack HCI deployments because of its versatility, extensibility, and security. It allows you to manage your computing environment through a web browser, in a consistent manner, regardless of whether that environment resides in an on-premises datacenter or in Azure.
You can install Windows Admin Center directly on servers you intend to manage. You can also install it on an intermediary server that serves as a gateway for connections to the managed servers. In both cases, a single server that hosts the Windows Admin Center installation can broker connections to multiple servers through PowerShell Remoting and Windows Management Instrumentation (WMI) over Windows Remote Management (WinRM).
Manage Azure Stack HCI VMs by using Windows Admin Center
You can use Windows Admin Center for a wide range of Azure Stack HCI VM management tasks, including:
- Creating and configuring VMs
- Connecting to VMs via Virtual Machine Connection (VM Connect)
- Managing the state of VMs
- Reviewing inventory, performance, and operational status of VMs
- Moving VMs between servers
- Exporting, importing, and cloning VMs
- Joining VMs to an Active Directory Domain Services (AD DS) domain
- Integrating VMs with hybrid Azure services, such as Azure Site Recovery
Note
You have the option of automating all of these tasks by using Windows PowerShell.
Create and configure a VM
To create a clustered VM, in Windows Admin Center, connect to the Azure Stack HCI cluster and browse to the Inventory tab of the Virtual machines pane. Use the Add menu item to display the New virtual machine pane and provide details such as the VM name; generation; target host; the file system path for VM configuration and virtual disk files; and processor, memory, network, and storage settings. You can also mount an ISO file that contains the image of the operating system you intend to install.

After you have created the VM, from its Settings pane in Windows Admin Center, you can modify its memory, processor, disks, and networking configuration; change the boot order; enable or disable integration services; set up affinity rules and checkpoints; and control security settings such as Secure Boot, encryption, and shielding.

Connect to a VM via VMConnect
If you intend to perform an interactive installation of the operating system, connect to the newly deployed VM via VMConnect. To connect to a VM via VMConnect, in Windows Admin Center, after you've connected to the Azure Stack HCI cluster, browse to the Inventory tab of the Virtual machines pane. Then use the Connect menu item to start the console session directly within the browser window.
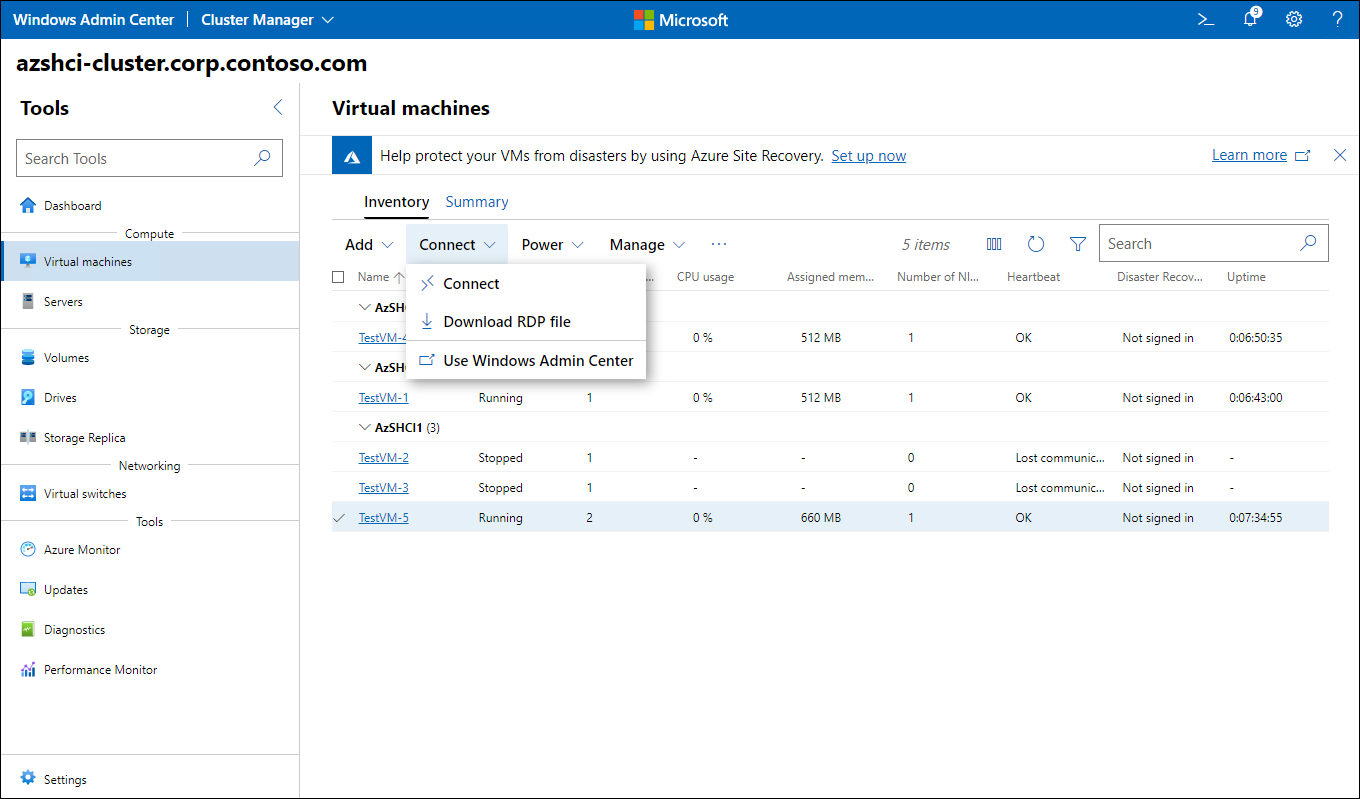
Note
VMConnect is a tool that allows you to install and manage the guest operating system of a Hyper-V VM without requiring direct network connectivity to that VM.
Note
To connect via VMConnect, allow Remote Desktop connections to the Hyper-V server hosting the target VM.
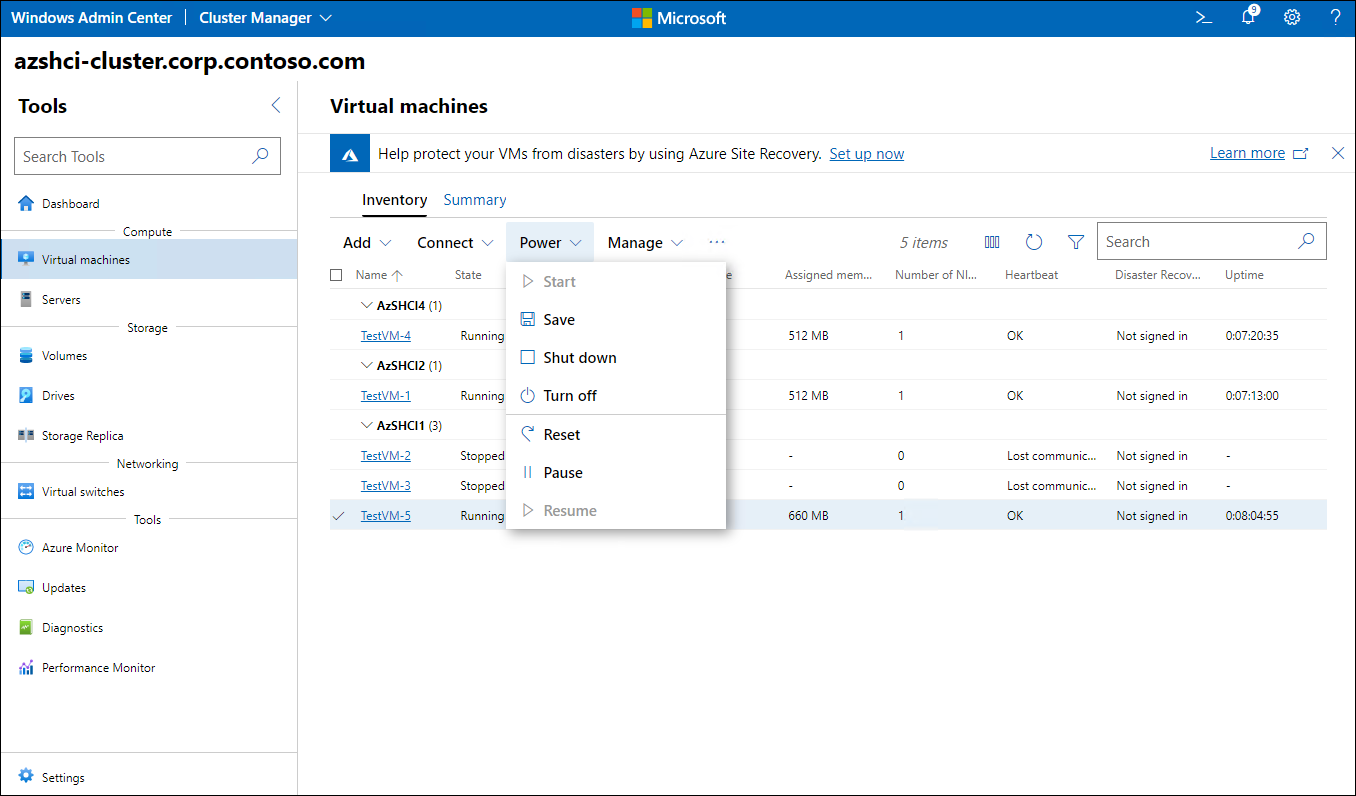
Manage the state of a VM
The same Windows Admin Center pane that allows you to connect to a VM via VMConnect or Remote Desktop also provides options for managing the VM state. After you select the Power menu header, you've access to menu items that allow you to start, save, shut down, turn off, reset, pause, or resume one or more VMs in the inventory list.
Review inventory, performance, and operational status of VMs
Windows Admin Center displays individual and aggregated data that represent the usage and performance of Azure Stack HCI VMs. For individual VMs, you can review live and historical data for the processor, memory, network, and disk telemetry. Aggregate data includes the total number of running, stopped, and paused VMs; recent health alerts; and processor, memory, and disk usage with breakdown per host and guest.
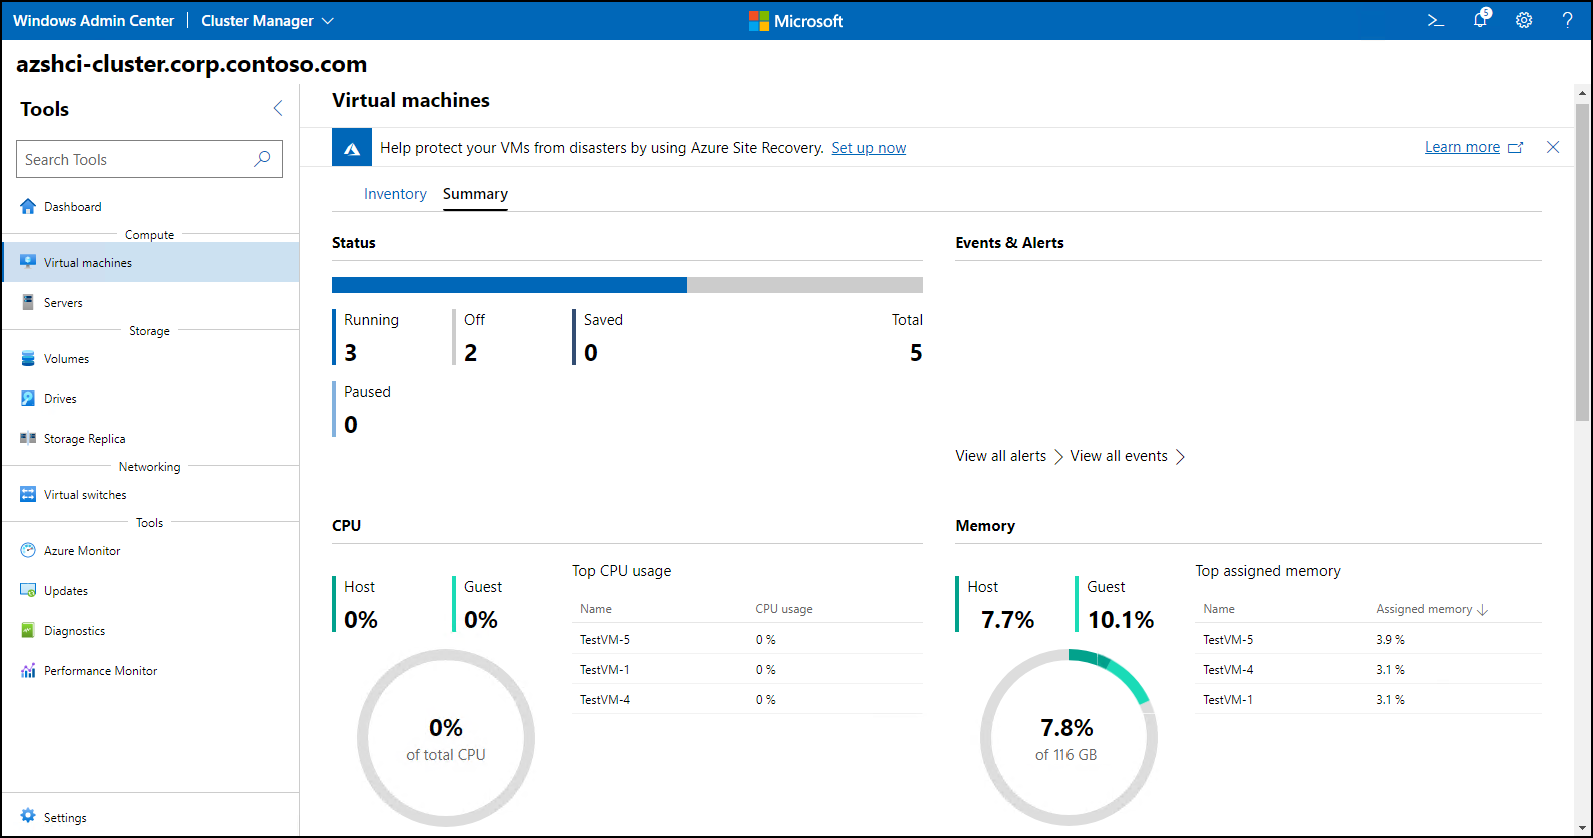
Also, you have access to processor and memory usage data from the host perspective, such as memory pressure, memory demand, and assigned memory. The Inventory tab includes the uptime, heartbeat status, and Azure Site Recovery protection status for each VM.

Move a VM between servers and clusters
Windows Admin Center also facilitates VM and storage migration within the same cluster, between clusters, and to a stand-alone server. When moving a VM outside of the local cluster, you can select distinct target paths for its configuration, checkpoint, and smart paging files. For intra-cluster VM moves, the storage remains in its original location.

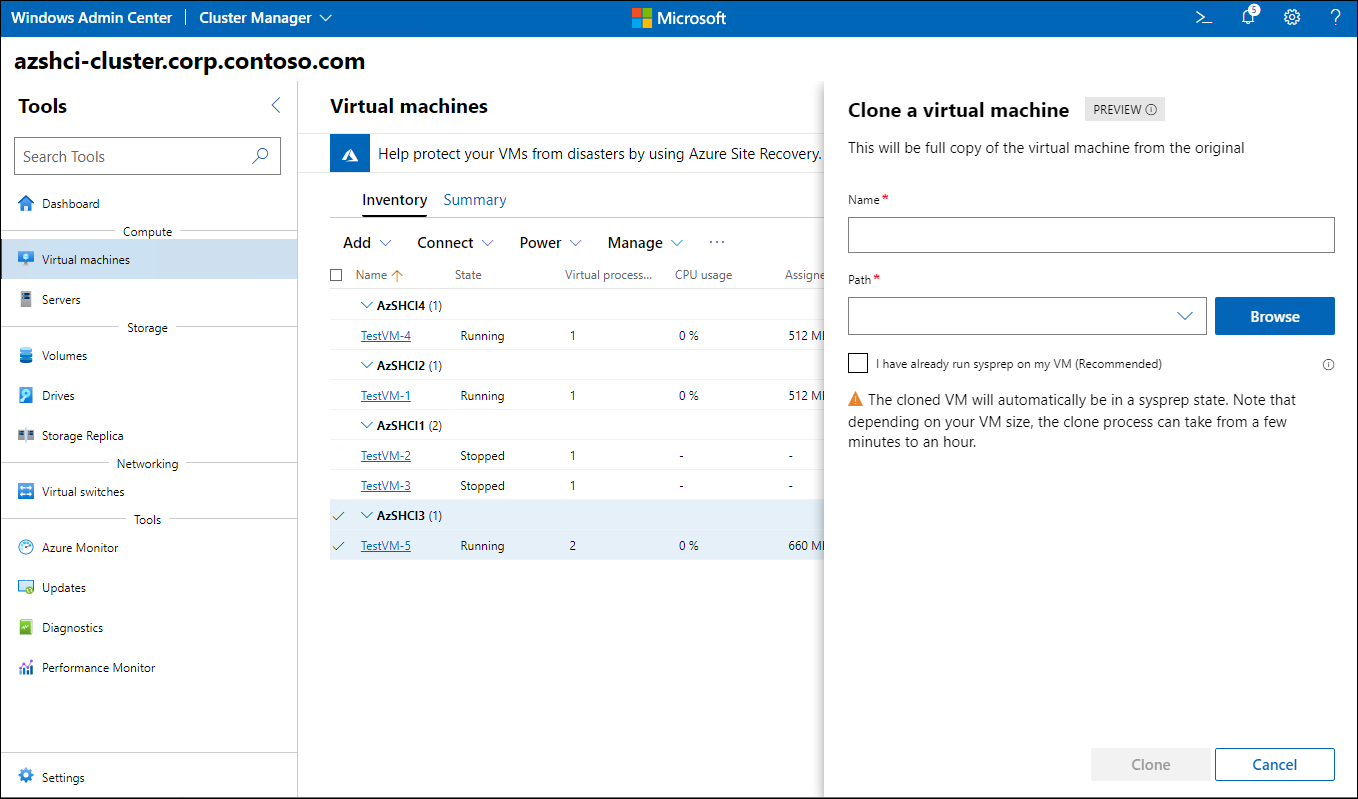
Export, import, and clone a VM
The export process identifies all of the VM files, including the VM configuration, checkpoints, and disks, and copies them to the location you specify. Import uses these files to create a new VM, with configuration and content that matches the exported VM. During import, you can fix incompatibilities between the source and destination Hyper-V servers. Typically, these incompatibilities are the result of the differences in their hardware. Such differences might prevent the ability to do a VM move.
Note
It is possible to copy files to a target location before importing them, rather than using export for this purpose.
The cloning process generates a generalized copy of a VM, which automatically includes running Sysprep before shutting down the operating system, unless you confirm that you've already completed this step.
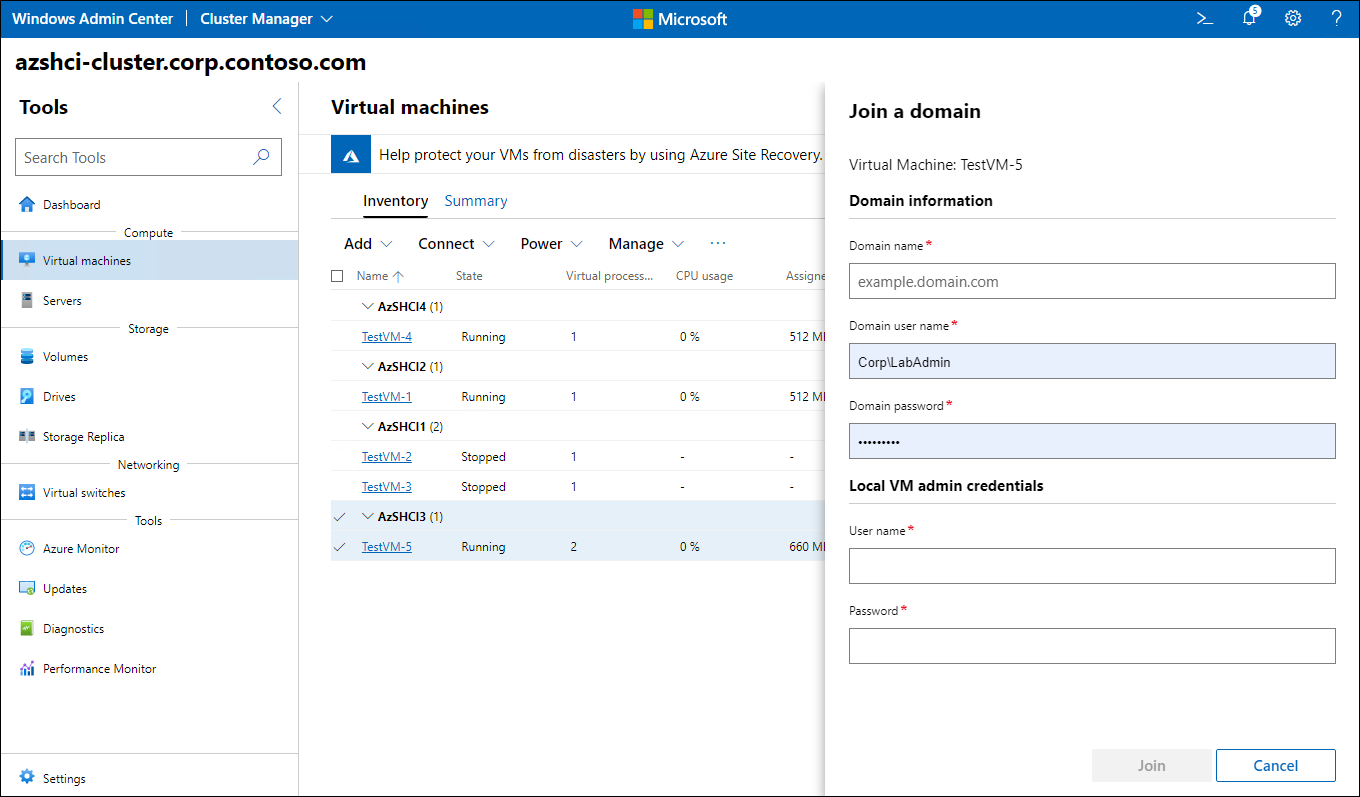
Join a VM to an AD DS domain
It is also possible to join a VM to an AD DS domain directly from Windows Admin Center. You just need to provide the credentials of a user account with local administrative privileges, the credentials of a domain user account with the privileges sufficient to perform domain join, and the name of the target domain.
Demonstration: Manage Azure Stack HCI VMs by using Windows Admin Center
In this demonstration, you'll learn how to manage Azure Stack HCI VMs by using Windows Admin Center.