Exercise - Set up disaster recovery with Azure Site Recovery
Azure Site Recovery automates the setup of recovery from one region to another. The setup process installs the Mobility Service onto the VMs, creates the required infrastructure in the recovery region, and gives you a way to monitor the progress.
Currently, two VMs are running the company's patient and employee systems. These systems are running in the West US region. You've been asked to protect the infrastructure by enabling it to be recovered to the East US region. Using Azure Site Recovery, you'll enable a Recovery Services vault to replicate the current workloads.

In this exercise, you'll complete the setup of Azure Site Recovery using the Azure portal.
Note
This exercise is optional, but depends on resources and an environment you created in the previous unit. If you don't have an Azure account, you can read through the instructions to understand how to use backup virtual machines with Azure Backup. If you want to complete this exercise, but don't have an Azure subscription or prefer not to use your account, you'll need to create a free account and first complete the exercises in the previous unit.
Create a recovery services vault
If you're not already signed in, sign in to the Azure portal with your credentials.
On the Azure portal homepage, under Azure services, select Create a resource. The Create a resource pane appears.

In the left pane, select IT & Management Tools, then search for Backup and Site Recovery.
Select Create. The Create Recovery Services vault page appears.
On the Basics tab, enter the following values for each setting:
Setting Value Project Details Subscription your subscription Resource group From the dropdown list, select east-coast-rg Instance Details Vault name asr-vault Region (US) East US 2 Select Review + create, and after validation passes, then select Create. It might take a few minutes for the deployment to complete.
After deployment completes, select Go to resource to view your asr-vault Recovery Services vault.
Enable replication
In this task, you'll replicate the two VMs that you created in the previous unit.
In the resources menu, select Replicated items under Protected items. The Replicated items pane appears.
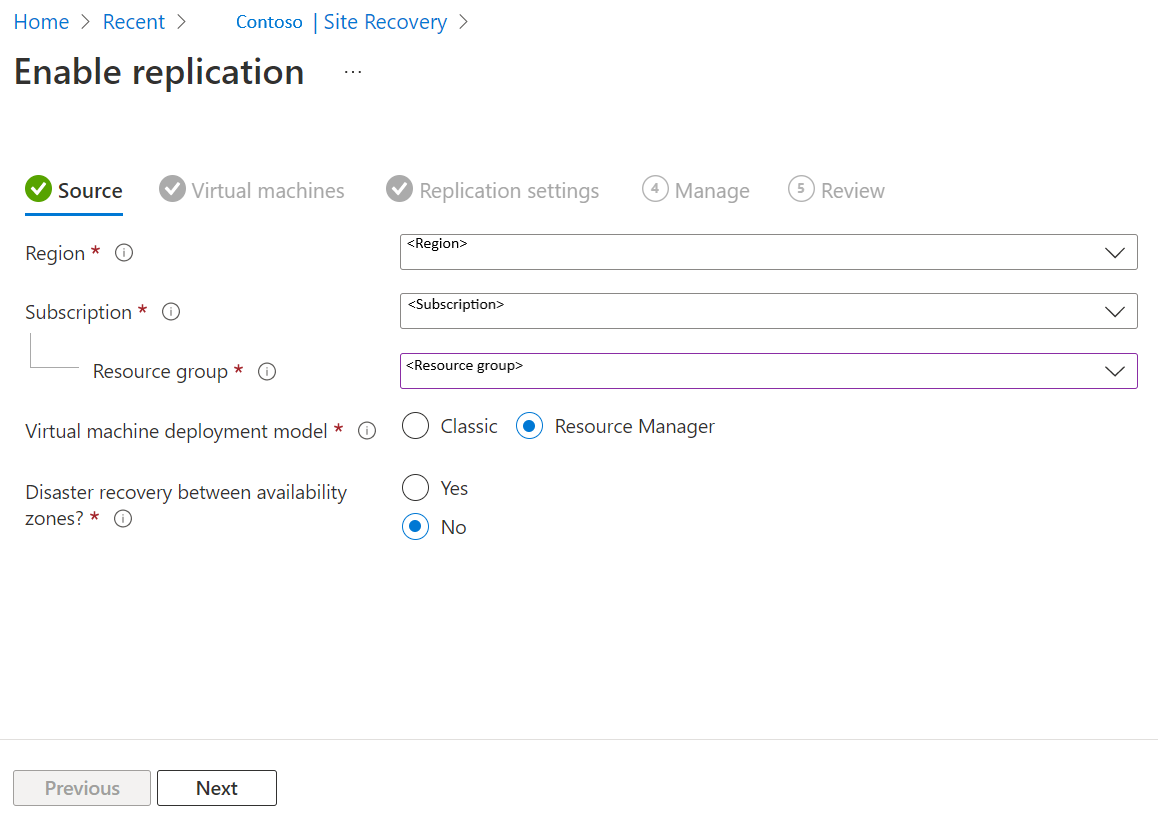
In the command bar, select Replicate, then select Azure virtual machines from the drop-down list. The Enable replication pane appears.
Enter the following values in the specified tabs, leaving other fields at their default values.
- On the Source tab, enter the following values for each setting:
- In Region, select (US) West US 2.
- Select your Azure subscription in the Subscription drop-down.
- Select west-coast-rg in the Resource group drop-down.
- Select Next.
- On the Virtual machines tab, select both VMs: hr-records and patient-records. Select Next.
- On the Replication settings tab, enter the following values for each setting:
- In Target location, select (US) East US 2.
- In the Target subscription field, select your Azure subscription and select OK.
- On the Source tab, enter the following values for each setting:
Select Next twice to advance to the Review tab.
On the Enable replication pane, select Enable replication. It might take a few moments for deployment to the east-coast-rg to complete.
Monitor replication progress
You can review the progress of your site recovery job by selecting Notifications in the global controls in the upper right corner of your Azure portal.
In the Notifications pane, you'll see that Enabling replication for 2 vm(s) is still running. Select the notification link.
The Site Recovery jobs lists all site recovery actions you have completed in this module.
In the jobs list, select the In progress link to view how the replication setup is progressing.
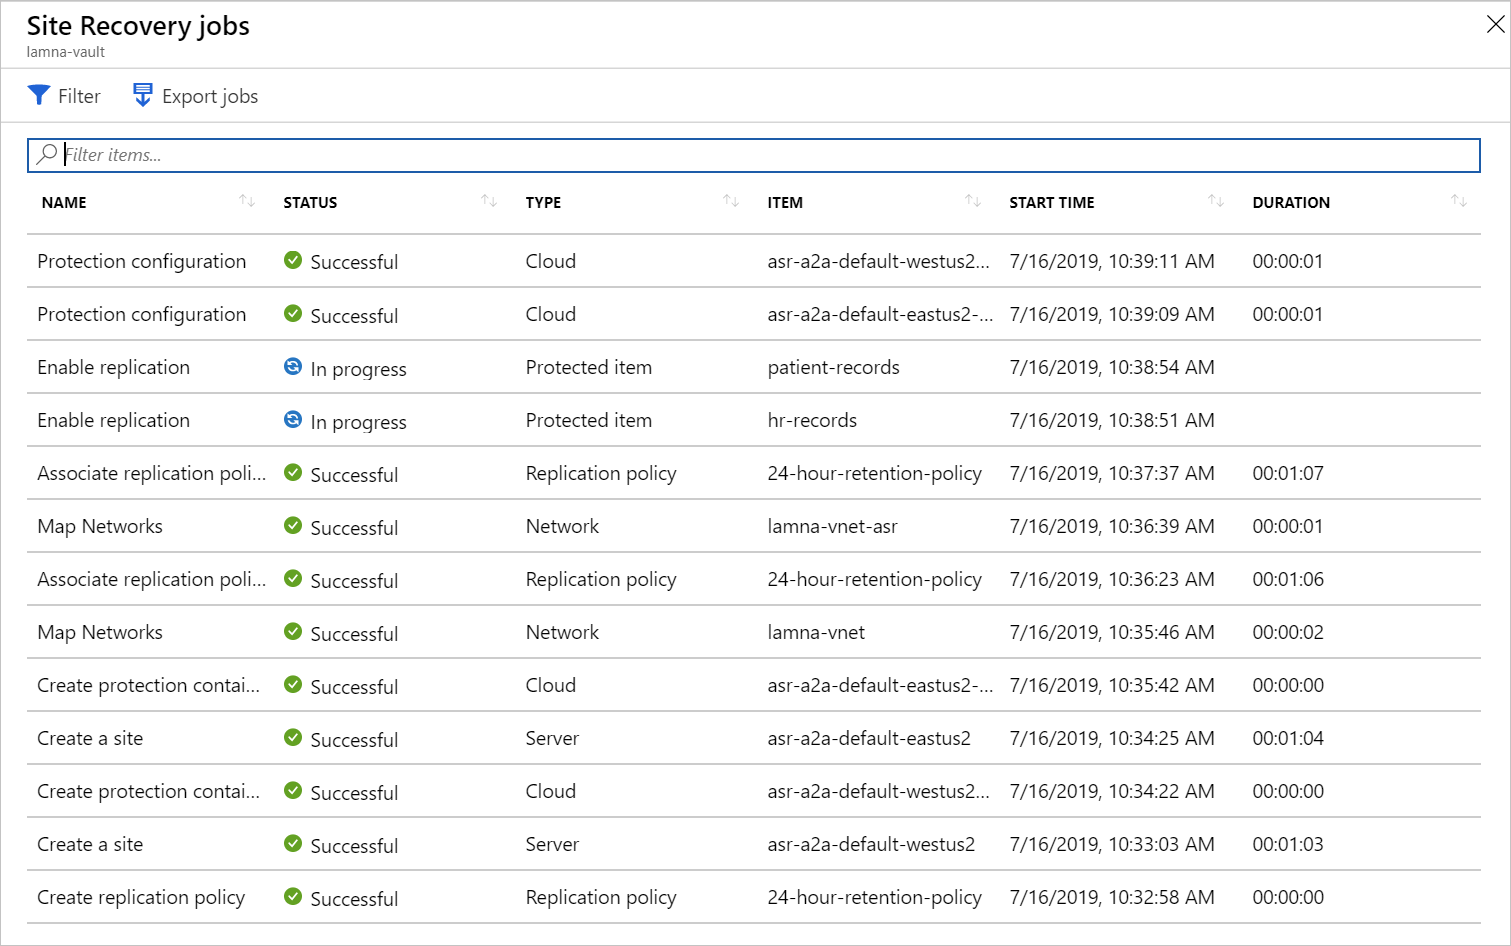
You can select any of the listed jobs to view more details.
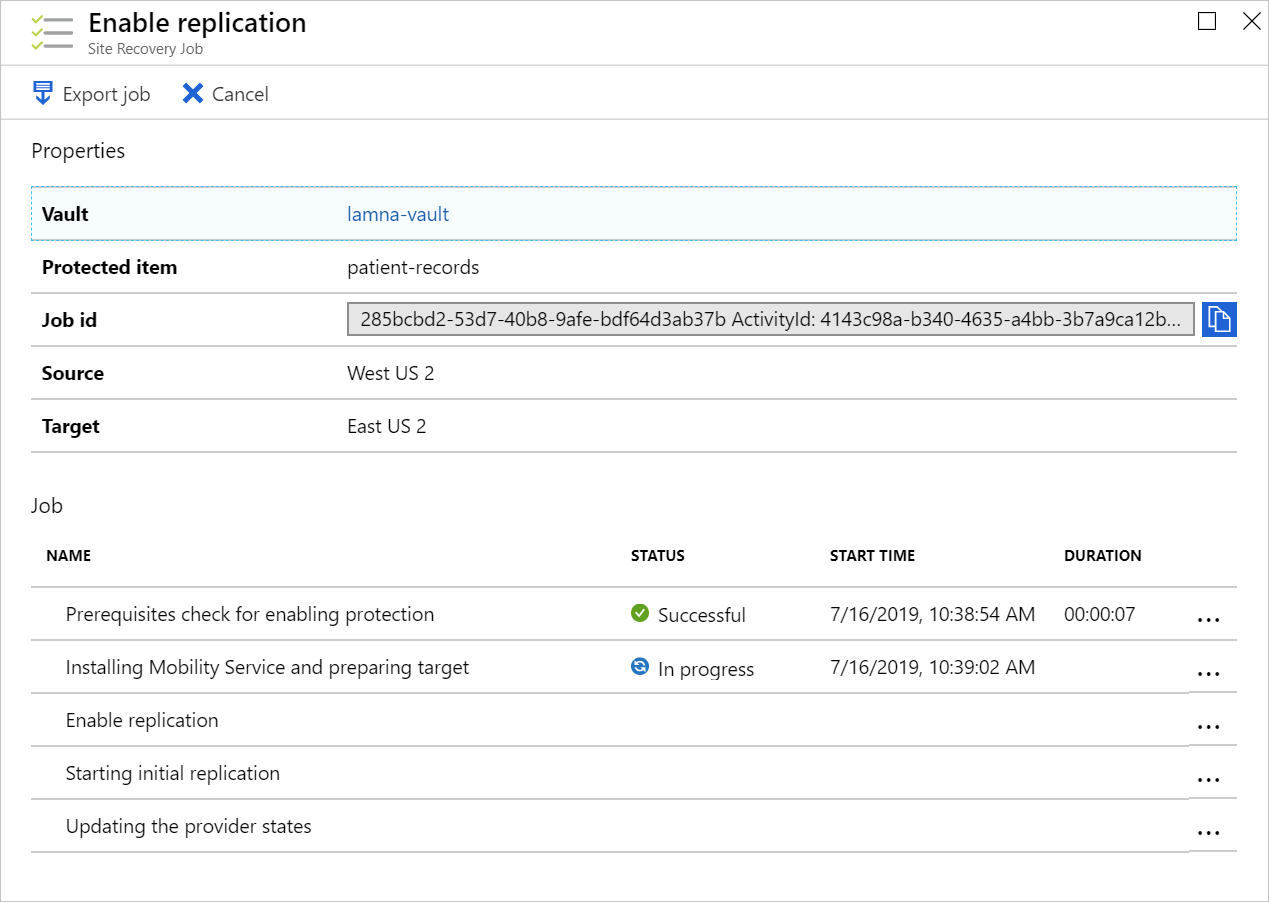
Two of these jobs will take the most time to complete. If you select either of the Enable replication jobs, you'll see that the Installing Mobility Service and preparing target step can take between five to 10 minutes to finish.