Build communication with Outlook
Watch the following demo video of the steps that you'll complete in this unit.
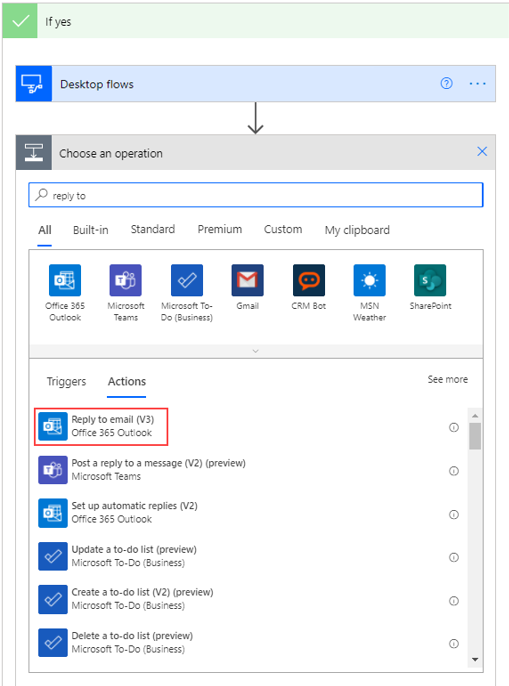
Now that you've gone through an approval and have updated your legacy app (if approved), you'll need to alert the invoice sender of the approval outcome. To begin, select Add an action under the If yes branch and then search for and select Reply to email (V3).
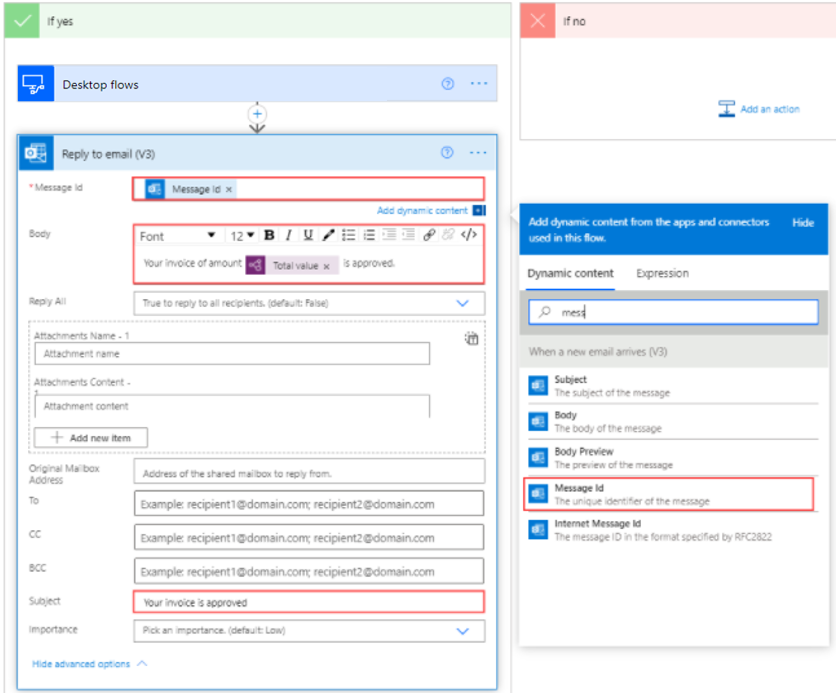
For the first field, find the Message ID of the original email in the Dynamic content menu. The body will be a combination of text and dynamic content, as shown in the following image. Expand the fields by selecting Show advanced options and then enter Your invoice is approved in the Subject field.
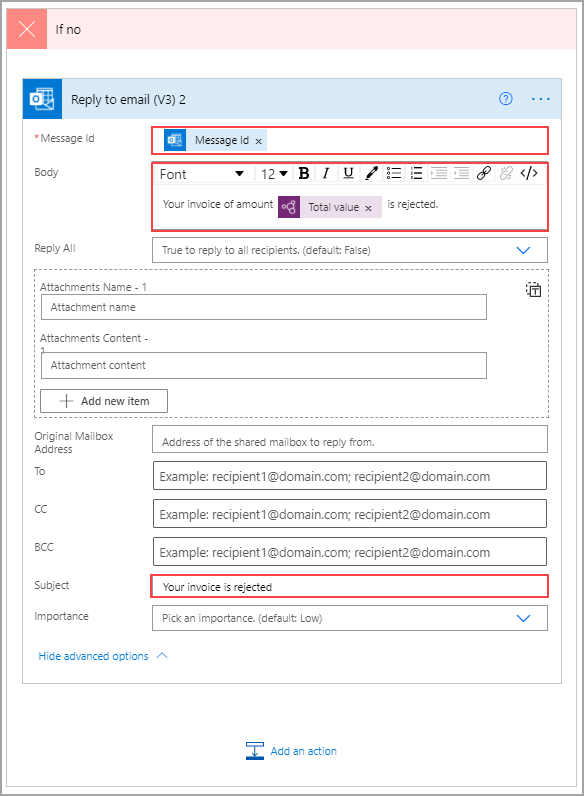
Now, you have the approval email and only need to add the rejection email. To do so, ensure that you're under the If no branch and then select Add an action. Search for and select Reply to email (V3).
For the first field, find the Message ID of the original email in the Dynamic content menu. The body will be a combination of text and dynamic content, as shown in the following image. Expand the fields by selecting Show advanced options and then enter Your invoice is rejected in the Subject field.
Select Save.


