Manage Arc VMs on Azure Stack HCI
Applies to: Azure Stack HCI, version 23H2
This article describes how to manage Arc virtual machines (VMs) running on Azure Stack HCI, version 23H2. The procedures to enable guest management, start, stop, restart, or delete an Arc VM are detailed.
Prerequisites
Before you begin, make sure to complete the following prerequisites:
Make sure you have access to an Azure Stack HCI cluster that is deployed and registered. During the deployment, an Arc Resource Bridge and a custom location are also created.
Go to the resource group in Azure. You can see the custom location and Azure Arc Resource Bridge created for the Azure Stack HCI cluster. Make a note of the subscription, resource group, and the custom location as you use these later in this scenario.
Make sure you have one or more Arc VMs running on this Azure Stack HCI cluster. For more information, see Create Arc VMs on Azure Stack HCI.
Enable guest management
After you created a VM, you would want to enable guest management on that VM.
There are two agents that are important to understand in the context of guest management - a VM guest agent and an Azure Connected Machine agent. Every Arc VM created via Azure portal or Azure CLI is provisioned with a guest agent (also referred to as the mocguestagent) on it.
When you enable guest management on an Arc VM, the guest agent installs the Azure Connected Machine agent. The Azure Connected Machine agent enables you to manage Azure Arc VM extensions on your Azure Stack HCI VM.
Based on whether a guest agent is running on your Arc VM, the steps to enable guest management are different.
Important
Make sure that your Azure Stack HCI cluster is running 2311 or later to run this procedure.
Verify if guest agent is running
To verify whether the guest agent is running on the Arc VM, connect to the Azure Stack HCI server.
Run the following command:
az stack-hci-vm show --name "<VM name>" --resource-group "<Resource group name>"Here's a snippet of the sample output that indicates that the guest agent is running. Look for
statusesunder thevmAgentin the output."instanceView": { "vmAgent": { "statuses": [ { "code": "ProvisioningState/succeeded", "displayStatus": "Connected", "level": "Info", "message": "Successfully established connection with mocguestagent", "time": "2024-01-13T00:57:39Z" }, { "code": "ProvisioningState/succeeded", "displayStatus": "Connected", "level": "Info", "message": "New mocguestagent version detected 'v0.13.0-3-gd13b4794", "time": "2024-01-13T00:57:39Z" } ], "vmConfigAgentVersion": "v0.13.0-3-gd13b4794" } }The guest agent is running:
- When
statusesindicatecodeasProvisioningState/succeededand thedisplayStatusasConnected. - If running an older version, the
statuseswould indicatecodeasOKand thedisplayStatusasActive
- When
If your statuses do not match the above output, follow the steps in Enable guest management when the guest agent is not running.
Enable guest management on a VM with guest agent running
To enable guest management on an Arc VM that has guest agent running, run the following command:
az stack-hci-vm update --name "myhci-vm" --enable-agent true --resource-group "myhci-rg"
Guest management is enabled by setting the enable-agent parameter to true. Guest management should take a few minutes to get enabled.
Follow the steps to verify that the guest management is enabled in the Azure portal.
Enable guest management on a VM when guest agent is not running
There are two scenarios when the guest agent is not running - when the statuses is connecting and when the statuses are blank. Each of these scenarios and the corresponding steps are described in the following sections.
Status displayed as connecting
Your status shows as connecting. Here's a sample output snippet indicating the requisite status.
"instanceView": {
      "vmAgent": {
        "statuses": [
          {
            "code": "ProvisioningState/InProgress",
            "displayStatus": "Connecting",
            "level": "Info",
            "message": "Waiting for connection with mocguestagent",
            "time": "2024-01-19T01:41:15Z"
          }
        ]
      }
    },
The guest agent is not running when:
- The guest agent is not running when
statusesindicatecodeasProvisioningState/InProgressand thedisplayStatusasConnecting. - If running an older version, the
statuseswould indicatecodeasOK, thedisplayStatusasActiveandmessageasSuccessfully started HyperV listener.
Follow these steps:
Connect to the VM using the OS specific steps. Run PowerShell as administrator.
Run one of the following commands to enable the guest agent on your VM based on the OS type:
Linux:
sudo -- sh -c 'mkdir /mociso && mount -L mocguestagentprov /mociso && bash /mociso/install.sh && umount /mociso && rm -df /mociso && eject LABEL=mocguestagentprov'Windows:
$d=Get-Volume -FileSystemLabel mocguestagentprov;$p=Join-Path ($d.DriveLetter+':\') 'install.ps1';powershell $pHere's a sample output for a Linux VM that shows the guest agent is successfully installed.

Connect to one of the Azure Stack HCI servers. Run the following command to enable guest management.
az stack-hci-vm update --name "myhci-vm" --enable-agent true --resource-group "myhci-rg"

Follow the steps to verify that the guest management is enabled in the Azure portal.
Status displayed as null
Your status shows as null. This indicates the required iso for guest agent is missing. Here's a sample output snippet indicating the null status.
"instanceView": {
      "vmAgent": {
        "statuses": []
      }
    },
Follow these steps:
Connect to Azure Stack HCI server.
Run the following command:
az stack-hci-vm update --name "<VM Name>" --resource-group "<Resource group name>" --enable-vm-config-agent trueThe
enable-vm-config-agentparameter mounts the required iso for the guest agent.Wait a few minutes and rerun the
az stack-hci-vm showcommand. When the status shows asconnecting, follow the steps in Status displayed as connecting.
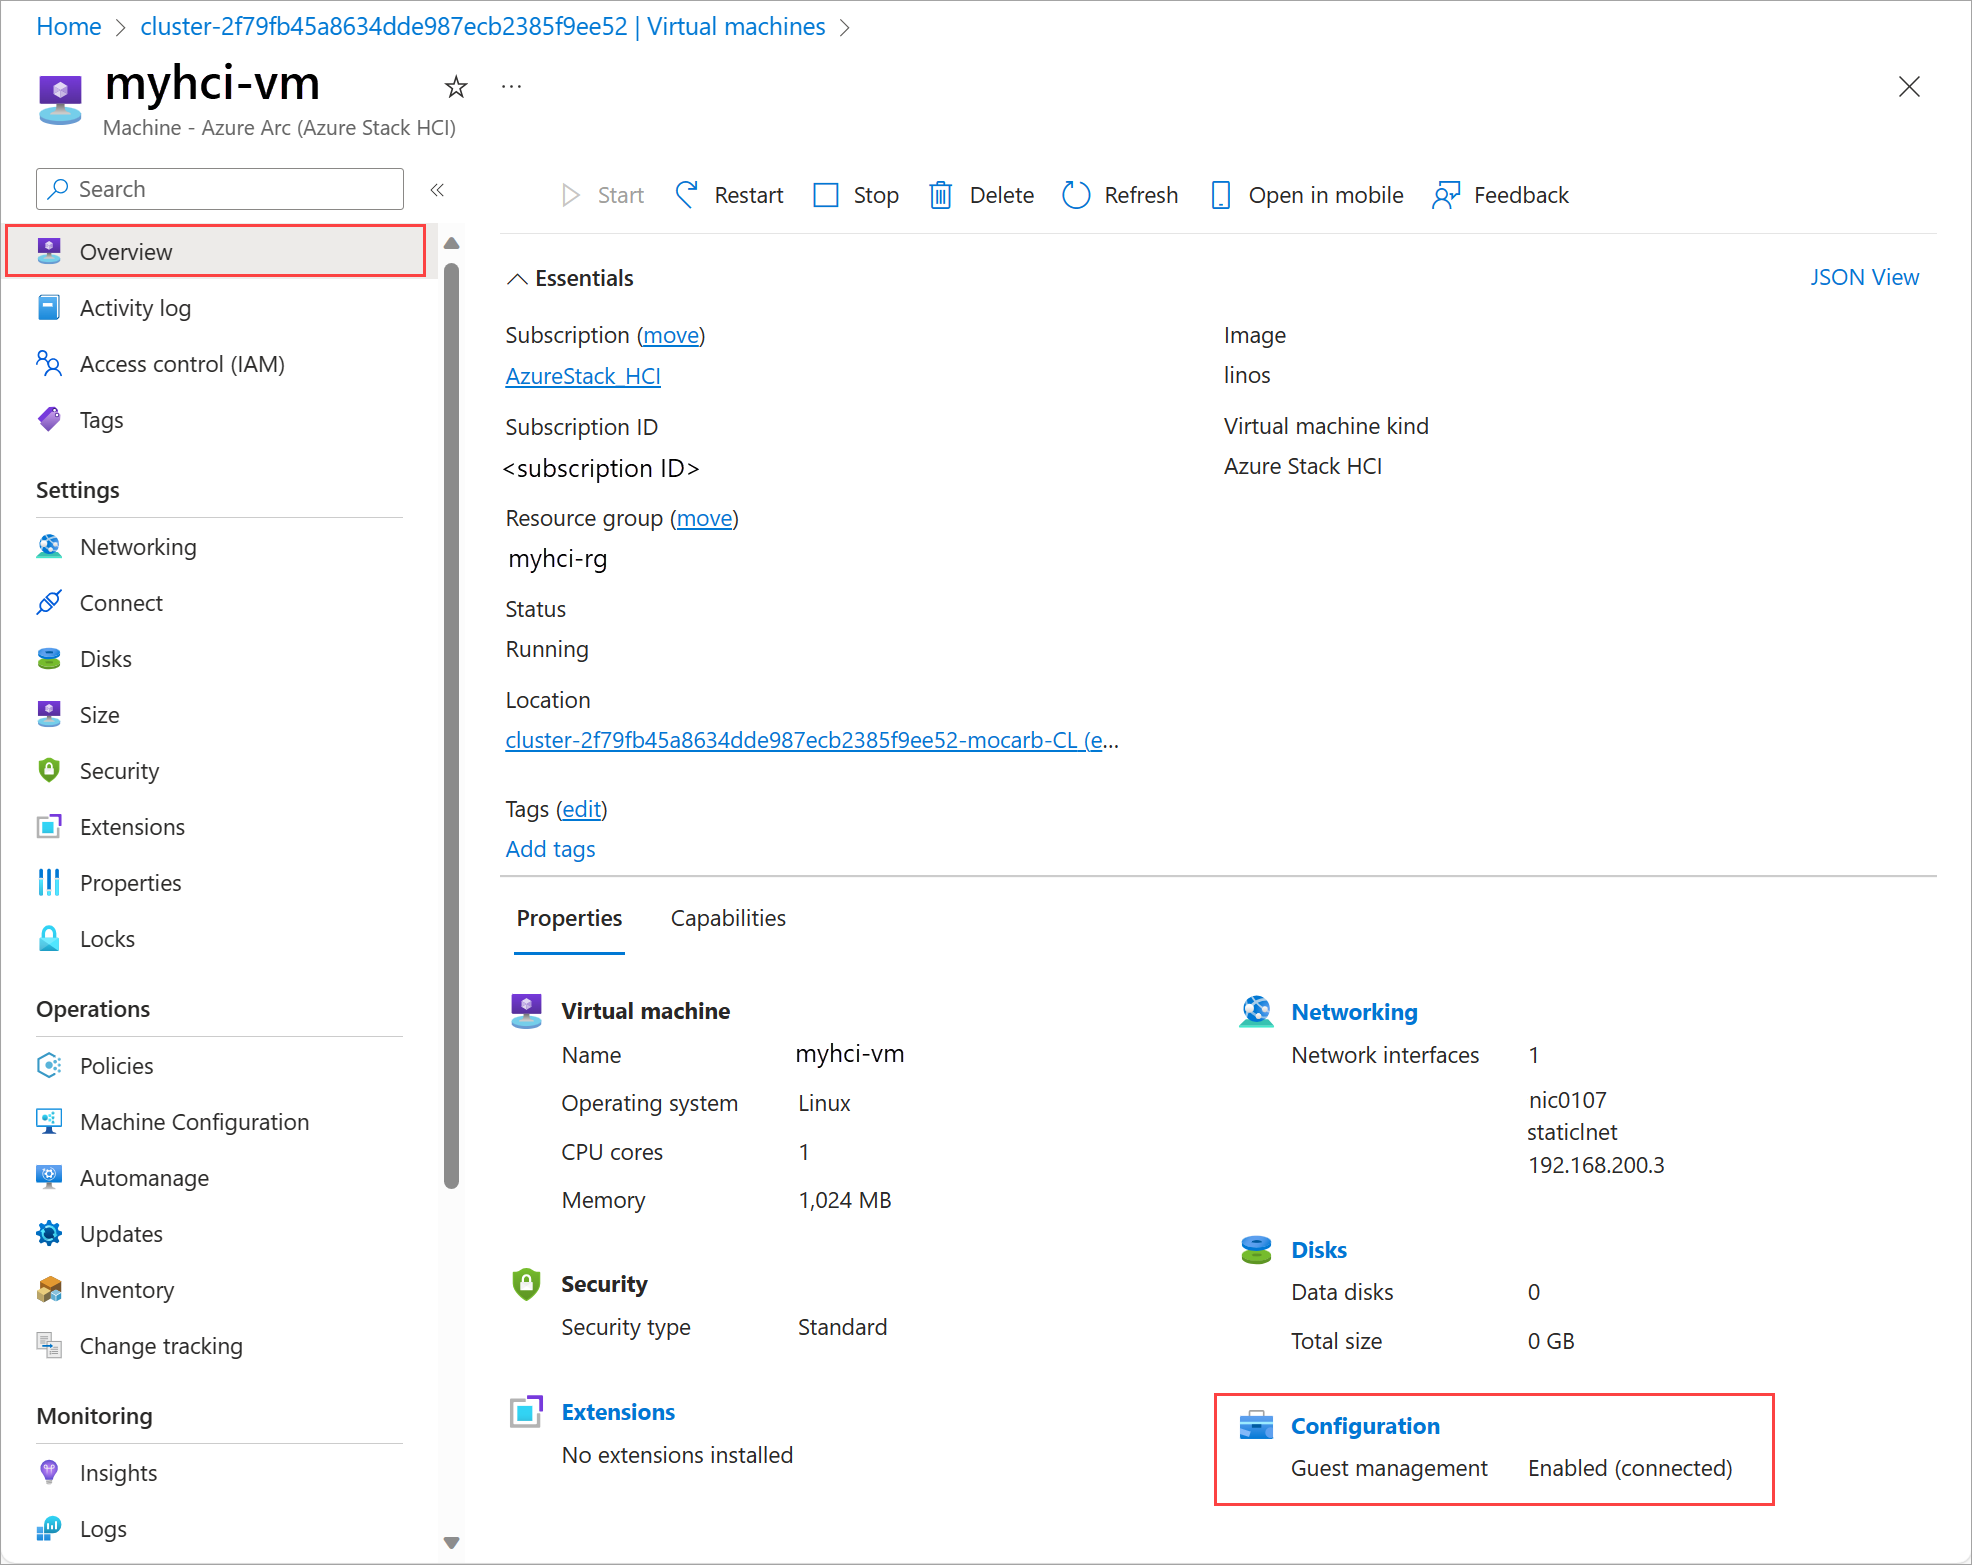
Verify guest management is enabled in the Azure portal
Go to the Azure portal.
Navigate to Your Azure Stack HCI cluster > Virtual machines and then select the VM on which you enabled the guest management.
In the Overview page, on the Properties tab in the right pane, go to Configuration. The Guest management should show as Enabled (Connected).

View VM properties
Follow these steps in the Azure portal of your Azure Stack HCI system to view VM properties.
Go to the Azure Stack HCI cluster resource and then go to Virtual machines.
In the right pane, from the list of virtual machines, select the name of the VM whose properties you wish to view.
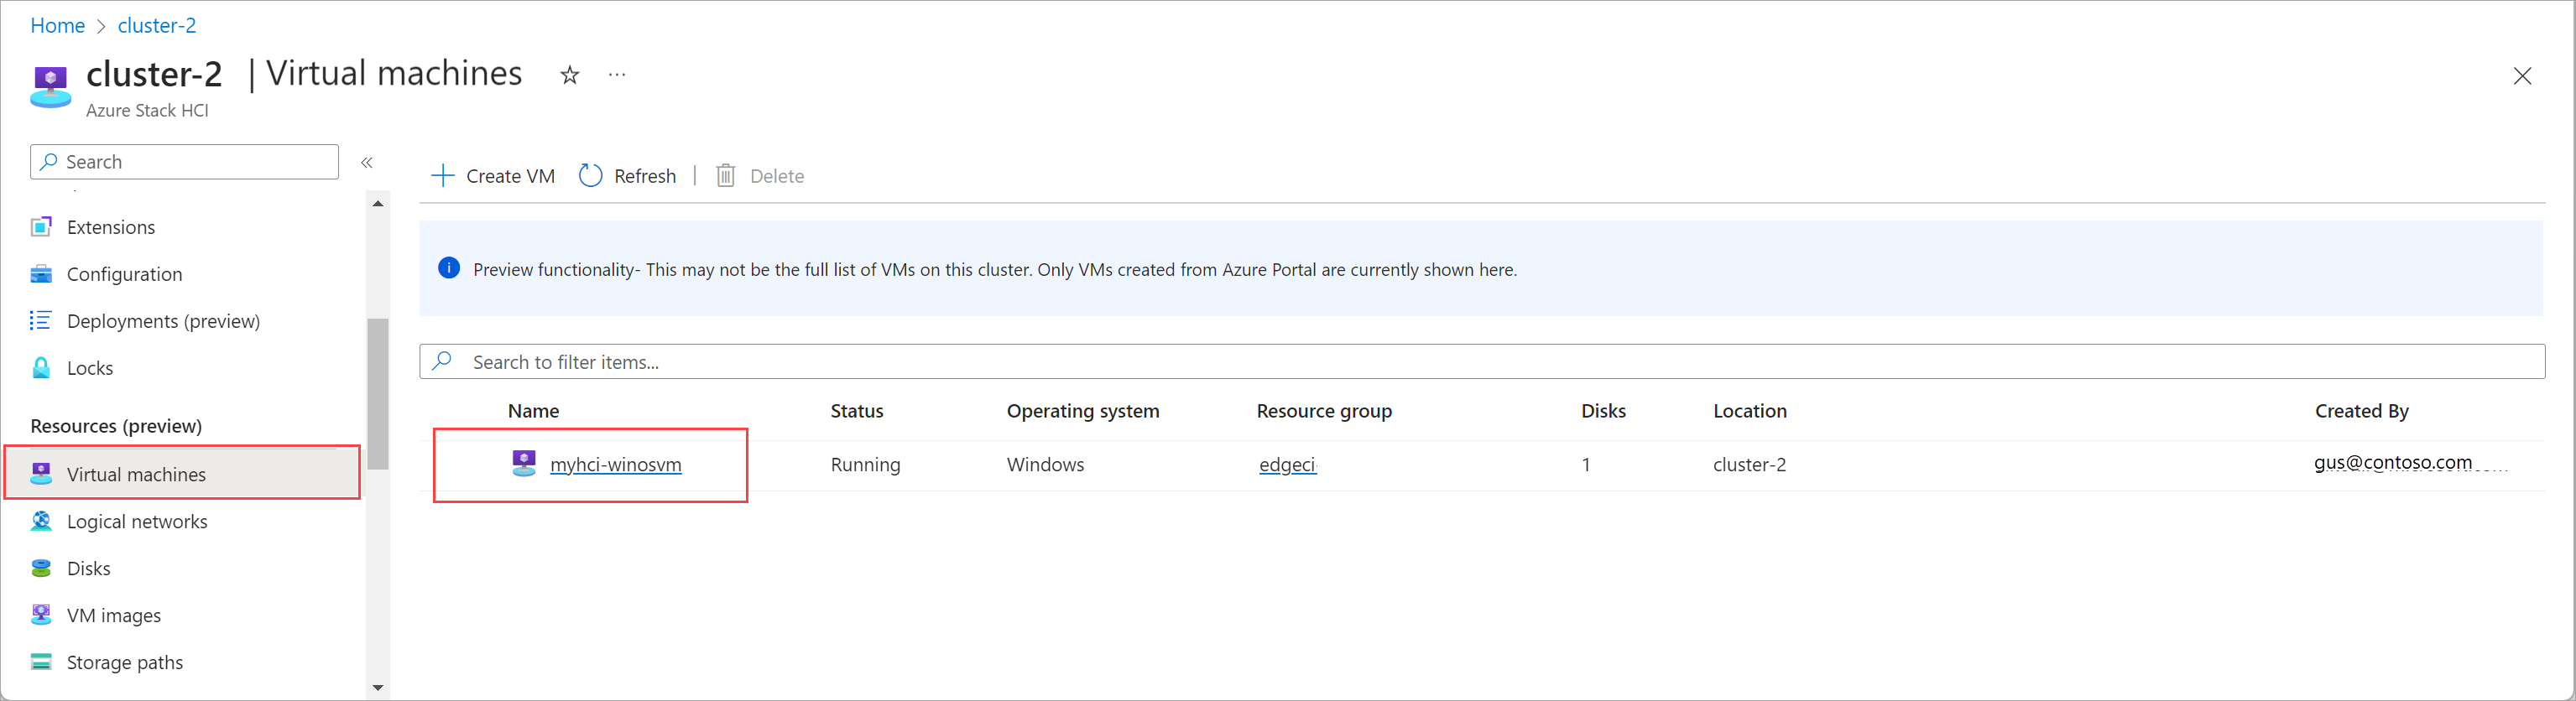
On the Overview page, go to the right pane and then go to the Properties tab. You can view the properties of your VM.


Start a VM
Follow these steps in the Azure portal of your Azure Stack HCI system to start a VM.
Go to the Azure Stack HCI cluster resource and then go to Virtual machines.
In the right pane, from the list of virtual machines, select a VM that isn't running and you wish to start.
On the Overview page for the VM, from the top command bar in the right pane, select Start, then select Yes.
Verify the VM has started.


Stop a VM
Follow these steps in the Azure portal of your Azure Stack HCI system to stop a VM.
Go to the Azure Stack HCI cluster resource and then go to Virtual machines.
In the right pane, from the list of virtual machines, select a VM that is running and you wish to stop.
On the Overview page for the VM, from the top command bar in the right pane, select Stop, then select Yes.
Verify the VM has stopped.


Restart a VM
Follow these steps in the Azure portal of your Azure Stack HCI system to restart a VM.
Go to the Azure Stack HCI cluster resource and then go to Virtual machines.
In the right pane, from the list of virtual machines, select a VM that is stopped and you wish to restart.
On the Overview page for the VM, from the top command bar in the right pane, select Restart, then select Yes.
Verify the VM has restarted.
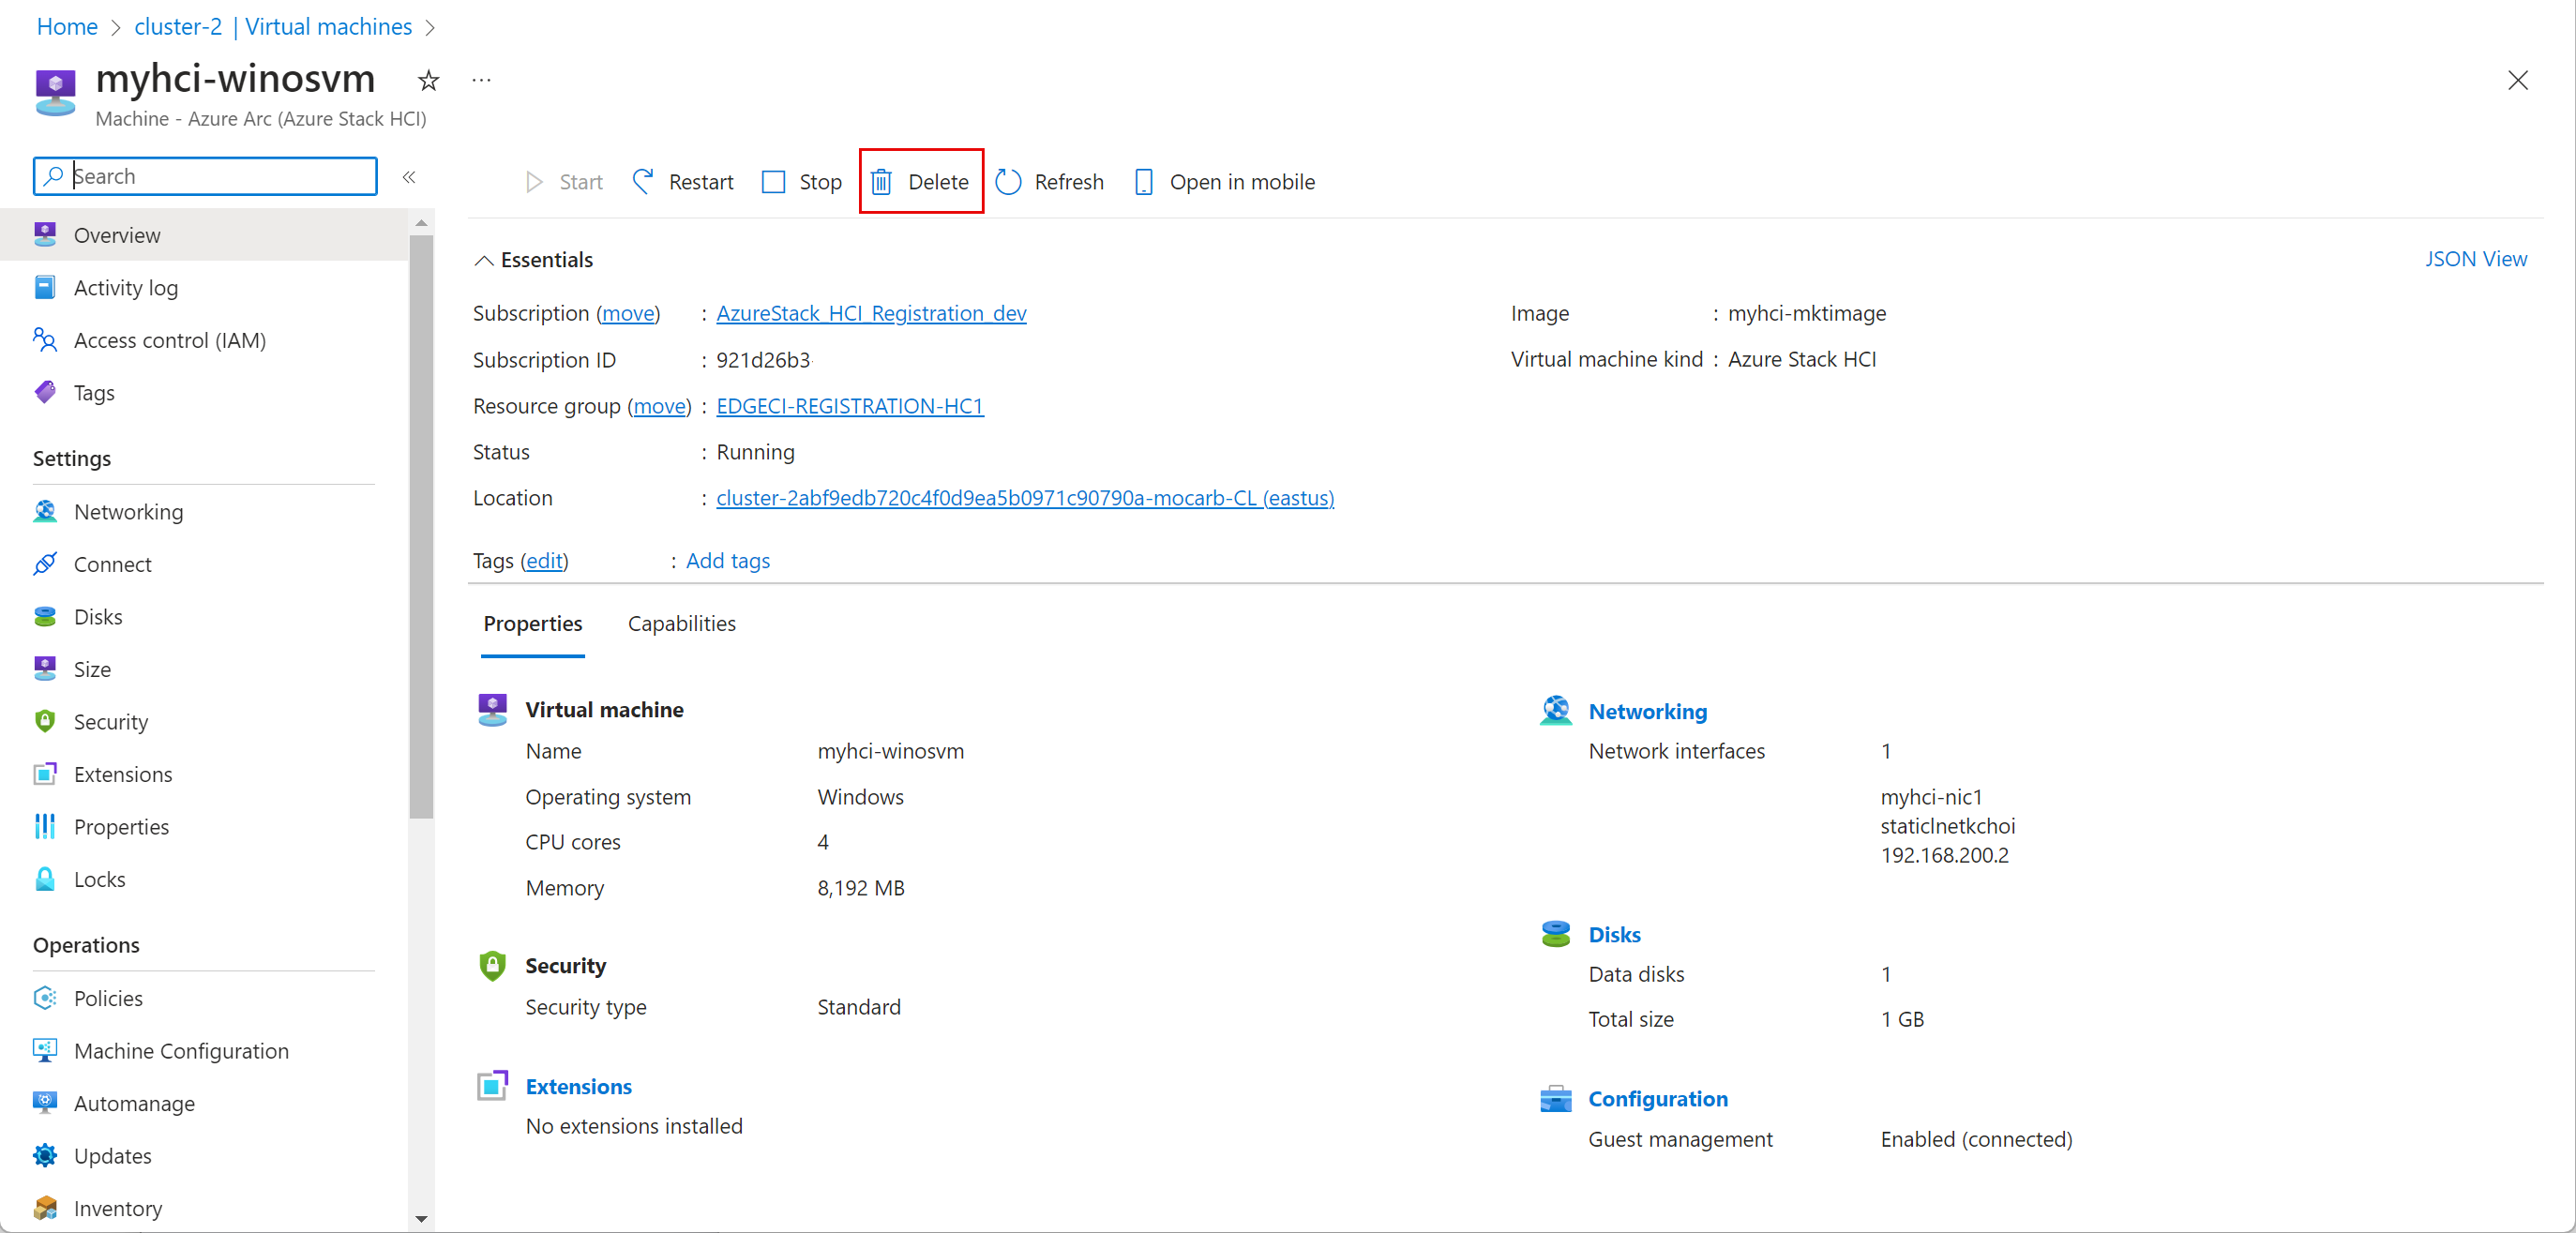

Delete a VM
Follow these steps in the Azure portal of your Azure Stack HCI system to remove a VM.
Go to the Azure Stack HCI cluster resource and then go to Virtual machines.
In the right pane, from the list of virtual machines, select a VM that you wish to remove from your system.
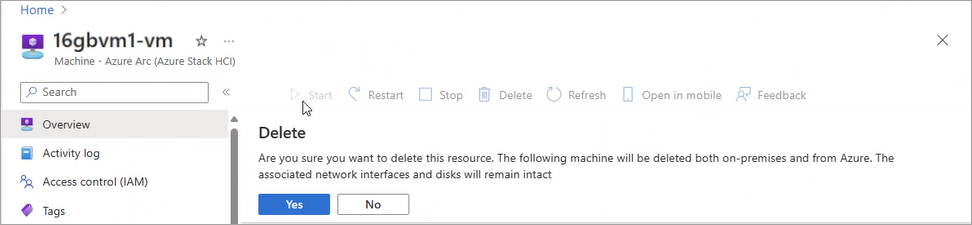
On the Overview page for the VM, from the top command bar in the right pane, select Delete, then select Yes.
You are now prompted to confirm the deletion. Select Yes. Verify the VM is removed.
Note that when a VM is deleted, all the resources associated with the VM are not deleted. For example, the data disks or the network interfaces associated with the VM are not deleted. You need to locate and delete these resources separately.
You can now go to the resource group where this VM was deployed. You can see that the VM is removed from the list of resources in the resource group. You may need to select the option to Show hidden types to view the resources associated with this VM that were not deleted.


Locate the associated resources such as the network interfaces and data disks, and delete them.
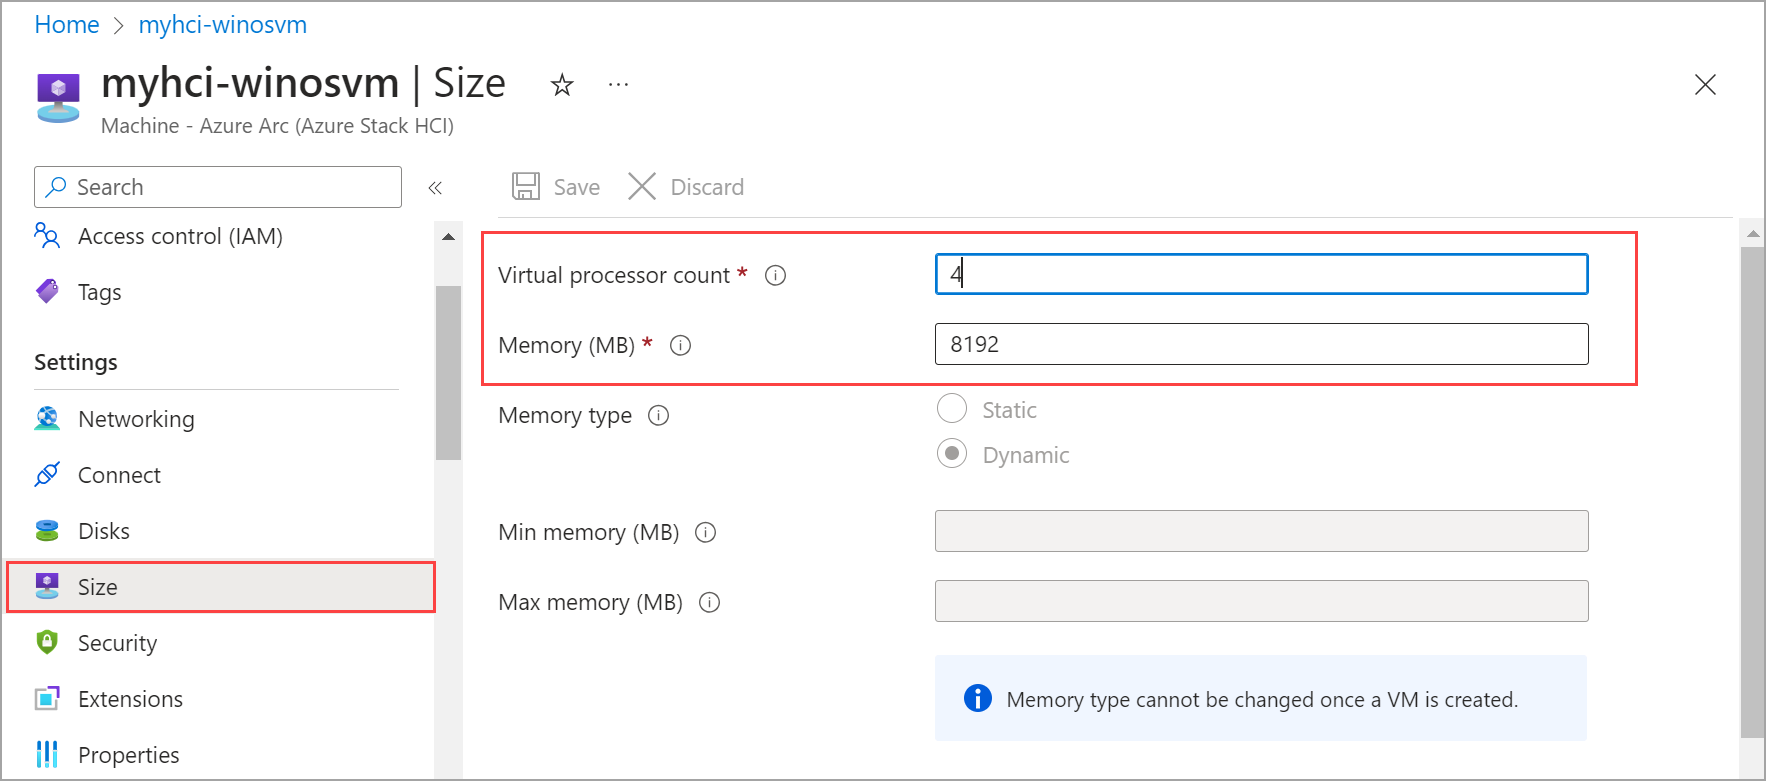
Change cores and memory
Follow these steps in the Azure portal of your Azure Stack HCI system to change cores and memory.
Go to your Azure Stack HCI cluster resource and then go to Virtual machines.
From the list of VMs in the right pane, select and go to the VM whose cores and memory you want to modify.
Under Settings, select Size. Edit the Virtual processor count or Memory (MB) to change the cores and memory size for the VM. Only the memory size can be changed. The memory type can't be changed once a VM is created.

Next steps
Tilbakemeldinger
Kommer snart: Gjennom 2024 faser vi ut GitHub Issues som tilbakemeldingsmekanisme for innhold, og erstatter det med et nytt system for tilbakemeldinger. Hvis du vil ha mer informasjon, kan du se: https://aka.ms/ContentUserFeedback.
Send inn og vis tilbakemelding for