Testing the FHIR API on Azure API for FHIR
Important
Azure API for FHIR will be retired on September 30, 2026. Follow the migration strategies to transition to Azure Health Data Services FHIR service by that date. Due to the retirement of Azure API for FHIR, new deployments won't be allowed beginning April 1, 2025. Azure Health Data Services FHIR service is the evolved version of Azure API for FHIR that enables customers to manage FHIR, DICOM, and MedTech services with integrations into other Azure services.
In the previous tutorial, you deployed the Azure API for FHIR and registered your client application. You're now ready to test your Azure API for FHIR.
Retrieve capability statement
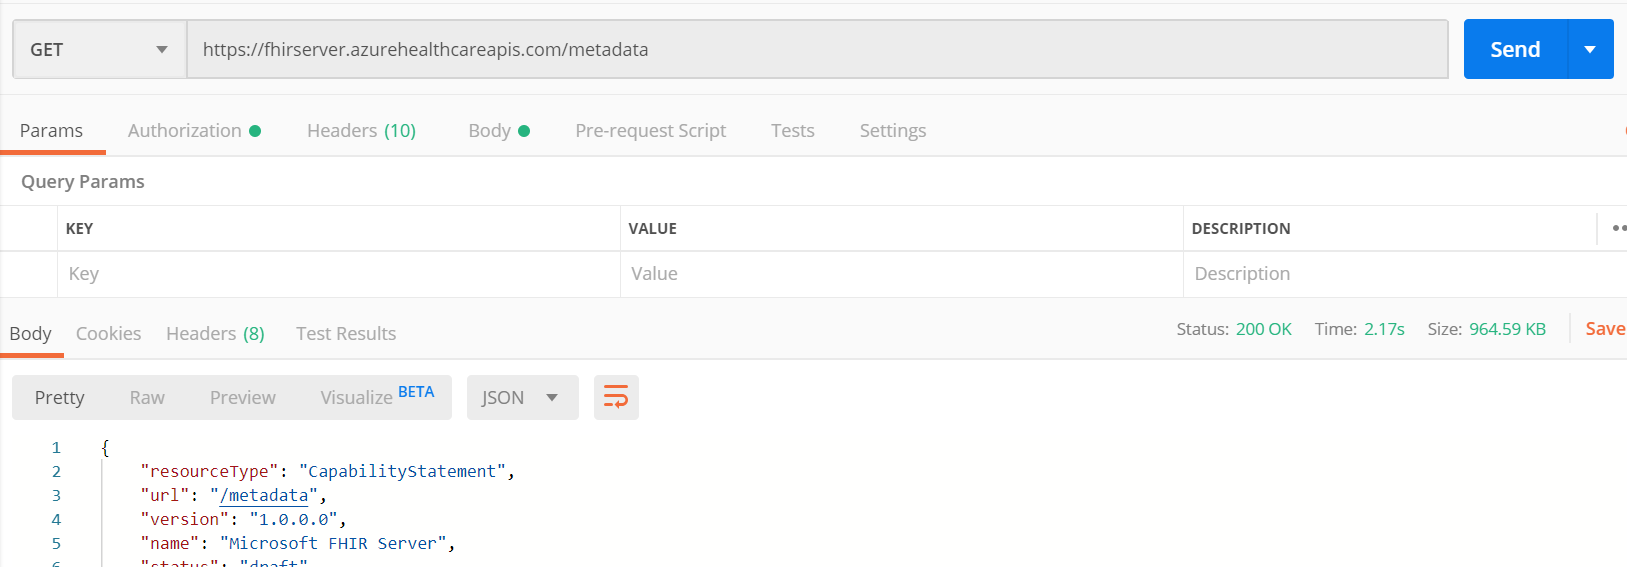
First we'll get the capability statement for your Azure API for FHIR.
- Open Postman.
- Retrieve the capability statement by doing
GET https://\<FHIR-SERVER-NAME>.azurehealthcareapis.com/metadata. In the image below the FHIR server name is fhirserver.
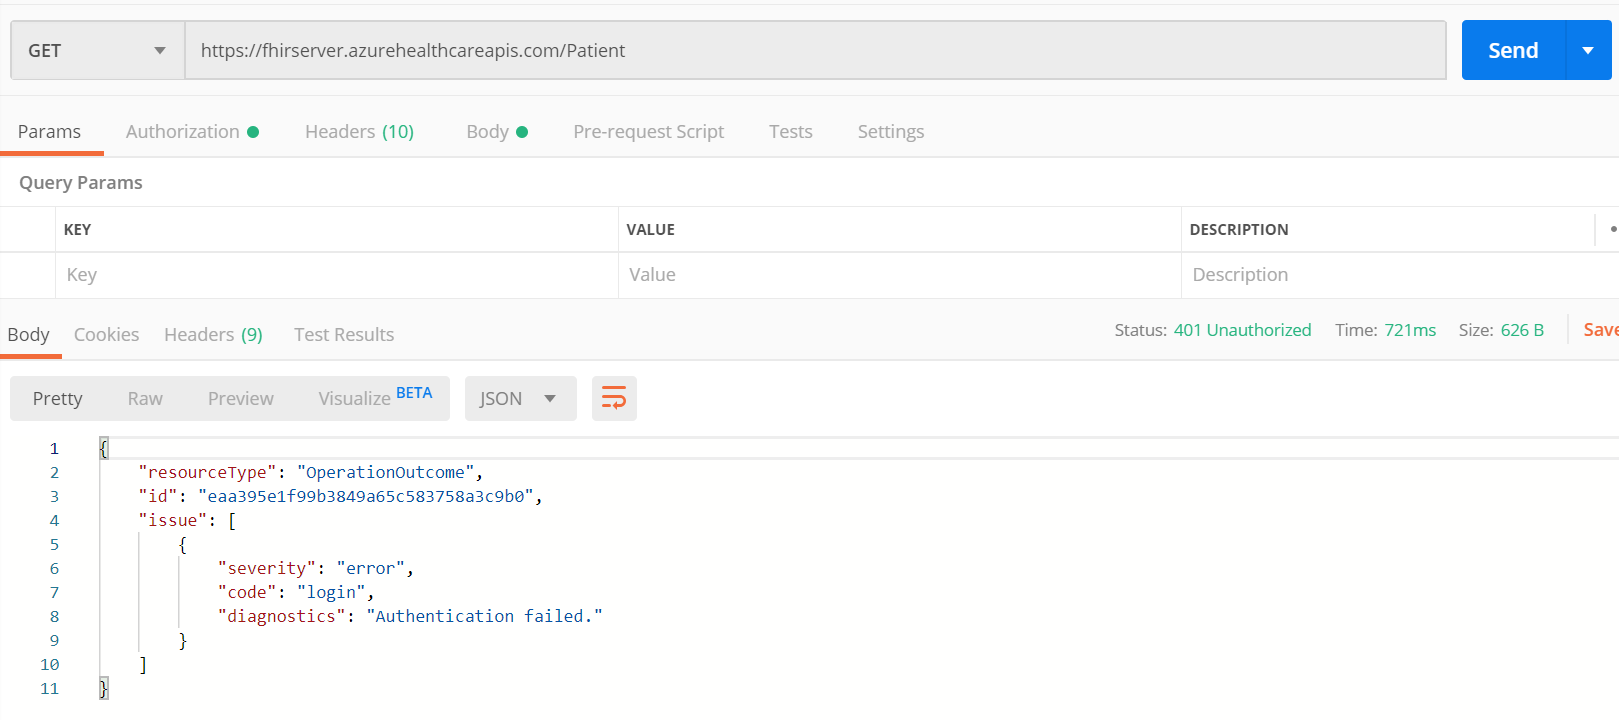
Next we'll attempt to retrieve a patient. To retrieve a patient, enter GET https://\<FHIR-SERVER-NAME>.azurehealthcareapis.com/Patient. You’ll receive a 401 Unauthorized error. This error is because you haven't proven that you should have access to patient data.
Get patient from FHIR server
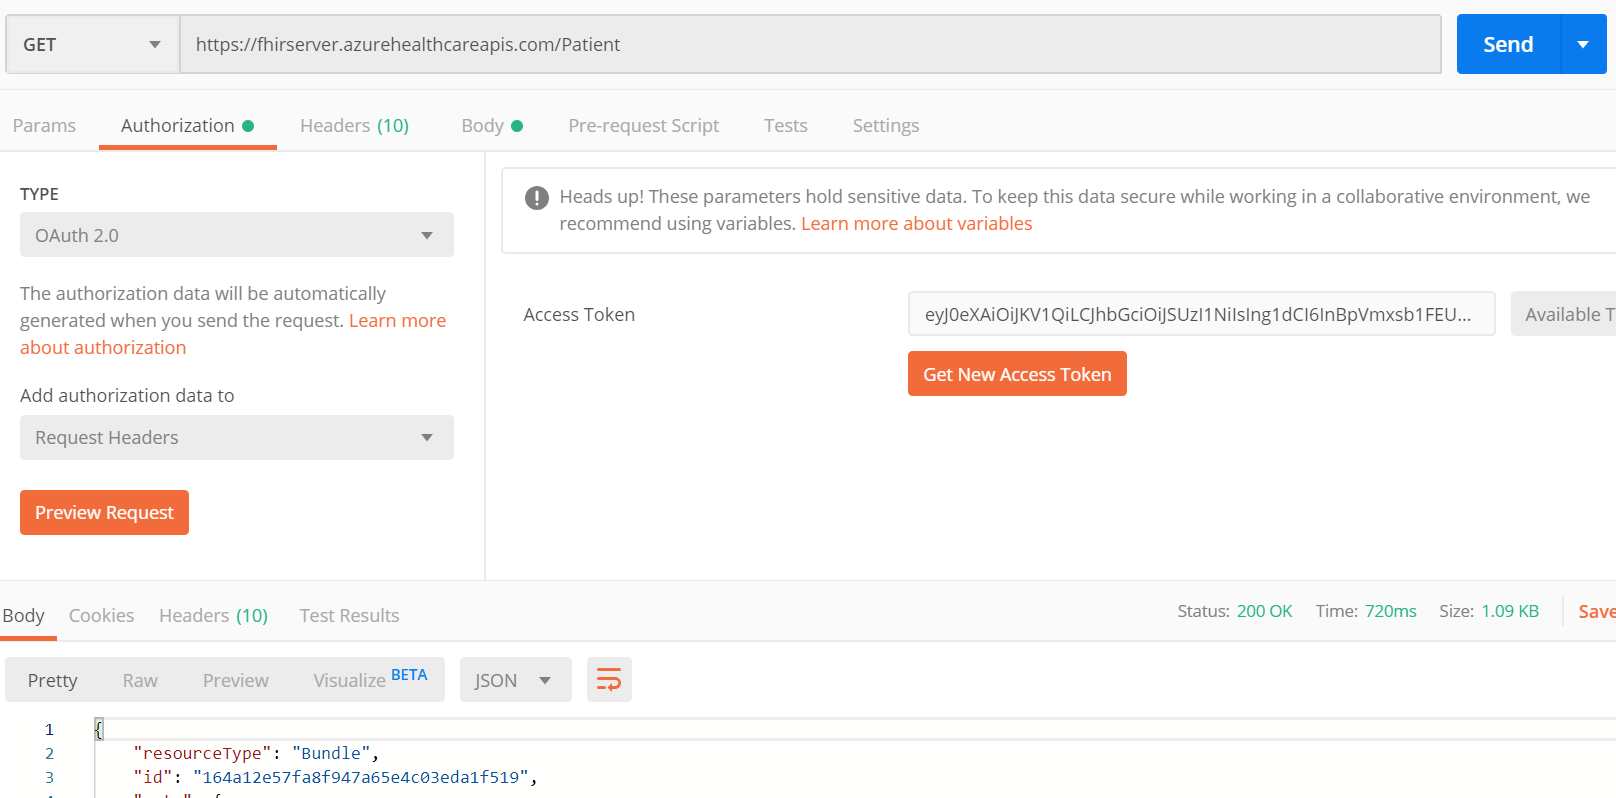
In order to gain access, you need an access token.
- Select Authorization and set the Type to OAuth2.0 in Postman.
- Select Get New Access Token.
- Fill in the fields and select Request Token. Below you can see the values for each field for this tutorial.
| Field | Value |
|---|---|
| Token Name | A name for your token |
| Grant Type | Authorization Code |
| Callback URL | https://www.getpostman.com/oauth2/callback |
| Auth URL | https://login.microsoftonline.com/<AZURE-AD-TENANT-ID>/oauth2/?resource=https://<FHIR-SERVER-NAME>.azurehealthcareapis.com |
| Access Token URL | https://login.microsoftonline.com/<AZURE-AD-TENANT-ID>/oauth2/token |
| Client ID | The client ID that you copied during the previous steps |
| Client Secret | <BLANK> |
| Scope | <BLANK> |
| State | 1234 |
| Client Authentication | Send client credentials in body |
- Sign in with your credentials and select Accept
- Scroll down on the result and select Use Token
- Select Send again at the top and this time you should get a result
Post patient into FHIR server
Now you have access, you can create a new patient. Here's a sample of a simple patient you can add into your FHIR server. Enter this json into the Body section of Postman.
    {
        "resourceType": "Patient",
        "active": true,
        "name": [
            {
                "use": "official",
                "family": "Kirk",
                "given": [
                    "James",
                    "Tiberious"
                ]
            },
            {
                "use": "usual",
                "given": [
                    "Jim"
                ]
            }
        ],
        "gender": "male",
        "birthDate": "1960-12-25"
    }
This POST will create a new patient in your FHIR server with the name James Tiberious Kirk.
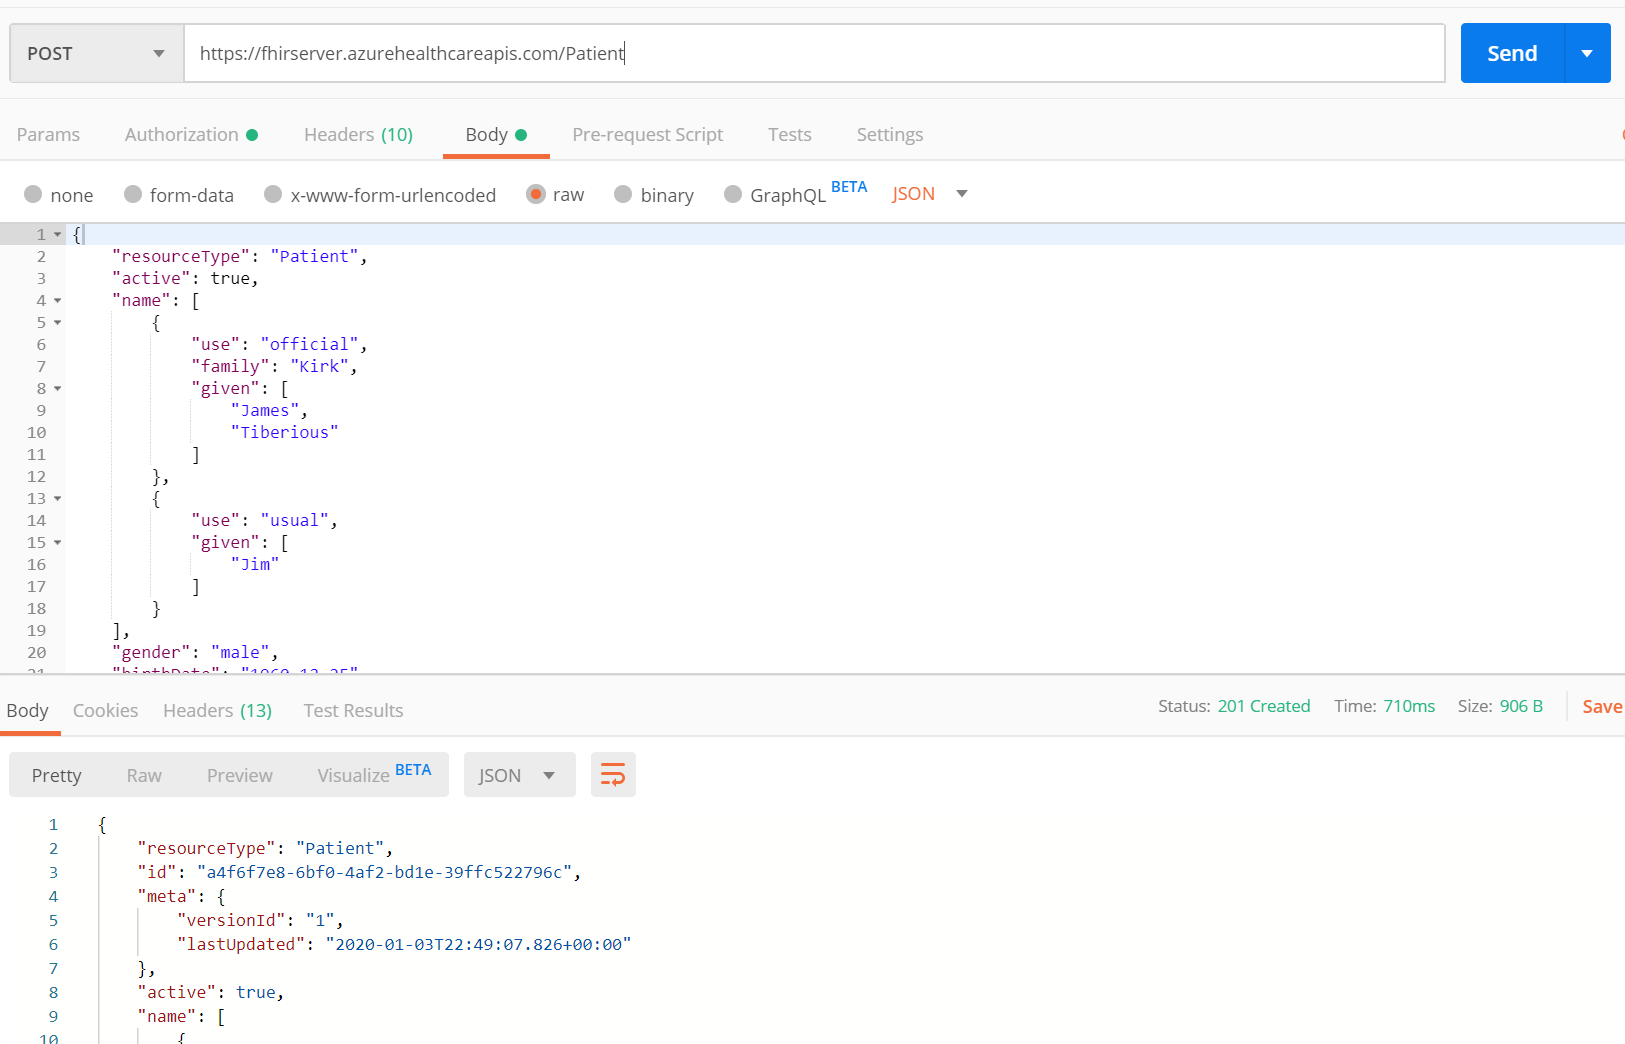
If you do the GET command to retrieve a patient again, you'll see James Tiberious Kirk listed in the output.
Note
When sending requests to the Azure API for FHIR, you need to ensure that you've set the content-type header to application/json
Troubleshooting access issues
If you ran into issues during any of these steps, review the documents we have put together on Microsoft Entra ID and the Azure API for FHIR.
- Microsoft Entra ID and Azure API for FHIR - This document outlines some of the basic principles of Microsoft Entra ID and how it interacts with the Azure API for FHIR.
- Access token validation - This how-to guide gives more specific details on access token validation and steps to take to resolve access issues.
Next Steps
Now that you can successfully connect to your client application, you’re ready to write your web application.
FHIR® is a registered trademark of HL7 and is used with the permission of HL7.
Tilbakemeldinger
Kommer snart: Gjennom 2024 faser vi ut GitHub Issues som tilbakemeldingsmekanisme for innhold, og erstatter det med et nytt system for tilbakemeldinger. Hvis du vil ha mer informasjon, kan du se: https://aka.ms/ContentUserFeedback.
Send inn og vis tilbakemelding for