Interactive quantum computing: sessions
This article explains the architecture of interactive quantum computing, also known as sessions, and how to create a new session.
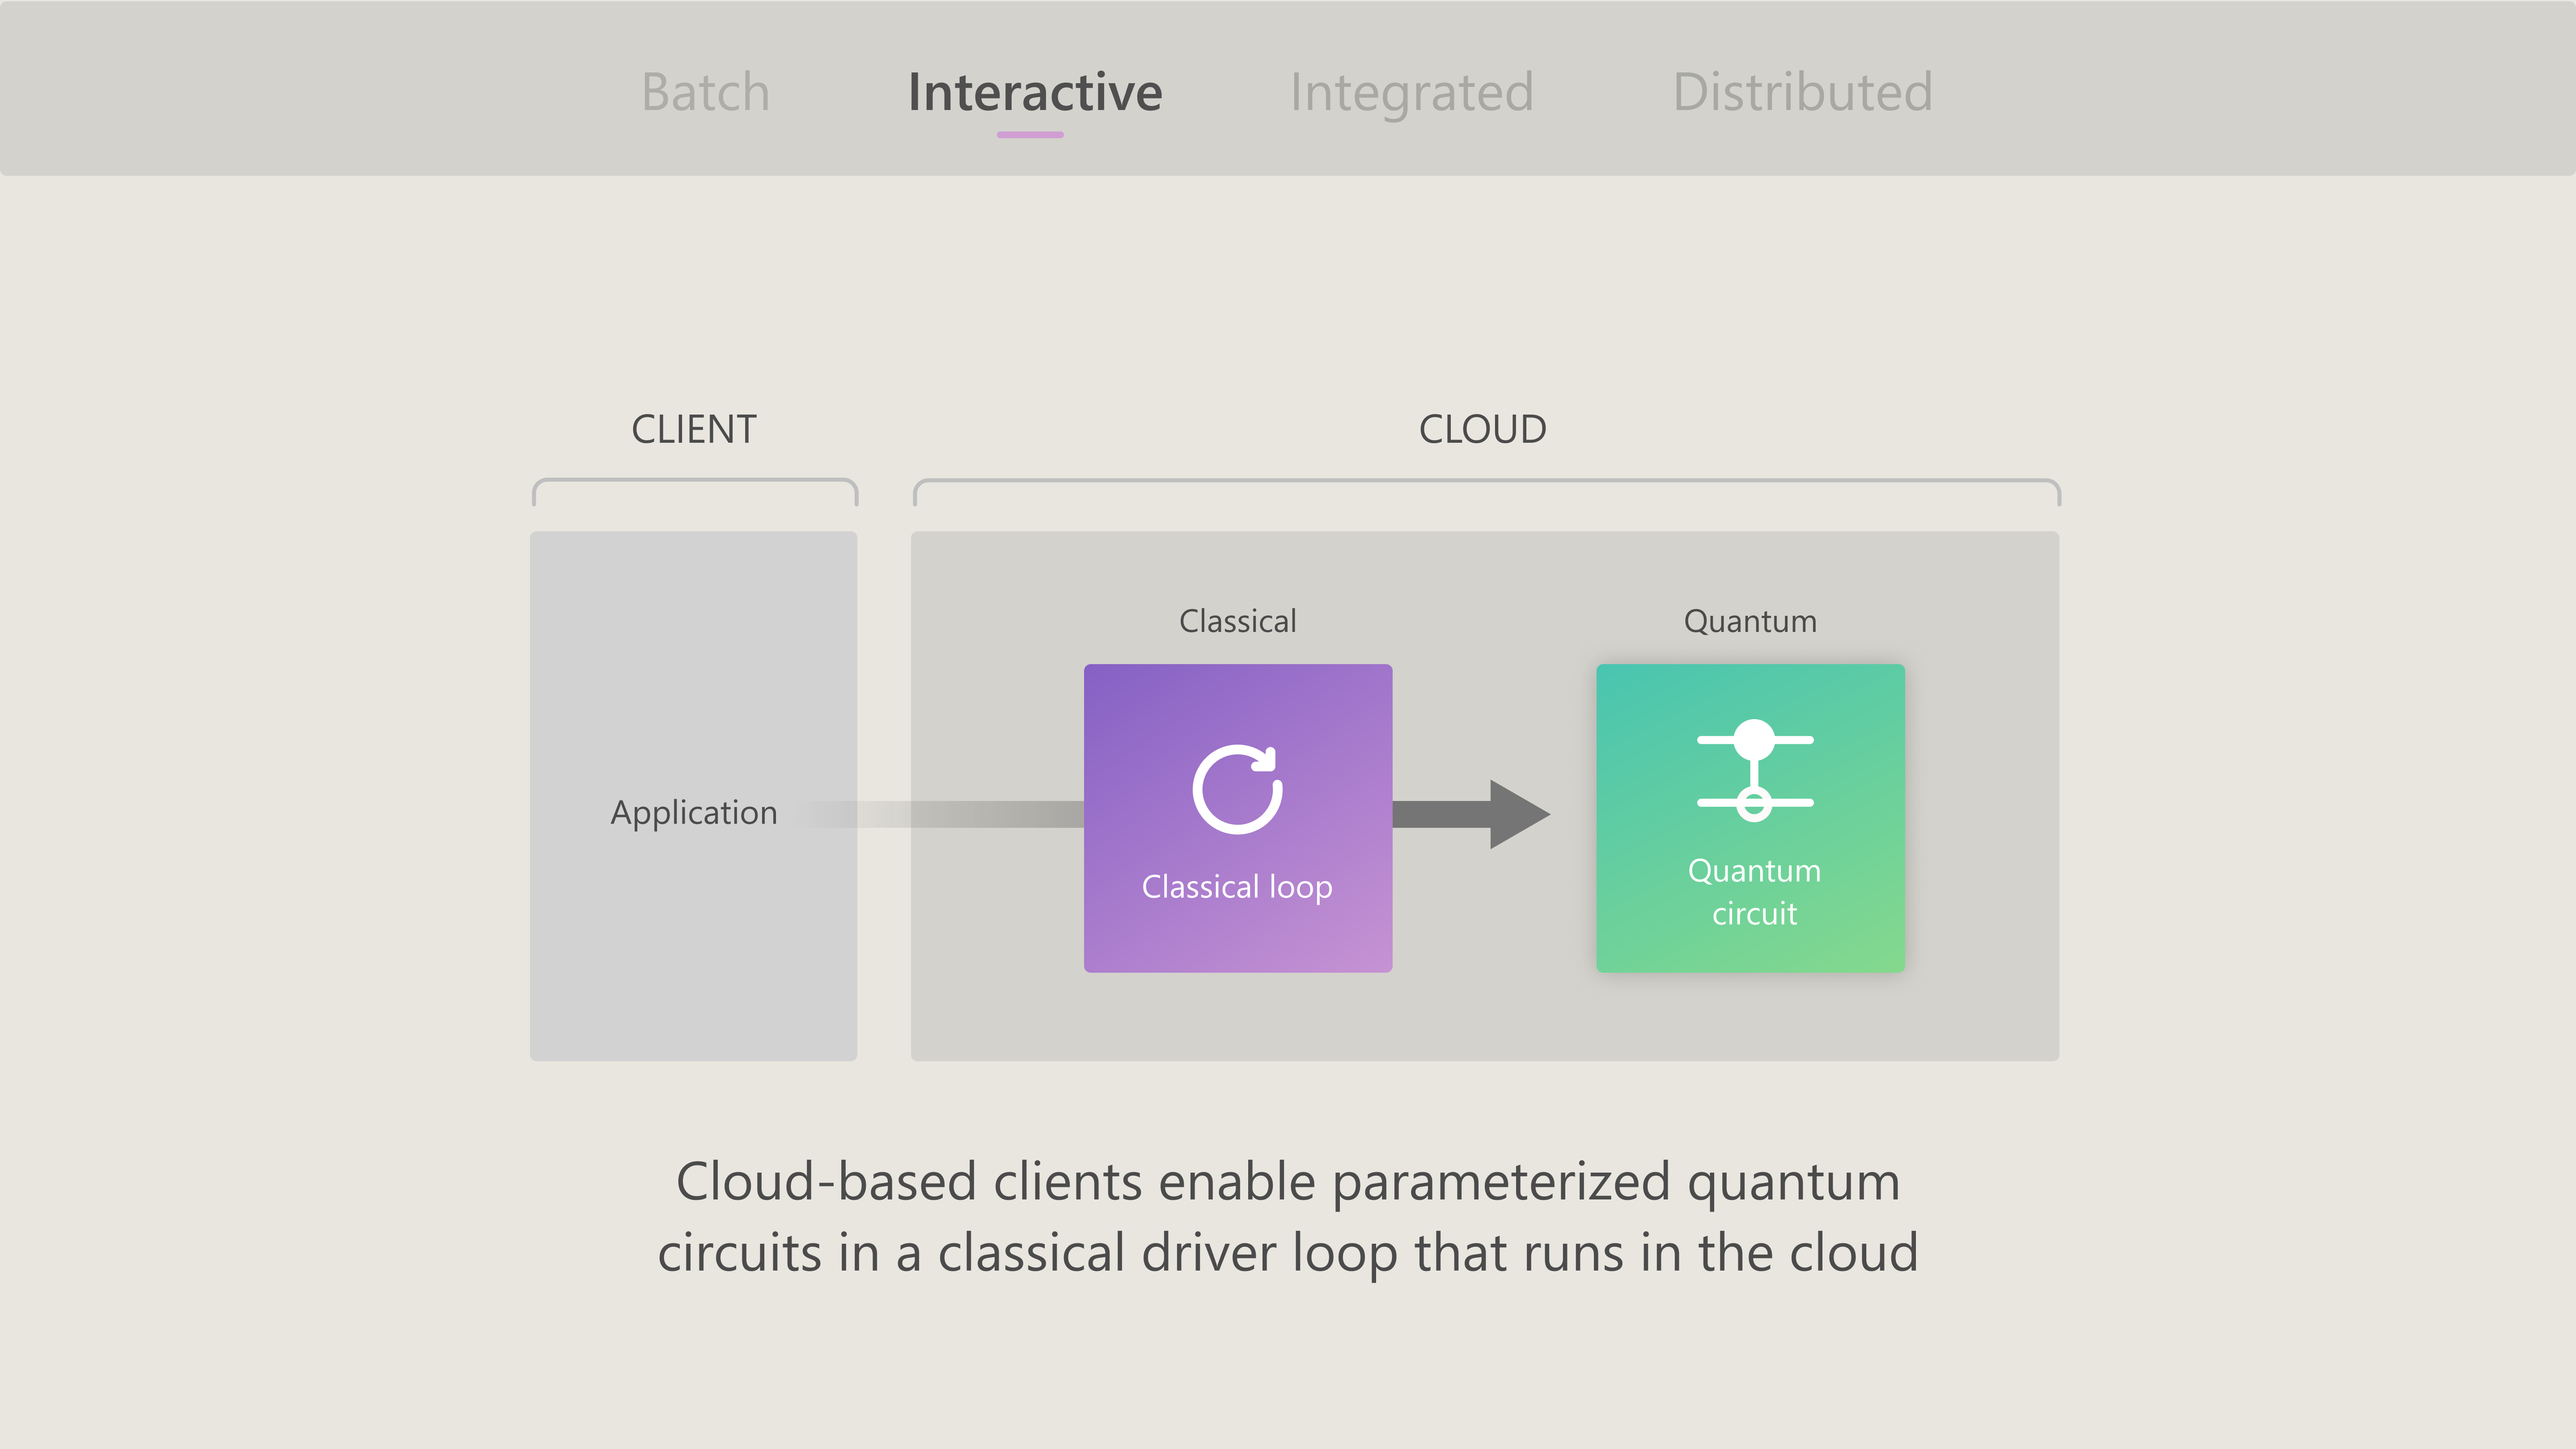
In this model of hybrid quantum computing, the client compute resource may be moved to the cloud, resulting in lower-latency and the ability to repeat execution of the quantum circuit with different parameters. Jobs can be grouped logically into one session, and the jobs in that session can be prioritized over non-session jobs. Although the qubit states don't persist between jobs, a session allows for shorter queue times for jobs and longer running problems.
Prerequisites
To create a session, you need the following prerequisites:
An Azure account with an active subscription. If you don’t have an Azure account, register for free and sign up for a pay-as-you-go subscription.
An Azure Quantum workspace. For more information, see Create an Azure Quantum workspace.
A Python environment with Python and Pip installed.
The Azure Quantum
azure-quantumpackage. If you want to use Qiskit or Cirq, you need to install theazure-quantumpackage with the [qiskit] or [cirq] tags.pip install --upgrade azure-quantum[qiskit]
What is a session?
A session is a logical grouping of one or more jobs submitted to a single target. Each session has a unique ID attached to each job in that session.
Sessions allow you to organize multiple quantum computing jobs with the ability to run classical code between quantum jobs. You'll be able to run complex algorithms to better organize and track your individual quantum computing jobs.
A key user scenario where you may want to combine jobs in a session is parameterized quantum algorithms where the output of one quantum computing job informs the parameters of the next quantum computing job. The most common examples of this type of algorithm are Variational Quantum Eigensolvers (VQE) and Quantum Approximate Optimization Algorithms (QAOA).
Supported hardware
Sessions are supported on all quantum computing hardware providers, currently IonQ, Quantinuum and Rigetti. In some cases, jobs submitted within a session are prioritized in the queue of that target. For more information, see Target behavior.
Get started with sessions
Sessions are managed with Python and can be created for any QIR quantum programs, including Q#, Qiskit, and Cirq programs.
This example shows how to create a session with Q# inline code using a Jupyter Notebook in Visual Studio Code. You can also create sessions using a Python program that invokes an adjacent Q# program.
Note
Sessions are managed with Python, even when running Q# inline code.
In VS Code, select View > Command palette and select Create: New Jupyter Notebook.
In the top-right, VS Code will detect and display the version of Python and the virtual Python environment that was selected for the notebook. If you have multiple Python environments, you may need to select a kernel using the kernel picker in the top right. If no environment was detected, see Jupyter Notebooks in VS Code for setup information.
In the first cell of the notebook, run
import azure.quantum

workspace = azure.quantum.Workspace(
    resource_id = "", # add your resource ID
    location = "", # add your location, for example "westus"
)
Click + Code to add a new cell in the notebook and import
qsharpPython SDK.import qsharpSelect the quantum target of your choice. In this example, you're using IonQ simulator as target.
target = workspace.get_targets("ionq.simulator")Select the configurations of your target profile, either
BaseorUnrestricted.qsharp.init(target_profile=qsharp.TargetProfile.Base) # or qsharp.TargetProfile.UnrestrictedWrite your Q# program. For example, the following Q# program generates a random bit. To illustrate the use of input arguments, this program takes an integer,
n, and an array of angles,angle, as input.%%qsharp open Microsoft.Quantum.Measurement; open Microsoft.Quantum.Arrays; operation GenerateRandomBits(n: Int, angle: Double[]) : Result[] { use qubits = Qubit[n]; // n parameter as the size of the qubit array for q in qubits { H(q); } R(PauliZ, angle[0], qubits[0]); // arrays as entry-points parameters R(PauliZ, angle[1], qubits[1]); let results = MeasureEachZ(qubits); ResetAll(qubits); return results; }Next, you create a session. Let's say you want to run
GenerateRandomBitoperation three times, so you usetarget.submitto submit the Q# operation with thetargetdata and you repeat the code three times - in a real world scenario, you may want to submit different programs instead of the same code.angle = [0.0, 0.0] with target.open_session(name="Q# session of three jobs") as session: target.submit(input_data=qsharp.compile(f"GenerateRandomBits(2, {angle})"), name="Job 1", shots=100) # First job submission angle[0] += 1 target.submit(input_data=qsharp.compile(f"GenerateRandomBits(2, {angle})"), name="Job 2", shots=100) # Second job submission angle[1] += 1 target.submit(input_data=qsharp.compile(f"GenerateRandomBits(2, {angle})"), name="Job 3", shots=100) # Third job submission session_jobs = session.list_jobs() [session_job.details.name for session_job in session_jobs]Important
When passing arguments as parameters to the job, they are formatted into the Q# expression when calling
qsharp.compile. This means that you need to be careful to format your arguments as Q# objects. In this example, because arrays in Python are already printed as [item0, item1, ...], the input arguments match the Q# formatting. For other Python data structures you might need more handling to get the string values inserted into the Q# in a compatible way.Once you create a session, you can use
workspace.list_session_jobsto retrieve a list of all jobs in the session. For more information, see How to manage sessions.
Monitoring sessions
You can use the Job management blade in your Quantum workspace to view all top-level submitted items, including sessions and individual jobs that aren't associated with any session.
- Select the Job management blade in your Quantum workspace.
- Identify the jobs of type Session. In this view you can see the Unique ID of a Session in column Id and monitor its Status. The states of a session are:
- Waiting: Jobs within the session are being executed.
- Succeeded: Session has ended successfully.
- TimeOut: If no new job is submitted within the session for 10 minutes, that session times out. For more information, see Session timeouts.
- Failed: If a job within a session fails, that session ends and reports a status of Failed. For more information, see Job failure policy within sessions.
- Click on a session's name for more details.
- You can see the list of All jobs within the session and monitor their status.
Target behavior
Each quantum hardware provider defines their own heuristics to best manage the prioritization of jobs within a session.
Quantinuum
If you choose to submit jobs within a session to a Quantinuum target, your session will have exclusive access to the hardware as long as you queue jobs within one minute from each other. After that, your jobs will be accepted and handled with the standard queueing and prioritization logic.
Related content
Tilbakemeldinger
Kommer snart: Gjennom 2024 faser vi ut GitHub Issues som tilbakemeldingsmekanisme for innhold, og erstatter det med et nytt system for tilbakemeldinger. Hvis du vil ha mer informasjon, kan du se: https://aka.ms/ContentUserFeedback.
Send inn og vis tilbakemelding for