Deploying to HoloLens and WMR headsets — MRTK2
There are two ways to deploy applications built with MRTK to your windows device, the Univeral Windows Platform (UWP) and the Standalone Platform. Applications built for HoloLens 1 or HoloLens 2 must target UWP, while applications built for WMR headsets may target either UWP or Standalone.
Building and deploying MRTK to HoloLens 1, HoloLens 2 and WMR headsets (UWP)
Instructions on how to build and deploy for HoloLens 1 and HoloLens 2 (UWP) can be found at building your application to device. These steps also allow you to deploy to WMR headsets.
Note
When deploying your application to your device in Visual Studio, you need to configure Visual Studio slightly differently depending on the device. The configurations are as follows
| Platform | Configuration | Architecture | Target |
|---|---|---|---|
| HoloLens 2 | Release or Master | ARM64 | Device |
| HoloLens 1 | Release or Master | x86 | Device |
| WMR Headsets | Release or Master | x64 | Local Machine |
Tip: When building for HoloLens 1, HoloLens 2, or WMR, it is recommended that the build settings "Target SDK Version" and "Minimum Platform Version" look like they do in the picture below:
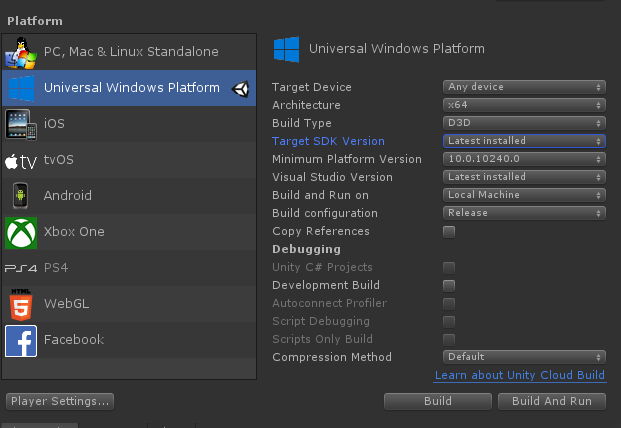
The other settings can be different (for example, Build Configuration/Architecture/Build Type and others can always be changed inside the Visual Studio solution).
Make sure that the "Target SDK Version" dropdown includes the option "10.0.18362.0" - if this is missing, the latest Windows SDK needs to be installed.
Unity 2019/2020 and HoloLens
If a HoloLens app appears as a 2D panel on device, make sure the following settings have been configured in Unity before deploying your UWP app:
If using the legacy built-in XR support (Unity 2019 only):
- Navigate to Edit > Project Settings, Player
- Under XR Settings in the UWP tab, make sure Virtual Reality Supported is enabled and the Windows Mixed Reality SDK has been added to SDKs.
- Build and deploy in Visual Studio
If using the OpenXR or Windows XR plugins:
- Follow the steps found in Getting Started with XRSDK
- Make sure the configuration profile is the DefaultXRSDKConfigurationProfile
- Navigate to Edit > Project Settings, XR-Plugin Management and make sure Windows Mixed Reality is enabled.
- Build and deploy in Visual Studio
Building and deploying MRTK to WMR Headsets (Standalone)
Standalone builds of MRTK can be used on WMR headsets. A Standalone build for a WMR headset requires the following extra steps:
Note
Unity's XR SDK also supports native WMR in Standalone builds, but does not require SteamVR or WMR plugin. These steps are required for Unity's legacy XR.
- Install Steam
- Install SteamVR
- Install the WMR Plugin
How to use WMR plugin
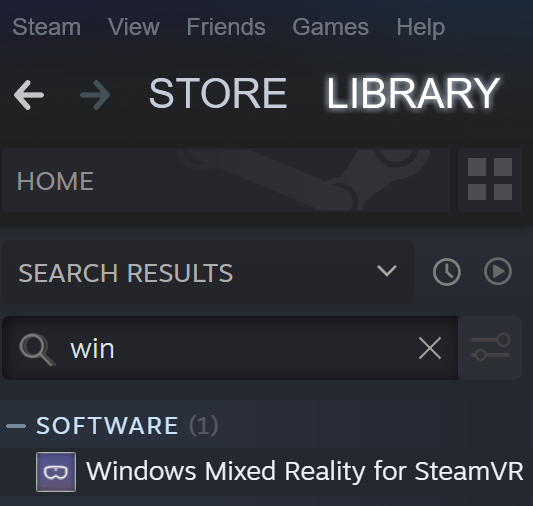
Open Steam and search for the Windows Mixed Reality Plugin
- Make sure SteamVR is closed before launching the WMR Plugin. Launching the WMR plugin also launches SteamVR.
- Make sure the WMR headset is plugged in.
Select Launch for the Windows Mixed Reality for SteamVR Plugin.
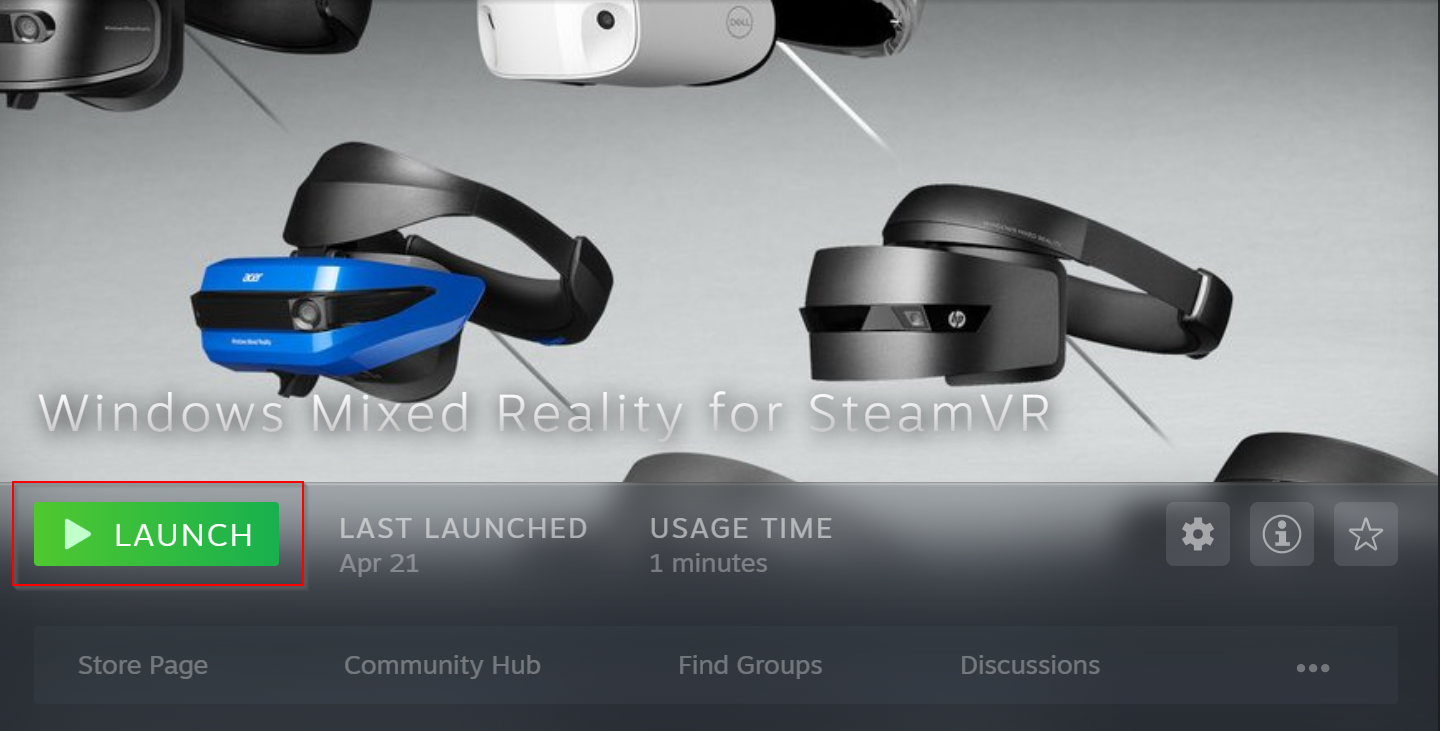
SteamVR and the WMR plugin will launch and a new tracking status window for the WMR headset will appear.
For more information visit the Windows Mixed Reality Steam Documentation

In Unity, with your MRTK scene open, navigate to File > Build Settings
Build the scene
- Select Add Open Scene
- Make sure the Platform is Standalone
- Select Build
- Choose the location for the new build in File Explorer

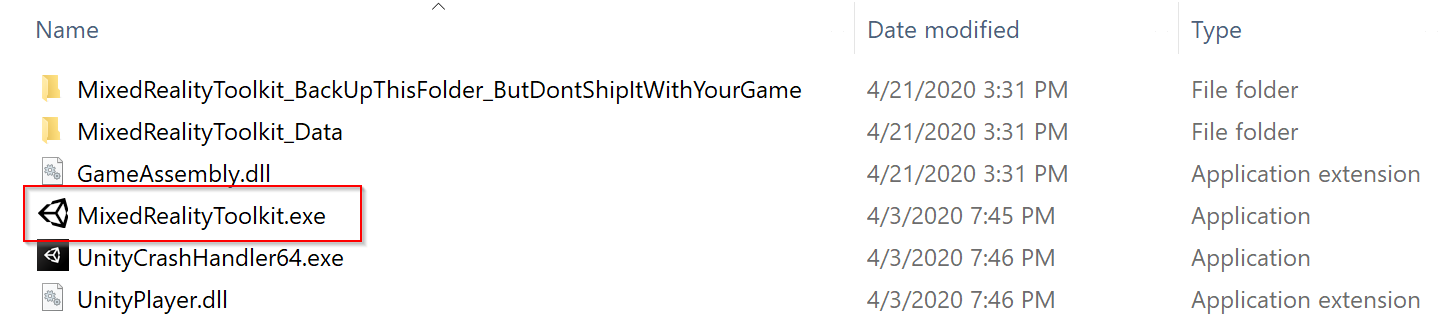
A new Unity executable will be created, to launch your app select the Unity executable in File Explorer.
See also
Tilbakemeldinger
Kommer snart: Gjennom 2024 faser vi ut GitHub Issues som tilbakemeldingsmekanisme for innhold, og erstatter det med et nytt system for tilbakemeldinger. Hvis du vil ha mer informasjon, kan du se: https://aka.ms/ContentUserFeedback.
Send inn og vis tilbakemelding for