DirectX and XAML interop
Note
This topic applies to Universal Windows Platform (UWP) games and apps, and to types in the Windows.UI.Xaml.Xxx namespaces (not Microsoft.UI.Xaml.Xxx).
You can use Extensible Application Markup Language (XAML) together with Microsoft DirectX together in your Universal Windows Platform (UWP) game or app. The combination of XAML and DirectX lets you build flexible user interface frameworks that interoperate with your DirectX-rendered content; which is particularly useful for graphics-intensive apps. This topic explains the structure of a UWP app that uses DirectX, and identifies the important types to use when building your UWP app to work with DirectX.
If your app mainly focuses on 2D rendering, then you might want to use the Win2D Windows Runtime library. That library is maintained by Microsoft, and is built on top of the core Direct2D technology. Win2D greatly simplifies the usage pattern to implement 2D graphics, and includes helpful abstractions for some of the techniques described in this document. See the project page for more details. This document covers guidance for app developers who choose not to use Win2D.
Note
DirectX APIs are not defined as Windows Runtime types, but you can use C++/WinRT to develop XAML UWP apps that interoperate with DirectX. If you factor the code that calls DirectX into its own C++/WinRT Windows Runtime component (WRC), then you can use that WRC in a UWP app (even a C# one) that then combines XAML and DirectX.
XAML and DirectX
DirectX provides two powerful libraries for 2D and 3D graphics, respectively—Direct2D and Direct3D. Although XAML provides support for basic 2D primitives and effects, many modeling and gaming apps need more complex graphics support. For these, you can use Direct2D and Direct3D to render the more complex graphics, and use XAML for more traditional user interface (UI) elements.
If you're implementing custom XAML and DirectX interop, then you need to know these two concepts.
- Shared surfaces are sized regions of the display, defined by XAML, that you can use DirectX to draw into indirectly by using Windows::UI::Xaml::Media::ImageSource types. For shared surfaces, you don't control the precise timing of when new content appears on-screen. Rather, updates to the shared surface are sync'd to the XAML framework's updates.
- A swap chain represents a collection of buffers that are used to display graphics with minimal latency. Typically, a swap chain is updated at 60 frames per second separately from the UI thread. However, a swap chain uses more memory and CPU resources in order to support rapid updates, and is relatively difficult to use, since you have to manage multiple threads.
Consider what you're using DirectX for. Will you use it to composite or animate a single control that fits within the dimensions of the display window? Will it contain output that needs to be rendered and controlled in real-time, as in a game? If so, then you'll probably need to implement a swap chain. Otherwise, you should be fine using a shared surface.
Once you've determined how you intend to use DirectX, you use one of the following Windows Runtime types to incorporate DirectX rendering into your UWP app.
- If you want to compose a static image, or draw a complex image at event-driven intervals, then draw to a shared surface with Windows::UI::Xaml::Media::Imaging::SurfaceImageSource. That type handles a sized DirectX drawing surface. Typically, you use this type when composing an image or texture as a bitmap for display in a document or UI element. It doesn't work well for real-time interactivity, such as a high-performance game. That's because updates to a SurfaceImageSource object are synced to XAML user interface updates, and that can introduce latency into the visual feedback you provide to the user, such as a fluctuating frame rate, or a perceived poor response to real-time input. Updates are still quick enough for dynamic controls or data simulations, though.
- If the image is larger than the provided screen real estate, and can be panned or zoomed by the user, then use Windows::UI::Xaml::Media::Imaging::VirtualSurfaceImageSource. That type handles a sized DirectX drawing surface that is larger than the screen. Like SurfaceImageSource, you use this when composing a complex image or control dynamically. And, also like SurfaceImageSource, it doesn't work well for high-performance games. Some examples of XAML elements that could use a VirtualSurfaceImageSource are map controls, or a large, image-dense document viewer.
- If you're using DirectX to present graphics updated in real-time, or in a situation where the updates must come on regular low-latency intervals, then use the SwapChainPanel class, so that you can refresh the graphics without syncing to the XAML framework refresh timer. With SwapChainPanel you can access the graphics device's swap chain (IDXGISwapChain1) directly, and layer XAML on top of the render target. SwapChainPanel works great for games and full-screen DirectX apps that require a XAML-based user interface. You must know DirectX well to use this approach, including the Microsoft DirectX Graphics Infrastructure (DXGI), Direct2D, and Direct3D technologies. For more info, see Programming Guide for Direct3D 11.
SurfaceImageSource
SurfaceImageSource provides you with a DirectX shared surface to draw into; it then composes the bits into app content.
Tip
The Line spacing (DirectWrite) and Downloadable fonts (DirectWrite) sample applications demonstrate SurfaceImageSource.
At a very high level, here's the process for creating and updating a SurfaceImageSource.
- Create a Direct 3D device, a Direct 2D device, and a Direct 2D device context.
- Create a SurfaceImageSource, and set the Direct 2D (or Direct 3D) device on that.
- Begin drawing on the SurfaceImageSource in order to obtain a DXGI surface.
- Draw to the DXGI surface with Direct2D (or Direct3D).
- End drawing on the SurfaceImageSource when you're done.
- Set the SurfaceImageSource on a XAML Image or ImageBrush in order to display it in your XAML UI.
And here's a deeper dive into those steps, with source code examples.
You can follow along with the code shown and described below by creating a new project in Microsoft Visual Studio. Create a Blank App (C++/WinRT) project. Target the latest generally-available (that is, not preview) version of the Windows SDK.
Open
pch.h, and add the following includes below the ones already there.// pch.h ... #include <d3d11_4.h> #include <d2d1_1.h> #include <windows.ui.xaml.media.dxinterop.h> #include <winrt/Windows.UI.Xaml.Media.Imaging.h>Add the
usingdirective shown below to the top ofMainPage.cpp, below the ones already there. Also inMainPage.cpp, replace the existing implementation of MainPage::ClickHandler with the listing shown below. The code creates a Direct 3D device, a Direct 2D device, and a Direct 2D device context. To do that, it calls D3D11CreateDevice, D2D1CreateDevice, and ID2D1Device::CreateDeviceContext.// MainPage.cpp | paste this below the existing using directives using namespace Windows::UI::Xaml::Media::Imaging;// MainPage.cpp | paste this to replace the existing MainPage::ClickHandler void MainPage::ClickHandler(IInspectable const&, RoutedEventArgs const&) { myButton().Content(box_value(L"Clicked")); uint32_t creationFlags = D3D11_CREATE_DEVICE_BGRA_SUPPORT; D3D_FEATURE_LEVEL featureLevels[] = { D3D_FEATURE_LEVEL_11_1, D3D_FEATURE_LEVEL_11_0, D3D_FEATURE_LEVEL_10_1, D3D_FEATURE_LEVEL_10_0, D3D_FEATURE_LEVEL_9_3, D3D_FEATURE_LEVEL_9_2, D3D_FEATURE_LEVEL_9_1 }; // Create the Direct3D device. winrt::com_ptr<::ID3D11Device> d3dDevice; D3D_FEATURE_LEVEL supportedFeatureLevel; winrt::check_hresult(::D3D11CreateDevice( nullptr, D3D_DRIVER_TYPE_HARDWARE, 0, creationFlags, featureLevels, ARRAYSIZE(featureLevels), D3D11_SDK_VERSION, d3dDevice.put(), &supportedFeatureLevel, nullptr) ); // Get the DXGI device. winrt::com_ptr<::IDXGIDevice> dxgiDevice{ d3dDevice.as<::IDXGIDevice>() }; // Create the Direct2D device and a corresponding context. winrt::com_ptr<::ID2D1Device> d2dDevice; ::D2D1CreateDevice(dxgiDevice.get(), nullptr, d2dDevice.put()); winrt::com_ptr<::ID2D1DeviceContext> d2dDeviceContext; winrt::check_hresult( d2dDevice->CreateDeviceContext( D2D1_DEVICE_CONTEXT_OPTIONS_NONE, d2dDeviceContext.put() ) ); }Next, add code to create a SurfaceImageSource, and set the Direct 2D (or Direct 3D) device on that by calling ISurfaceImageSourceNativeWithD2D::SetDevice.
Note
If you'll be drawing to your SurfaceImageSource from a background thread, then you'll also need to ensure that the DXGI device has multi-threaded access enabled (as shown in the code below). For performance reasons you should do that only if you'll be drawing from a background thread.
Define the size of the shared surface by passing the height and width to the SurfaceImageSource constructor. You can also indicate whether the surface needs alpha (opacity) support.
To set the device, and run the draw operations, we'll need a pointer to ISurfaceImageSourceNativeWithD2D. To obtain one, query the SurfaceImageSource object for its underlying ISurfaceImageSourceNativeWithD2D interface.
// MainPage.cpp | paste this at the end of MainPage::ClickHandler
SurfaceImageSource surfaceImageSource(500, 500);

winrt::com_ptr<::ISurfaceImageSourceNativeWithD2D> sisNativeWithD2D{
    surfaceImageSource.as<::ISurfaceImageSourceNativeWithD2D>() };

// Associate the Direct2D device with the SurfaceImageSource.
sisNativeWithD2D->SetDevice(d2dDevice.get());

// To enable multi-threaded access (optional)
winrt::com_ptr<::ID3D11Multithread> d3dMultiThread{
    d3dDevice.as<::ID3D11Multithread>() };
d3dMultiThread->SetMultithreadProtected(true);
Call ISurfaceImageSourceNativeWithD2D::BeginDraw to retrieve a DXGI surface (an IDXGISurface interface). You can call ISurfaceImageSourceNativeWithD2D::BeginDraw (and the later drawing commands) from a background thread if you've enabled multi-threaded access. In this step you also create a bitmap from the DXGI surface, and set that into the Direct 2D device context.
In the offset parameter, ISurfaceImageSourceNativeWithD2D::BeginDraw returns the point offset (an x,y value) of the updated target rectangle. You can use that offset to determine where to draw your updated content with the ID2D1DeviceContext.
// MainPage.cpp | paste this at the end of MainPage::ClickHandler
winrt::com_ptr<::IDXGISurface> dxgiSurface;

RECT updateRect{ 0, 0, 500, 500 };
POINT offset{ 0, 0 };
HRESULT beginDrawHR = sisNativeWithD2D->BeginDraw(
    updateRect,
    __uuidof(::IDXGISurface),
    dxgiSurface.put_void(),
    &offset);

// Create render target.
winrt::com_ptr<::ID2D1Bitmap1> bitmap;
winrt::check_hresult(
    d2dDeviceContext->CreateBitmapFromDxgiSurface(
        dxgiSurface.get(),
        nullptr,
        bitmap.put()
    )
);

// Set context's render target.
d2dDeviceContext->SetTarget(bitmap.get());
Use the Direct 2D device context to draw the contents of the SurfaceImageSource. Only the area specified for update in the previous step in the updateRect parameter is drawn.
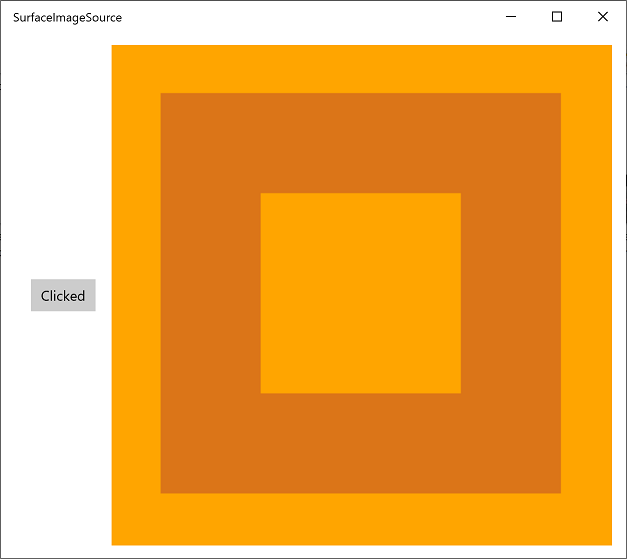
// MainPage.cpp | paste this at the end of MainPage::ClickHandler
if (beginDrawHR == DXGI_ERROR_DEVICE_REMOVED ||
    beginDrawHR == DXGI_ERROR_DEVICE_RESET ||
    beginDrawHR == D2DERR_RECREATE_TARGET)
{
    // The Direct3D and Direct2D devices were lost and need to be re-created.
    // Recovery steps are:
    // 1) Re-create the Direct3D and Direct2D devices
    // 2) Call ISurfaceImageSourceNativeWithD2D::SetDevice with the new Direct2D
    //    device
    // 3) Redraw the contents of the SurfaceImageSource
}
else if (beginDrawHR == E_SURFACE_CONTENTS_LOST)
{
    // The devices were not lost but the entire contents of the surface
    // were. Recovery steps are:
    // 1) Call ISurfaceImageSourceNativeWithD2D::SetDevice with the Direct2D
    //    device again
    // 2) Redraw the entire contents of the SurfaceImageSource
}
else
{
    // Draw using Direct2D context.
    d2dDeviceContext->BeginDraw();

    d2dDeviceContext->Clear(D2D1::ColorF(D2D1::ColorF::Orange));

    winrt::com_ptr<::ID2D1SolidColorBrush> brush;
    winrt::check_hresult(d2dDeviceContext->CreateSolidColorBrush(
        D2D1::ColorF(D2D1::ColorF::Chocolate),
        D2D1::BrushProperties(0.8f),
        brush.put()));

    D2D1_SIZE_F const size{ 500, 500 };
    D2D1_RECT_F const rect{ 100.0f, 100.0f, size.width - 100.0f, size.height - 100.0f };
    d2dDeviceContext->DrawRectangle(rect, brush.get(), 100.0f);

    d2dDeviceContext->EndDraw();
}
Call ISurfaceImageSourceNativeWithD2D::EndDraw to complete the bitmap (you must call ISurfaceImageSourceNativeWithD2D::EndDraw only from the UI thread). Then set the SurfaceImageSource on a XAML Image (or ImageBrush) in order to display it in your XAML UI.
// MainPage.cpp | paste this at the end of MainPage::ClickHandler
sisNativeWithD2D->EndDraw();

// The SurfaceImageSource object's underlying
// ISurfaceImageSourceNativeWithD2D object will contain the completed bitmap.

theImage().Source(surfaceImageSource);
Note
Calling SurfaceImageSource::SetSource (inherited from IBitmapSource::SetSource) currently throws an exception. Don't call it from your SurfaceImageSource object.
Note
Avoid drawing to SurfaceImageSource while your Window is hidden or inactive, otherwise ISurfaceImageSourceNativeWithD2D APIs will fail. Handle events around window visibility and application suspension to accomplish that.
Finally, add the following Image element inside the existing XAML markup in
MainPage.xaml.<!-- MainPage.xaml --> ... <Image x:Name="theImage" Width="500" Height="500" /> ...You can now build and run the app. Click the button to see the contents of the SurfaceImageSource displayed in the Image.
VirtualSurfaceImageSource
VirtualSurfaceImageSource extends SurfaceImageSource, and it's for scenarios where the content is potentially too large to fit on the screen all at once (and/or too large to fit in video memory as a single texture), and so the content must be virtualized in order to render optimally. For example, mapping apps, or large document canvases.
Tip
The Complex inking sample application demonstrates VirtualSurfaceImageSource.
VirtualSurfaceImageSource differs from SurfaceImageSource in that it uses a callback—IVirtualSurfaceImageSourceCallbacksNative::UpdatesNeeded—which you implement to update regions of the surface as they become visible on the screen. You don't need to clear regions that are hidden, because the XAML framework takes care of that for you.
It's a good idea to become familiar with SurfaceImageSource (see the SurfaceImageSource section above) before tackling VirtualSurfaceImageSource. But at a very high level, here's the process for creating and updating a VirtualSurfaceImageSource.
- Implement the IVirtualSurfaceImageSourceCallbackNative interface.
- Create a Direct 3D device, a Direct 2D device, and a Direct 2D device context.
- Create a VirtualSurfaceImageSource, and set the Direct 2D (or Direct 3D) device on that.
- Call RegisterForUpdatesNeeded on the VirtualSurfaceImageSource.
- In your UpdatesNeeded callback, call GetUpdateRectCount and GetUpdateRects.
- Render the update rectangles (using BeginDraw/EndDraw just like for SurfaceImageSource).
- Set the SurfaceImageSource on a XAML Image or ImageBrush in order to display it in your XAML UI.
And here's a deeper dive into those steps, with source code examples.
You can follow along with the code shown and described below by creating a new project in Microsoft Visual Studio. Create a Blank App (C++/WinRT) project, and name it VSISDemo (it's important to give the project this name if you'll be copy-pasting in the code listings given below). Target the latest generally-available (that is, not preview) version of the Windows SDK.
Open
pch.h, and add the following includes below the ones already there.// pch.h ... #include <d3d11_4.h> #include <d2d1_1.h> #include <windows.ui.xaml.media.dxinterop.h> #include <winrt/Windows.UI.Xaml.Media.Imaging.h>In this step, you'll provide an implementation of the IVirtualSurfaceUpdatesCallbackNative interface. Add a new Header File (.h) item to the project, and name it CallbackImplementation.h. Replace the contents of that file with the listing below. The code is explained after the listing.
#include "pch.h"

namespace winrt::VSISDemo::implementation
{
    struct CallbackImplementation : winrt::implements<CallbackImplementation, ::IVirtualSurfaceUpdatesCallbackNative>
    {
        CallbackImplementation(
            winrt::com_ptr<::ISurfaceImageSourceNativeWithD2D> sisNativeWithD2D,
            winrt::com_ptr<::IVirtualSurfaceImageSourceNative> const& vsisNative,
            winrt::com_ptr<::ID2D1DeviceContext> const& d2dDeviceContext) :
            m_sisNativeWithD2D(sisNativeWithD2D),
            m_vsisNative(vsisNative),
            m_d2dDeviceContext(d2dDeviceContext)
        {}

        IFACEMETHOD(UpdatesNeeded)()
        {
            HRESULT hr = S_OK;

            ULONG drawingBoundsCount = 0;
            m_vsisNative->GetUpdateRectCount(&drawingBoundsCount);

            std::unique_ptr<RECT[]> drawingBounds(
                new RECT[drawingBoundsCount]);

            m_vsisNative->GetUpdateRects(
                drawingBounds.get(),
                drawingBoundsCount);

            for (ULONG i = 0; i < drawingBoundsCount; ++i)
            {
                winrt::com_ptr<::IDXGISurface> dxgiSurface;

                POINT offset{ 0, 0 };
                HRESULT beginDrawHR = m_sisNativeWithD2D->BeginDraw(
                    drawingBounds[i],
                    __uuidof(::IDXGISurface),
                    dxgiSurface.put_void(),
                    &offset);

                // Create render target.
                winrt::com_ptr<::ID2D1Bitmap1> bitmap;
                winrt::check_hresult(
                    m_d2dDeviceContext->CreateBitmapFromDxgiSurface(
                        dxgiSurface.get(),
                        nullptr,
                        bitmap.put()
                    )
                );

                // Set context's render target.
                m_d2dDeviceContext->SetTarget(bitmap.get());

                if (beginDrawHR == DXGI_ERROR_DEVICE_REMOVED ||
                    beginDrawHR == DXGI_ERROR_DEVICE_RESET ||
                    beginDrawHR == D2DERR_RECREATE_TARGET)
                {
                    // The Direct3D and Direct2D devices were lost and need to be re-created.
                    // Recovery steps are:
                    // 1) Re-create the Direct3D and Direct2D devices
                    // 2) Call ISurfaceImageSourceNativeWithD2D::SetDevice with the new Direct2D
                    //    device
                    // 3) Redraw the contents of the SurfaceImageSource
                }
                else if (beginDrawHR == E_SURFACE_CONTENTS_LOST)
                {
                    // The devices were not lost but the entire contents of the surface
                    // were. Recovery steps are:
                    // 1) Call ISurfaceImageSourceNativeWithD2D::SetDevice with the Direct2D
                    //    device again
                    // 2) Redraw the entire contents of the SurfaceImageSource
                }
                else
                {
                    // Draw using Direct2D context.
                    m_d2dDeviceContext->BeginDraw();

                    m_d2dDeviceContext->Clear(D2D1::ColorF(D2D1::ColorF::Orange));

                    winrt::com_ptr<::ID2D1SolidColorBrush> brush;
                    winrt::check_hresult(m_d2dDeviceContext->CreateSolidColorBrush(
                        D2D1::ColorF(D2D1::ColorF::Chocolate),
                        D2D1::BrushProperties(0.8f),
                        brush.put()));

                    D2D1_SIZE_F const size{ drawingBounds[i].right - drawingBounds[i].left, drawingBounds[i].bottom - drawingBounds[i].top };
                    D2D1_RECT_F const rect{ 100.0f, 100.0f, size.width - 100.0f, size.height - 100.0f };
                    m_d2dDeviceContext->DrawRectangle(rect, brush.get(), 100.0f);

                    m_d2dDeviceContext->EndDraw();
                }

                m_sisNativeWithD2D->EndDraw();
            }

            return hr;
        }

    private:
        winrt::com_ptr<::ISurfaceImageSourceNativeWithD2D> m_sisNativeWithD2D{ nullptr };
        winrt::com_ptr<::IVirtualSurfaceImageSourceNative> m_vsisNative{ nullptr };
        winrt::com_ptr<::ID2D1DeviceContext> m_d2dDeviceContext{ nullptr };
    };
}
Whenever a region of the VirtualSurfaceImageSource needs to be updated, the framework calls your implementation of IVirtualSurfaceUpdatesCallbackNative::UpdatesNeeded (shown above).
That can happen either when the framework determines that the region needs to be drawn (when the user pans or zooms the view of the surface, for example), or after your app has called IVirtualSurfaceImageSourceNative::Invalidate on that region.
In your implementation of IVirtualSurfaceImageSourceNative::UpdatesNeeded, use the IVirtualSurfaceImageSourceNative::GetUpdateRectCount and IVirtualSurfaceImageSourceNative::GetUpdateRects methods to determine which region(s) of the surface must be drawn.
For each region that must be updated, draw the specific content to that region, but constrain your drawing to the bounded regions for better performance. The specifics of calling the ISurfaceImageSourceNativeWithD2D methods are the same as for SurfaceImageSource (see the SurfaceImageSource section above).
Note
Avoid drawing to VirtualSurfaceImageSource while your Window is hidden or inactive, otherwise ISurfaceImageSourceNativeWithD2D APIs will fail. Handle events around window visibility and application suspension to accomplish that.
In the MainPage class, we'll add a member of type CallbackImplementation. We'll also create a Direct 3D device, a Direct 2D device, and a Direct 2D device context. To do that, we'll call D3D11CreateDevice, D2D1CreateDevice, and ID2D1Device::CreateDeviceContext.
Replace the contents of
MainPage.idl,MainPage.h, andMainPage.cppwith the contents of the listings below.// MainPage.idl namespace VSISDemo { [default_interface] runtimeclass MainPage : Windows.UI.Xaml.Controls.Page { MainPage(); } }// MainPage.h #pragma once #include "MainPage.g.h" #include "CallbackImplementation.h" namespace winrt::VSISDemo::implementation { struct MainPage : MainPageT<MainPage> { MainPage(); void ClickHandler(Windows::Foundation::IInspectable const& sender, Windows::UI::Xaml::RoutedEventArgs const& args); private: winrt::com_ptr<::IVirtualSurfaceUpdatesCallbackNative> m_cbi{ nullptr }; }; } namespace winrt::VSISDemo::factory_implementation { struct MainPage : MainPageT<MainPage, implementation::MainPage> { }; }// MainPage.cpp #include "pch.h" #include "MainPage.h" #include "MainPage.g.cpp" using namespace winrt; using namespace Windows::UI::Xaml; using namespace Windows::UI::Xaml::Media::Imaging; namespace winrt::VSISDemo::implementation { MainPage::MainPage() { InitializeComponent(); } void MainPage::ClickHandler(IInspectable const&, RoutedEventArgs const&) { myButton().Content(box_value(L"Clicked")); uint32_t creationFlags = D3D11_CREATE_DEVICE_BGRA_SUPPORT; D3D_FEATURE_LEVEL featureLevels[] = { D3D_FEATURE_LEVEL_11_1, D3D_FEATURE_LEVEL_11_0, D3D_FEATURE_LEVEL_10_1, D3D_FEATURE_LEVEL_10_0, D3D_FEATURE_LEVEL_9_3, D3D_FEATURE_LEVEL_9_2, D3D_FEATURE_LEVEL_9_1 }; // Create the Direct3D device. winrt::com_ptr<::ID3D11Device> d3dDevice; D3D_FEATURE_LEVEL supportedFeatureLevel; winrt::check_hresult(::D3D11CreateDevice( nullptr, D3D_DRIVER_TYPE_HARDWARE, 0, creationFlags, featureLevels, ARRAYSIZE(featureLevels), D3D11_SDK_VERSION, d3dDevice.put(), &supportedFeatureLevel, nullptr) ); // Get the Direct3D device. winrt::com_ptr<::IDXGIDevice> dxgiDevice{ d3dDevice.as<::IDXGIDevice>() }; // Create the Direct2D device and a corresponding context. winrt::com_ptr<::ID2D1Device> d2dDevice; ::D2D1CreateDevice(dxgiDevice.get(), nullptr, d2dDevice.put()); winrt::com_ptr<::ID2D1DeviceContext> d2dDeviceContext; winrt::check_hresult( d2dDevice->CreateDeviceContext( D2D1_DEVICE_CONTEXT_OPTIONS_NONE, d2dDeviceContext.put() ) ); } }Next, add code to create a VirtualSurfaceImageSource with the size that you want, and set the Direct 2D (or Direct 3D) device on that by calling ISurfaceImageSourceNativeWithD2D::SetDevice.
Note
If you'll be drawing to your VirtualSurfaceImageSource from a background thread, then you'll also need to ensure that the DXGI device has multi-threaded access enabled (as shown in the code below). For performance reasons you should do that only if you'll be drawing from a background thread.
To set the device, and run the draw operations, we'll need a pointer to ISurfaceImageSourceNativeWithD2D. To obtain one, query the VirtualSurfaceImageSource object for its underlying ISurfaceImageSourceNativeWithD2D interface.
Also query for IVirtualSurfaceImageSourceNative, and call IVirtualSurfaceImageSourceNative::RegisterForUpdatesNeeded, providing your implementation of IVirtualSurfaceUpdatesCallbackNative.
Then set the SurfaceImageSource on a XAML Image (or ImageBrush) in order to display it in your XAML UI.
// MainPage.cpp | paste this at the end of MainPage::ClickHandler
VirtualSurfaceImageSource virtualSurfaceImageSource(2000, 2000);

winrt::com_ptr<::ISurfaceImageSourceNativeWithD2D> sisNativeWithD2D{
    virtualSurfaceImageSource.as<::ISurfaceImageSourceNativeWithD2D>() };

// Associate the Direct2D device with the SurfaceImageSource.
sisNativeWithD2D->SetDevice(d2dDevice.get());

// To enable multi-threaded access (optional)
winrt::com_ptr<::ID3D11Multithread> d3dMultiThread{
    d3dDevice.as<::ID3D11Multithread>() };
d3dMultiThread->SetMultithreadProtected(true);

winrt::com_ptr<::IVirtualSurfaceImageSourceNative> vsisNative{
    virtualSurfaceImageSource.as<::IVirtualSurfaceImageSourceNative>() };

m_cbi = winrt::make<CallbackImplementation>(sisNativeWithD2D, vsisNative, d2dDeviceContext);
vsisNative->RegisterForUpdatesNeeded(m_cbi.as<::IVirtualSurfaceUpdatesCallbackNative>().get());

// The SurfaceImageSource object's underlying
// ISurfaceImageSourceNativeWithD2D object will contain the completed bitmap.

theImage().Source(virtualSurfaceImageSource);
Finally, add the following Image element inside the existing XAML markup in
MainPage.xaml.<!-- MainPage.xaml --> ... <Image x:Name="theImage" Width="500" Height="500" /> ...You can now build and run the app. Click the button to see the contents of the VirtualSurfaceImageSource displayed in the Image.
SwapChainPanel and gaming
SwapChainPanel is the Windows Runtime type designed to support high-performance graphics and gaming, where you manage the swap chain directly. In this case, you create your own DirectX swap chain and manage the presentation of your rendered content. Another feature of the SwapChainPanel is that you can overlay other XAML elements in front of it.
Tip
The following sample applications demonstrate SurfaceImageSource: Direct2D advanced color image rendering, Direct2D photo adjustment, Direct2D SVG image rendering, Low latency input, DirectX and XAML game, and XAML SwapChainPanel DirectX interop (Windows 8.1).
To ensure good performance, there are certain limitations to the SwapChainPanel type.
- There should be no more than 4 SwapChainPanel instances per app.
- You should set the DirectX swap chain's height and width (in DXGI_SWAP_CHAIN_DESC1) to the current dimensions of the swap chain element. If you don't, then the display content will be scaled to fit (using DXGI_SCALING_STRETCH).
- You must set the DirectX swap chain's scaling mode (in DXGI_SWAP_CHAIN_DESC1) to DXGI_SCALING_STRETCH.
- You must create the DirectX swap chain by calling IDXGIFactory2::CreateSwapChainForComposition.
You update the SwapChainPanel based on the needs of your app, and not sync'd with the updates of the XAML framework. If you need to synchronize the updates of the SwapChainPanel to those of the XAML framework, then register for the Windows::UI::Xaml::Media::CompositionTarget::Rendering event. Otherwise, you must consider any cross-thread issues if you try to update the XAML elements from a different thread than the one updating the SwapChainPanel.
If you need to receive low-latency pointer input to your SwapChainPanel, then use SwapChainPanel::CreateCoreIndependentInputSource. That method returns a CoreIndependentInputSource object that can be used to receive input events at minimal latency on a background thread. Note that once this method is called, normal XAML pointer input events will not be raised for the SwapChainPanel, since all input will be redirected to the background thread.
Here's the process for creating and updating a SwapChainPanel object.
You can follow along with the code shown and described below by creating a new project in Microsoft Visual Studio. Create a Blank App (C++/WinRT) project, and name it SCPDemo (it's important to give the project this name if you'll be copy-pasting in the code listings given below). Target the latest generally-available (that is, not preview) version of the Windows SDK.
Open
pch.h, and add the following includes below the ones already there.// pch.h ... #include <d3d11_4.h> #include <d2d1_1.h> #include <windows.ui.xaml.media.dxinterop.h>In the MainPage class, we'll first create a Direct 3D device, a Direct 2D device, and a Direct 2D device context. To do that, we'll call D3D11CreateDevice, D2D1CreateDevice, and ID2D1Device::CreateDeviceContext.
Replace the contents of
MainPage.idl,MainPage.h, andMainPage.cppwith the contents of the listings below.// MainPage.idl namespace SCPDemo { [default_interface] runtimeclass MainPage : Windows.UI.Xaml.Controls.Page { MainPage(); } }// MainPage.h #pragma once #include "MainPage.g.h" namespace winrt::SCPDemo::implementation { struct MainPage : MainPageT<MainPage> { MainPage(); void ClickHandler(Windows::Foundation::IInspectable const& sender, Windows::UI::Xaml::RoutedEventArgs const& args); }; } namespace winrt::SCPDemo::factory_implementation { struct MainPage : MainPageT<MainPage, implementation::MainPage> { }; }// MainPage.cpp #include "pch.h" #include "MainPage.h" #include "MainPage.g.cpp" using namespace winrt; using namespace Windows::UI::Xaml; namespace winrt::SCPDemo::implementation { MainPage::MainPage() { InitializeComponent(); } void MainPage::ClickHandler(IInspectable const&, RoutedEventArgs const&) { myButton().Content(box_value(L"Clicked")); uint32_t creationFlags = D3D11_CREATE_DEVICE_BGRA_SUPPORT; D3D_FEATURE_LEVEL featureLevels[] = { D3D_FEATURE_LEVEL_11_1, D3D_FEATURE_LEVEL_11_0, D3D_FEATURE_LEVEL_10_1, D3D_FEATURE_LEVEL_10_0, D3D_FEATURE_LEVEL_9_3, D3D_FEATURE_LEVEL_9_2, D3D_FEATURE_LEVEL_9_1 }; // Create the Direct3D device. winrt::com_ptr<::ID3D11Device> d3dDevice; D3D_FEATURE_LEVEL supportedFeatureLevel; winrt::check_hresult(::D3D11CreateDevice( nullptr, D3D_DRIVER_TYPE_HARDWARE, 0, creationFlags, featureLevels, ARRAYSIZE(featureLevels), D3D11_SDK_VERSION, d3dDevice.put(), &supportedFeatureLevel, nullptr) ); // Get the Direct3D device. winrt::com_ptr<::IDXGIDevice> dxgiDevice{ d3dDevice.as<::IDXGIDevice>() }; // Create the Direct2D device and a corresponding context. winrt::com_ptr<::ID2D1Device> d2dDevice; ::D2D1CreateDevice(dxgiDevice.get(), nullptr, d2dDevice.put()); winrt::com_ptr<::ID2D1DeviceContext> d2dDeviceContext; winrt::check_hresult( d2dDevice->CreateDeviceContext( D2D1_DEVICE_CONTEXT_OPTIONS_NONE, d2dDeviceContext.put() ) ); } }Wrap your XAML markup in a SwapChainPanel element with an
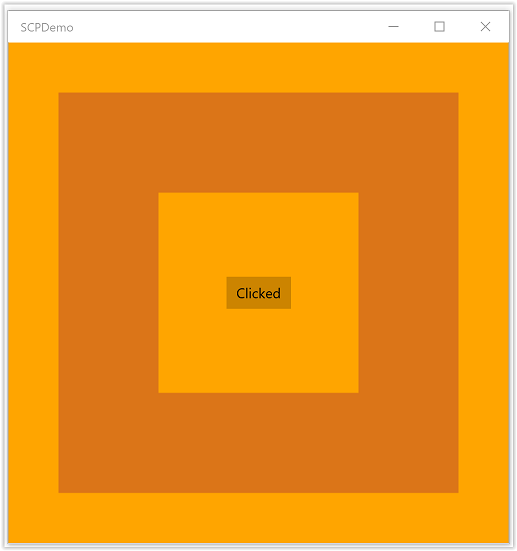
x:Name. The wrapped XAML elements will render in front of the SwapChainPanel.<!-- MainPage.xaml --> <SwapChainPanel x:Name="swapChainPanel"> <StackPanel Orientation="Horizontal" HorizontalAlignment="Center" VerticalAlignment="Center"> <Button x:Name="myButton" Click="ClickHandler">Click Me</Button> </StackPanel> </SwapChainPanel>You can then access that SwapChainPanel object via the accessor function with the same name, as we'll see.
Next, call call IDXGIFactory2::CreateSwapChainForComposition to create a swap chain.
// MainPage.cpp | paste this at the end of MainPage::ClickHandler
// Get the DXGI adapter.
winrt::com_ptr< ::IDXGIAdapter > dxgiAdapter;
dxgiDevice->GetAdapter(dxgiAdapter.put());

// Get the DXGI factory.
winrt::com_ptr< ::IDXGIFactory2 > dxgiFactory;
dxgiFactory.capture(dxgiAdapter, &IDXGIAdapter::GetParent);

DXGI_SWAP_CHAIN_DESC1 swapChainDesc { 0 };
swapChainDesc.Width = 500;
swapChainDesc.Height = 500;
swapChainDesc.Format = DXGI_FORMAT_B8G8R8A8_UNORM; // This is the most common swapchain format.
swapChainDesc.Stereo = false;
swapChainDesc.SampleDesc.Count = 1; // Don't use multi-sampling.
swapChainDesc.SampleDesc.Quality = 0;
swapChainDesc.BufferUsage = DXGI_USAGE_RENDER_TARGET_OUTPUT;
swapChainDesc.BufferCount = 2;
swapChainDesc.Scaling = DXGI_SCALING_STRETCH;
swapChainDesc.SwapEffect = DXGI_SWAP_EFFECT_FLIP_SEQUENTIAL; // We recommend using this swap effect for all applications.
swapChainDesc.Flags = 0;

// Create a swap chain by calling IDXGIFactory2::CreateSwapChainForComposition.
winrt::com_ptr< ::IDXGISwapChain1 > swapChain;
dxgiFactory->CreateSwapChainForComposition(
    d3dDevice.get(),
    &swapChainDesc,
    nullptr,
    swapChain.put());
Get an ISwapChainPanelNative from the SwapChainPanel that you named swapChainPanel. The call ISwapChainPanelNative::SetSwapChain to set the swap chain on the SwapChainPanel.
// MainPage.cpp | paste this at the end of MainPage::ClickHandler
// Get native interface for SwapChainPanel
auto panelNative{ swapChainPanel().as<ISwapChainPanelNative>() };

winrt::check_hresult(
    panelNative->SetSwapChain(swapChain.get())
);
Lastly, draw to the DirectX swap chain, and then present it to display the contents.
// Create a Direct2D target bitmap associated with the
// swap chain back buffer, and set it as the current target.
D2D1_BITMAP_PROPERTIES1 bitmapProperties =
    D2D1::BitmapProperties1(
        D2D1_BITMAP_OPTIONS_TARGET | D2D1_BITMAP_OPTIONS_CANNOT_DRAW,
        D2D1::PixelFormat(DXGI_FORMAT_B8G8R8A8_UNORM, D2D1_ALPHA_MODE_PREMULTIPLIED),
        96.f,
        96.f
    );

winrt::com_ptr<::IDXGISurface> dxgiBackBuffer;
swapChain->GetBuffer(0, __uuidof(dxgiBackBuffer), dxgiBackBuffer.put_void());

winrt::com_ptr< ::ID2D1Bitmap1 > targetBitmap;
winrt::check_hresult(
    d2dDeviceContext->CreateBitmapFromDxgiSurface(
        dxgiBackBuffer.get(),
        &bitmapProperties,
        targetBitmap.put()
    )
);

d2dDeviceContext->SetTarget(targetBitmap.get());

// Draw using Direct2D context.
d2dDeviceContext->BeginDraw();

d2dDeviceContext->Clear(D2D1::ColorF(D2D1::ColorF::Orange));

winrt::com_ptr<::ID2D1SolidColorBrush> brush;
winrt::check_hresult(d2dDeviceContext->CreateSolidColorBrush(
    D2D1::ColorF(D2D1::ColorF::Chocolate),
    D2D1::BrushProperties(0.8f),
    brush.put()));

D2D1_SIZE_F const size{ 500, 500 };
D2D1_RECT_F const rect{ 100.0f, 100.0f, size.width - 100.0f, size.height - 100.0f };
d2dDeviceContext->DrawRectangle(rect, brush.get(), 100.0f);

d2dDeviceContext->EndDraw();

swapChain->Present(1, 0);
The XAML elements are refreshed when the Windows Runtime layout/render logic signals an update.
You can now build and run the app. Click the button to see the contents of the SwapChainPanel displayed behind the other XAML elements.
Note
In general, your DirectX app should create swap chains in landscape orientation, and equal to the display window size (which is usually the native screen resolution in most Microsoft Store games). That ensures that your app uses the optimal swap chain implementation when it doesn't have any visible XAML overlay. If the app is rotated to portrait mode, then your app should call IDXGISwapChain1::SetRotation on the existing swap chain, apply a transform to the content if needed, and then call SetSwapChain again on the same swap chain. Similarly, your app should call SetSwapChain again on the same swap chain whenever the swap chain is resized by calling IDXGISwapChain::ResizeBuffers.
Related topics
Opinia
Dostępne już wkrótce: W 2024 r. będziemy stopniowo wycofywać zgłoszenia z serwisu GitHub jako mechanizm przesyłania opinii na temat zawartości i zastępować go nowym systemem opinii. Aby uzyskać więcej informacji, sprawdź: https://aka.ms/ContentUserFeedback.
Prześlij i wyświetl opinię dla