Get started with Power Automate
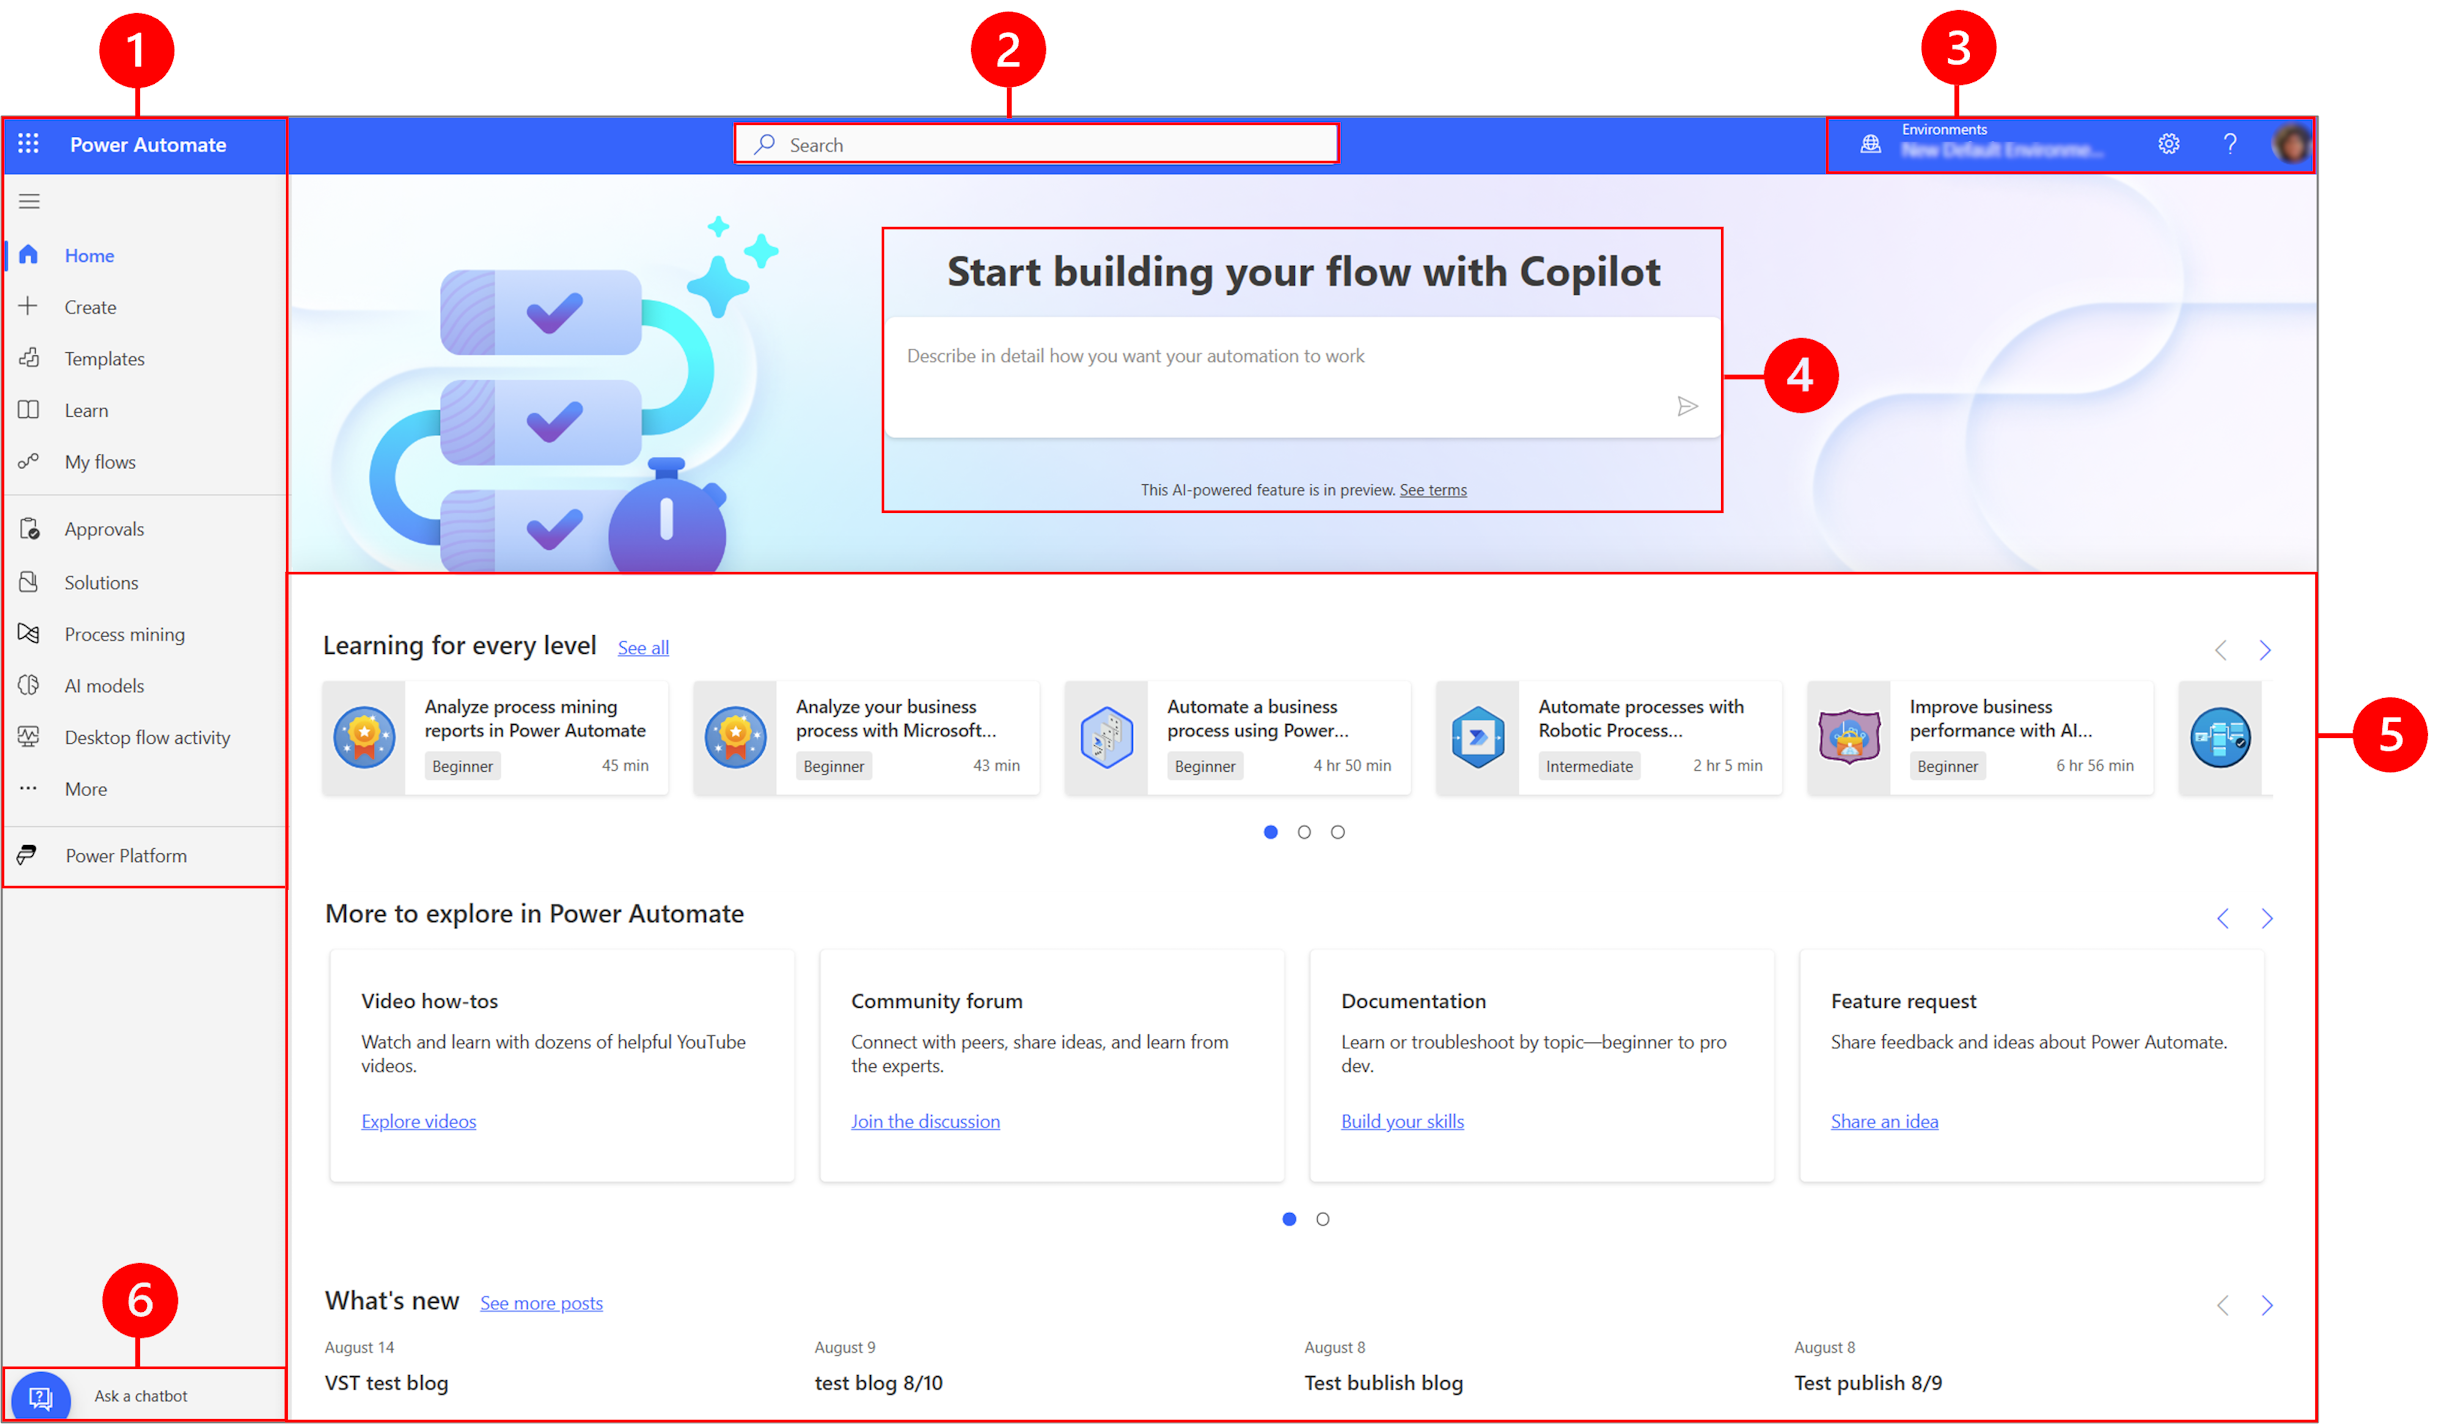
The Power Automate home page offers you various options for creating your own flows and learning about the key features for Power Automate. You can get a quick sense of what's possible and how Power Automate can help your business.
If your organization has AI enabled, then it also includes the new Copilot features.
To learn more, select the links below.
Legend:
- Left navigation pane
- Search
- Environment information and settings
- AI Copilot
- Learning tools and more
- Ask a chatbot
1 – Left navigation pane
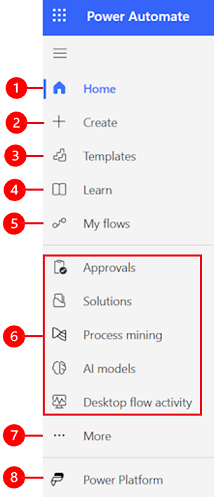
Find what you need with the left navigation pane. When you sign in to Power Automate home page, the left navigation pane shows the following menu items:
Legend:
Home: Takes you to the Power Automate home page.
Create: Create flows by using Copilot, templates or build your own.
Templates: View and search for templates you can use to create flows.
Learn: Learn experience takes you to the Power Automate product documentation.
My Flows: If you've created a flow, or someone else has created one and shared it with you, you can view or edit it.
Your most used pages: When you first sign in, items such as Approvals, Solutions, Process mining, AI models, and Desktop Flow Activity appear in the left navigation menu by default. Use the More menu item to unpin any of these items and pin something else.
More: Pin your most used items to the left navigation pane, such as Tables, Cloud flow activity, Connections, and more.
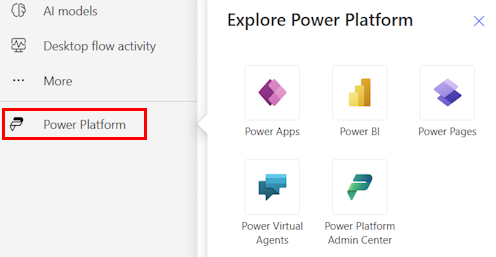
Power Platform: Explore other Power Platform products.
Pin and unpin
Pin your most used pages in the navigation pane so you can quickly access features that you use frequently. Links to other pages are available through the More menu item. When you pin an item, it appears in the middle section above More.
When you sign in, the left navigation pane contains Templates, Approvals, Solutions, Process mining, AI models, and Desktop Flow Activity. However, you can pin and unpin pages to customize it to your preference.
To pin or unpin an item from the left navigation pane, select More, and then select the  pin button or
  unpin button.
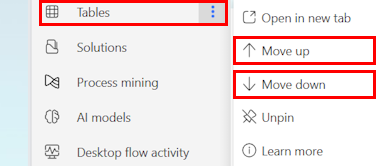
You can also unpin an item by selecting the vertical ellipsis (⋮) next to the item > Unpin.
Discover all
Select Discover all to see the Discover page on the left navigation pane.
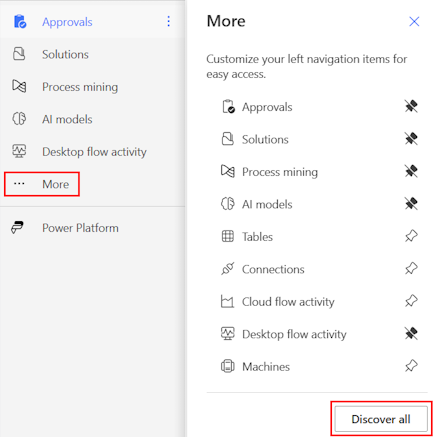
To keep it pinned, select the pin button.
Move up or move down
When you have some pages pinned in the navigation pane, you can move them up or down.
To move a page up or down, select the vertical ellipsis (⋮) next to the menu item that you want to move, and then select Move up or Move down.
Power Platform
From the left navigation pane, select Power Platform to access Power Platform services such as Power Platform admin center, Power BI, and Power Apps.
2 – Search
Use the Search field at the top of the screen to create flows.
3 – Environment information and settings
View your environment information and settings.
Choose an environment
Environments create boundaries between different types of work. For example, an organization might have separate environments for different departments. Many organizations use environments to separate flows that are still being developed from those that are ready for widespread use. You might have access to multiple environments or only one. If you have the appropriate permissions, you might even be able to create your own environments.
To verify which environment you're in, find the environment switcher near the right side of the header.
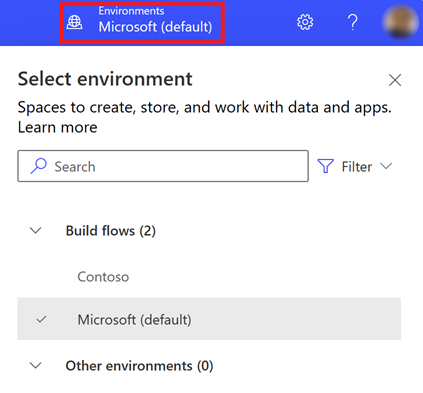
With the environment selector, environments are grouped into two categories: Build Flows and Other environments. Select Filter to filter the list of environments by your role, data platform (Dataverse or none), and environment type, such as production or sandbox.

Environments where you have either system administrator and/or system customizer security role membership appear under Build flows. The Other environments list displays environments where you have read-only permissions, and can access approvals.
Tip
Hover over an environment in the list to view the details of the environment.
Filter environments by role
| Filter role | Power Platform role or description |
|---|---|
| Admin | System administrator Environment administrator |
| Maker with data access | System administrator System customizer |
| Maker without full data access | Environment maker (with or without Dataverse) |
| Run only user | User without maker-level access |
Note
- To view the environment list in the environment switcher in Power Automate, you must have the Environment Maker, System Customizer, or System Administrator security role in the environment. For information about predefined security roles, see Predefined security roles in the Microsoft Power Platform admin guide.
- Make sure that you're in the correct environment before you create a flow, an app, or a similar component. You can't easily move components from one environment to another.
- Every member in an organization can access the default environment. Like any environment, users can see flows where they have sufficient privileges to access a flow.
- When you create a flow in one environment, you won't be able to see it from another environment.
For more information, see Environments overview
Frequently asked questions about environments
Why does Power Automate show different environments compared to Power Apps?
Power Automate and Power Apps will both show environments with administrator access and environment maker access.
Power Apps will show environments with app contributor access, when users without a maker-level security role assigned but with edit permission to at least one canvas app in the environment. More information: Choose an environment in Power Apps
Power Automate will show environments user can approve approvals. User will be granted read access to environments have approvals.
Since approvals are frequently used in Power Automate, users could have read access to many environments.
How do I get access to environments?
You can view access in the Power Platform admin center, by logging in using an account with environment administrator permissions. If you don't have administrator privileges, contact your administrator to obtain access.
Once in admin center, select the Users and Teams options under the access panel, environment admin could find everyone/teams has access to the environment. Environment admin could also change the security roles for a particular user.
More information: Manage environments in Power Platform admin center.
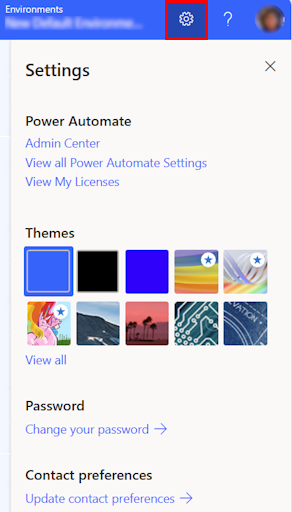
Settings
Select the gear icon to perform tasks such as identify your Power Automate licenses, and open the page where you can perform administrative tasks.
Admin Center: Opens the Power Platform admin center.
View all Power Automate Settings: View or update your language and time settings, notifications, or access directories.
View My Licenses: View your licenses. To learn more, go to Licensing overview for Microsoft Power Platform.
Themes: From the list of themes, select a theme for your organization.
Password: Change your password.
Contact preferences: Update your contact information.
Help
In the header, select the question mark icon to find more information about Power Automate.

Here are some examples of what you can find with the help feature:
- Find links to documentation.
- Browse the Power Automate training on Microsoft Learn.
- Access the Power Automate Community, where you can share information with users in other organizations.
- Get announcements on the newest features in the Power Automate blog.
4 - AI Copilot
If your organization has AI enabled, then you see Start building your flow with Copilot on the Power Automate Home screen.

To learn more, go to Get started with Copilot in Power Automate (preview).
5 – Learning tools and more
The Home page gives you access to learning tools, videos, community forums, and more. Scroll down the screen to view all the product related tools.
Here's the list of the main categories:
Learning for every level: Discover learning modules you can take to learn how to use Power Automate.
More to explore in Power Automate: Discover all that Power Automate has to offer such as video how-tos and the Power Automate Community forum.
What's new: Learn about upcoming events as well as new and updated product features.
6 - Ask a chatbot
Get contextual help while building your flow using the Power Platform virtual agent. To learn more, go to Get contextual help with flows from the Microsoft Copilot Studio bot.
Feedback
Coming soon: Throughout 2024 we will be phasing out GitHub Issues as the feedback mechanism for content and replacing it with a new feedback system. For more information see: https://aka.ms/ContentUserFeedback.
Submit and view feedback for