Create a Windows app with an Azure backend
Overview
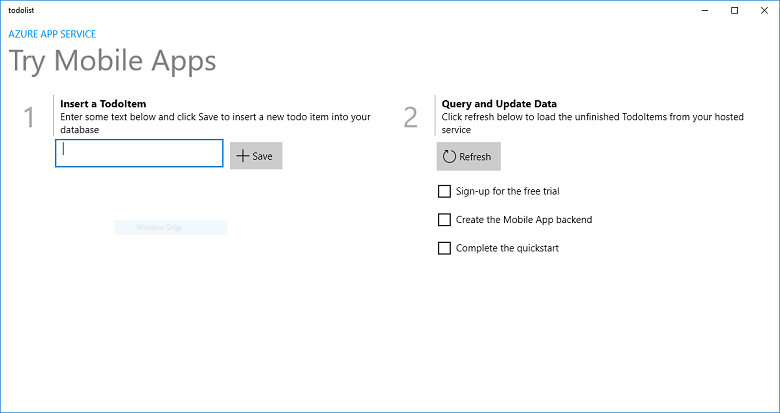
This tutorial shows you how to add a cloud-based backend service to a Universal Windows Platform (UWP) app. For more information, see What are Mobile Apps. The following are screen captures from the completed app:
Completing this tutorial is a prerequisite for all other Mobile App tutorials for UWP apps.
Prerequisites
To complete this tutorial, you need the following:
- An active Azure account. If you don't have an account, you can sign up for an Azure trial and get up to 10 free mobile apps that you can keep using even after your trial ends. For details, see Azure Free Trial.
- Windows 10.
- Visual Studio Community 2017.
- Familiarity with UWP app development. Visit the UWP documentation to learn how to get set up to build UWP apps.
Create a new Azure Mobile App backend
Follow these steps to create a new Mobile App backend.
Sign in to the Azure portal.
Click Create a resource.
In the search box, type Web App.
In the results list, select Web App from the Marketplace.
Select your Subscription and Resource Group (select an existing resource group or create a new one (using the same name as your app)).
Choose a unique Name of your web app.
Choose the default Publish option as Code.
In the Runtime stack, you need to select a version under ASP.NET or Node. If you are building a .NET backend, select a version under ASP.NET. Otherwise if you are targeting a Node based application, select one of the version from Node.
Select the right Operating System, either Linux or Windows.
Select the Region where you would like this app to be deployed.
Select the appropriate App Service Plan and hit Review and create.
Under Resource Group, select an existing resource group or create a new one (using the same name as your app).
Click Create. Wait a few minutes for the service to be deployed successfully before proceeding. Watch the Notifications (bell) icon in the portal header for status updates.
Once the deployment is completed, click on the Deployment details section and then click on the Resource of Type Microsoft.Web/sites. It will navigate you to the App Service Web App that you just created.
Click on the Configuration blade under Settings and in the Application settings, click on the New application setting button.
In the Add/Edit application setting page, enter Name as MobileAppsManagement_EXTENSION_VERSION and Value as latest and hit OK.
You are all set to use this newly created App Service Web app as a Mobile app.
Create a database connection and configure the client and server project
Download the client SDK quickstarts for the following platforms:
iOS (Objective-C)
iOS (Swift)
Android (Java)
Xamarin.iOS
Xamarin.Android
Xamarin.Forms
Cordova
Windows (C#)Note
If you use the iOS project you need to download "azuresdk-iOS-*.zip" from latest GitHub release. Unzip and add the
MicrosoftAzureMobile.frameworkfile to the project's root.You will have to add a database connection or connect to an existing connection. First, determine whether you’ll create a data store or use an existing one.
Create a new data store: If you’re going to create a data store, use the following quickstart:
Quickstart: Getting started with single databases in Azure SQL Database
Existing data source: Follow the instructions below if you want to use an existing database connection
SQL Database Connection String format -
Data Source=tcp:{your_SQLServer},{port};Initial Catalog={your_catalogue};User ID={your_username};Password={your_password}{your_SQLServer} Name of the server, this can be found in the overview page for your database and is usually in the form of “server_name.database.windows.net”. {port} usually 1433. {your_catalogue} Name of the database. {your_username} User name to access your database. {your_password} Password to access your database.
Add the connection string to your mobile app In App Service, you can manage connection strings for your application by using the Configuration option in the menu.
To add a connection string:
Click on the Application settings tab.
Click on [+] New connection string.
You will need to provide Name, Value and Type for your connection string.
Type Name as
MS_TableConnectionStringValue should be the connecting string you formed in the step before.
If you are adding a connection string to a SQL Azure database choose SQLAzure under type.
Azure Mobile Apps has SDKs for .NET and Node.js backends.
Node.js backend
If you’re going to use Node.js quickstart app, follow the instructions below.
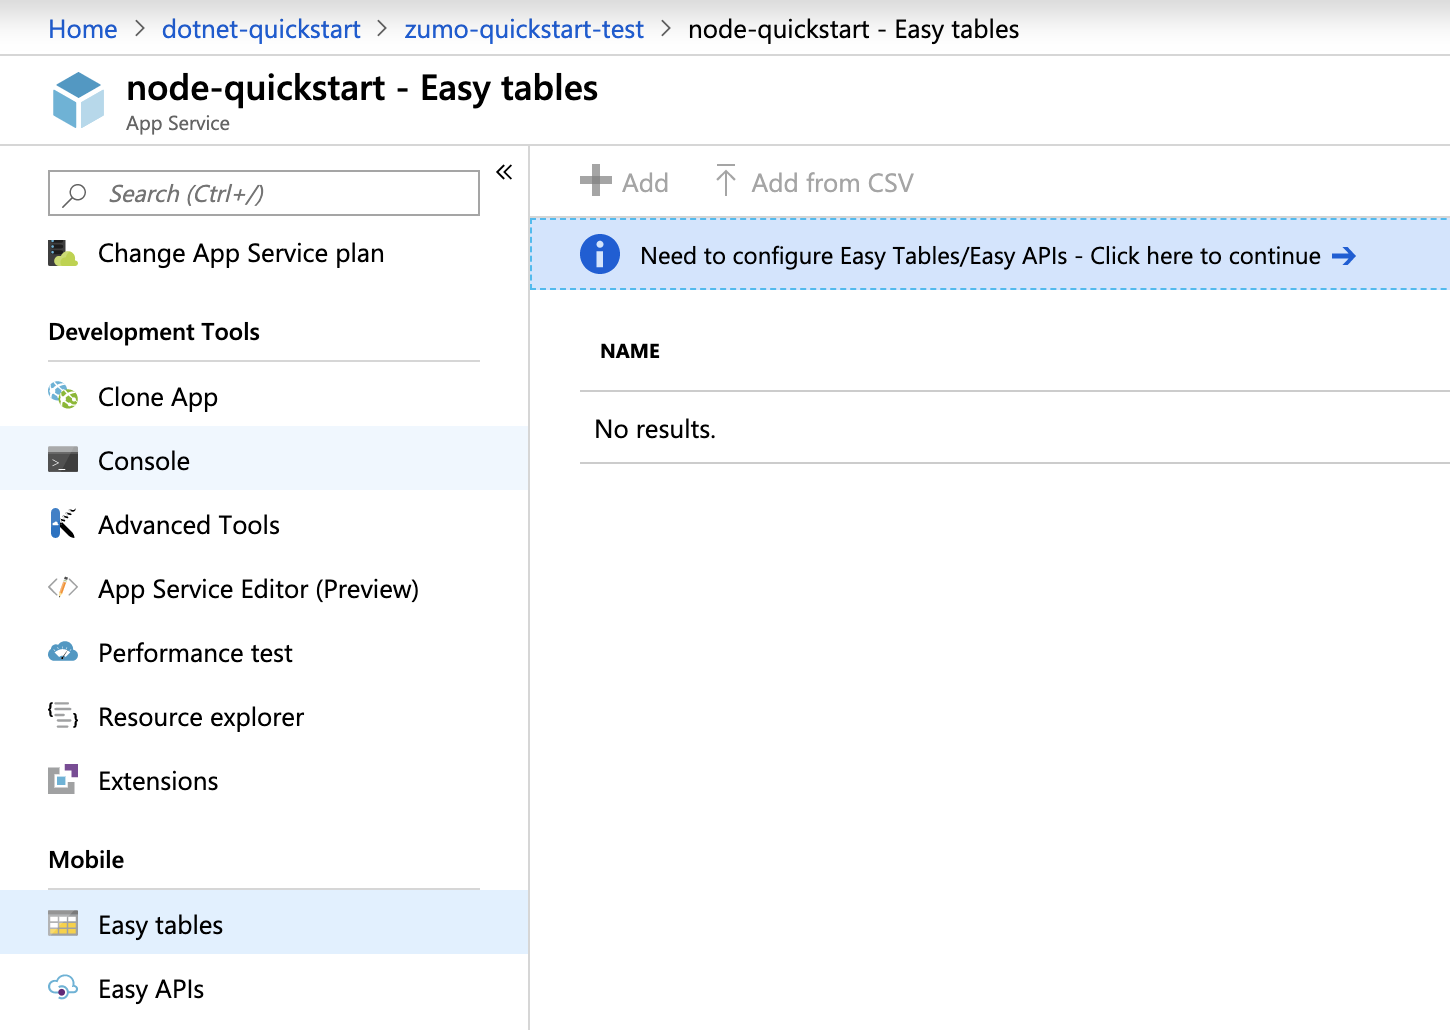
In the Azure portal, go to Easy Tables, you will see this screen.
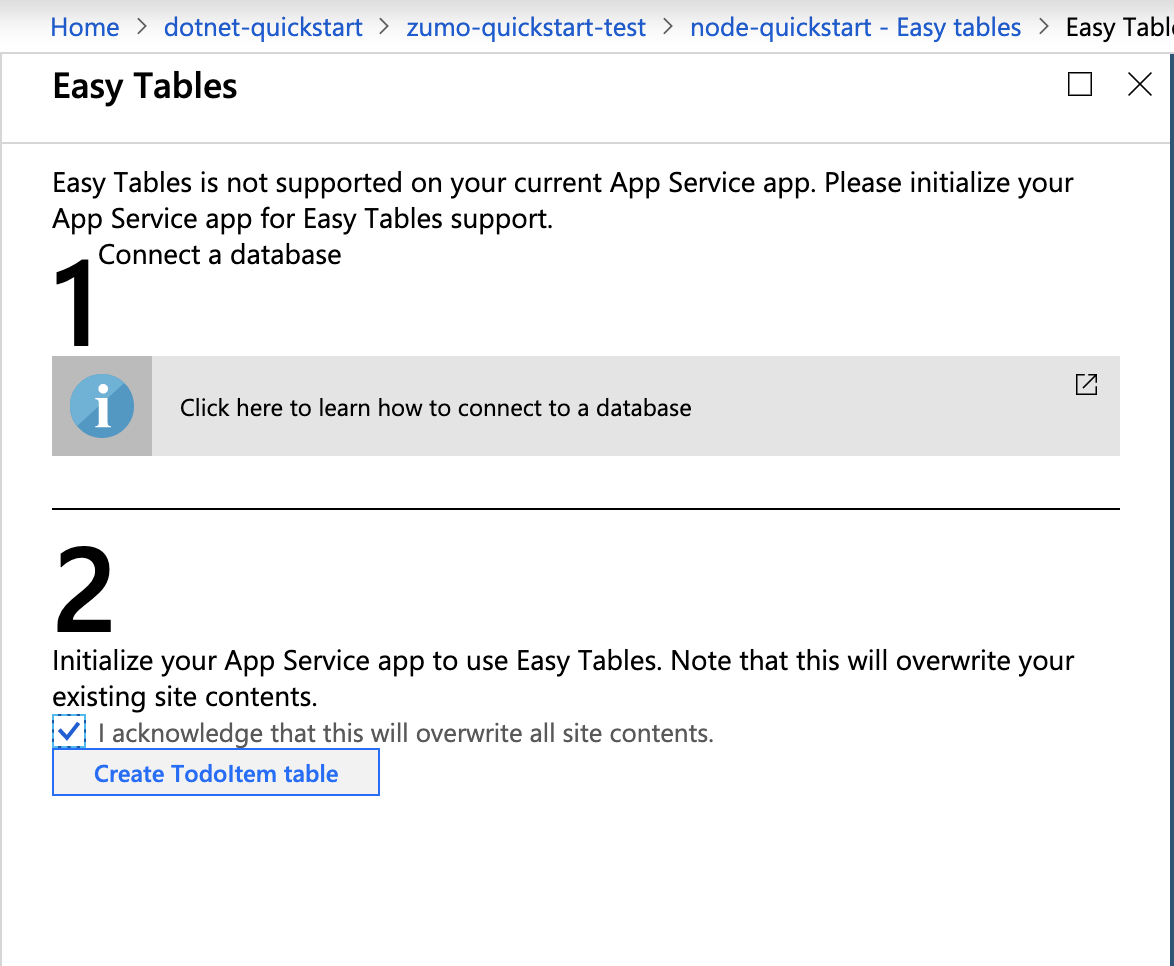
Make sure the SQL connection string is already added in the Configuration tab. Then check the box of I acknowledge that this will overwrite all site contents and click the Create TodoItem table button.
In Easy Tables, click the + Add button.
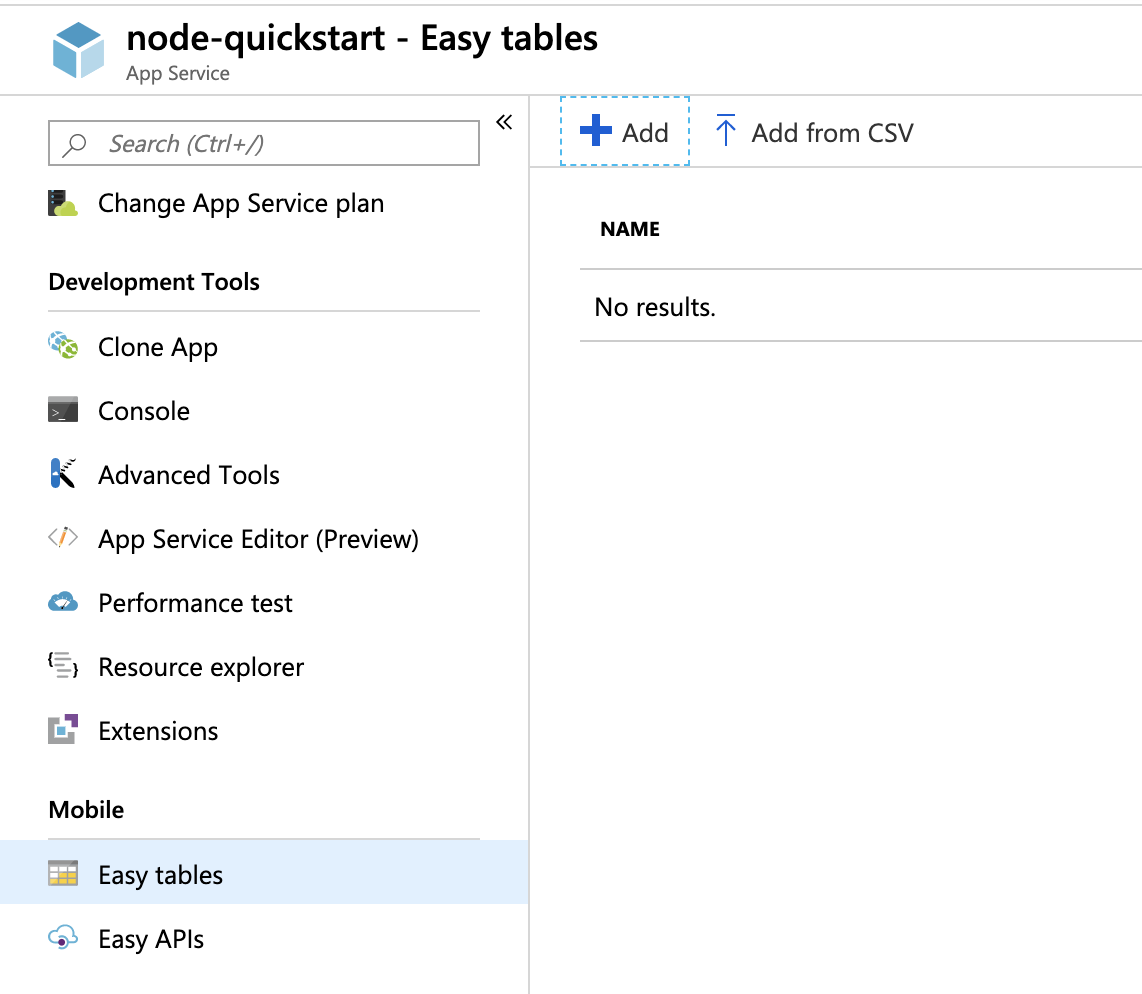
Create a
TodoItemtable with anonymous access.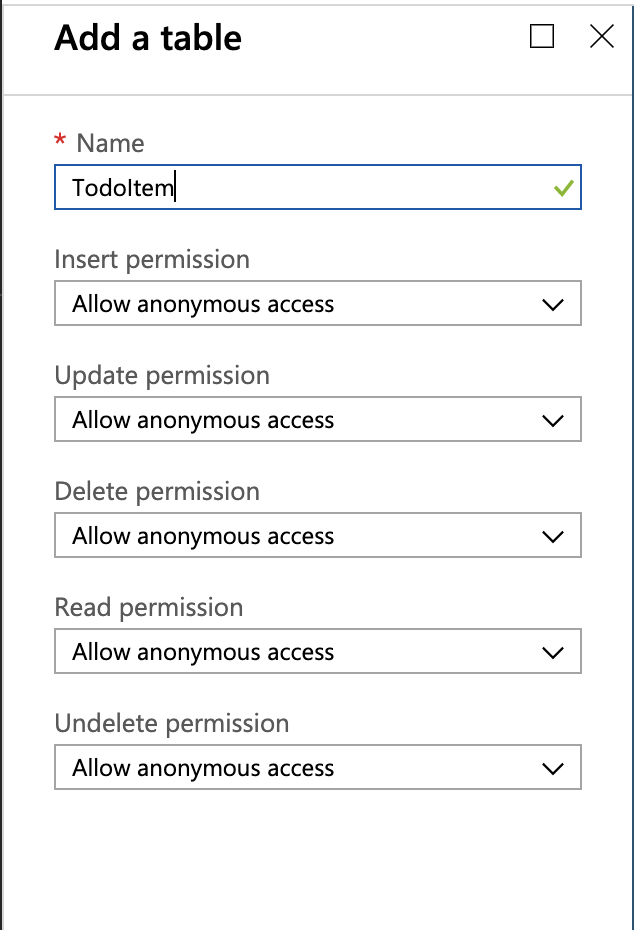
.NET backend
If you’re going to use .NET quickstart app, follow the instructions below.
Download the Azure Mobile Apps .NET server project from the azure-mobile-apps-quickstarts repository.
Build the .NET server project locally in Visual Studio.
In Visual Studio, open Solution Explorer, right-click on
ZUMOAPPNAMEServiceproject, click Publish, you will see aPublish to App Servicewindow. If you are working on Mac, check out other ways to deploy the app here.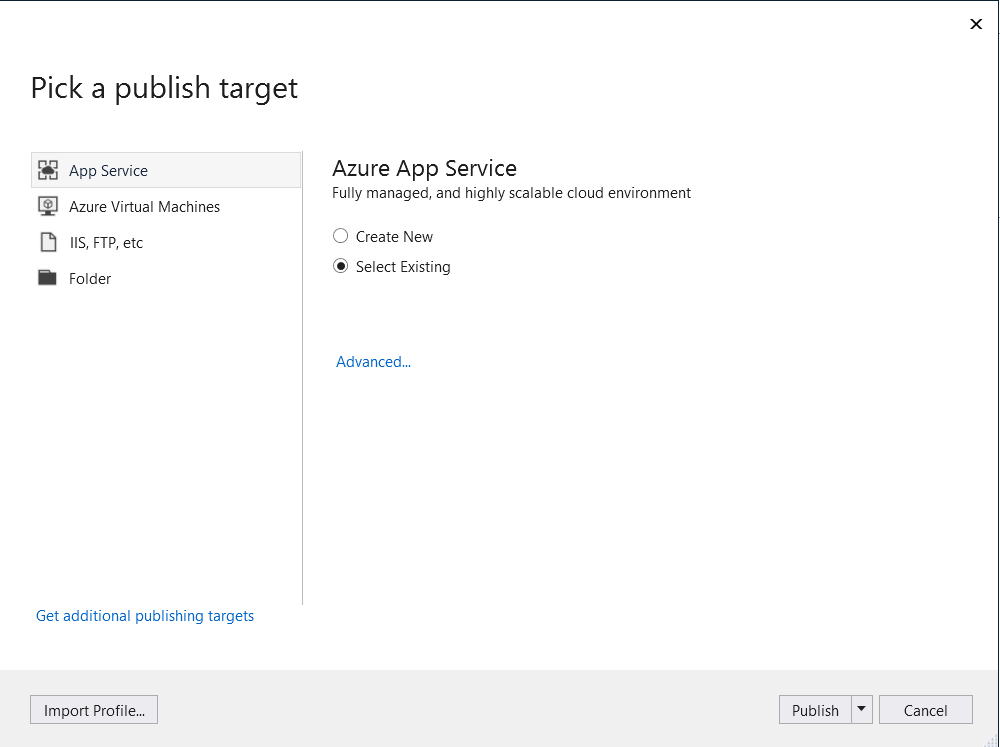
Select App Service as publish target, then click Select Existing, then click the Publish button at the bottom of the window.
You will need to log into Visual Studio with your Azure subscription first. Select the
Subscription,Resource Group, and then select the name of your app. When you are ready, click OK, this will deploy the .NET server project that you have locally into the App Service backend. When deployment finishes, you will be redirected tohttp://{zumoappname}.azurewebsites.net/in the browser.
Run the client project
Open the UWP project.
Go to the Azure portal and navigate to the mobile app that you created. On the
Overviewblade, look for the URL which is the public endpoint for your mobile app. Example - the sitename for my app name "test123" will be https://test123.azurewebsites.net.Open the file
App.xaml.csin this folder - windows-uwp-cs/ZUMOAPPNAME/. The application name isZUMOAPPNAME.In
Appclass, replaceZUMOAPPURLparameter with public endpoint above.public static MobileServiceClient MobileService = new MobileServiceClient("ZUMOAPPURL");becomes
public static MobileServiceClient MobileService = new MobileServiceClient("https://test123.azurewebsites.net");Press the F5 key to deploy and run the app.
In the app, type meaningful text, such as Complete the tutorial, in the Insert a TodoItem text box, and then click Save.
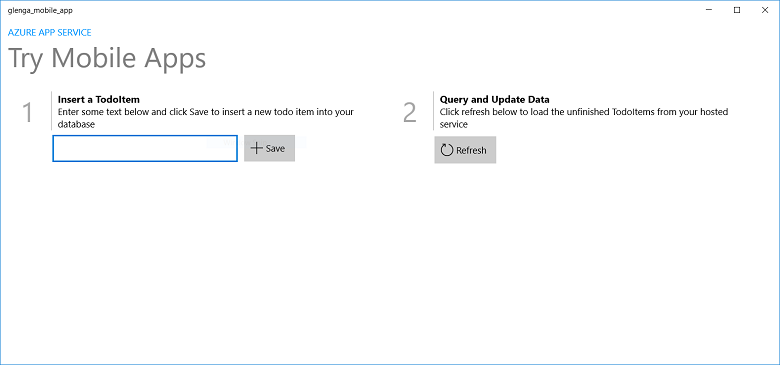
This sends a POST request to the new mobile app backend that's hosted in Azure.