Collaborate with a Dynamics 365 Remote Assist user with Microsoft Teams desktop for PC or Mac
Tip
Dynamics 365 Remote Assist customers now have access to Remote Assist in Microsoft Teams mobile. Take advantage of all that Teams has to offer and collaborate with other users! For the best calling experience on HoloLens, use Dynamics 365 Guides.
With Guides, the same remote experts can assist you through a problem while you have the holographic content of a Guide appearing before you.
Learn more and try Guides!
When you use Microsoft Teams desktop for the PC or Mac, you can collaborate with people using Dynamics 365 Remote Assist on HoloLens (in this article, a "Dynamics 365 Remote Assist HoloLens user") or Dynamics 365 Remote Assist on a mobile device (in this article, a "Dynamics 365 Remote Assist mobile user").
Dynamics 365 Remote Assist supports new Teams seamlessly. No migration required. Learn more: New Microsoft Teams app.
The features you can use to collaborate differ depending on which platform the Dynamics 365 Remote Assist user is using.
Note
At this time, Dynamics 365 Remote Assist does not support holographic annotations in Teams for Virtualized Desktop Infrastructure (VDI). The Mixed Reality toolbar does not appear for VDI users.
Collaborating with Dynamics 365 Remote Assist HoloLens users versus Dynamics 365 Remote Assist mobile users
| Task | Teams desktop features available when collaborating with HoloLens user | Teams desktop features available when collaborating with mobile user |
|---|---|---|
| Make outgoing call | Yes | Yes |
| Receive incoming call | Yes | Yes |
| Join a one-to-one call | Yes | Yes |
| Join a group call | Yes | Yes |
| Join a meeting | Yes | Yes |
| Control outgoing video, outgoing audio, and incoming audio | Yes | Yes |
| Annotate Dynamics 365 Remote Assist user's environment | Yes | Yes |
| Annotate 2D snapshot using arrows and ink | No | Yes |
| Send a text message | Yes | Yes |
| Share files from OneDrive or device | Yes | Yes |
| Record call | Yes, only in a group call or meeting. A one-to-one call can be recorded, but the HoloLens user must initiate the recording. | A one-to-one call can be recorded, but the Dynamics 365 Remote Assist mobile user must initiate the recording. |
| Share screen | Yes | No, but you can send any file type to a Dynamics 365 Remote Assist mobile user. |
Key terms
In Dynamics 365 Remote Assist:
- A meeting is a call scheduled through Microsoft Teams. A meeting can include one or more participants.
- A one-to-one call is a call between two people that isn't scheduled through Teams.
- A group call is a call with more than two people that isn't scheduled through Teams. To create a group call, start with a one-to-one call, and then add more participants.
Launch Teams
- Launch the Teams app.
Important
If this is the first time you have launched Teams and you have not been invited to any other teams, Teams will automatically take you to the correct place. If you have been invited to other teams, you might need to switch to the appropriate tenant.
To switch tenants, in the drop-down menu in the upper-right corner of the window, select the appropriate guest tenant. Teams might take a few seconds to reload.
Make and take calls
Accept a call
- When you see an incoming call notification in the bottom right side of your screen, select Audio or Video to join the call.
Call a Dynamics 365 Remote Assist user who is in your organization
After launching Teams, select the Calls tab to see suggested contacts.
Select the Video button on the contact card to call a suggested contact, or use the search bar to find a contact and call them.
Call a Dynamics 365 Remote Assist user who is outside your organization
You can search, call, or receive a call from a Dynamics 365 Remote Assist user in another organization if your organization is federated with that organization. When searching for this Dynamics 365 Remote Assist user, you must enter their full email address.
Note
If you can't find the contact you're looking for, it might be because Teams federation (Teams external access) has not been enabled. Contact your administrator for help.
Make a group call
Start by calling one person, and then select Open Participants (
 ).
).Search for the person you want to call, and then call them.
Learn more about who can join a group call.
Schedule and join a meeting with a Dynamics 365 Remote Assist HoloLens user
Note
Dynamics 365 Remote Assist users might not be able to join scheduled meetings between different companies if link-rewriting (URL-rewriting services) are used to fight spam. To make sure that users can join scheduled meetings in this situation, add an exception so that links from teams.microsoft.com are not rewritten.
Schedule a meeting ahead of the call
Check out the following links:
Join a Teams meeting
Check out the following links:
If the Dynamics 365 Remote Assist HoloLens user is invited to the meeting, they can sign in to Dynamics 365 Remote Assist, and then select Join Meeting at the bottom of the Recent Contacts page.
If the Dynamics 365 Remote Assist HoloLens user isn't invited to the meeting, but you would like them to join the meeting:
Join the meeting, and then select Participants from the Call Controls toolbar.
Start typing their name, and then call them.
Adjust what you see
Teams tries to anticipate what you want to see in a meeting, and you can also manually pin a video, reframe a video, and more.
Note
At this time, when you use Teams to capture a cloud-based recording of the call, the layout you configure is not the layout captured in the call recording. The layout of the recording is determined by the number of call participants. See the following examples.
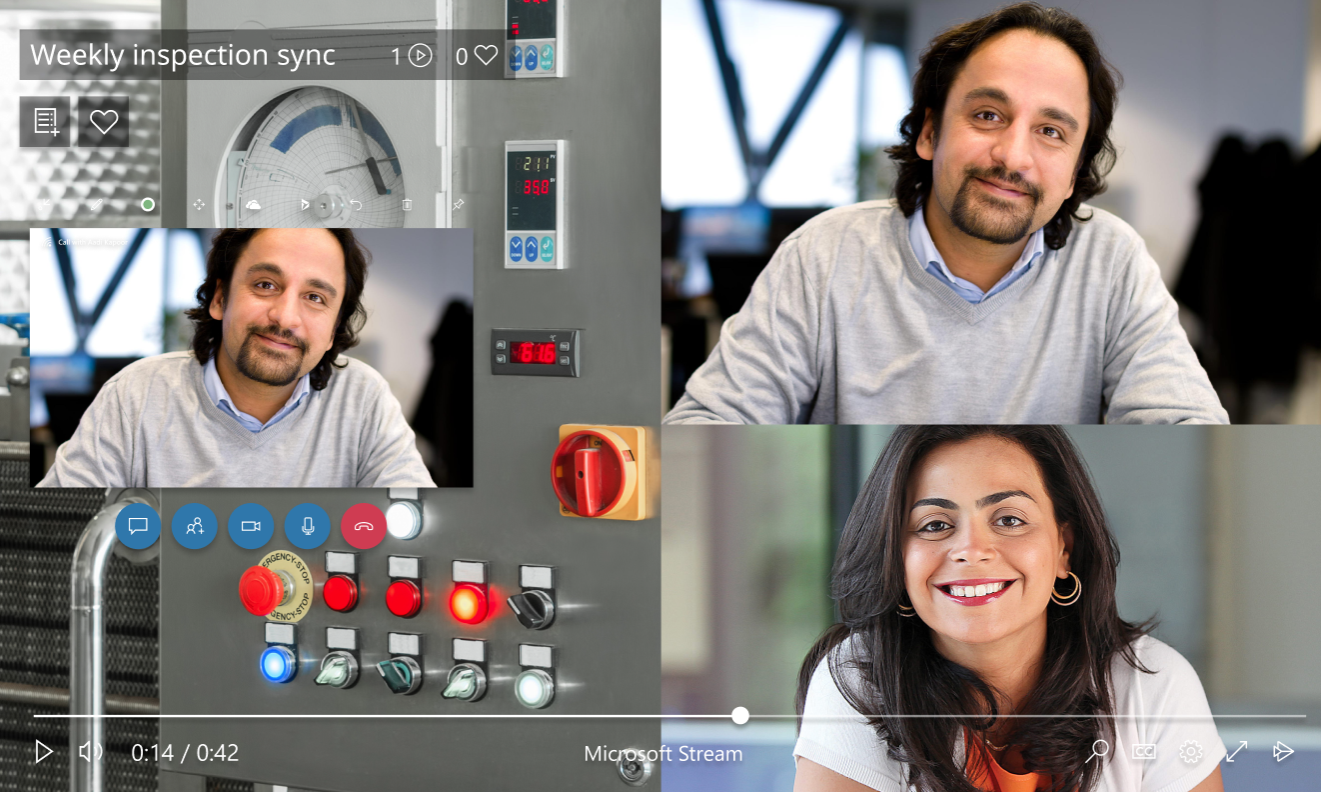
Example of a Teams recording of a call with two participants:

Example of a Teams recording of a call with more than four participants:
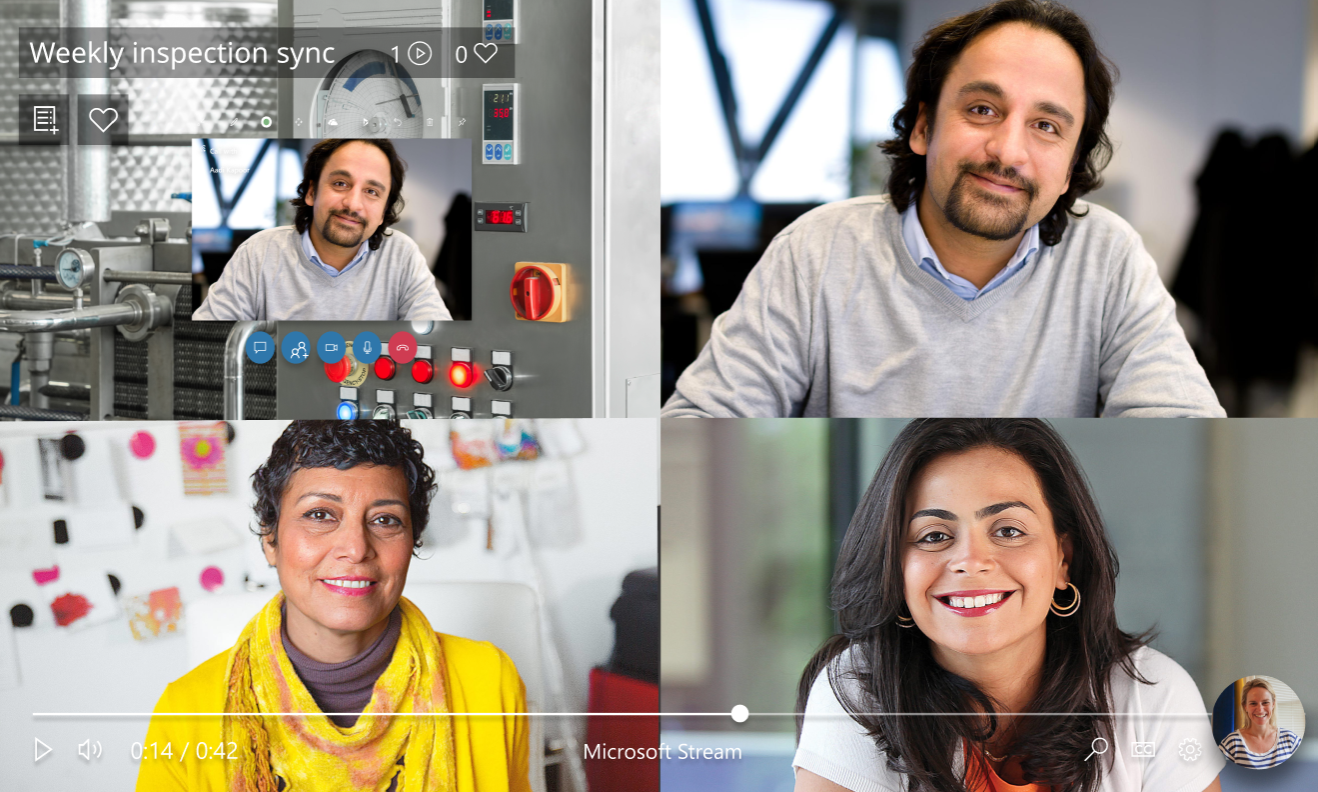
If you want the recording to capture the exact layout of the call you configure, use the Windows Game Bar to capture a screen recording of your computer.
Use call controls
When you're in a call, you see the call controls at the bottom of the screen.
| Button | Description |
|---|---|
 |
Control outgoing video |
 |
Control outgoing audio |
 |
Share your desktop or a running application (with a Dynamics 365 Remote Assist HoloLens user only) |
 |
Open a chat window to send text messages |
|
See current participants, or add more |
To use more features, select the More […] button. For example, select Blur my background if you have sensitive information behind you or want to protect the privacy of colleagues who are behind you. When you are in a group call or meeting with a Dynamics 365 Remote Assist HoloLens user, the More […] button provides the option to record the call.
Add annotations in the Dynamics 365 Remote Assist user's environment
When you're in a call, you see your collaborator’s space, including holograms, and can use the Mixed Reality toolbar to add annotations.

Note
- The toolbar appears only when the video on stage is from the Dynamics 365 Remote Assist user.
- The toolbar will appear but will be disabled if the Dynamics 365 Remote Assist user is not ready to receive annotations and files (for example, the user's outgoing video feed is disabled, the user temporarily lost tracking, or Dynamics 365 Remote Assist is not in the foreground).
- The toolbar will not appear if the same Dynamics 365 Remote Assist user is connected from Teams and Dynamics 365 Remote Assist at the same time, regardless of the device used.
- The toolbar will not appear if you have not turned on the new Microsoft Teams meeting experience.
Begin editing
To start annotating, first do one of the following to pause the video stream and enter edit mode:
Select anywhere in the call window.
Select one of the items on the Mixed Reality toolbar.
Select Start editing.
In edit mode, the expert sees a live stream of the call in the corner of the app window, including the annotations that other call participants add.
Add arrows, ink, and files
Use the Mixed Reality toolbar to place arrows, draw, or add files in the HoloLens user's space. The following table describes the buttons in the Mixed Reality toolbar.
| Button | Description |
|---|---|
 |
Add an arrow. |
 |
Add ink (draw). |
 |
Insert a file in the HoloLens user's space. You can select an image or PDF file from OneDrive or from your device. |
 |
Change the arrow or ink color. |
Finish editing
When done annotating, do one of the following actions:
Select Stop editing.
Select the live video feed in the corner of your screen.
Make changes to your edits
To make changes to your edits:
While in edit mode, select Undo to undo the last action.
While in edit mode, select Erase all (
 ) to erase all of the annotations made during that editing session.
While in live mode, select Erase all (
) to erase all of the annotations made during that call.
Note
Specific drawings or arrows can’t be removed.
Each call participant can only remove the annotations they added.
Minimize the Mixed Reality toolbar
The Mixed Reality toolbar appears by default whenever you join a new call with a Dynamics 365 Remote Assist user.
If you want to focus on the video stream from the HoloLens user, you can minimize the toolbar by selecting the MR Toolbar button.

Note
The toolbar remains minimized if you switch to a different Dynamics 365 Remote Assist user's video feed.
To restore the toolbar, select the MR Toolbar button again.
Annotate a 2D snapshot
Dynamics 365 Remote Assist enables users to take 2D snapshots of their environment and mixed-reality annotations, and annotate them during a call. Snapshots are critical in situations where a still image might be needed to add annotations. These snapshots can be used for reference later or work validation. Snapshots can also be utilized in low-bandwidth situations.
When a Dynamics 365 Remote Assist user takes a snapshot, the video feed freezes. They can then start editing to begin adding annotations. After both call participants are finished annotating the snapshot, the Dynamics 365 Remote Assist user can select the check mark to exit from annotation mode, and can choose to save the snapshot.
Annotations are displayed only during the snapshot session. When the Dynamics 365 Remote Assist user exits Snapshot mode, annotations from that snapshot session are removed.
For more information, check out the following links:
Share files
You can share a OneDrive file or local file with a Dynamics 365 Remote Assist user. Supported files include .jpg, .bmp, .png, .tif/.tiff, .pdf, and still .gif.
Note
You might want to show the Dynamics 365 Remote Assist HoloLens user a file that is not supported by the file-sharing feature. For example, you might want to show a video and control when it plays and pauses, or show a PowerPoint presentation and control which slide the Dynamics 365 Remote Assist HoloLens user can see. You can do this by sharing your desktop or application window. When you do this, a new window appears in the Dynamics 365 Remote Assist HoloLens user's environment.
Share files with a Dynamics 365 Remote Assist HoloLens user
Note
Dynamics 365 Remote Assist follows Teams policies for sharing files. If your Teams policies are configured to prevent file sharing, users won't be able to share files with each other. See these links for more info:
Use one of the following methods to share files with a Dynamics 365 Remote Assist HoloLens user:
In the Mixed Reality toolbar, select Add file (
) to share a file from OneDrive or your computer. The file is uploaded in your personal OneDrive and permissions to access that single file is granted to call participants.From the Teams chat, select Attach file to share a file from OneDrive or your computer.
When you share a file, it appears as a new window in the Dynamics 365 Remote Assist HoloLens user's space and a link to the file is shared in the chat. All call participants can annotate a file displayed in the Dynamics 365 Remote Assist HoloLens user's space.
Note
After you share a file and it appears in the Dynamics 365 Remote Assist HoloLens user's space, you cannot move, delete, or resize the file.
Share files with a Dynamics 365 Remote Assist mobile user
- From the Teams chat, select Attach file to share a file from OneDrive or your computer. When you share a file with a Dynamics 365 Remote Assist mobile user, it's sent in the Dynamics 365 Remote Assist mobile text chat.
To access the file after the call:
Any call participant can find the link to the file in the Teams chat.
During the call, the Dynamics 365 Remote Assist HoloLens user can save the file to their OneDrive by tapping the OneDrive icon in the top-right corner of the window. The file is then automatically saved to a OneDrive folder called HoloLens Received Files.
Share your desktop or application window (with a Dynamics 365 Remote Assist HoloLens user only)
You might want to share your desktop or application window with a Dynamics 365 Remote Assist HoloLens user. Sharing is useful if you want to communicate information that isn't in a supported file type (.jpg, .bmp, .png, .tif/.tiff, .pdf, and still .gif.). For example, you might share an instructional video playing in your browser, or a series of instructions embedded in a PowerPoint presentation.
To share your desktop or a running application:
Select Share.

Select the application window you want to share, or share your screen.
Note
You can share one application window or screen at a time. If you want to share a different screen, select the Close share tray button to stop sharing, select a different screen, and then start sharing again.
Record a call
You might want to record the Dynamics 365 Remote Assist call for documentation or record-keeping purposes. Read the following comparison chart to understand the three options for recording a call. Keep reading to learn more about each option.
Comparison chart: Three ways to record a call
| Recording type | What the recording captures | Who initiates the recording? | Pros | Cons |
|---|---|---|---|---|
| Create a cloud-based recording using Teams or Dynamics 365 Remote Assist | Teams desktop outgoing video feed (or avatar) and Dynamics 365 Remote Assist outgoing video feed (or avatar) | A Teams desktop user can only initiate a cloud-based recording in a group call or meeting. A Dynamics 365 Remote Assist user (HoloLens or mobile) can only initiate a cloud-based recording in a one-to-one call with a Teams desktop user. | Recording is automatically saved in OneDrive or SharePoint and link is available in Teams chat. If your admin configured the Dynamics 365 Field Service integration, you can post the recording link in a Field Service work order. | The layout of the recording depends on the number of call participants, and the layout can't be configured. The recording captures the outgoing video feed (or avatar) of up to four call participants and the recording screen is divided evenly among the call participants. The Dynamics 365 Remote Assist HoloLens user’s view never occupies the entire recording. Even if you primarily care about what the HoloLens user sees, you can't adjust the recording layout to only capture what the HoloLens user sees. This view might be confusing for a call with two participants (for example, one-to-one call or meeting with two participants); during the call, you see a horizontal section of the HoloLens user’s view, but because the Teams recording divides the recording screen into half, in the call recording, you see a vertical section of the HoloLens user’s view. |
| Record your Teams desktop screen using Windows Game Bar | The exact call layout you configure during the call | Teams desktop user | Because the Teams desktop user is just recording their computer screen, the recording layout matches what the Teams desktop user sees during the call. | If the recording needs to be accessible to others, the Teams user must manually upload the video to a shared drive and share it with all call participants or other people. |
| Record the HoloLens user's view using HoloLens OS | HoloLens user’s view | HoloLens user | The clarity of the HoloLens user’s field of view isn't impacted by the call connection quality. | If the recording needs to be accessible to others, the HoloLens user must manually upload the video to a shared location. Recording length might be limited by the HoloLens internal memory. |
Create a cloud-based recording using Teams or Dynamics 365 Remote Assist
The comparison chart mentions that when you create a cloud-based recording using Teams, the recording screen is divided evenly among the call participants. See the following examples.
Recording layout when call includes two participants
In a call recording with two participants, each participant’s outgoing video (or avatar) occupies one half of the recording, and both halves are vertical. During a Dynamics 365 Remote Assist call, a Teams desktop user sees a horizontal slice of the HoloLens user's view, but the recording only captures the middle vertical slice of the HoloLens user's view. Furthermore, during the Dynamics 365 Remote Assist call, the Teams desktop user only sees their outgoing video feed in the corner of the call, but in the recording, the Teams desktop user's outgoing video feed occupies half the recording. (If the Teams user turns off their outgoing video feed, their avatar occupies half the recording.)
Note
To ensure that critical information is captured in the recording, the HoloLens user must keep it in the center of their view.
Recording layout when call includes three participants
In a recording with three participants, each participant’s outgoing video (or avatar) occupies one third of the recording. During the Dynamics 365 Remote Assist call, the Teams desktop user only sees their outgoing video feed in the corner of the call, but in the recording, the Teams desktop user's outgoing video feed occupies one third the recording. (If the Teams user turns off their outgoing video feed, their avatar occupies one third of the recording.)
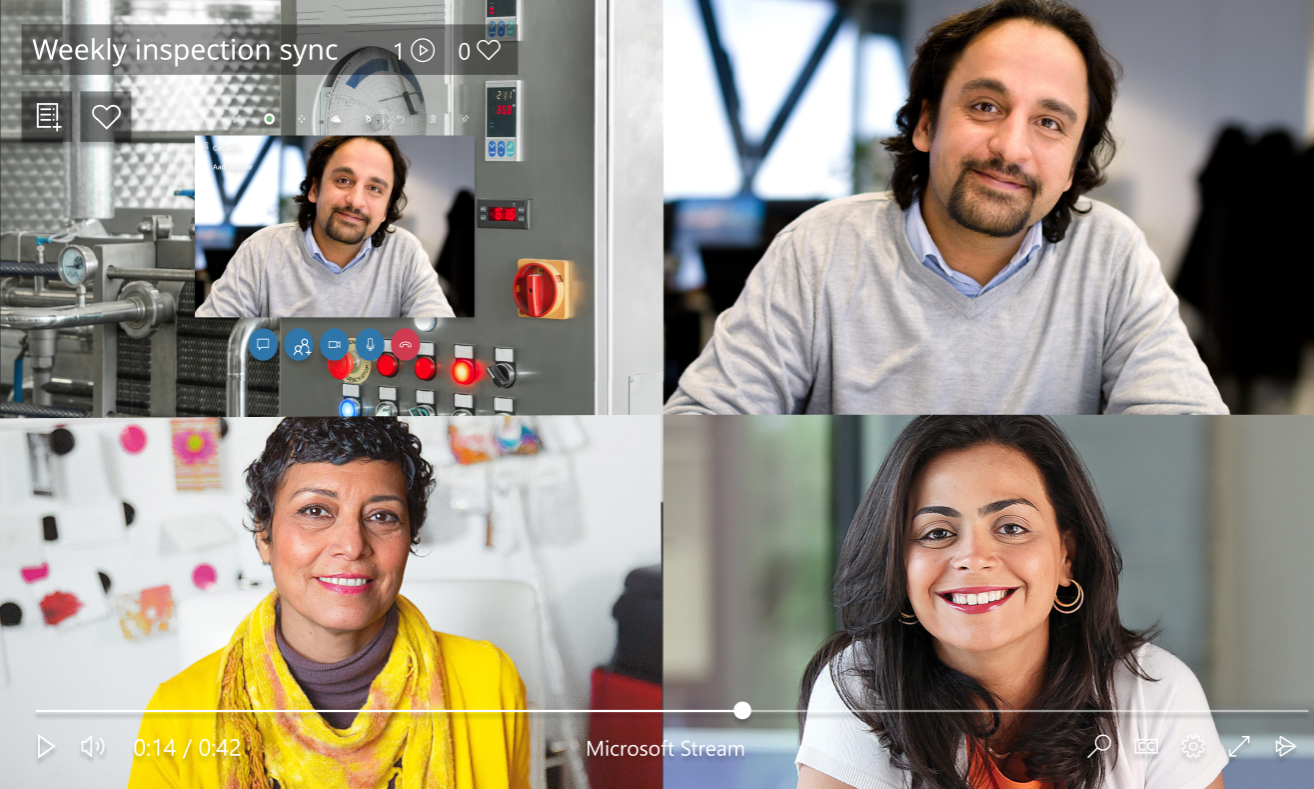
Recording layout when call includes four participants
In a recording with four participants, each participant’s outgoing video (or avatar) occupies one fourth of the recording. During the Dynamics 365 Remote Assist call, the Teams desktop user only sees their outgoing video feed in the corner of the call, but in the recording, the Teams desktop user's outgoing video feed occupies one fourth of the recording. (If the Teams user turns off their outgoing video feed, their avatar occupies one fourth of the recording.)
Recording layout when call includes four or more participants
A recording including four or more participants splits the horizontal recording into four, with remaining participants’ avatars in the bottom-right corner of the recording.
How to initiate a cloud-based recording
If you're in a group call or meeting, go to the call controls, select the More […] button, and then select Start recording. A call recording ends if:
You select Stop recording.
The Dynamics 365 Remote Assist call ends.
If you're in a one-to-one call, ask the Dynamics 365 Remote Assist user (HoloLens or mobile) to initiate the recording.
The person who initiates the recording owns the video. When a recording ends, it begins uploading to OneDrive or SharePoint. Once the video is uploaded, the recorder receives an email notification, and all call participants can view a link to OneDrive or SharePoint via the Teams chat. The owner is the only participant who can give permission or download the video to share the recording beyond these people.
If your admin configured the Dynamics 365 Field Service integration, you can access the recording link and can post it in a Dynamics 365 Field Service work order.
Record your Teams desktop screen using Windows Game Bar
If it's imperative that your recording captures as much of the Dynamics 365 Remote Assist HoloLens user’s view as possible, and as little of the Teams user’s outgoing videos (or avatars) as possible, consider recording your desktop screen using the Windows Game Bar.
Initiate a recording of what the Teams desktop user sees during the call
Join a Dynamics 365 Remote Assist call using the Teams desktop application.
Press the Windows logo key (
 ) + G to open the Game Bar.
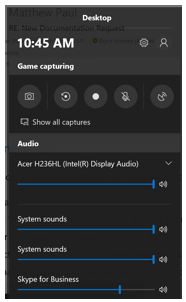
Select the Start Recording button (or press Windows logo key
+ Alt + R).A small recording menu appears that shows that the recording is in progress.

To stop recording, select Stop Recording.
The video of the recording appears in your Videos/Captures folder.
Learn more about the Windows Game Bar.
Record the HoloLens user's view using the HoloLens OS
Learn about how the HoloLens user can use the HoloLens OS to record what they see.
Send a text message
During a call, participants can communicate through the text chat. The chat log is available through Teams after the call ends.
From the call controls, select Text Chat ( to open the chat. The Dynamics 365 Remote Assist user can only see messages exchanged during the call, but you might see messages exchanged before the call.
You can also attach a OneDrive or local file through the Teams chat Attach file feature.
Note
Dynamics 365 Remote Assist chat supports certain formats, including bold, italic, strikethrough, and underline. It also supports hyperlinks. However, it does not support HTML-formatted text or lists, such as a passage you copy and paste from a website.
For example, if you copy and paste text from a website that has HTML formatting and send it during a Dynamics 365 Remote Assist call, the Dynamics 365 Remote Assist HoloLens user will see the text in the Dynamics 365 Remote Assist chat window, but the formatting may not be what you expect.
File a support ticket
If you encounter an issue that's blocking you from using the application, file a support ticket. Microsoft support works with you until the issue is resolved.
Feedback
În curând: Pe parcursul anului 2024, vom elimina treptat Probleme legate de GitHub ca mecanism de feedback pentru conținut și îl vom înlocui cu un nou sistem de feedback. Pentru mai multe informații, consultați: https://aka.ms/ContentUserFeedback.
Trimiteți și vizualizați feedback pentru