Deploy Azure DevOps Builds with App Center
Important
Visual Studio App Center is scheduled for retirement on March 31, 2025. While you can continue to use Visual Studio App Center until it is fully retired, there are several recommended alternatives that you may consider migrating to.
You can deploy your apps from Azure DevOps to App Center with the Deploy with App Center Task.
Note
For on-premise version servers, please install this extension and ensure that you are using the 3.173.0 version or newer. All older versions will not be working after February 1, 2021.
Creating a signed build
Only signed builds can be deployed and installed to devices, ensure your existing Azure DevOps build definition produces a signed build.
Setting up distribution with App Center
Once you're done with the signing task, add the build task App Center Distribute. This task uploads your signed build to App Center so that you can distribute it to your beta testers.
Warning
You need App Center Distribute Task version 3 or newer to use this feature.
When configuring the App Center Distribute task, you'll need your App Center API key. To obtain this key, open a browser, and navigate to the App Center dashboard, then open your Account Settings.
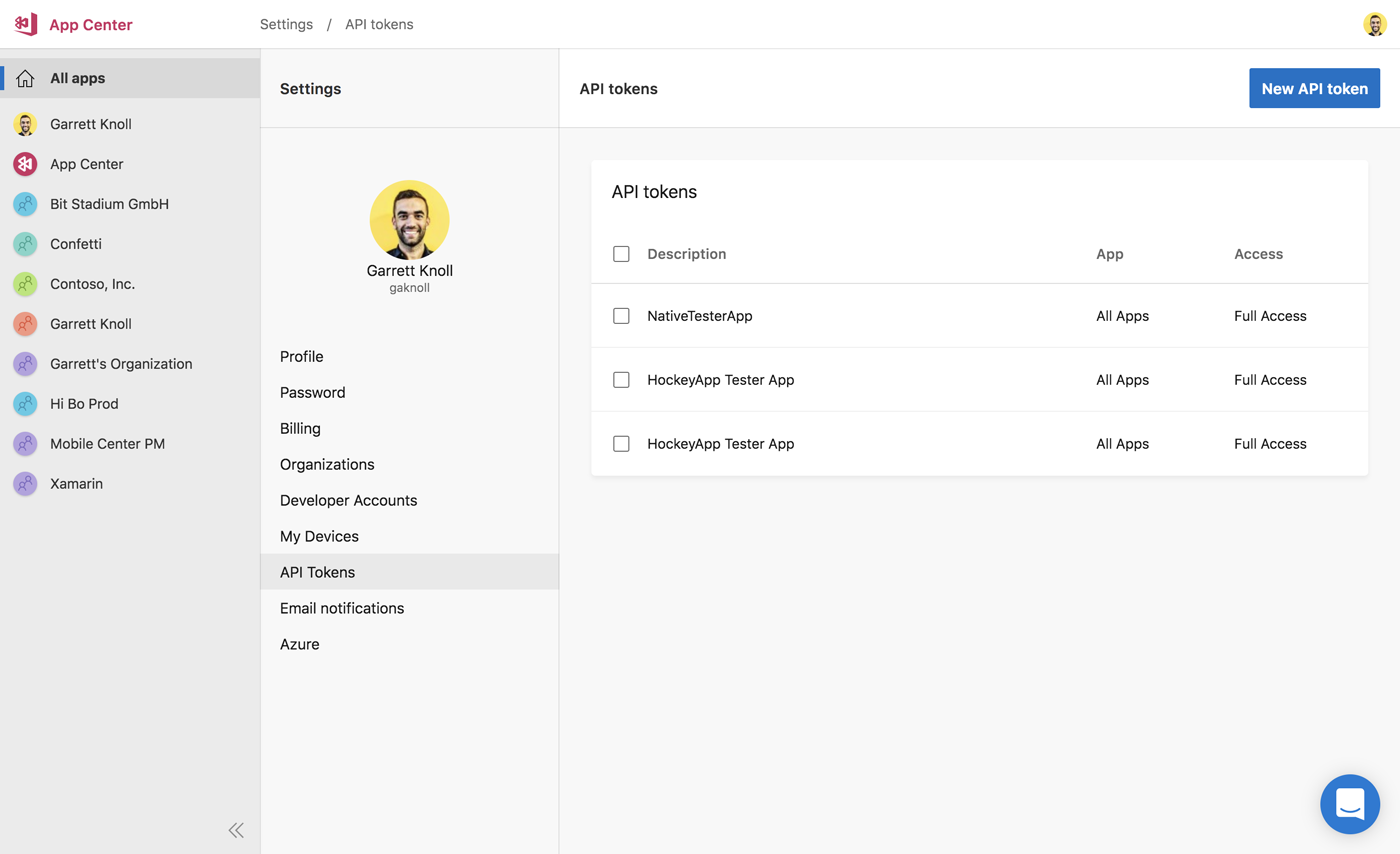
Create a new API token, making sure the API token has full access (so that Azure DevOps can create new releases for distribution), then copy the key. Switch back to Azure DevOps and the App Center Distribute task and create a new App Center Connection. If you're using the new YAML editor, follow the VSTS documentation to create a new connection. Paste the API key you copied from App Center, ensure that the server URL is https://api.appcenter.ms/v0.1, and give the connection a name.
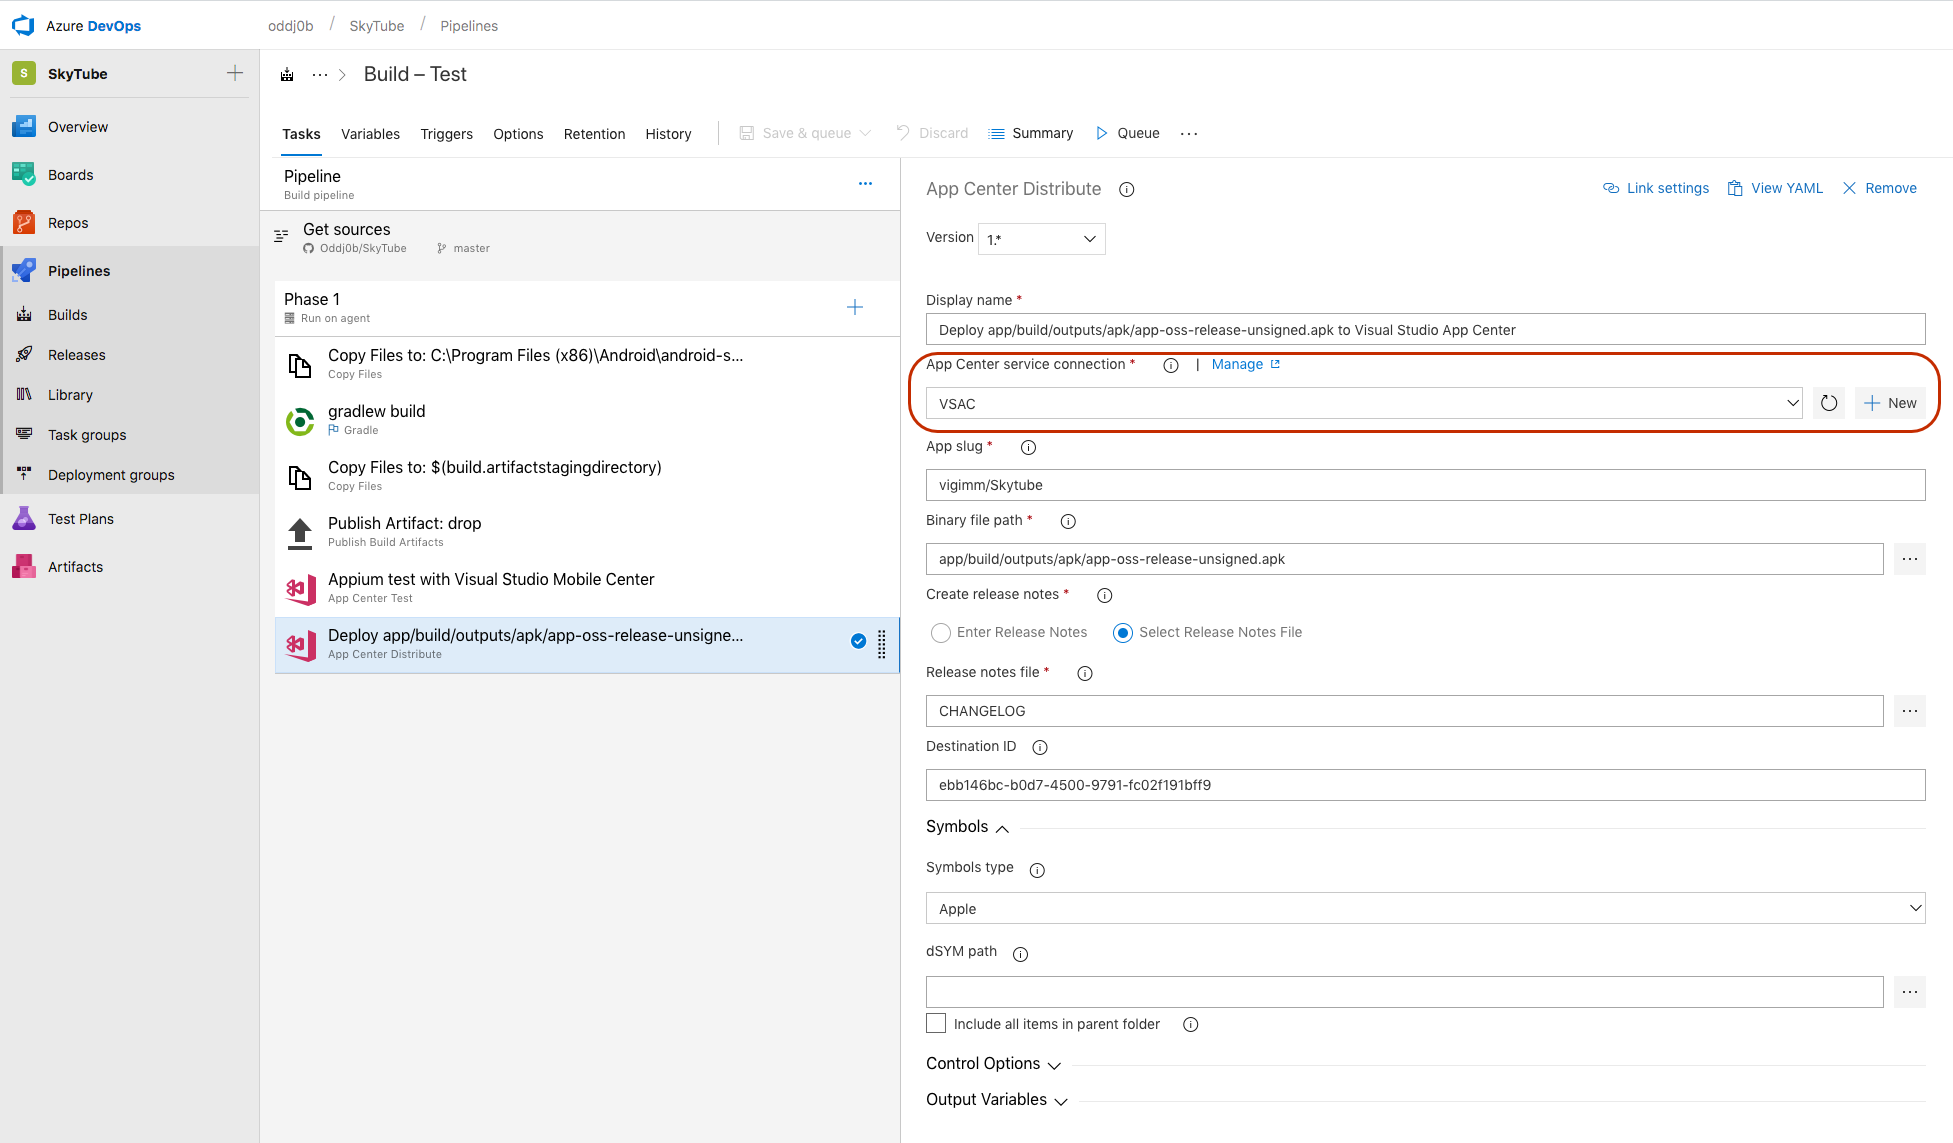
After you've created the connection between Azure DevOps and App Center, Azure DevOps needs to know which app you want to distribute the signed build to. You can find the app slug by going to your project on App Center, and extracting it based on the url for the app:
- App owned by user -
https://appcenter.ms/users/{USER_NAME}/apps/{APP_ID} - App owned by org -
https://appcenter.ms/orgs/{ORG_NAME}/apps/{APP_ID}
For example, the app slug for https://appcenter.ms/users/vigimm/apps/SkyTube is vigimm/Skytube.

Next, define the binary file path of where your apps built.
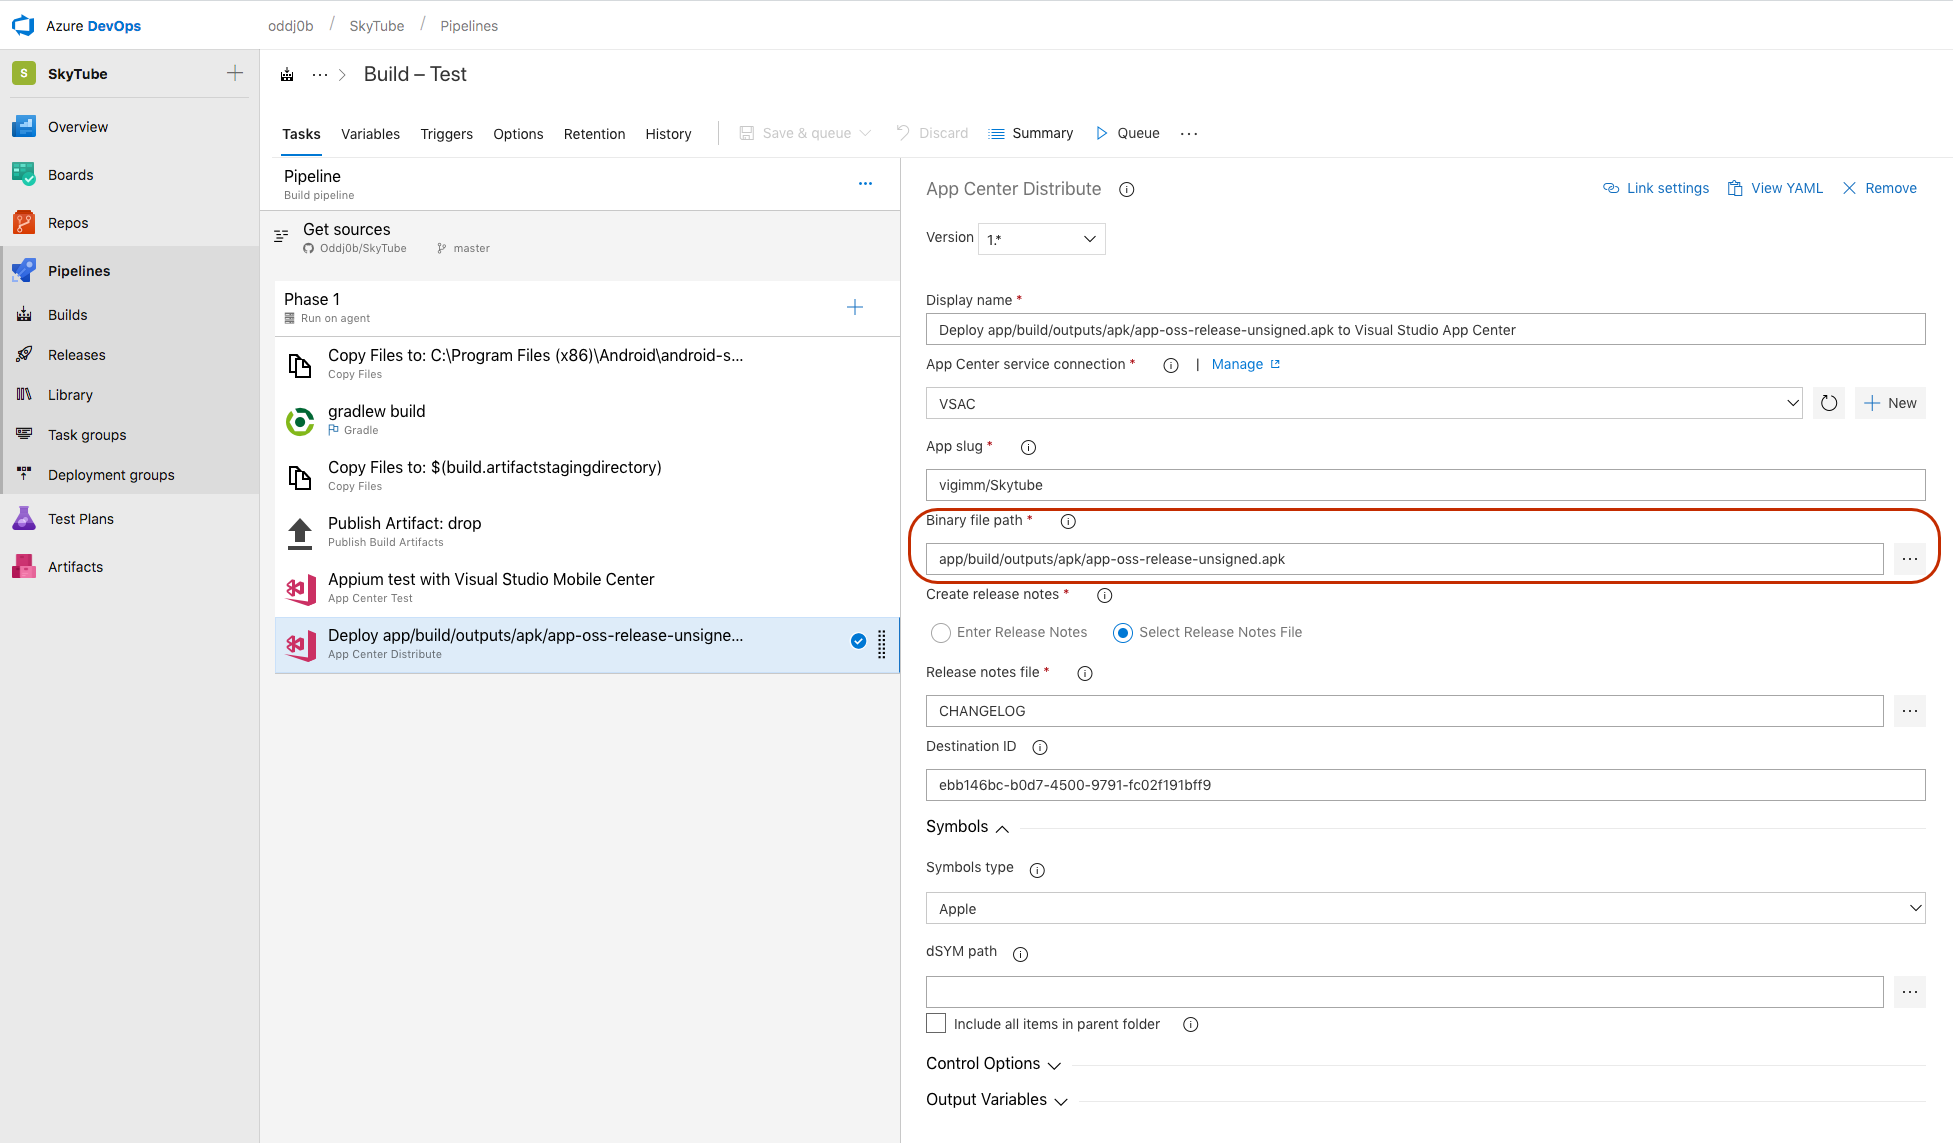
Finally, add release notes to your distribution.
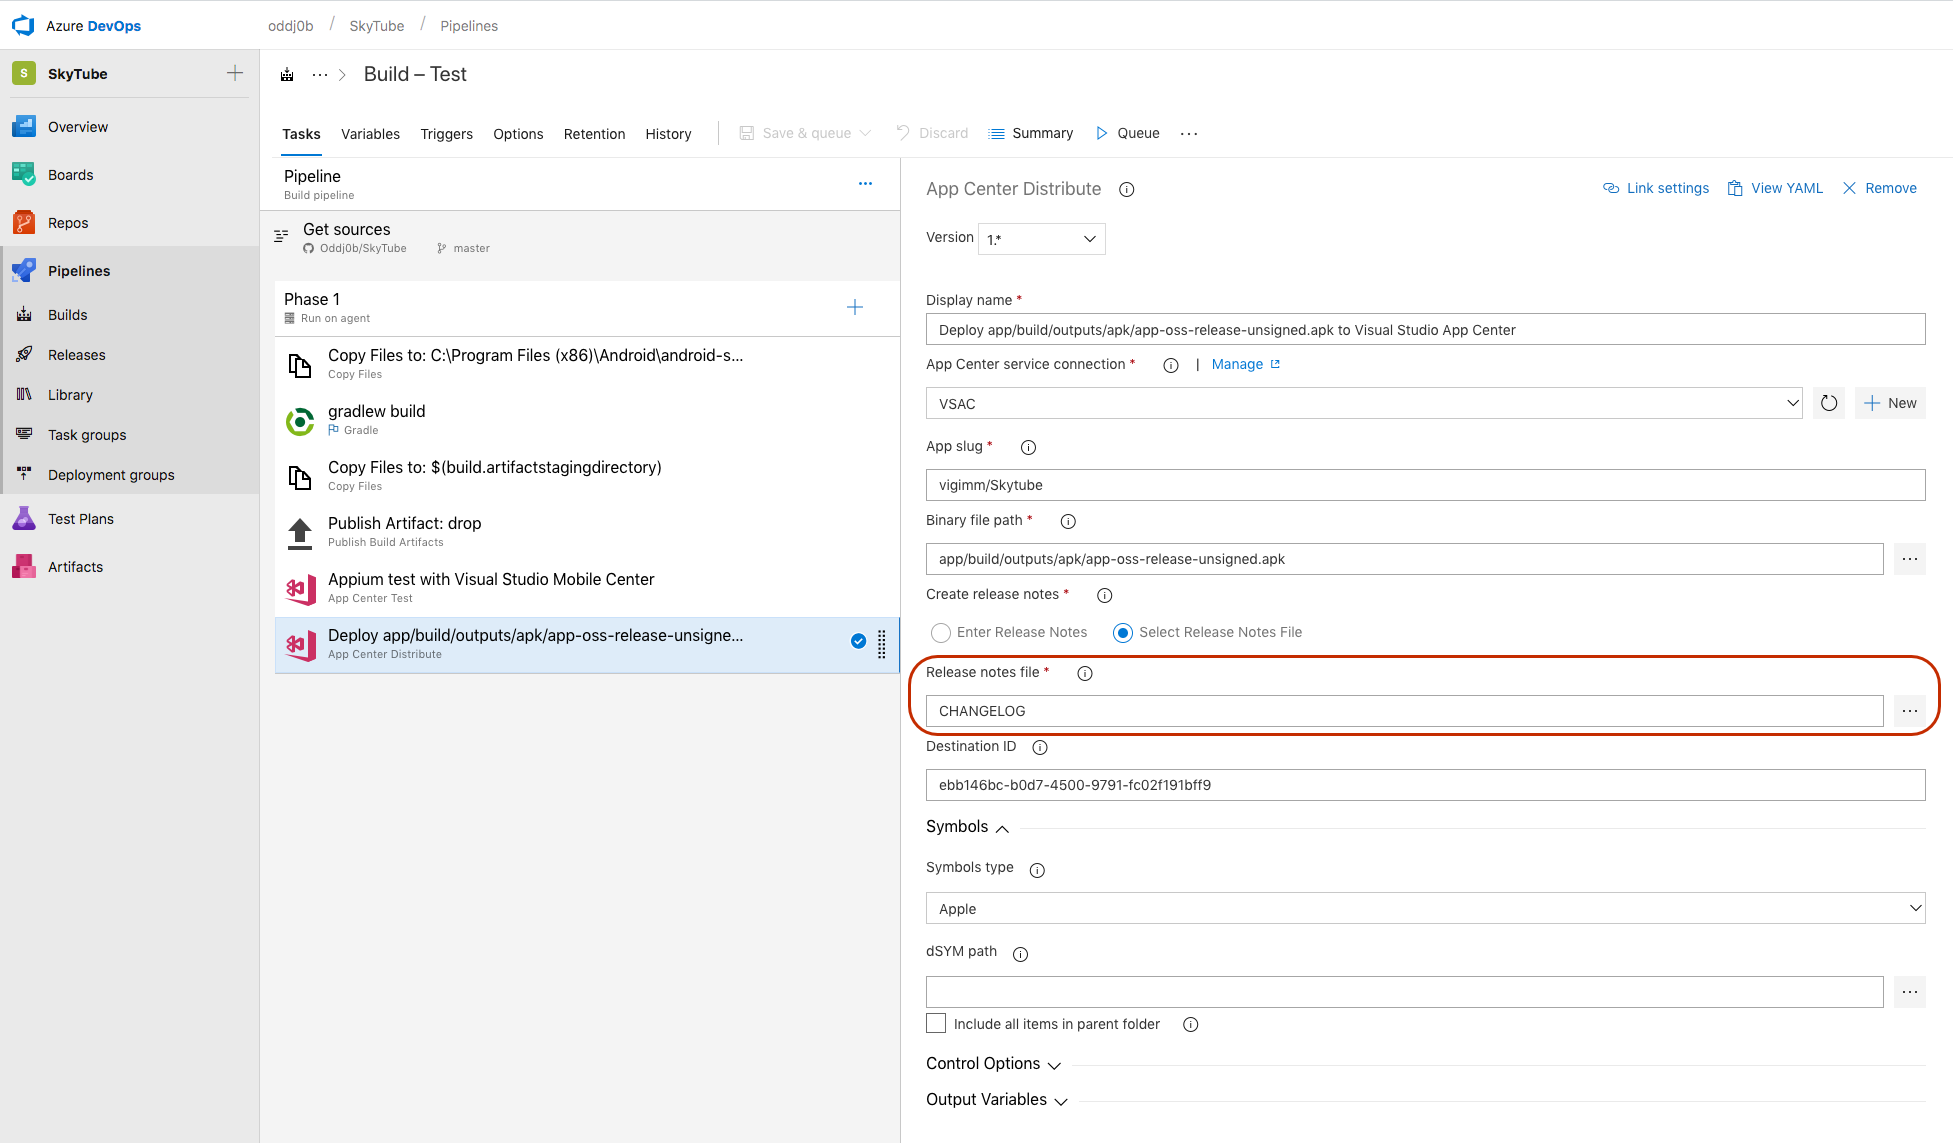
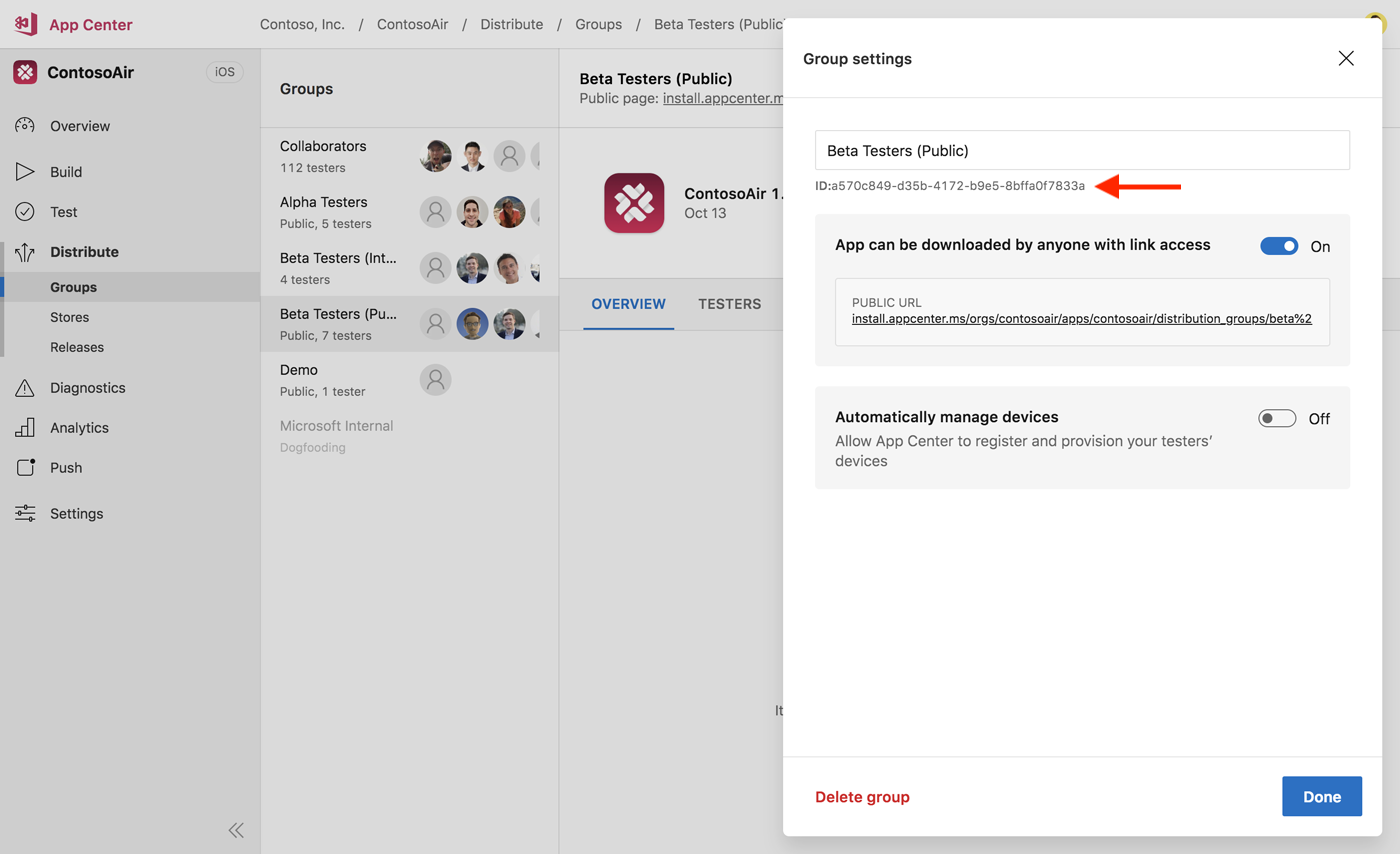
App Center deploys to your Collaborators group by default. Optionally, you can specify a destination ID or a store connection ID. The destination ID can be found by first selecting a distribution group, and then viewing the distribution group settings.
![]()
You'll find the destination ID below the distribution group name.
Obtain the Store connection ID using an API call; learn how to use the App Center API elsewhere in the documentation.
Call the API using the following link: https://openapi.appcenter.ms/#/distribute/stores_list for querying for the Store IDs. Below is an example of the results returned from the API call. You'll be using the value of the key ID for specifying a store as target.
[
  {
    "id": "ebb146bc-b0d7-4500-9791-fc02f191bff9",
    "name": "Alpha team",
    "type": "apple",
    "track": "testflight-external",
    "created_by": "5114c905-76db-49e5-8a47-58c34b33a38b",
    "service_connection_id": "2a85ad1e-b44e-d6fd-a85f-8daee62b54ed"
  },
  {
    "id": "10ba5942-1388-4b2a-869a-9de40d5c0cff",
    "name": "Production",
    "type": "apple",
    "track": "production",
    "created_by": "5114c905-76db-49e5-8a47-58c34b33a38b",
    "service_connection_id": "2a85ad1e-b44e-d6fd-a85f-8daee62b54ed"
  },
  {
    "id": "894dd821-9f16-44a3-b2a7-d513d226babb",
    "name": "iTunes Connect users",
    "type": "apple",
    "track": "testflight-internal",
    "created_by": "5114c905-76db-49e5-8a47-58c34b33a38b",
    "service_connection_id": "2a85ad1e-b44e-d6fd-a85f-8daee62b54ed"
  }
]
Distributing the signed builds to App Center
Once you finished configuring the App Center Distribute task, you can Save and Queue your build. If it's successful, your signed build will be uploaded to the releases of the defined destination.
Now that your signed build is in App Center, you're all set! You and your users can download the signed build directly from App Center, or further redistribute the release to another group.
Feedback
Coming soon: Throughout 2024 we will be phasing out GitHub Issues as the feedback mechanism for content and replacing it with a new feedback system. For more information see: https://aka.ms/ContentUserFeedback.
Submit and view feedback for