Store unstructured data using Azure Functions and Azure Cosmos DB
Azure Cosmos DB is a great way to store unstructured and JSON data. Combined with Azure Functions, Azure Cosmos DB makes storing data quick and easy with much less code than required for storing data in a relational database.
Note
At this time, the Azure Cosmos DB trigger, input bindings, and output bindings work with SQL API and Graph API accounts only.
In Azure Functions, input and output bindings provide a declarative way to connect to external service data from your function. In this article, learn how to update an existing function to add an output binding that stores unstructured data in an Azure Cosmos DB document.
Prerequisites
To complete this tutorial:
This topic uses as its starting point the resources created in Create your first function from the Azure portal. If you haven't already done so, please complete these steps now to create your function app.
Create an Azure Cosmos DB account
You must have an Azure Cosmos DB account that uses the SQL API before you create the output binding.
From the Azure portal menu or the Home page, select Create a resource.
Search for Azure Cosmos DB. Select Create > Azure Cosmos DB.
On the Create an Azure Cosmos DB account page, select the Create option within the Azure Cosmos DB for NoSQL section.
Azure Cosmos DB provides several APIs:
- NoSQL, for document data
- PostgreSQL
- MongoDB, for document data
- Apache Cassandra
- Table
- Apache Gremlin, for graph data
To learn more about the API for NoSQL, see Welcome to Azure Cosmos DB.
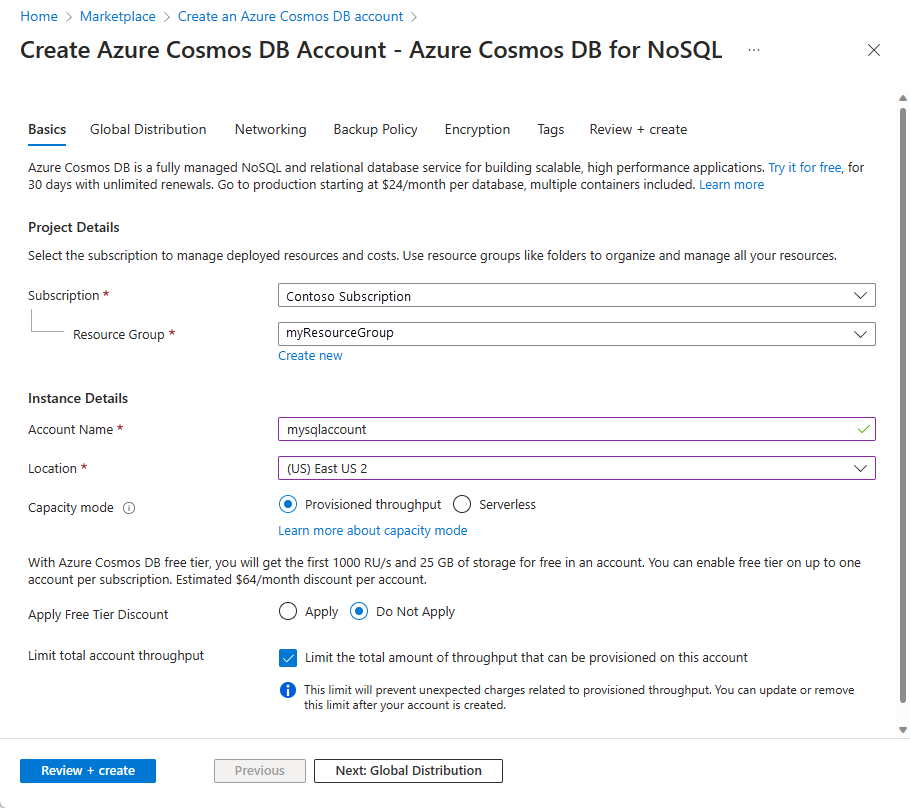
In the Create Azure Cosmos DB Account page, enter the basic settings for the new Azure Cosmos DB account.
Setting Value Description Subscription Subscription name Select the Azure subscription that you want to use for this Azure Cosmos DB account. Resource Group Resource group name Select a resource group, or select Create new, then enter a unique name for the new resource group. Account Name A unique name Enter a name to identify your Azure Cosmos DB account. Because documents.azure.com is appended to the name that you provide to create your URI, use a unique name. The name can contain only lowercase letters, numbers, and the hyphen (-) character. It must be 3-44 characters. Location The region closest to your users Select a geographic location to host your Azure Cosmos DB account. Use the location that is closest to your users to give them the fastest access to the data. Capacity mode Provisioned throughput or Serverless Select Provisioned throughput to create an account in provisioned throughput mode. Select Serverless to create an account in serverless mode. Apply Azure Cosmos DB free tier discount Apply or Do not apply With Azure Cosmos DB free tier, you get the first 1000 RU/s and 25 GB of storage for free in an account. Learn more about free tier. Limit total account throughput Selected or not Limit the total amount of throughput that can be provisioned on this account. This limit prevents unexpected charges related to provisioned throughput. You can update or remove this limit after your account is created. You can have up to one free tier Azure Cosmos DB account per Azure subscription and must opt in when creating the account. If you don't see the option to apply the free tier discount, another account in the subscription has already been enabled with free tier.
Note
The following options are not available if you select Serverless as the Capacity mode:
- Apply Free Tier Discount
- Limit total account throughput
In the Global Distribution tab, configure the following details. You can leave the default values for this quickstart:
Setting Value Description Geo-Redundancy Disable Enable or disable global distribution on your account by pairing your region with a pair region. You can add more regions to your account later. Multi-region Writes Disable Multi-region writes capability allows you to take advantage of the provisioned throughput for your databases and containers across the globe. Availability Zones Disable Availability Zones help you further improve availability and resiliency of your application. Note
The following options are not available if you select Serverless as the Capacity mode in the previous Basics page:
- Geo-redundancy
- Multi-region Writes
Optionally, you can configure more details in the following tabs:
- Networking. Configure access from a virtual network.
- Backup Policy. Configure either periodic or continuous backup policy.
- Encryption. Use either service-managed key or a customer-managed key.
- Tags. Tags are name/value pairs that enable you to categorize resources and view consolidated billing by applying the same tag to multiple resources and resource groups.
Select Review + create.
Review the account settings, and then select Create. It takes a few minutes to create the account. Wait for the portal page to display Your deployment is complete.
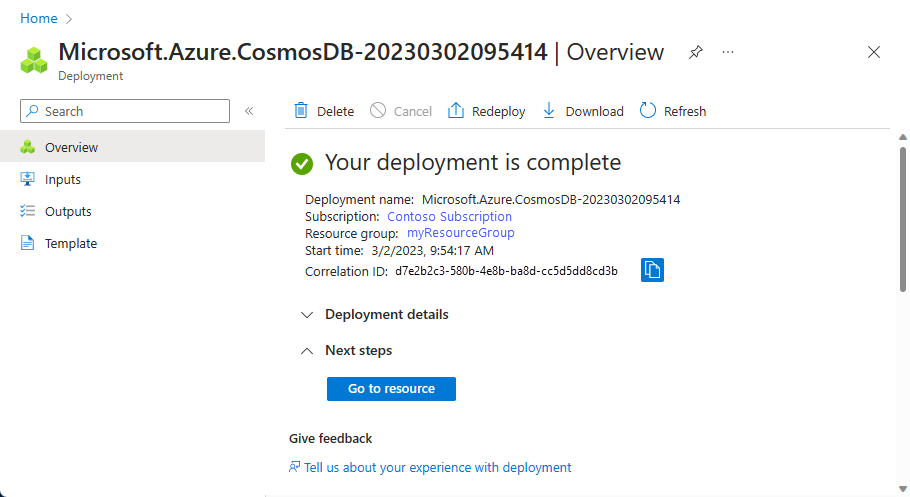
Select Go to resource to go to the Azure Cosmos DB account page.


Add an output binding
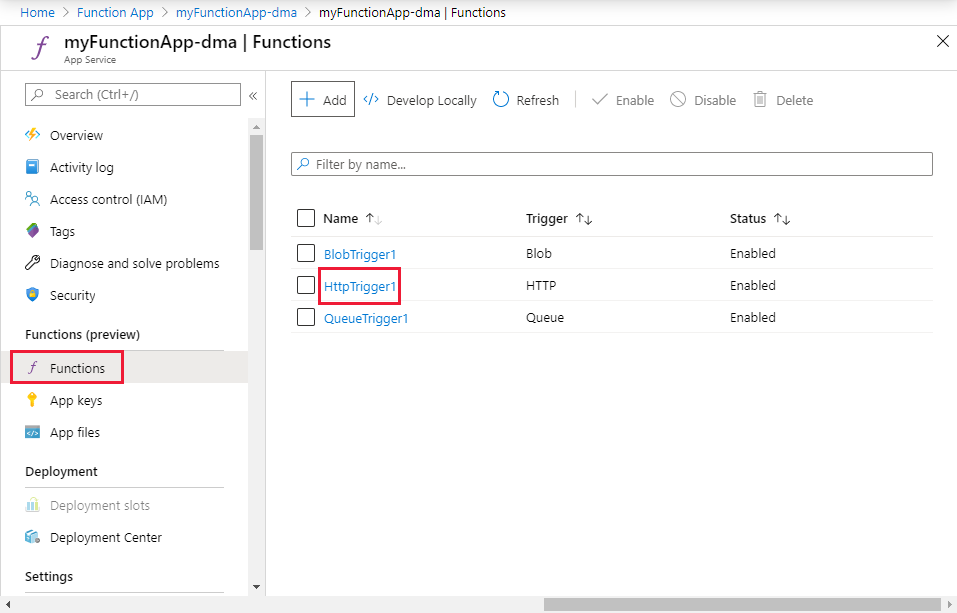
In the Azure portal, navigate to and select the function app you created previously.
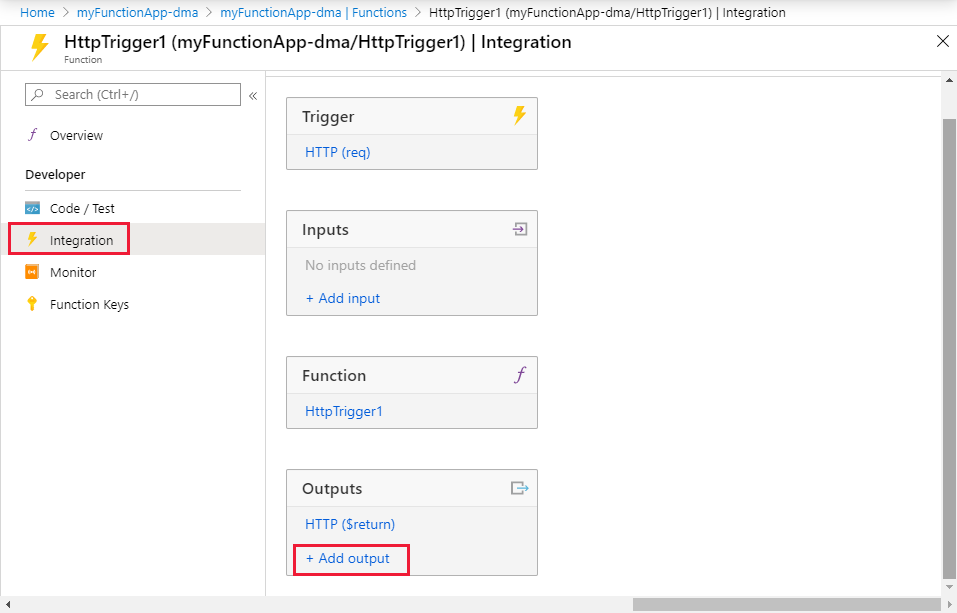
Select Functions, and then select the HttpTrigger function.
Select Integration and + Add output.
Use the Create Output settings as specified in the table:
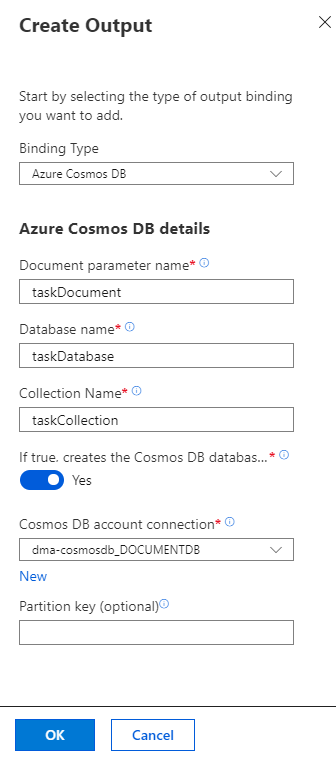
Setting Suggested value Description Binding Type Azure Cosmos DB Name of the binding type to select to create the output binding to Azure Cosmos DB. Document parameter name taskDocument Name that refers to the Azure Cosmos DB object in code. Database name taskDatabase Name of database to save documents. Collection name taskCollection Name of the database collection. If true, creates the Azure Cosmos DB database and collection Yes The collection doesn't already exist, so create it. Azure Cosmos DB account connection New setting Select New, then choose Azure Cosmos DB Account and the Database account you created earlier, and then select OK. Creates an application setting for your account connection. This setting is used by the binding to connection to the database. Select OK to create the binding.
Update the function code
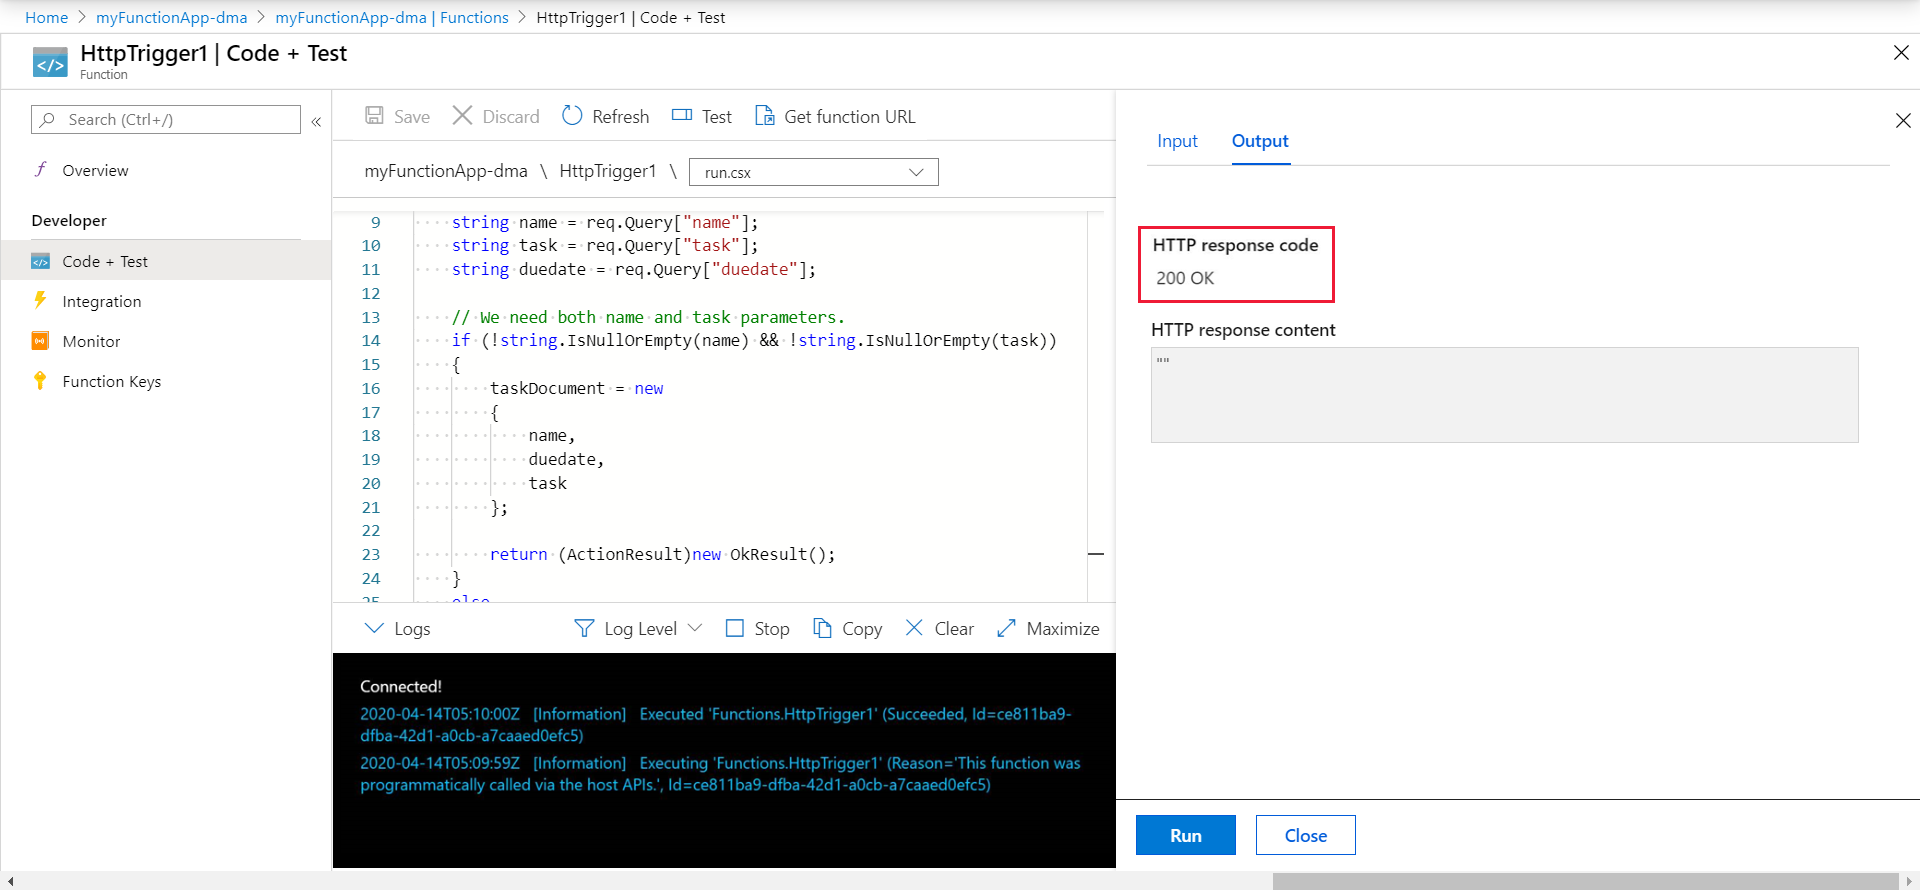
Replace the existing function code with the following code, in your chosen language:
Replace the existing C# function with the following code:
#r "Newtonsoft.Json"

using Microsoft.AspNetCore.Mvc;
using Microsoft.AspNetCore.Http;
using Microsoft.Extensions.Logging;

public static IActionResult Run(HttpRequest req, out object taskDocument, ILogger log)
{
    string name = req.Query["name"];
    string task = req.Query["task"];
    string duedate = req.Query["duedate"];

    // We need both name and task parameters.
    if (!string.IsNullOrEmpty(name) && !string.IsNullOrEmpty(task))
    {
        taskDocument = new
        {
            name,
            duedate,
            task
        };

        return (ActionResult)new OkResult();
    }
    else
    {
        taskDocument = null;
        return (ActionResult)new BadRequestResult();
    }
}
This code sample reads the HTTP Request query strings and assigns them to fields in the taskDocument object. The taskDocument binding sends the object data from this binding parameter to be stored in the bound document database. The database is created the first time the function runs.
Test the function and database
Select Test/Run. Under Query, select + Add parameter and add the following parameters to the query string:
nametaskduedate

Select Run and verify that a 200 status is returned.
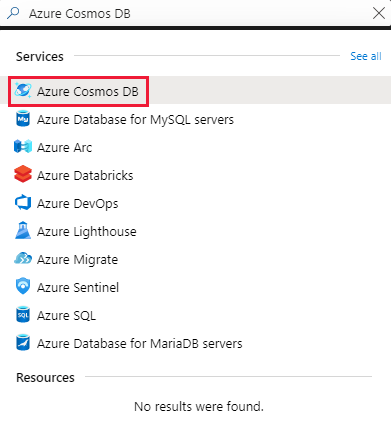
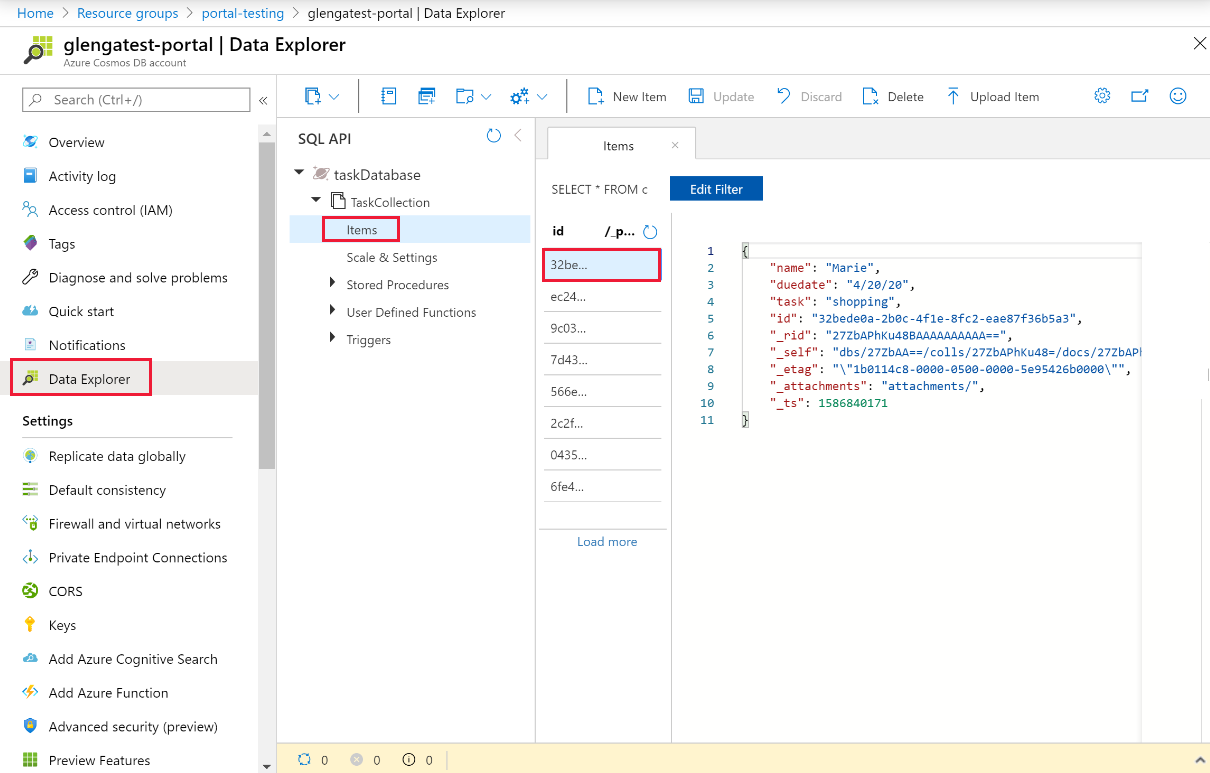
In the Azure portal, search for and select Azure Cosmos DB.
Choose your Azure Cosmos DB account, then select Data Explorer.
Expand the TaskCollection nodes, select the new document, and confirm that the document contains your query string values, along with some additional metadata.
You've successfully added a binding to your HTTP trigger to store unstructured data in an Azure Cosmos DB instance.
Clean up resources
In the preceding steps, you created Azure resources in a resource group. If you don't expect to need these resources in the future, you can delete them by deleting the resource group.
From the Azure portal menu or Home page, select Resource groups. Then, on the Resource groups page, select myResourceGroup.
On the myResourceGroup page, make sure that the listed resources are the ones you want to delete.
Select Delete resource group, type myResourceGroup in the text box to confirm, and then select Delete.
Next steps
For more information about binding to an Azure Cosmos DB instance, see Azure Functions Azure Cosmos DB bindings.
- Azure Functions triggers and bindings concepts
Learn how Functions integrates with other services. - Azure Functions developer reference
Provides more technical information about the Functions runtime and a reference for coding functions and defining triggers and bindings. - Code and test Azure Functions locally
Describes the options for developing your functions locally.
Feedback
Coming soon: Throughout 2024 we will be phasing out GitHub Issues as the feedback mechanism for content and replacing it with a new feedback system. For more information see: https://aka.ms/ContentUserFeedback.
Submit and view feedback for