Tutorial: Sentiment analysis with Azure AI services
In this tutorial, you'll learn how to easily enrich your data in Azure Synapse Analytics with Azure AI services. You'll use the Azure AI Language text analytics capabilities to perform sentiment analysis.
A user in Azure Synapse can simply select a table that contains a text column to enrich with sentiments. These sentiments can be positive, negative, mixed, or neutral. A probability will also be returned.
This tutorial covers:
- Steps for getting a Spark table dataset that contains a text column for sentiment analysis.
- Using a wizard experience in Azure Synapse to enrich data by using Text Analytics in Azure AI Language.
If you don't have an Azure subscription, create a free account before you begin.
Prerequisites
- Azure Synapse Analytics workspace with an Azure Data Lake Storage Gen2 storage account configured as the default storage. You need to be the Storage Blob Data Contributor of the Data Lake Storage Gen2 file system that you work with.
- Spark pool in your Azure Synapse Analytics workspace. For details, see Create a Spark pool in Azure Synapse.
- Pre-configuration steps described in the tutorial Configure Azure AI services in Azure Synapse.
Sign in to the Azure portal
Sign in to the Azure portal.
Create a Spark table
You'll need a Spark table for this tutorial.
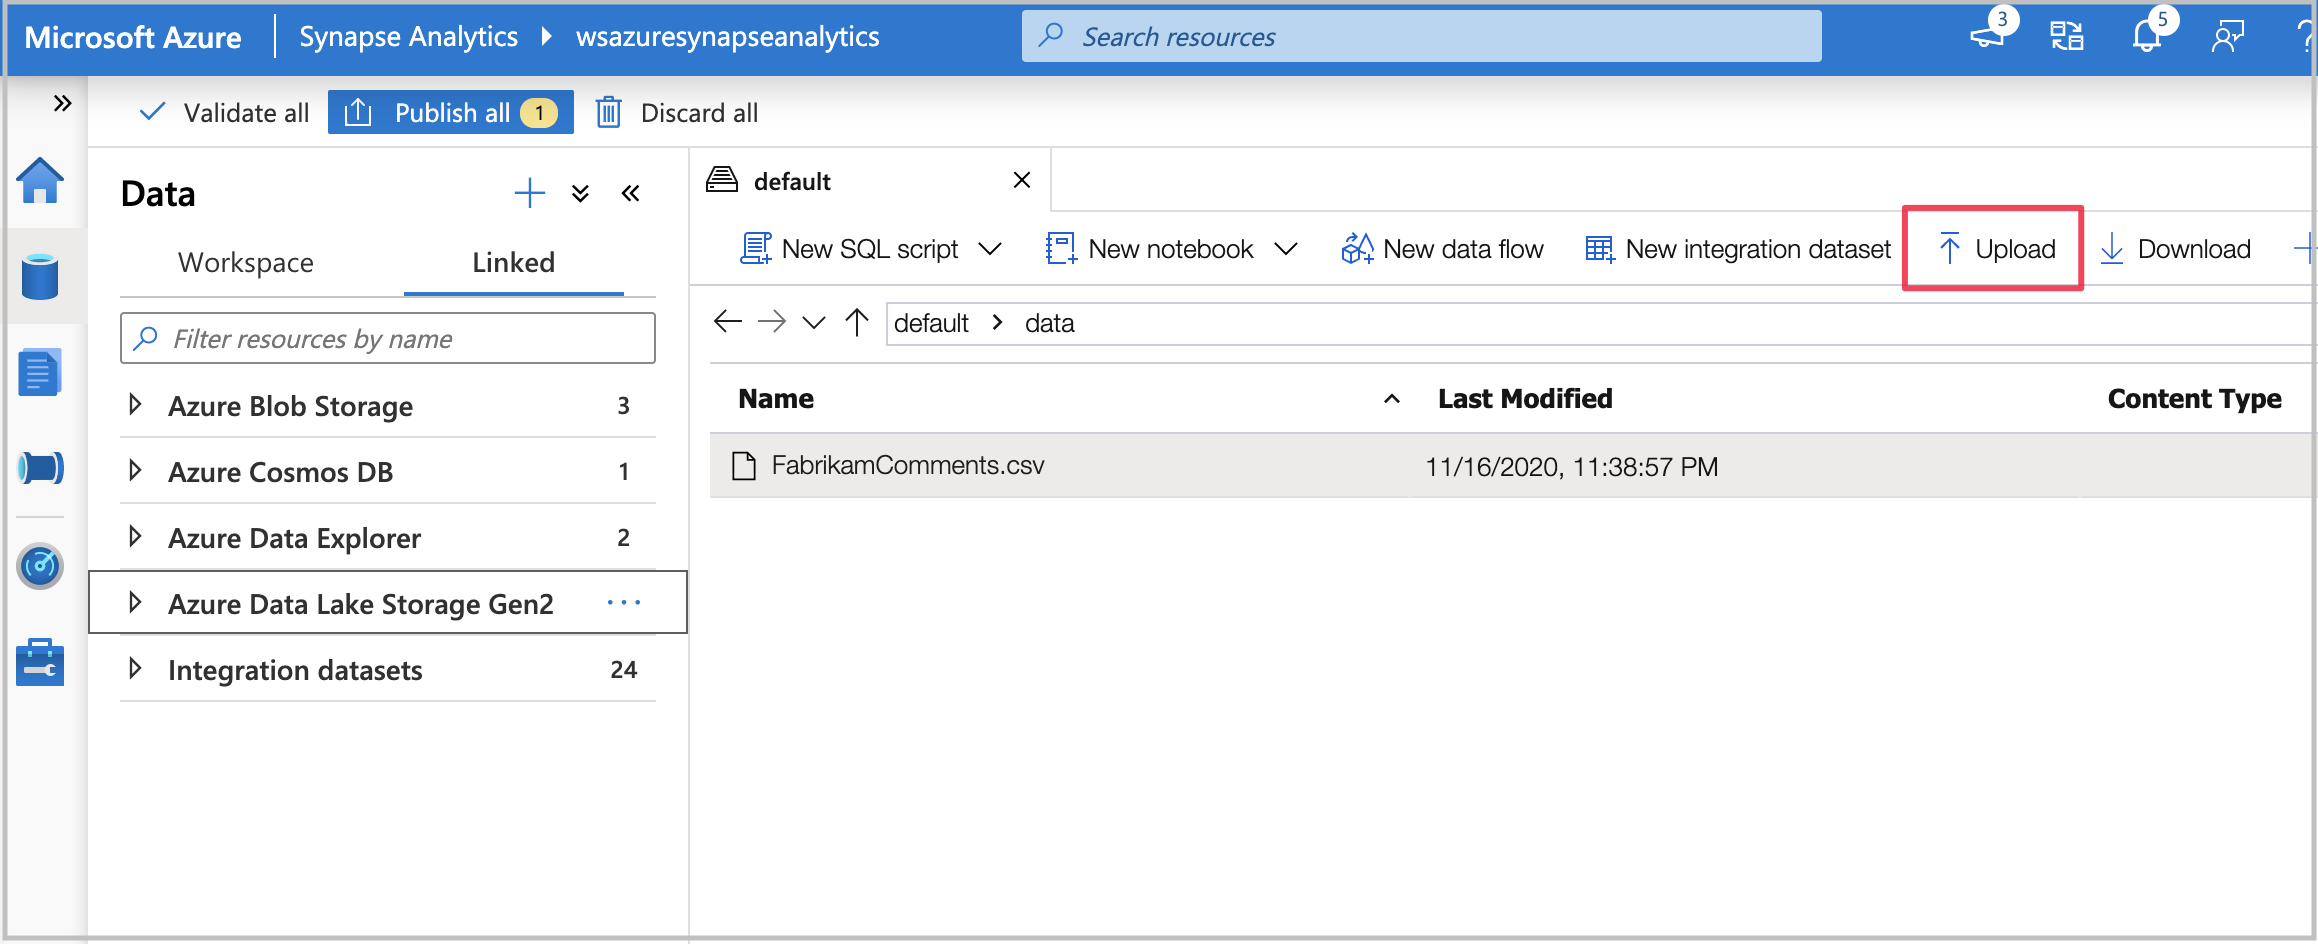
Download the FabrikamComments.csv file, which contains a dataset for text analytics.
Upload the file to your Azure Synapse storage account in Data Lake Storage Gen2.
Create a Spark table from the .csv file by right-clicking the file and selecting New Notebook > Create Spark table.
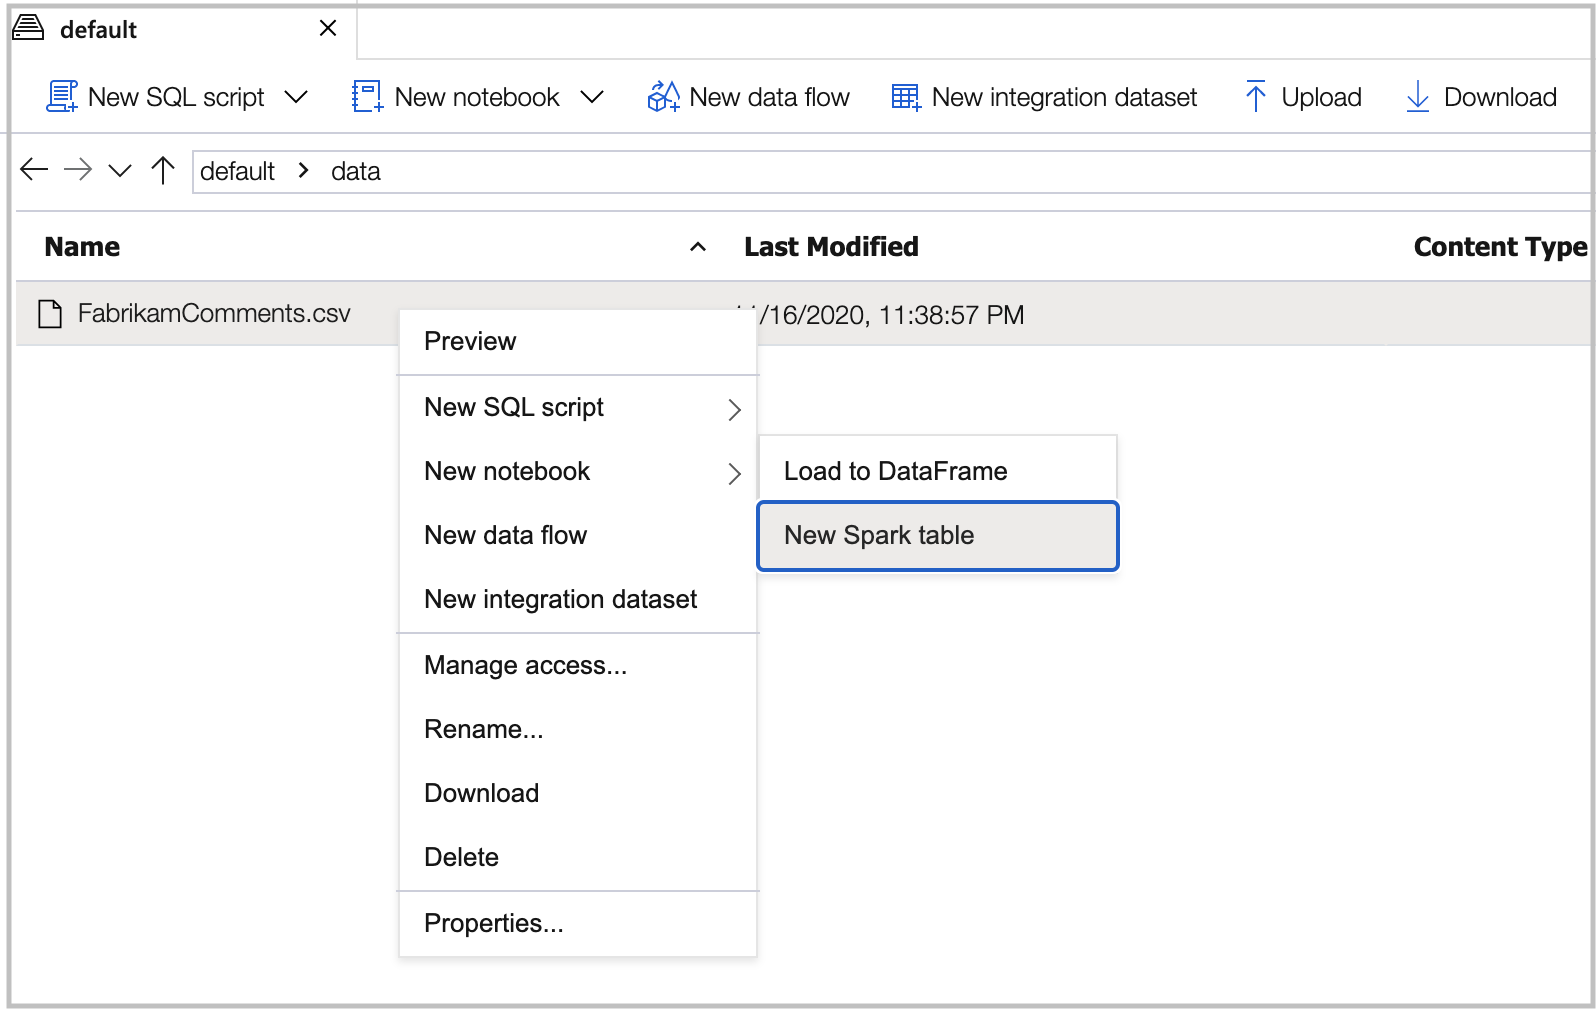
Name the table in the code cell and run the notebook on a Spark pool. Remember to set
header=True.
%%pyspark
df = spark.read.load('abfss://default@azuresynapsesa.dfs.core.windows.net/data/FabrikamComments.csv', format='csv'
## If a header exists, uncomment the line below
, header=True
)
df.write.mode("overwrite").saveAsTable("default.YourTableName")
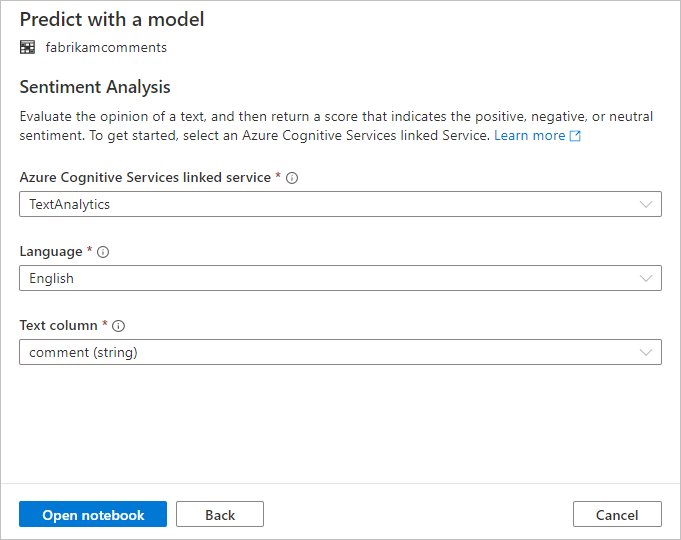
Open the Azure AI services wizard
Right-click the Spark table created in the previous procedure. Select Machine Learning > Predict with a model to open the wizard.
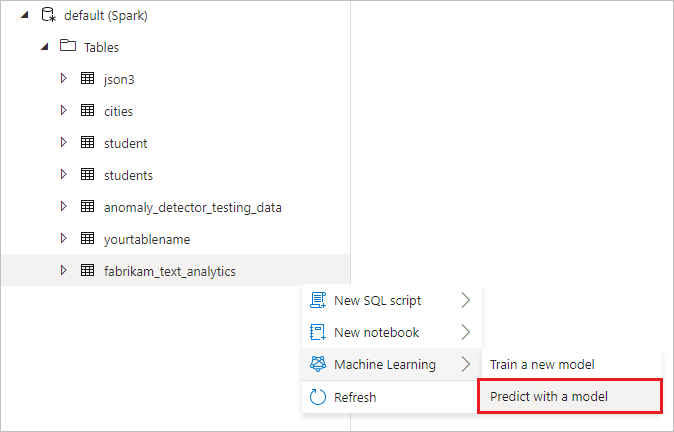
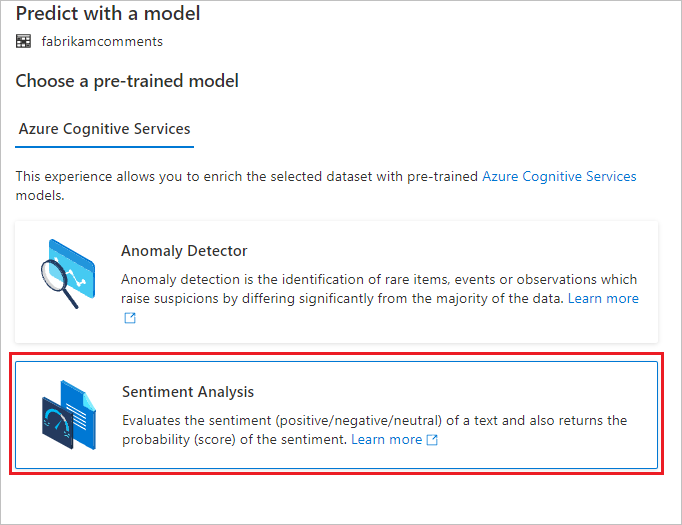
A configuration panel appears, and you're asked to select a pre-trained model. Select Sentiment Analysis.
Configure sentiment analysis
Next, configure the sentiment analysis. Select the following details:
- Azure Cognitive Services linked service: As part of the prerequisite steps, you created a linked service to your Azure AI service. Select it here.
- Language: Select English as the language of the text that you want to perform sentiment analysis on.
- Text column: Select comment (string) as the text column in your dataset that you want to analyze to determine the sentiment.
When you're done, select Open notebook. This generates a notebook for you with PySpark code that performs the sentiment analysis with Azure AI services.
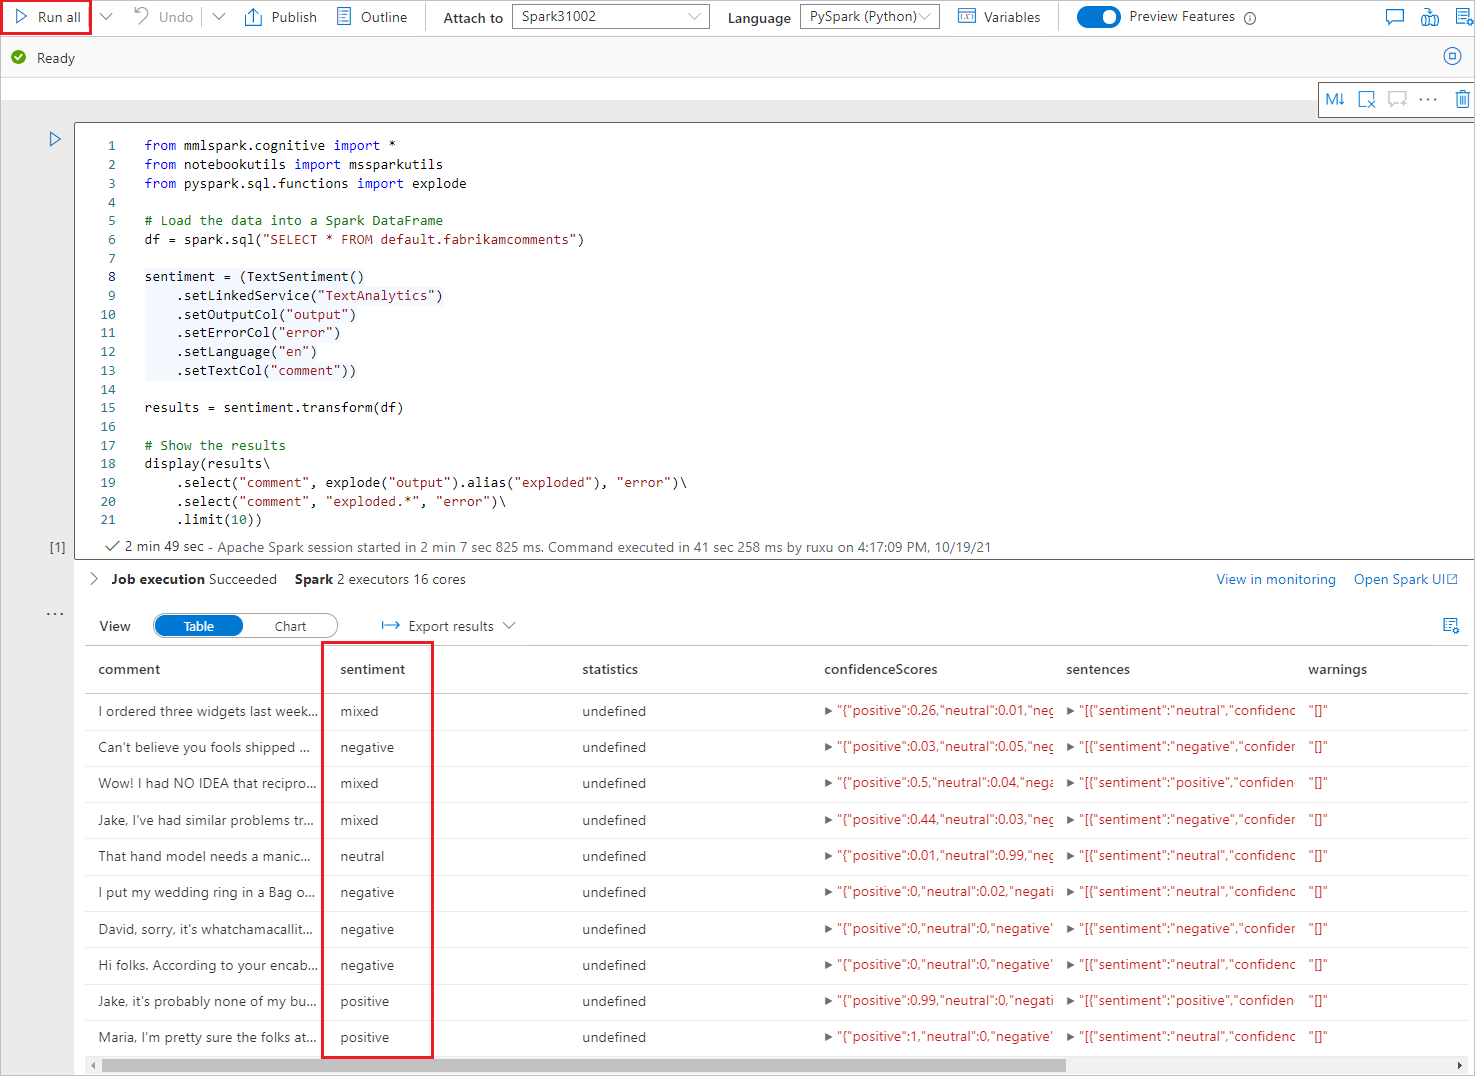
Run the notebook
The notebook that you just opened uses the SynapseML library to connect to Azure AI services. The Azure AI services linked service that you provided allow you to securely reference your Azure AI service from this experience without revealing any secrets.
You can now run all cells to enrich your data with sentiments. Select Run all.
The sentiments are returned as positive, negative, neutral, or mixed. You also get probabilities per sentiment. Learn more about sentiment analysis in Azure AI services.
Next steps
Feedback
Coming soon: Throughout 2024 we will be phasing out GitHub Issues as the feedback mechanism for content and replacing it with a new feedback system. For more information see: https://aka.ms/ContentUserFeedback.
Submit and view feedback for