Features in Configuration Manager technical preview version 2003
Applies to: Configuration Manager (technical preview branch)
This article introduces the features that are available in the technical preview for Configuration Manager, version 2003. Install this version to update and add new features to your technical preview site.
Review the technical preview article before installing this update. That article familiarizes you with the general requirements and limitations for using a technical preview, how to update between versions, and how to provide feedback.
The following sections describe the new features to try out in this version:
Onboard Configuration Manager clients to Microsoft Defender for Endpoint via the Microsoft Intune admin center
You can now deploy Microsoft Defender ATP Endpoint Detection and Response (EDR) onboarding policies to Configuration Manager managed clients. These clients don't require Microsoft Entra ID or MDM enrollment, and the policy is targeted at ConfigMgr collections rather than Microsoft Entra groups.
This capability allows customers to manage both Intune MDM and Configuration Manager client EDR/ATP onboarding from a single management experience - the Microsoft Intune admin center.
Prerequisites
- Access to the Microsoft Intune admin center.
- An E5 license for Microsoft Defender for Endpoint.
- A Microsoft Intune tenant attached hierarchy.
Try it out!
Try to complete the tasks. Then send Feedback with your thoughts on the feature.
Make Configuration Manager collections available to assign Microsoft Defender for Endpoint policies
- From a Configuration Manger console connected to your top-level site, right-click on a device collection and select Properties.
- On the Cloud Sync tab, enable the option to Make this collection available to assign Microsoft Defender ATP policies in Intune.
- The option is disabled if your hierarchy isn't tenant attached.
Create Microsoft Defender for Endpoint policy for Configuration Manager collections
Open a web browser and go to
https://aka.ms/ATPTenantAttachPreview.Select Endpoint detection and response then select Create Policy.
Use the following settings for the profile, then click Create when done:
- Platform: Windows 10 and later
- Profile: *Windows 10 Config Manager

Supply a Name and Description then click Next.
Choose your Configuration settings then click Next.
Under Assignments, click Select collections to include. You'll see a list of your available Configuration Manager collections. Select your collections and click Next when done.

Click Create once you have finished reviewing your settings under Review + create.


Track configuration item remediations
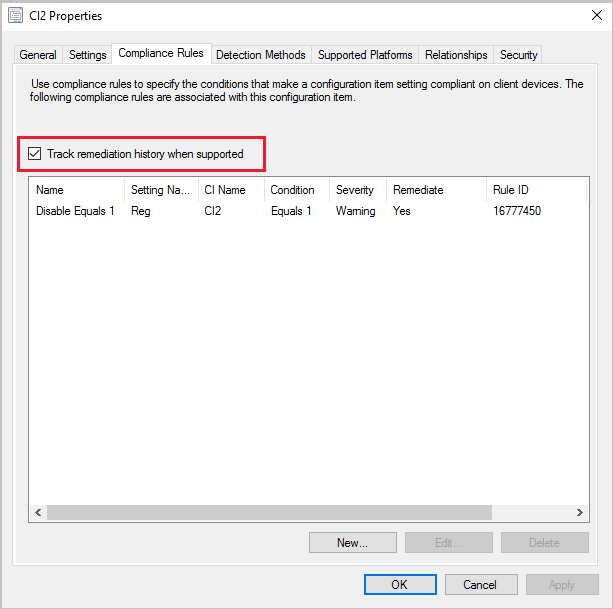
You can now Track remediation history when supported on your configuration item compliance rules. When this option is enabled, any remediation that occurs on the client for the configuration item generates a state message. The history is stored in the Configuration Manager database.
Build custom reports to view the remediation history by using the public view v_CIRemediationHistory. The RemediationDate column is the time, in UTC, the client ran the remediation. The ResourceID identifies the device. Building custom reports with the v_CIRemediationHistory view helps you:
- Identify possible issues with your remediation scripts
- Find trends in remediations such as a client that is consistently non-compliant each evaluation cycle.
Try it out!
Try to complete the tasks. Then send Feedback with your thoughts on the feature.
Enable the Track remediation history when supported option
- For new configuration items, add the Track remediation history when supported option in the Compliance Rules tab when you create a new setting on the wizard's Settings page.
- For existing configuration items, add the Track remediation history when supported option on the Compliance Rules tab in the configuration item Properties.

Show boundary groups for devices
To help you better troubleshoot device behaviors with boundary groups, you can now view the boundary groups for specific devices. In the Devices node or when you show the members of a Device Collection, add the new Boundary Group(s) column to the list view.
If a device is in more than one boundary group, the value is a comma-separated list of boundary group names.
The data updates when the client makes a location request to the site, or at most every 24 hours.
If a client is roaming and not a member of a boundary group, the value is blank.
Note
This information is site data and only available on primary sites. You won't see a value for this column when you connect the Configuration Manager to a central administration site.
New feedback wizard
The Configuration Manager console now has a new wizard for sending feedback. The redesigned wizard improves the workflow with better guidance about how to submit good feedback. It includes the following changes:
- It requires a description of the feedback
- Select from a list of issue categories
- It includes tips for how to write useful feedback
- It adds a new page to attach files
- The summary page displays your transaction ID, which also includes any error messages with suggestions to resolve them.
Note
This new wizard is only in the Configuration Manager console. Support Center has a similar feedback experience, which doesn't change in this release.
Prerequisites
Update the Configuration Manager console to the latest version
On the computer where you run the console, allow it to access the following internet endpoints to send diagnostic data to Microsoft:
https://*.events.data.microsoft.com/https://*.blob.core.windows.net/
How to send a smile
To send feedback on something that you like about Configuration Manager:
In the upper-right corner of the Configuration Manager console, select the smiley face icon. Choose Send a smile.
On the first page of the Provide feedback wizard:
Tell us what you liked: Enter a detailed description of why you're filing this feedback.
You can contact me about this feedback: To allow Microsoft to contact you about this feedback if necessary, select this option and specify a valid email address.
Include screenshot: Select this option to add a screenshot. By default it uses the full screen, select Refresh to capture the latest image. Select Browse to select a different image file.
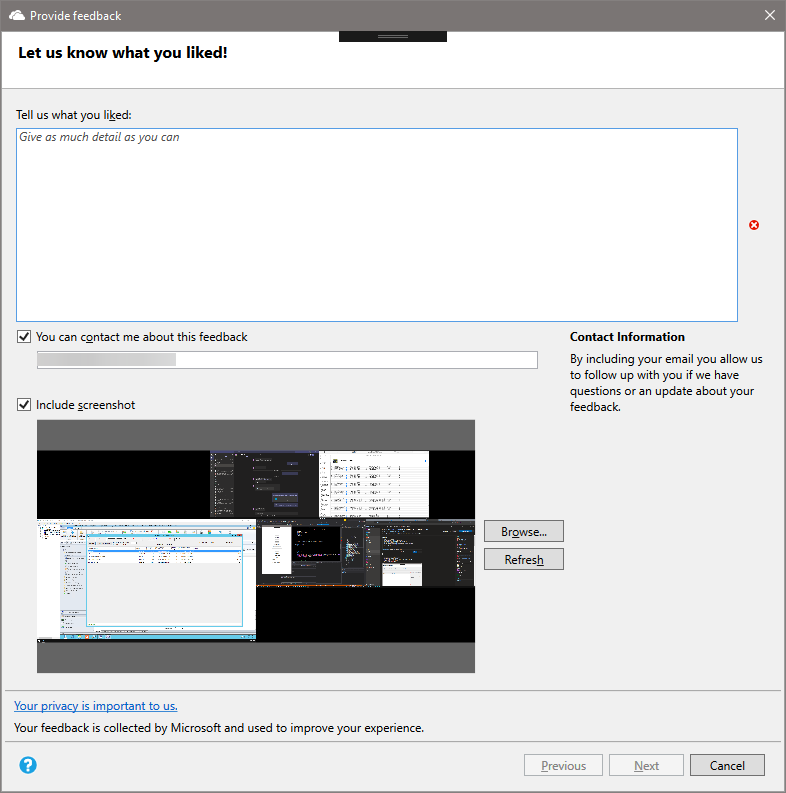
Select Next to send the feedback. You may see a progress bar as it packages the content to send.
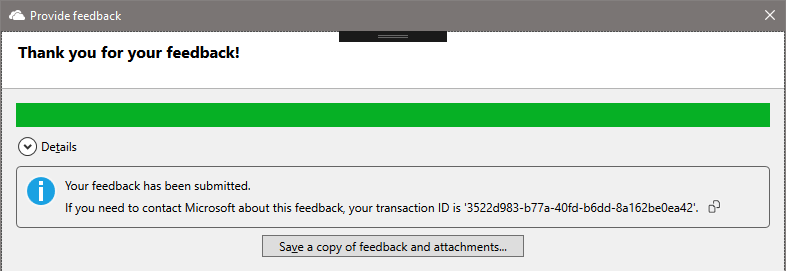
When the progress is complete, select Details to see the transaction ID or any errors that occurred.


How to send a frown
Before you file a frown, prepare your information:
If you have multiple issues, send a separate report for each issue. Don't include multiple issues in a single report.
Provide clear details on the issue. Share any research that you've gathered so far. More detailed information is better to help Microsoft investigate and diagnose the issue.
Do you need immediate assistance? If so, contact Microsoft support for urgent issues. For more information, see Support options and community resources.
Is this feedback a suggestion to improve the product? If so, share a new idea. For more information, see Send a suggestion.
Is the issue with the product documentation? You can file feedback directly on the documentation. For more information, see Doc feedback.
To send feedback on something that you didn't like about the Configuration Manager product:
In the upper-right corner of the Configuration Manager console, select the smiley face icon. Choose Send a frown.
On the first page of the Provide feedback wizard:
Issue category: Select a category that's most appropriate for your issue.
Describe your issue with as much detail as possible.
You can contact me about this feedback: To allow Microsoft to contact you about this feedback if necessary, select this option and specify a valid email address.

On the Add more details page of the wizard:
Include screenshot: Select this option to add a screenshot. By default it uses the full screen, select Refresh to capture the latest image. Select Browse to select a different image file.
Include additional files: Select Attach and add log files, which can help Microsoft better understand the issue. To remove all attached files from your feedback, select Clear all. To remove individual files, select the delete icon to the right of the file name.
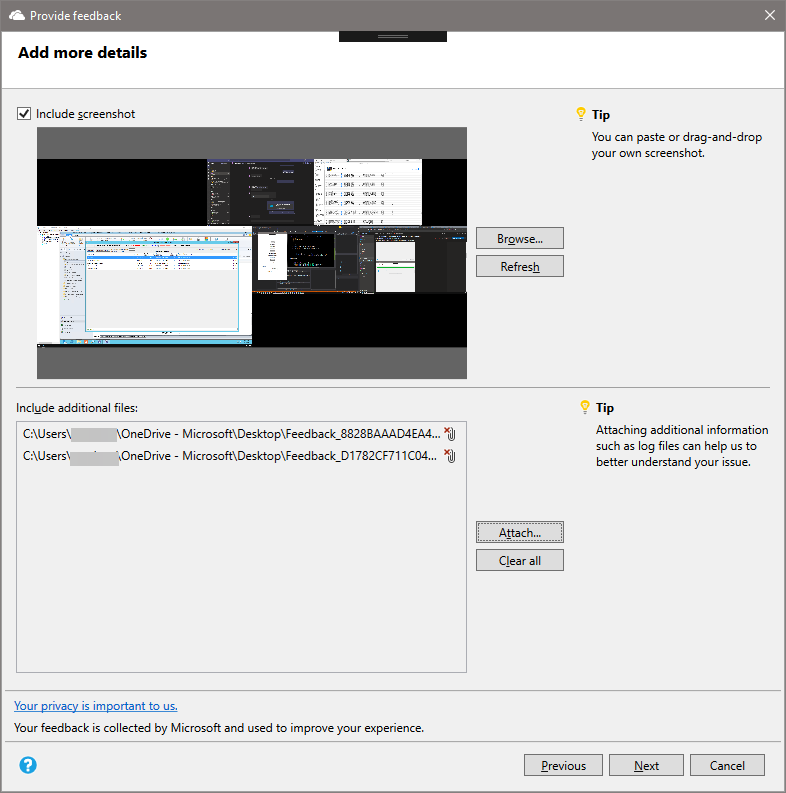
Select Next to send the feedback. You may see a progress bar as it packages the content to send.
When the progress is complete, select Details to see the transaction ID or any errors that occurred.


If you don't have internet connectivity:
The Provide feedback wizard still packages your feedback and files.
The final summary page shows an error that it couldn't send the feedback.
Select the option to Save a copy of feedback and attachments. For more information on how to send it to Microsoft, see Send feedback that you saved for later submission.
If the Provide feedback wizard successfully submits your feedback, but fails to send the attached files, use the same instructions for no internet connectivity.
Improvements to Microsoft Edge Management dashboard
The Microsoft Edge Management dashboard has a new Preferred browser by device chart. The chart gives you insights into which browser was most used by each device over the last seven days. If a user has two devices, they're counted separately since the primary browser used on each device might vary.
Prerequisites
Enable the following properties in the below hardware inventory classes for the new Preferred browser by device chart:
- SMS_BrowserUsage (SMS_BrowserUsage)
- BrowserName
- UsagePercentage
View the dashboard
From the Software Library workspace, click Microsoft Edge Management to see the dashboard's new chart.

Improvements to CMPivot
Configuration Manager has had the ability to run CMPivot feature from a device collection and do real-time querying on devices. We've now added the ability to run CMPivot from an individual device. This change makes it easier for people such as help desk technicians to create CMPivot queries for an individual device.
Try it out!
Try to complete the tasks. Then send Feedback with your thoughts on the feature.
You can start CMPivot for an individual device in two ways. The device name is at the top of the CMPivot window so you can differentiate it from others. To start CMPivot for a device:
Select an individual device in a device collection and click Start CMPivot. There's no need to select the entire device collection.
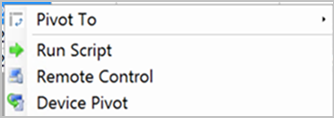
Within an existing CMPivot operation, right-click a device in the device output and pivot using the Device Pivot option.
- This action launches a separate CMPivot instance on that individually selected device.

Query for feedback sent to Microsoft
Configuration Manager technical preview branch version 2001.2 included a new status message, which has details about feedback sent from the site. To help you more easily find those status messages, this release includes a query, Feedback sent to Microsoft.
In the Configuration Manager console, go to the Monitoring workspace.
Expand the Queries node, and select the query Feedback sent to Microsoft.
In the ribbon, on the Home tab, in the Query group, select Run.
Known issue with query
This query doesn't appear when you upgrade from a previous technical preview branch version. To work around this issue, run the following SQL script on your site database:
IF EXISTS (SELECT * FROM Queries WHERE QueryKey = N'SMS595')
BEGIN
DELETE FROM Queries WHERE QueryKey = N'SMS595'
END

INSERT INTO Queries (QueryKey, Name, Comments, Architecture, Lifetime, WQL) VALUES ('SMS595', N'Feedback sent to Microsoft', N'Configuration Manager feedback sent to Microsoft for this hierarchy.', 'SMS_StatusMessage', 1, 'select stat.*, ins.*, att1.*, stat.Time from  SMS_StatusMessage as stat left join SMS_StatMsgInsStrings as ins on ins.RecordID = stat.RecordID left join SMS_StatMsgAttributes as att1 on att1.RecordID = stat.RecordID where stat.Time >= ##PRM:SMS_StatusMessage.Time## and (stat.MessageID = 53900 or stat.MessageID = 53901) order by stat.Time DESC')
New SDK method for task sequence progress
Some customers build custom task sequence interfaces using the IProgressUI::ShowMessage method, but it doesn't return a value for the user's response. Based on your feedback, this release adds the IProgressUI::ShowMessageEx method. This new method is similar to the existing method, but also includes a new integer result variable, pResult. The value of this variable is a standard Windows message box return value.
The following PowerShell script sample shows how to use this method:
$Message = "Can you see this message?"
$Title = "Contoso IT"
$Type = 4 # Yes/No
$Output = 0

$TaskSequenceProgressUi = New-Object -ComObject "Microsoft.SMS.TSProgressUI"
$TaskSequenceProgressUi.ShowMessageEx($Message, $Title, $Type, [ref]$Output)

$TSEnv = New-Object -ComObject "Microsoft.SMS.TSEnvironment"
if ($Output -eq 6) {
$TSEnv.Value("TS-UserPressedButton") = 'Yes'
}
You can use a script like this in the Run PowerShell Script step in the task sequence. If the user selects Yes in the custom window, the script creates a custom task sequence variable TS-UserPressedButton with a value of Yes. You can then use this task sequence variable in other scripts or as a condition on other task sequence steps.
Improvements to OS deployment
This release includes the following improvements to OS deployment:
The Check Readiness step now includes a check to determine if the device uses UEFI, Computer is in UEFI mode.
It also includes a new task sequence variable, _TS_CRUEFI. This read-only variable supports the following values:
0: BIOS1: UEFI
If you enable the task sequence progress window to show more detailed progress information, it now doesn't count enabled steps in a disabled group. This change helps make the progress estimate more precise.
Next steps
For more information about installing or updating the technical preview branch, see Technical preview.
For more information about the different branches of Configuration Manager, see Which branch of Configuration Manager should I use?.
Feedback
Coming soon: Throughout 2024 we will be phasing out GitHub Issues as the feedback mechanism for content and replacing it with a new feedback system. For more information see: https://aka.ms/ContentUserFeedback.
Submit and view feedback for