Customize the look and feel of a copilot
Important
Power Virtual Agents capabilities and features are now part of Microsoft Copilot Studio following significant investments in generative AI and enhanced integrations across Microsoft Copilot.
Some articles and screenshots may refer to Power Virtual Agents while we update documentation and training content.
Your copilot's look and feel is defined by its canvas. To customize your copilot, you must customize its canvas. You can customize the canvas in two ways, depending on the complexity of the customizations:
Customize the default canvas with JavaScript styling in the HTML code of the website where you deploy your copilot.
This approach is useful if you want to make small customizations without investing in code development.Use a custom canvas that's based on the Bot Framework Web Chat canvas.
This approach requires extensive developer knowledge. It's useful for organizations that want a completely custom experience.
Important
You may install and use the sample code included in this article only for use with Microsoft Copilot Studio. The sample code is licensed "as is" and is excluded from any service level agreements or support services. You bear the risk of using it.
Microsoft gives no express warranties, guarantees, or conditions and excludes all implied warranties, including merchantability, fitness for a particular purpose, and non-infringement.
After you create and publish a copilot, your customers can use the copilot's Web Chat canvas to interact with it.
You can also combine the customized canvas with configuring your copilot to automatically start the conversation.
Lastly, you can change the name and icon of your copilot (when it's shared in Microsoft Teams) directly from the portal.
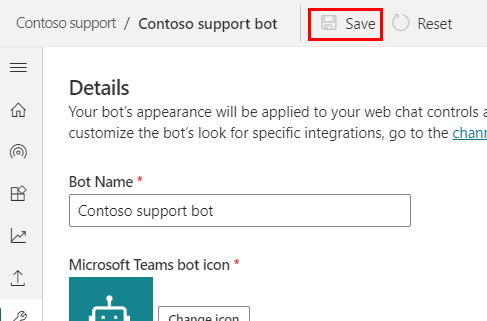
Change the copilot name and icon
Important
If your copilot is connected to Omnichannel for Customer Service, its name is defined by the Display name property in the Azure portal registration.
You can change the copilot's name and icon. This will affect the icon in all channels where you publish your copilot.
In the navigation menu, under Settings, select Details.
Change the copilot's name and icon. Review the recommendations on Microsoft Teams icon formats
Select Save to commit your changes.

Important
After updating your copilot's icon, it may take up to 24 hours for the new icon to appear everywhere.
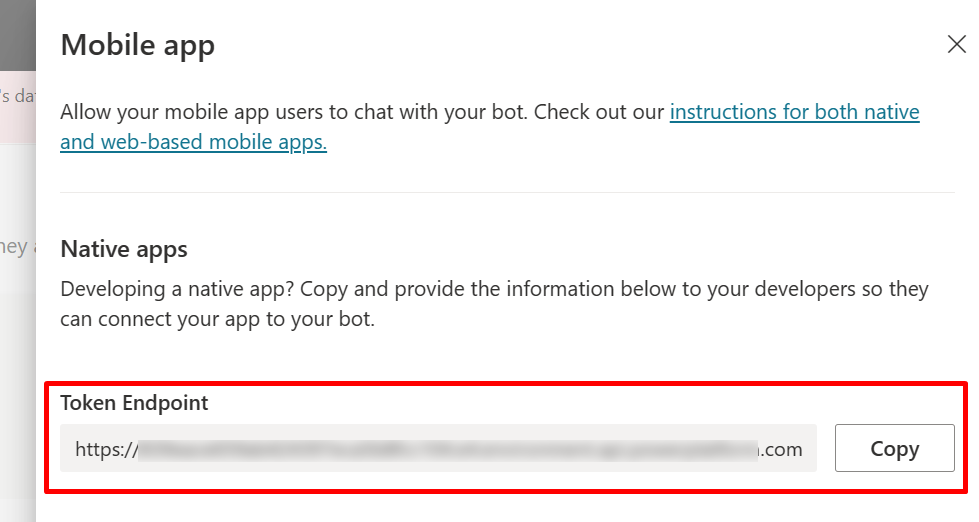
Retrieve token endpoint
To customize your canvas, whether it's the default canvas or a custom one you connect to, you need to retrieve your copilot details.
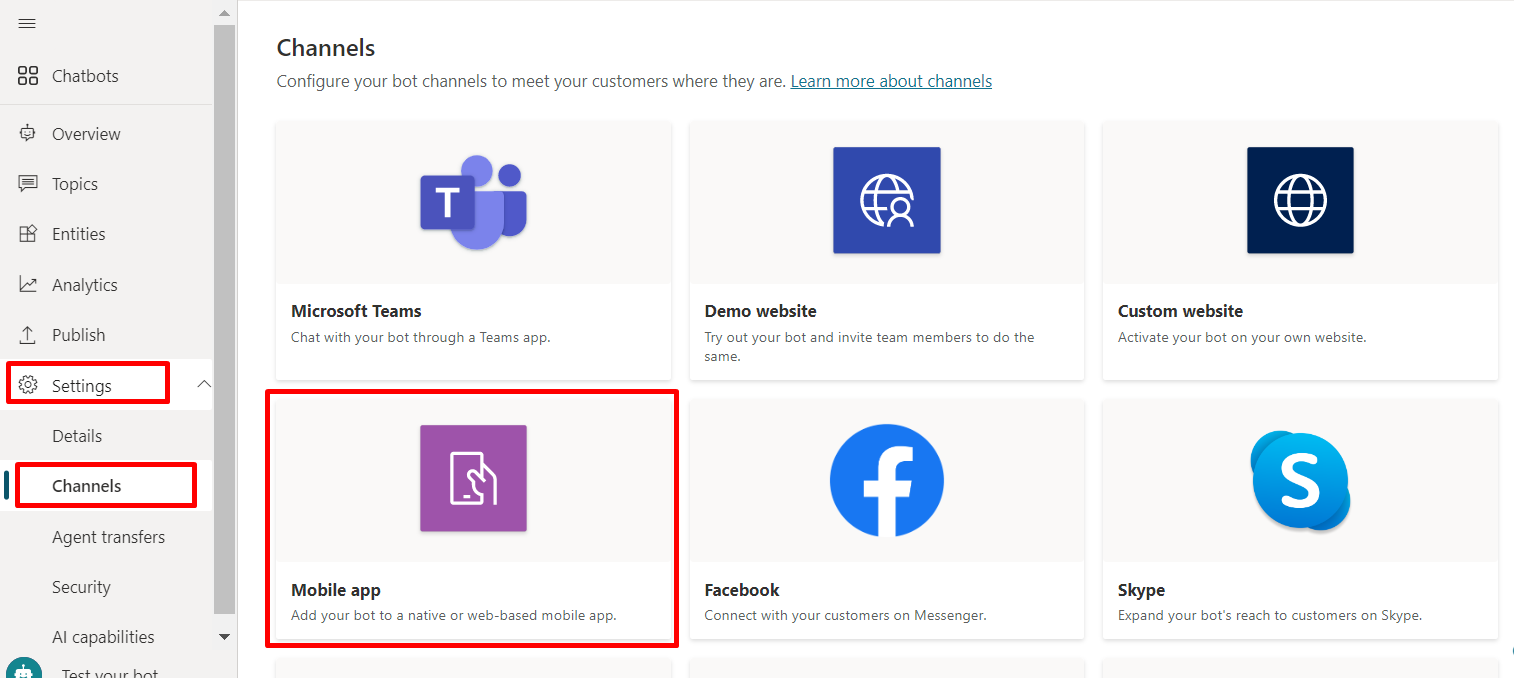
In the navigation menu under Settings, select Channels.
Select Mobile app.
Next to Token Endpoint, select Copy.
Customize the default canvas (simple)
Configure how the chat canvas looks with some simple CSS and JavaScript styling options.
First, you need to configure where you're deploying your copilot canvas.
Copy and paste the HTML code below and save it as index.html.
You can also copy and paste the code below into the w3schools.com HTML try it editor. You'll still need to add your token endpoint.<!doctype html> <html lang="en"> <head> <title>Contoso Sample Web Chat</title> <!-- This styling is for the Web Chat demonstration purposes. It is recommended that style is moved to a separate file for organization in larger projects. Please visit https://github.com/microsoft/BotFramework-WebChat for details about Web Chat. --> <style> html, body { height: 100%; } body { margin: 0; } h1 { color: whitesmoke; font-family: Segoe UI; font-size: 16px; line-height: 20px; margin: 0; padding: 0 20px; } #banner { align-items: center; background-color: black; display: flex; height: 50px; } #webchat { height: calc(100% - 50px); overflow: hidden; position: fixed; top: 50px; width: 100%; } </style> </head> <body> <div> <div id="banner"> <h1>Contoso copilot name</h1> </div> <div id="webchat" role="main"></div> </div> <!-- In this sample, the latest version of Web Chat is being used. In production environment, the version number should be pinned and version bump should be done frequently. Please visit https://github.com/microsoft/BotFramework-WebChat/tree/main/CHANGELOG.md for changelog. --> <script crossorigin="anonymous" src="https://cdn.botframework.com/botframework-webchat/latest/webchat.js"></script> <script> (async function () { // Specifies style options to customize the Web Chat canvas. // Please visit https://microsoft.github.io/BotFramework-WebChat for customization samples. const styleOptions = { // Hide upload button. hideUploadButton: true }; // Specifies the token endpoint URL. // To get this value, visit Copilot Studio > Settings > Channels > Mobile app page. const tokenEndpointURL = new URL('<COPILOT TOKEN ENDPOINT>'); // Specifies the language the copilot and Web Chat should display in: // - (Recommended) To match the page language, set it to document.documentElement.lang // - To use current user language, set it to navigator.language with a fallback language // - To use another language, set it to supported Unicode locale // Setting page language is highly recommended. // When page language is set, browsers will use native font for the respective language. const locale = document.documentElement.lang || 'en'; // Uses language specified in <html> element and fallback to English (United States). // const locale = navigator.language || 'ja-JP'; // Uses user preferred language and fallback to Japanese. // const locale = 'zh-HAnt'; // Always use Chinese (Traditional). const apiVersion = tokenEndpointURL.searchParams.get('api-version'); const [directLineURL, token] = await Promise.all([ fetch(new URL(`/powervirtualagents/regionalchannelsettings?api-version=${apiVersion}`, tokenEndpointURL)) .then(response => { if (!response.ok) { throw new Error('Failed to retrieve regional channel settings.'); } return response.json(); }) .then(({ channelUrlsById: { directline } }) => directline), fetch(tokenEndpointURL) .then(response => { if (!response.ok) { throw new Error('Failed to retrieve Direct Line token.'); } return response.json(); }) .then(({ token }) => token) ]); // The "token" variable is the credentials for accessing the current conversation. // To maintain conversation across page navigation, save and reuse the token. // The token could have access to sensitive information about the user. // It must be treated like user password. const directLine = WebChat.createDirectLine({ domain: new URL('v3/directline', directLineURL), token }); // Sends "startConversation" event when the connection is established. const subscription = directLine.connectionStatus$.subscribe({ next(value) { if (value === 2) { directLine .postActivity({ localTimezone: Intl.DateTimeFormat().resolvedOptions().timeZone, locale, name: 'startConversation', type: 'event' }) .subscribe(); // Only send the event once, unsubscribe after the event is sent. subscription.unsubscribe(); } } }); WebChat.renderWebChat({ directLine, locale, styleOptions }, document.getElementById('webchat')); })(); </script> </body> </html>In the index.html file you created, enter your token endpoint at the line
const tokenEndpointURL = "<YOUR TOKEN ENDPOINT>";.Open index.html using a modern browser (for example, Microsoft Edge) to open the copilot in the custom canvas.
Test the copilot to ensure you are receiving responses from it and that it's working correctly.
If you encounter problems, make sure you've published your copilot, and that your token endpoint has been inserted in the correct place. It should be after the equals sign (=) at the line
const tokenEndpointURL = "<YOUR TOKEN ENDPOINT>", and surrounded by double quotation marks (").
Customize the copilot icon, background color, and name
Once you get the customized canvas working with your copilot, you can make changes to it.
You can use the JavaScript styleOptions options to configure a number of pre-defined styles.
See Web Chat customization for links to the defaultStyleOptions.js file and more information on what you can customize and how it will look.
Change the copilot icon
Update the index.html file with the following sample code:
const styleOptions = {
  accent: '#00809d',
  botAvatarBackgroundColor: '#FFFFFF',
  botAvatarImage: 'https://learn.microsoft.com/azure/bot-service/v4sdk/media/logo_bot.svg',
  botAvatarInitials: 'BT',
  userAvatarImage: 'https://avatars.githubusercontent.com/u/661465'
};
Replace the copilot and user avatar images with your company images.
If you don't have an image URL, you can use a Base64-encoded image string instead.
Change the background color
Update the index.html file with following sample code:
const styleOptions = {
  backgroundColor: 'lightgray'
};
Change
backgroundColorto any color you wish. You can use standard CSS color names, RGB values, or HEX.
Change the copilot name
Update the
<h1>text in the index.html file with the following:<body> <div id="banner"> <h1><img src="contosocopilot-teams.png"> Contoso copilot name</h1> </div>Change the text to whatever you want to call the copilot. You can also insert an image, although you may need to style it to ensure it fits within the heading section.
Customize and host your chat canvas (advanced)
You can connect your Copilot Studio copilot with a custom canvas that is hosted as a standalone web app. This option is best if you need to embed a customized iFrame across multiple web pages.
Note
Hosting a custom canvas requires software development. Our guidance here is intended for experienced IT professionals, such as IT admins or developers who have a good understanding of developer tools, utilities, and IDEs.
Pick a sample to customize
We recommend starting with one of these samples custom-built to work with Copilot Studio:
Full bundle is a custom canvas capable of showing all rich content from Copilot Studio. For example:
Location and file uploading is a custom canvas capable of getting a user's location and sending it to a Copilot Studio copilot. For example:
Or you can pick from other sample Web Chat canvases provided by Bot Framework.
Customize canvas using styleSetOptions
As with customizing the default canvas, you can use styleSetOptions to customize the custom canvas. All customizable properties are listed in defaultStyleOptions.js. For more information on what you can customize and how it will look, see Web Chat customization.
Deploy your customized canvas
In order to host your custom canvas, deploy all files to a web app.
Related topics
Feedback
Coming soon: Throughout 2024 we will be phasing out GitHub Issues as the feedback mechanism for content and replacing it with a new feedback system. For more information see: https://aka.ms/ContentUserFeedback.
Submit and view feedback for