Explore the home page
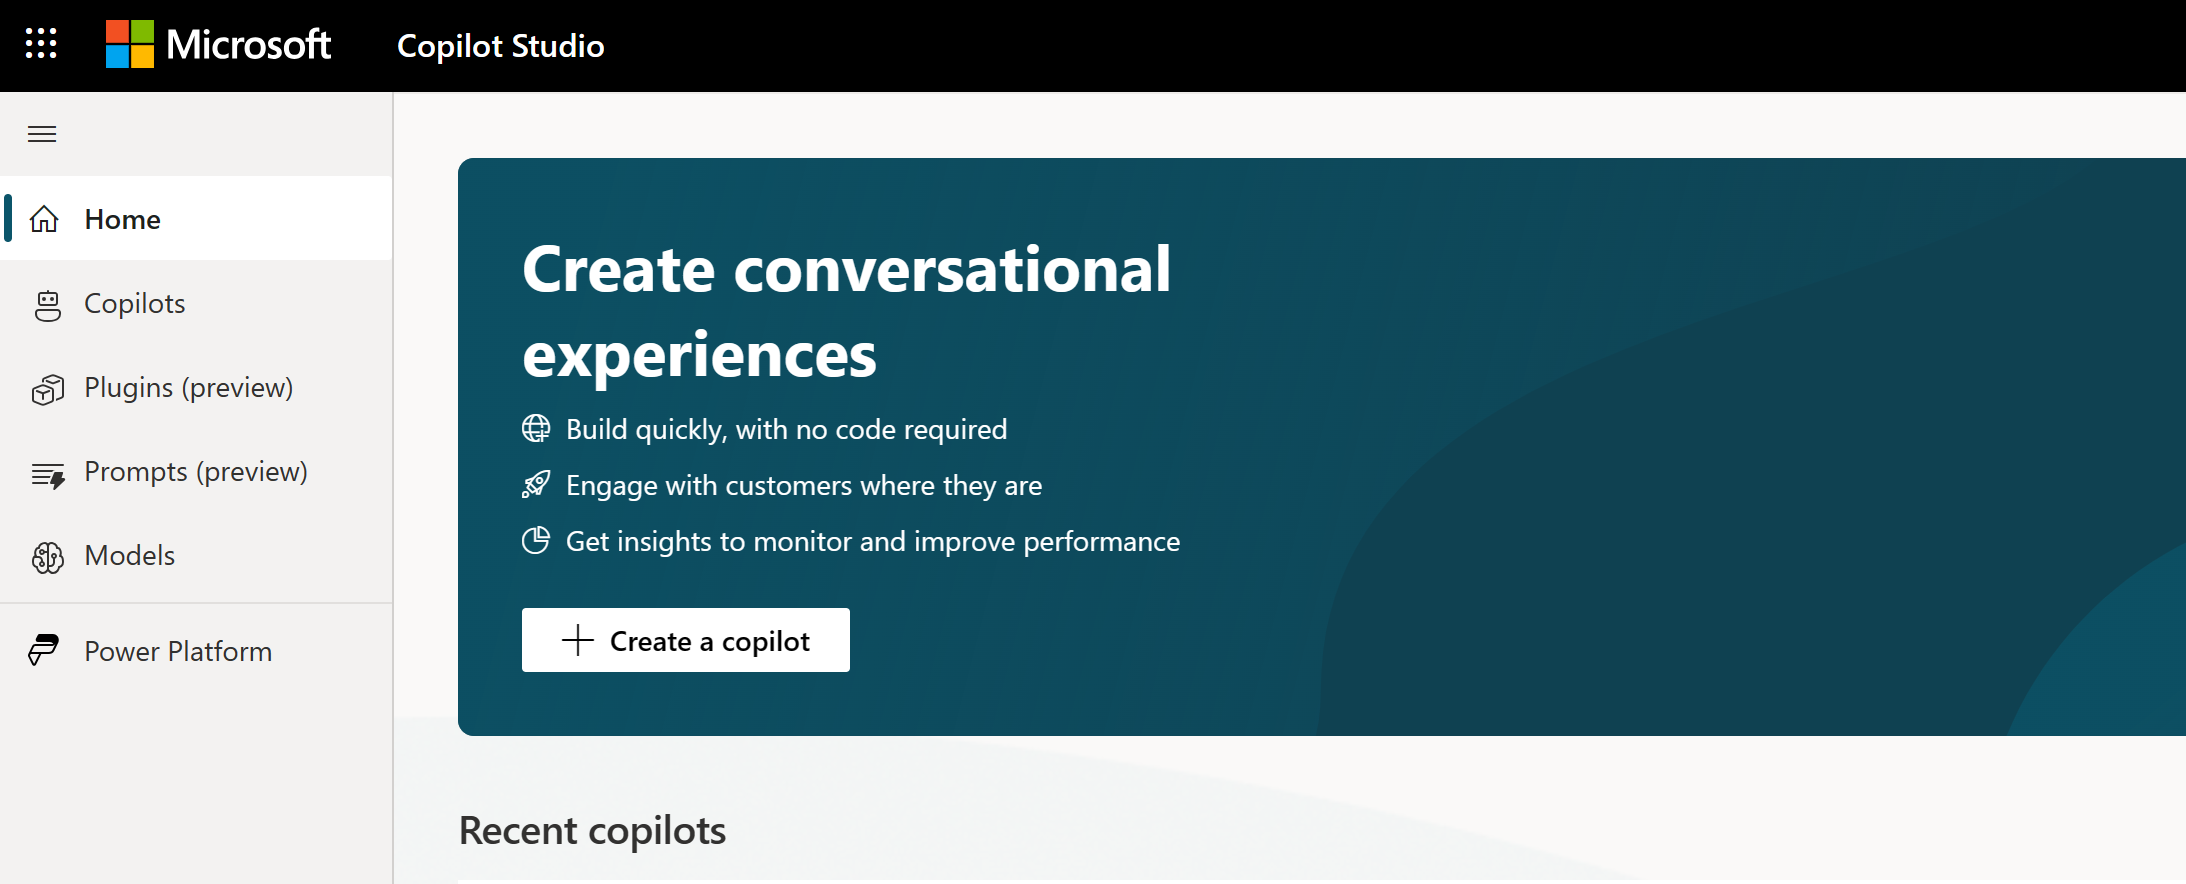
Copilot Studio has an app-level home page, listing all your copilots. On this page you can create a new copilot, view recent copilots, and access learning resources like videos, documentation, and learning paths.
In the navigation menu, select Copilots to open the Copilots page. All copilots you create in a given environment appear here. In your list of copilots, you can see metadata such as owner, when it was last published, and who last modified the copilot.
Create a copilot
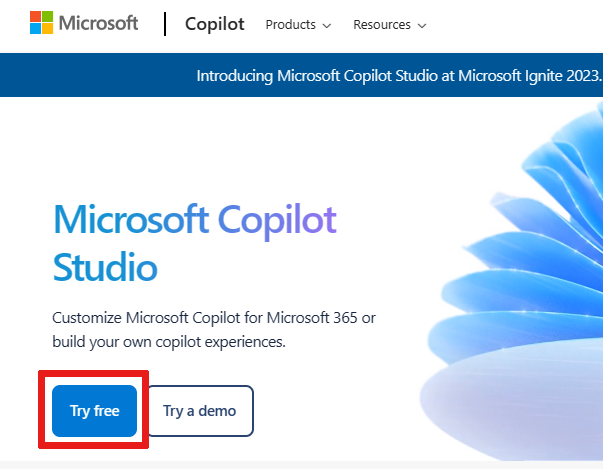
Go to the Microsoft Copilot Studio introduction website. Supported browsers include Microsoft Edge, Chrome, and Firefox.
On the website, select Try free and sign in with your work email address.
Note
Personal Microsoft accounts are currently not supported.
After you sign up, a default Power Apps environment is made for you. For most users, this default is sufficient. However, to specify a custom Power Apps environment, select another one, using the environment picker.

Note
Microsoft Copilot Studio is only supported in these data locations. Outside of these locations, create a custom environment with Region set to a supported data location before you create your copilot.
For more information on creating a custom Power Apps environment, see Working with environments.
Once signed up, you land on the Home page. Select Create a copilot.
A wizard starts. Give your copilot a name.
In the What language do you want your copilot to speak? field, select a language. The language dropdown is prepopulated with the browser locale.
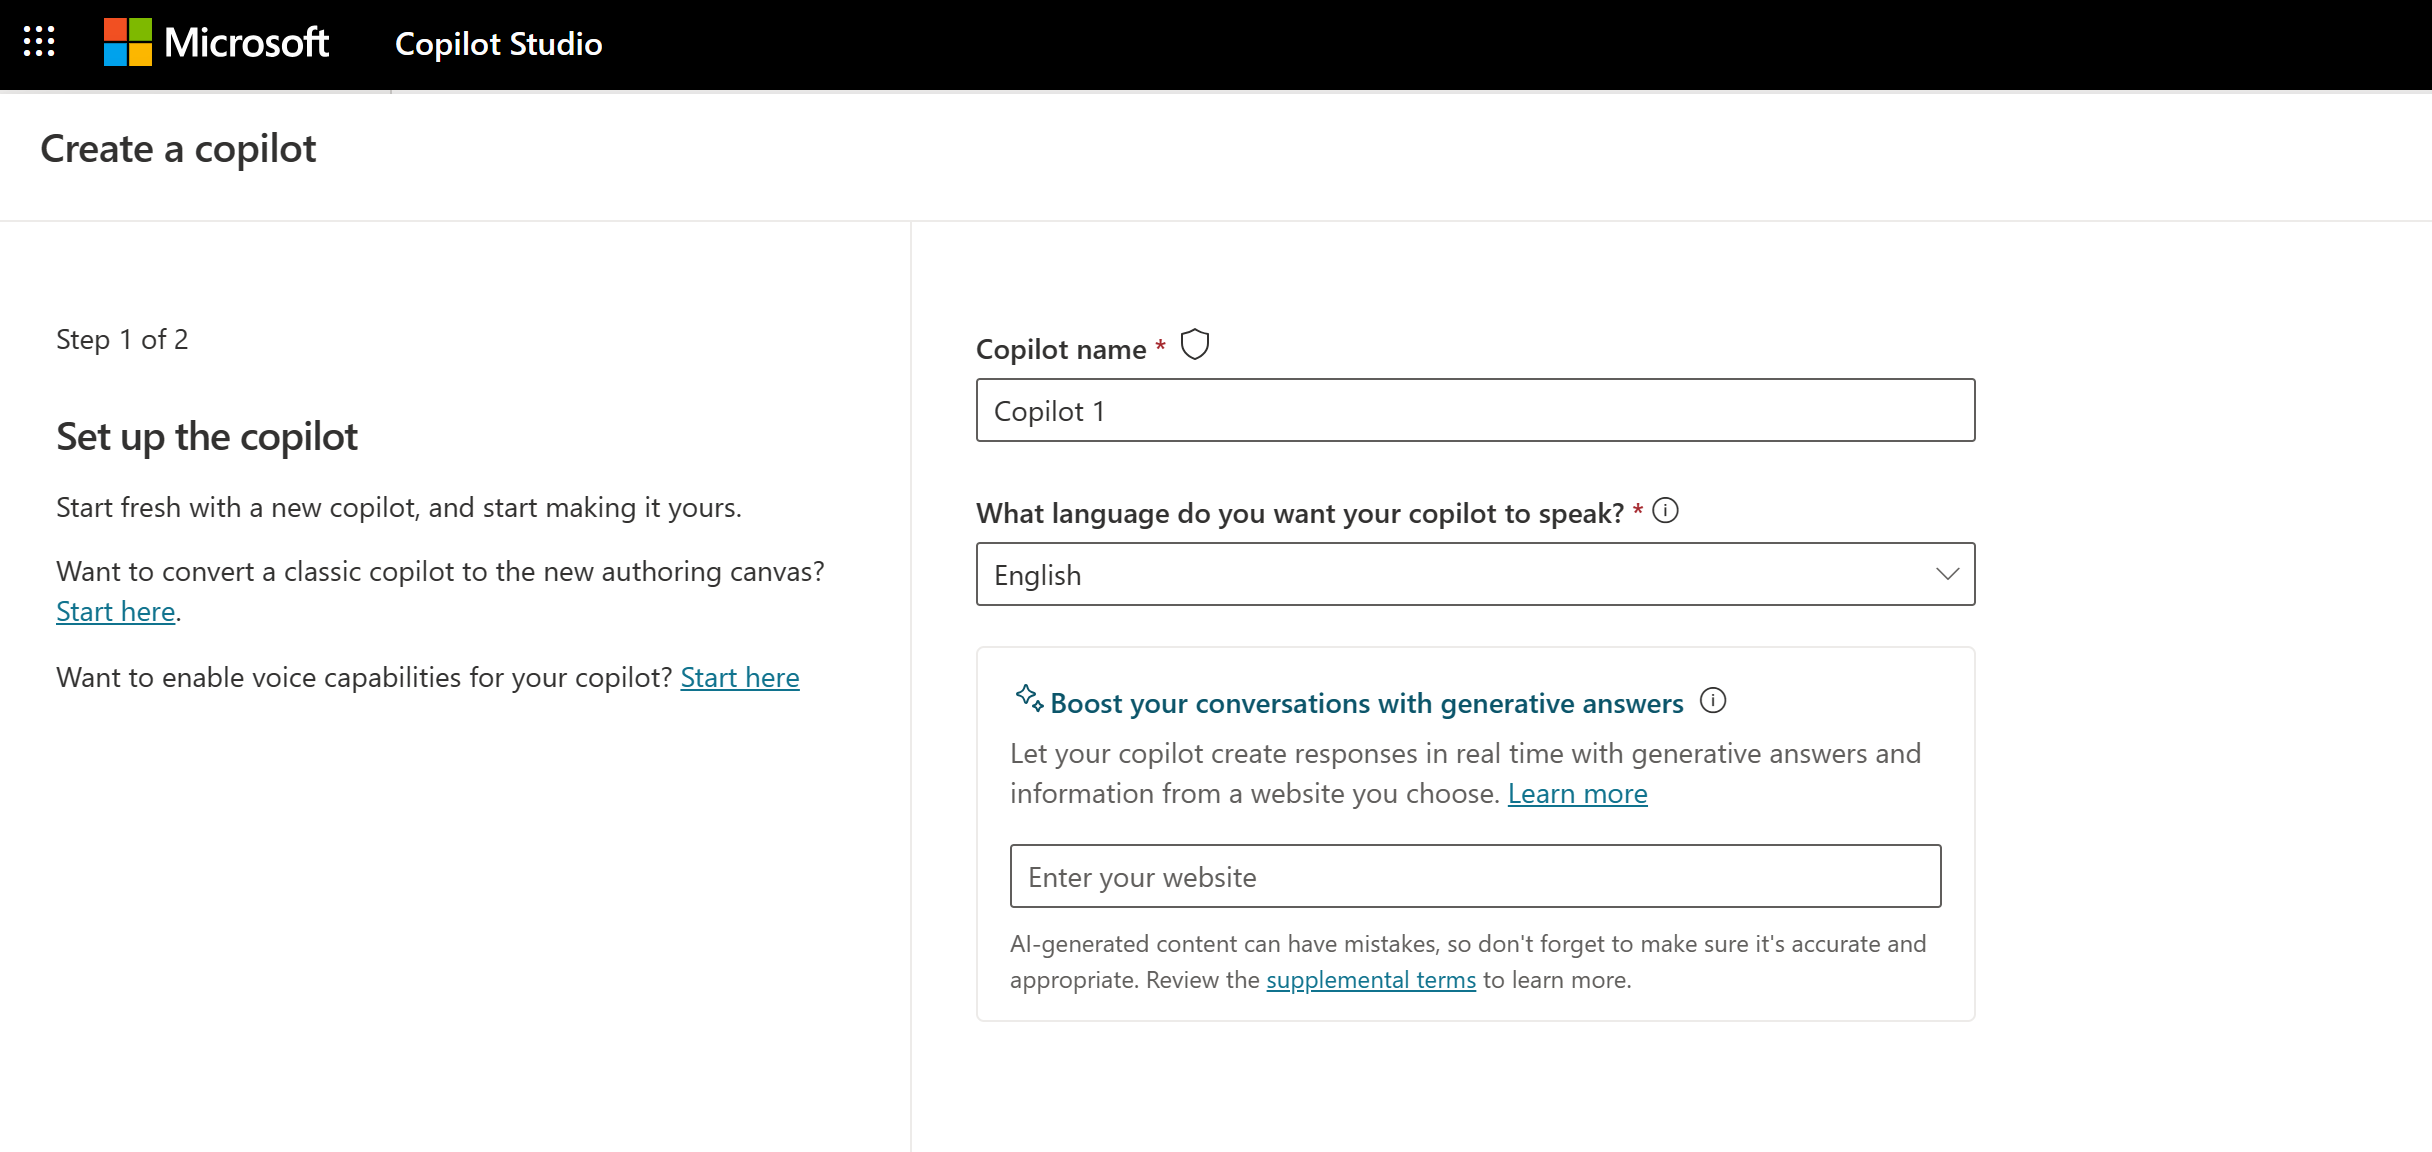
(Optional) To boost conversations with AI-generated responses, add a URL to the Boost your conversations with generative answers field.
(Optional) You can make customizations and enhancements before finalizing your copilot.
Choose Edit advanced options at the bottom of the page.
Select a copilot icon to give your copilot a personality and represent your business scenario. You can select from the prepopulated list of icons or upload a custom icon. This icon gets displayed in the chat window when the copilot responds.
Choose prepopulated Lesson topics to provide starter content and familiarize yourself with copilot topics.
Select the solution for your copilot and the schema name.
These options are all advanced options, which can be changed later.
Select Create.
Creating your first copilot in a new environment can take up to 15 minutes. Additional copilots get created faster.
You're redirected to the copilot's Overview page.
Note
Copilot operations like publish and authentication configurations might take a few more minutes to be ready for use.
Familiarize yourself with Copilot Studio
While waiting for processing, you might want to:
- Explore the overall user interface for Copilot Studio.
- Explore topics and start creating and editing topics.
- Experiment with the preloaded user topics and system topics.
- Interact with your copilot using the Test copilot chat pane.
- Review Key concepts - Authoring Copilot Studio copilots to better understand authoring.
Tip
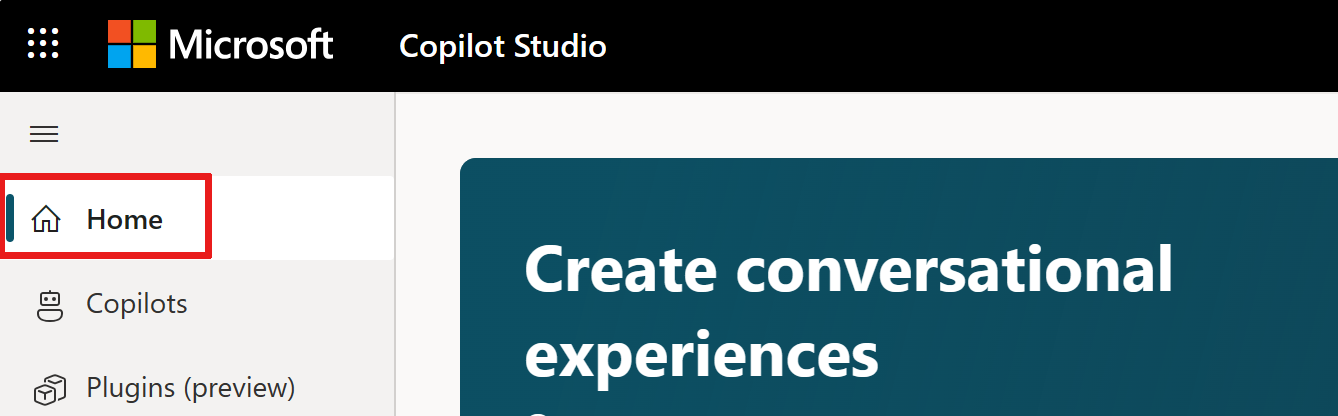
Select Home, in the navigation menu, to go back to the app-level home page from your copilot.
Create a topic
With a new copilot, you can start creating topics. A topic is a dialog tree that describes how your copilot responds to a user's question.
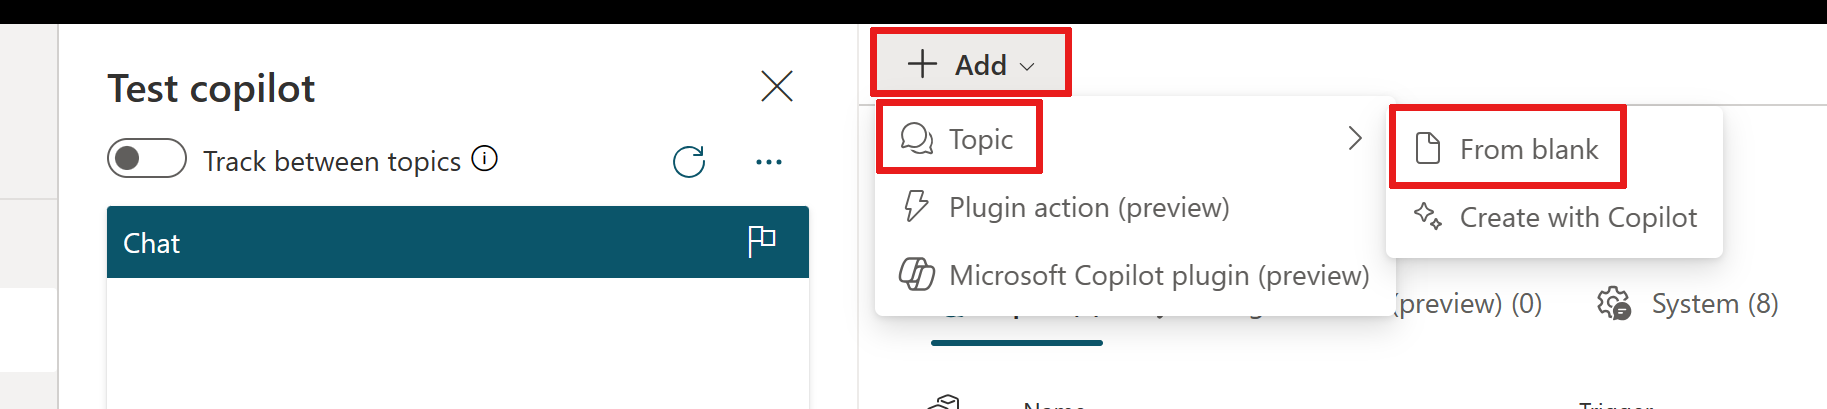
In the navigation menu, select Topics, then select Add at the top of the page. From Add, select Topic, and then From blank.
Here you build a topic by giving it a name and configuring a trigger. Trigger phrases are examples of user questions or utterances that teach the copilot to respond when the questions or utterances are detected.
- Name your topic 'Personal Hello World' at the top.
- In the Trigger box under Phrases, select Edit. The On Recognized Intent pane appears.
- Add 'hello world' text, also called an utterance, under Add phrases.
- Select the + icon next to the phrase box to add it to your trigger.
- Select the Save icon at the top to save your trigger.

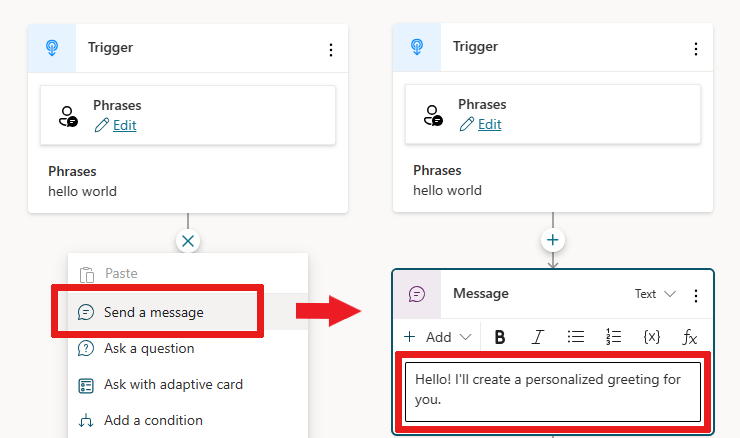
Select the (+) icon below your trigger node and select Send a message.
Enter 'Hello! I'll create a personalized greeting for you.' into the newly added Message node.
Select the Save icon at the top to save your trigger.
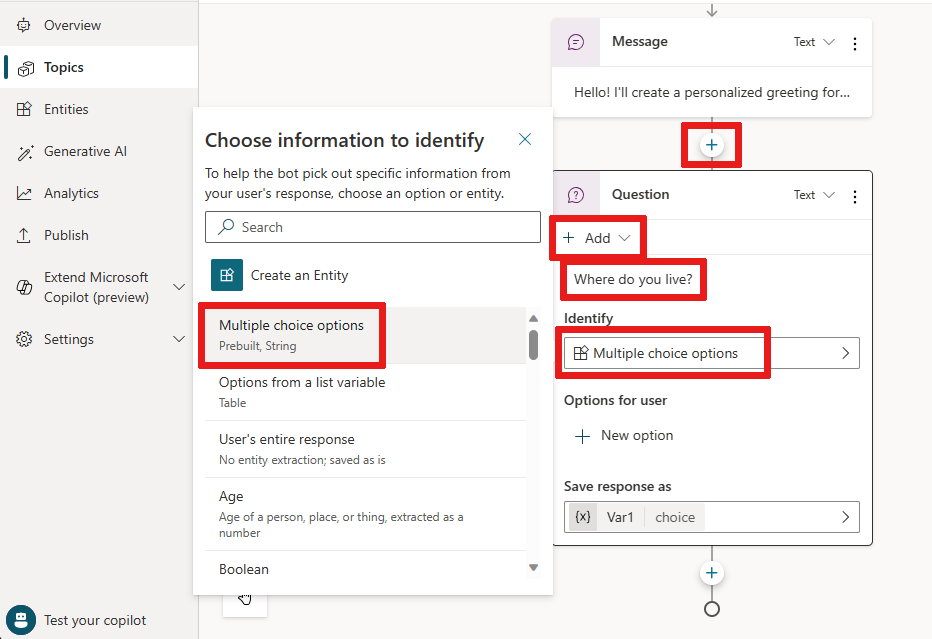
Select the (+) icon below your new message node and add an Ask a question node.
Enter the question text, 'Where do you live?', in the Ask a message box. Select Multiple choice options under Identify to give the customer a choice in responses.
With Multiple choice options selected, you need to add more options.
Add two options for the user, by selecting + New option under Options for user in the Question node, then enter 'Seattle' as the text. Add another option and enter 'Bellevue' as the text.
Each option is presented in the copilot chat as a multiple choice button to the user.
View the whole dialog tree in the authoring canvas to understand the conversation flow.
The dialog tree creates separate paths in the conversation, depending on the customer's response. This path leads the customer to the best resolution for each user response.
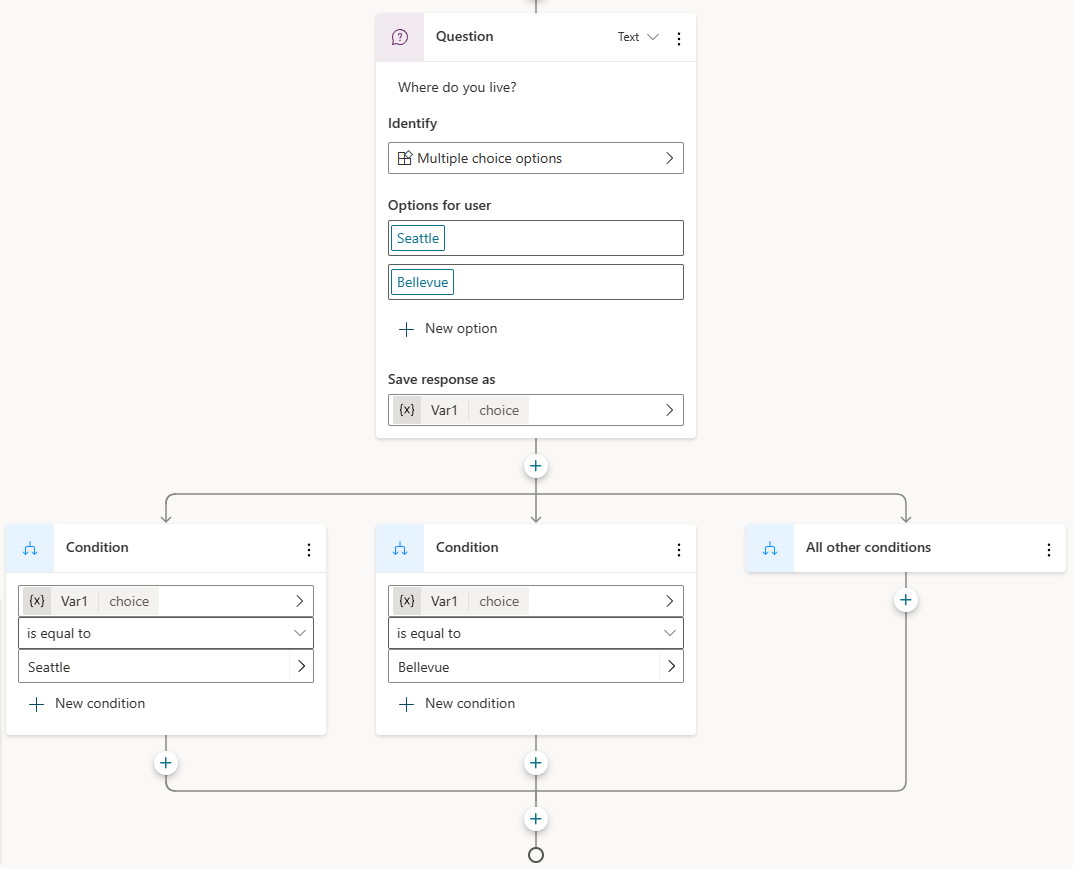
In the forked conversation path, the nodes automatically check for 'Seattle' in one path and 'Bellevue' in the other path to take the best next step.
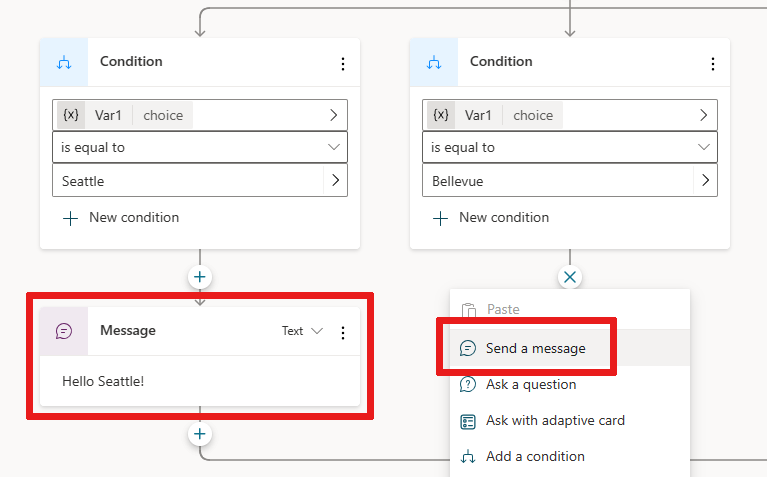
Finally, select the (+) icon below each of the Condition nodes to add a Message node in each branch.
Add a small message like 'Hello Seattle!' in the Seattle branch and 'Hello Bellevue!' in the Bellevue branch.
Select the Save icon at the top to save your trigger.
You now have a basic branching dialog tree, congratulations! You can begin to create more complex versions of this tree by incorporating variables, entities, and Power Automate flows.
Test your content in real time
With content authored into a dialog tree, test the conversation in real time to see if it's working as you expected. You can test, using the Test your copilot pane.
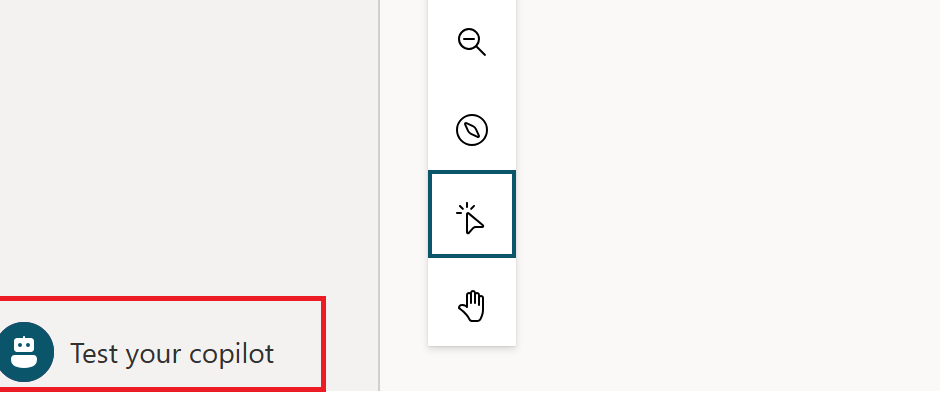
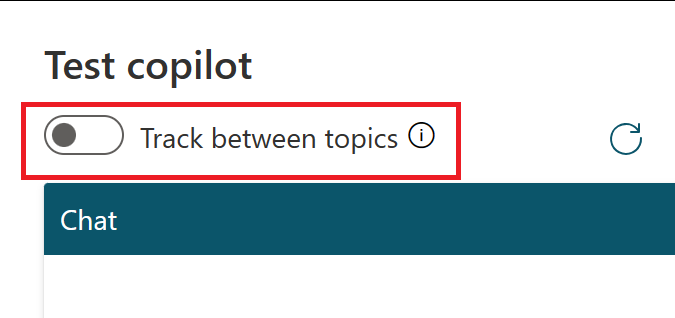
If the test copilot pane isn't showing on your screen, select Test your copilot at the bottom of the navigation menu.
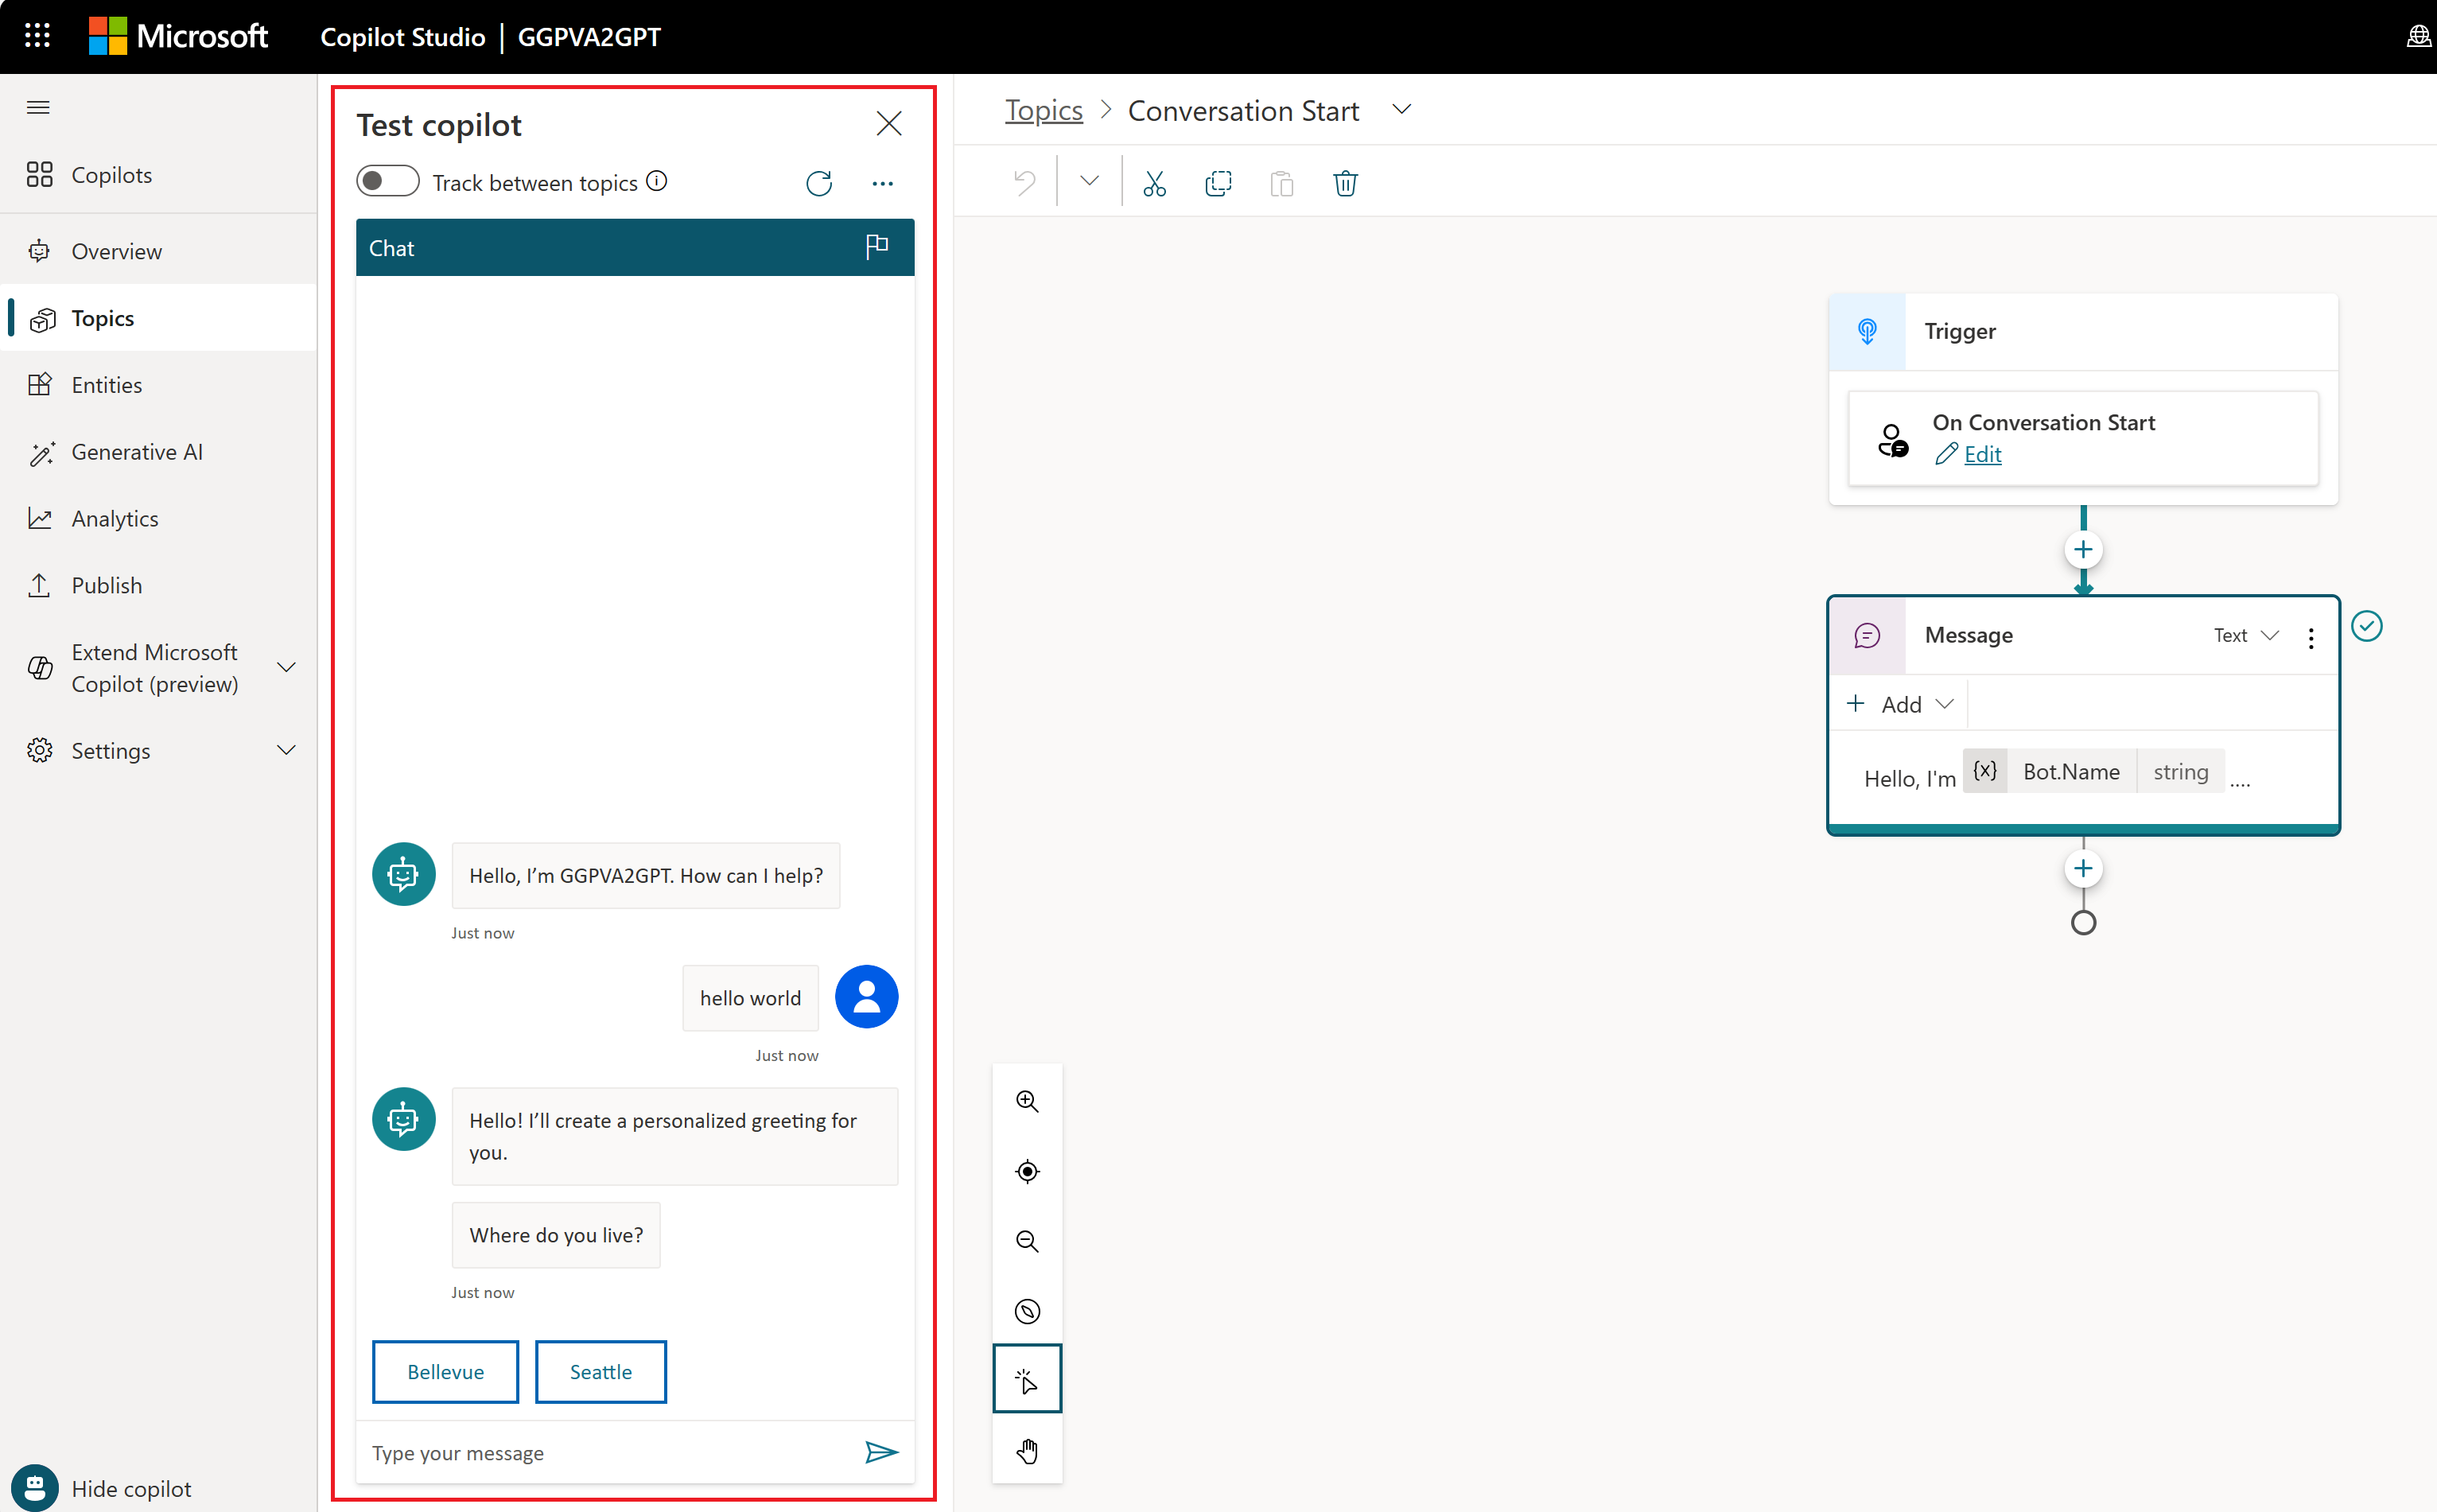
Turn on Track between topics at the top, which enables you to follow along with the copilot as it executes your dialog. You see parts of your dialog tree highlighted as the copilot gets to that portion of the dialog.
Type "hello world" in the chat window, and send the message to the copilot. You see the top portion of your dialog tree highlighted in green, and Seattle and Bellevue presented as user options in the test copilot pane.
The copilot is now waiting for you to respond, displaying suggestions on how to respond. These suggestion buttons reflect what you authored within your dialog tree in the Ask a question node.
In the test copilot, you can either select these suggestion buttons to continue, or you can enter your response into the chat window.

Continue the dialog by selecting the Seattle branch.
You see the chat stop once you reach the bottom of this branch. If you author more content, the dialog continues, but since we only created a small dialog tree, we reach the end of the content quickly.
This test experience empowers you to quickly create and test a conversation to ensure that the conversation flows as anticipated. If the dialog doesn't reflect your intention, you can change the dialog, and save it. The latest content is pushed into the test copilot, and you can try it out again. The published version of the copilot doesn't change, so feel free to play around with your content until you're happy with it.
Publish your copilot - web app
Once you're fine with the content authored in your copilot, you can publish your copilot to a website.
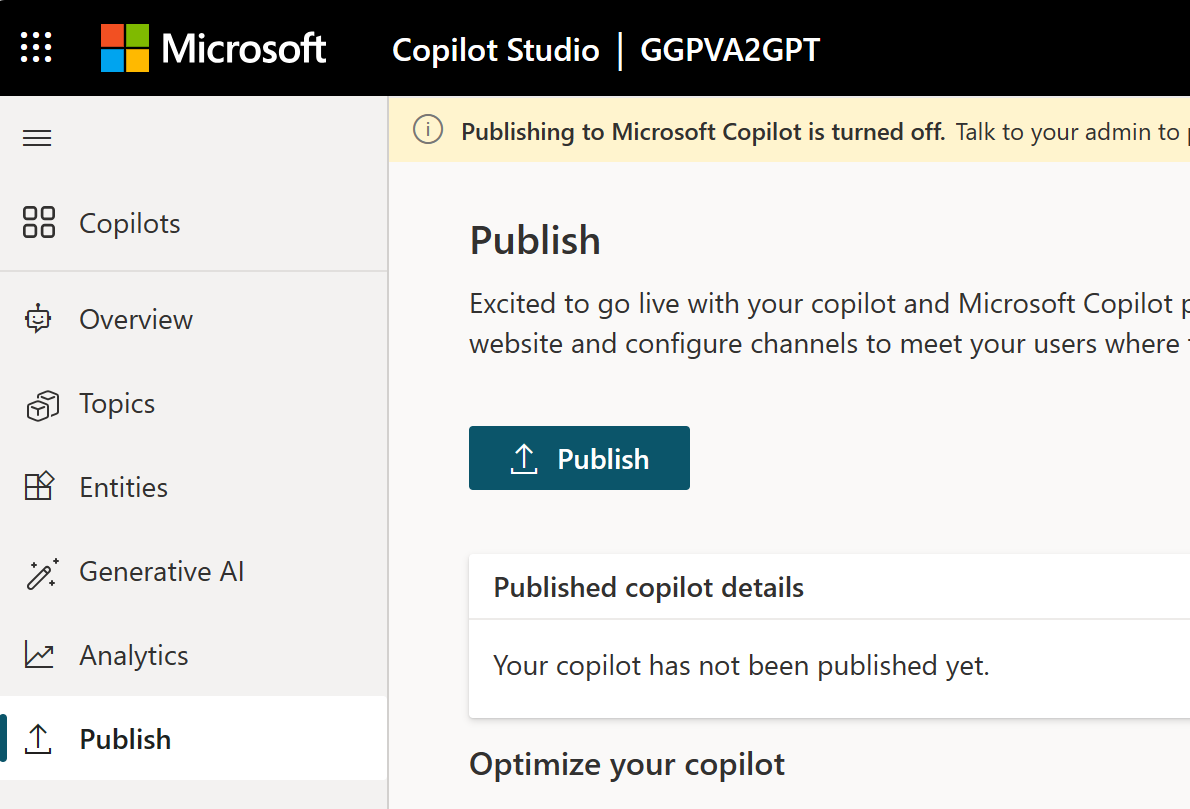
In the navigation menu, select the Publish.
Select Publish to activate your copilot. If the publish is successful, you see a green banner on the top of the page.
Select the demo website link under Share your copilot to see it in action on a demo website.
A new window opens in your browser. If you don't see a new window, check if a pop-up blocker is active and, if so, allow the window to be opened. Usually, you can allow pop-ups from the URL field directly.
The webpage demonstrates what your copilot looks like to an end-user who comes to your webpage. The copilot canvas is at the bottom. You can interact with it by typing into the window or by selecting a starter phrase from the provided options.
For more information on publishing your copilot to other channels, see the documentation under Publication key concepts.
When your copilot completes interactions with users, the statistics are recorded in your copilot's analytics. To view analytics, select Analytics from the navigation menu.
Here, you can find key performance indicators (KPIs) showing:
- The volume of sessions your copilot handled.
- how effectively your copilot was able to engage end-users and resolve issues
- escalation rates to human agents
- abandonment rates during conversations
You find customer satisfaction information at the KPI level and in the Customer Satisfaction tab.
Note
There is up to a 1-hour delay between when the conversations occur and when the statistics for those conversations appear in the analytics views. Also, all interactions with the copilot are logged in analytics, including interactions from your demo website, custom website, or test copilot.
You can also view detailed session history and transcripts by selecting Analytics > Sessions. Here, you can download a CSV file with the full session transcript. You can tune the performance of your copilot and change the content in your topics to improve your copilot's efficiency.
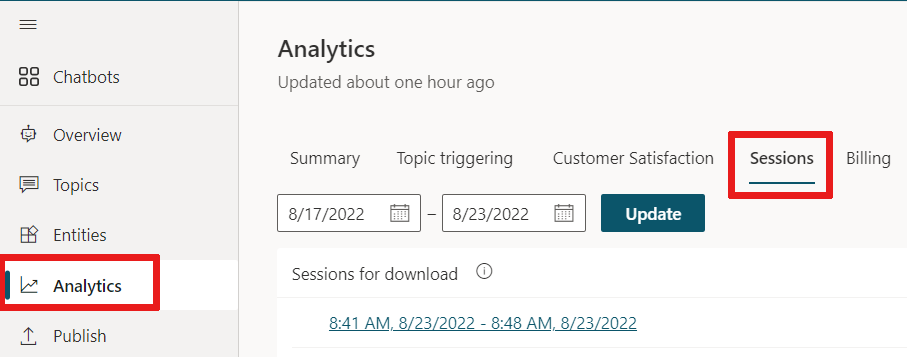
For more information, see Analytics key concepts.
Copilot Studio empowers anyone in the organization to build copilots in Microsoft Teams. The copilot has built-in natural language processing (NLP) and a no-code graphical interface. With our latest Teams integration, you can create, author, test, and publish your copilot into Teams within the Microsoft Teams interface.
When you create a copilot, consider:
- The types of questions someone might ask.
- The different ways a question is asked.
- The expected answers.
- Whether or not a user has follow-up questions or concerns.
To help you get started making human resource (HR) copilots, this quickstart guides you through:
- How to map your scenario and needs to align with what a copilot can do.
- How to create a copilot in the Copilot Studio app in Teams.
- How to build and enhance topics that answer common HR-style questions.
- How to test, publish, and share the copilot with your organization.
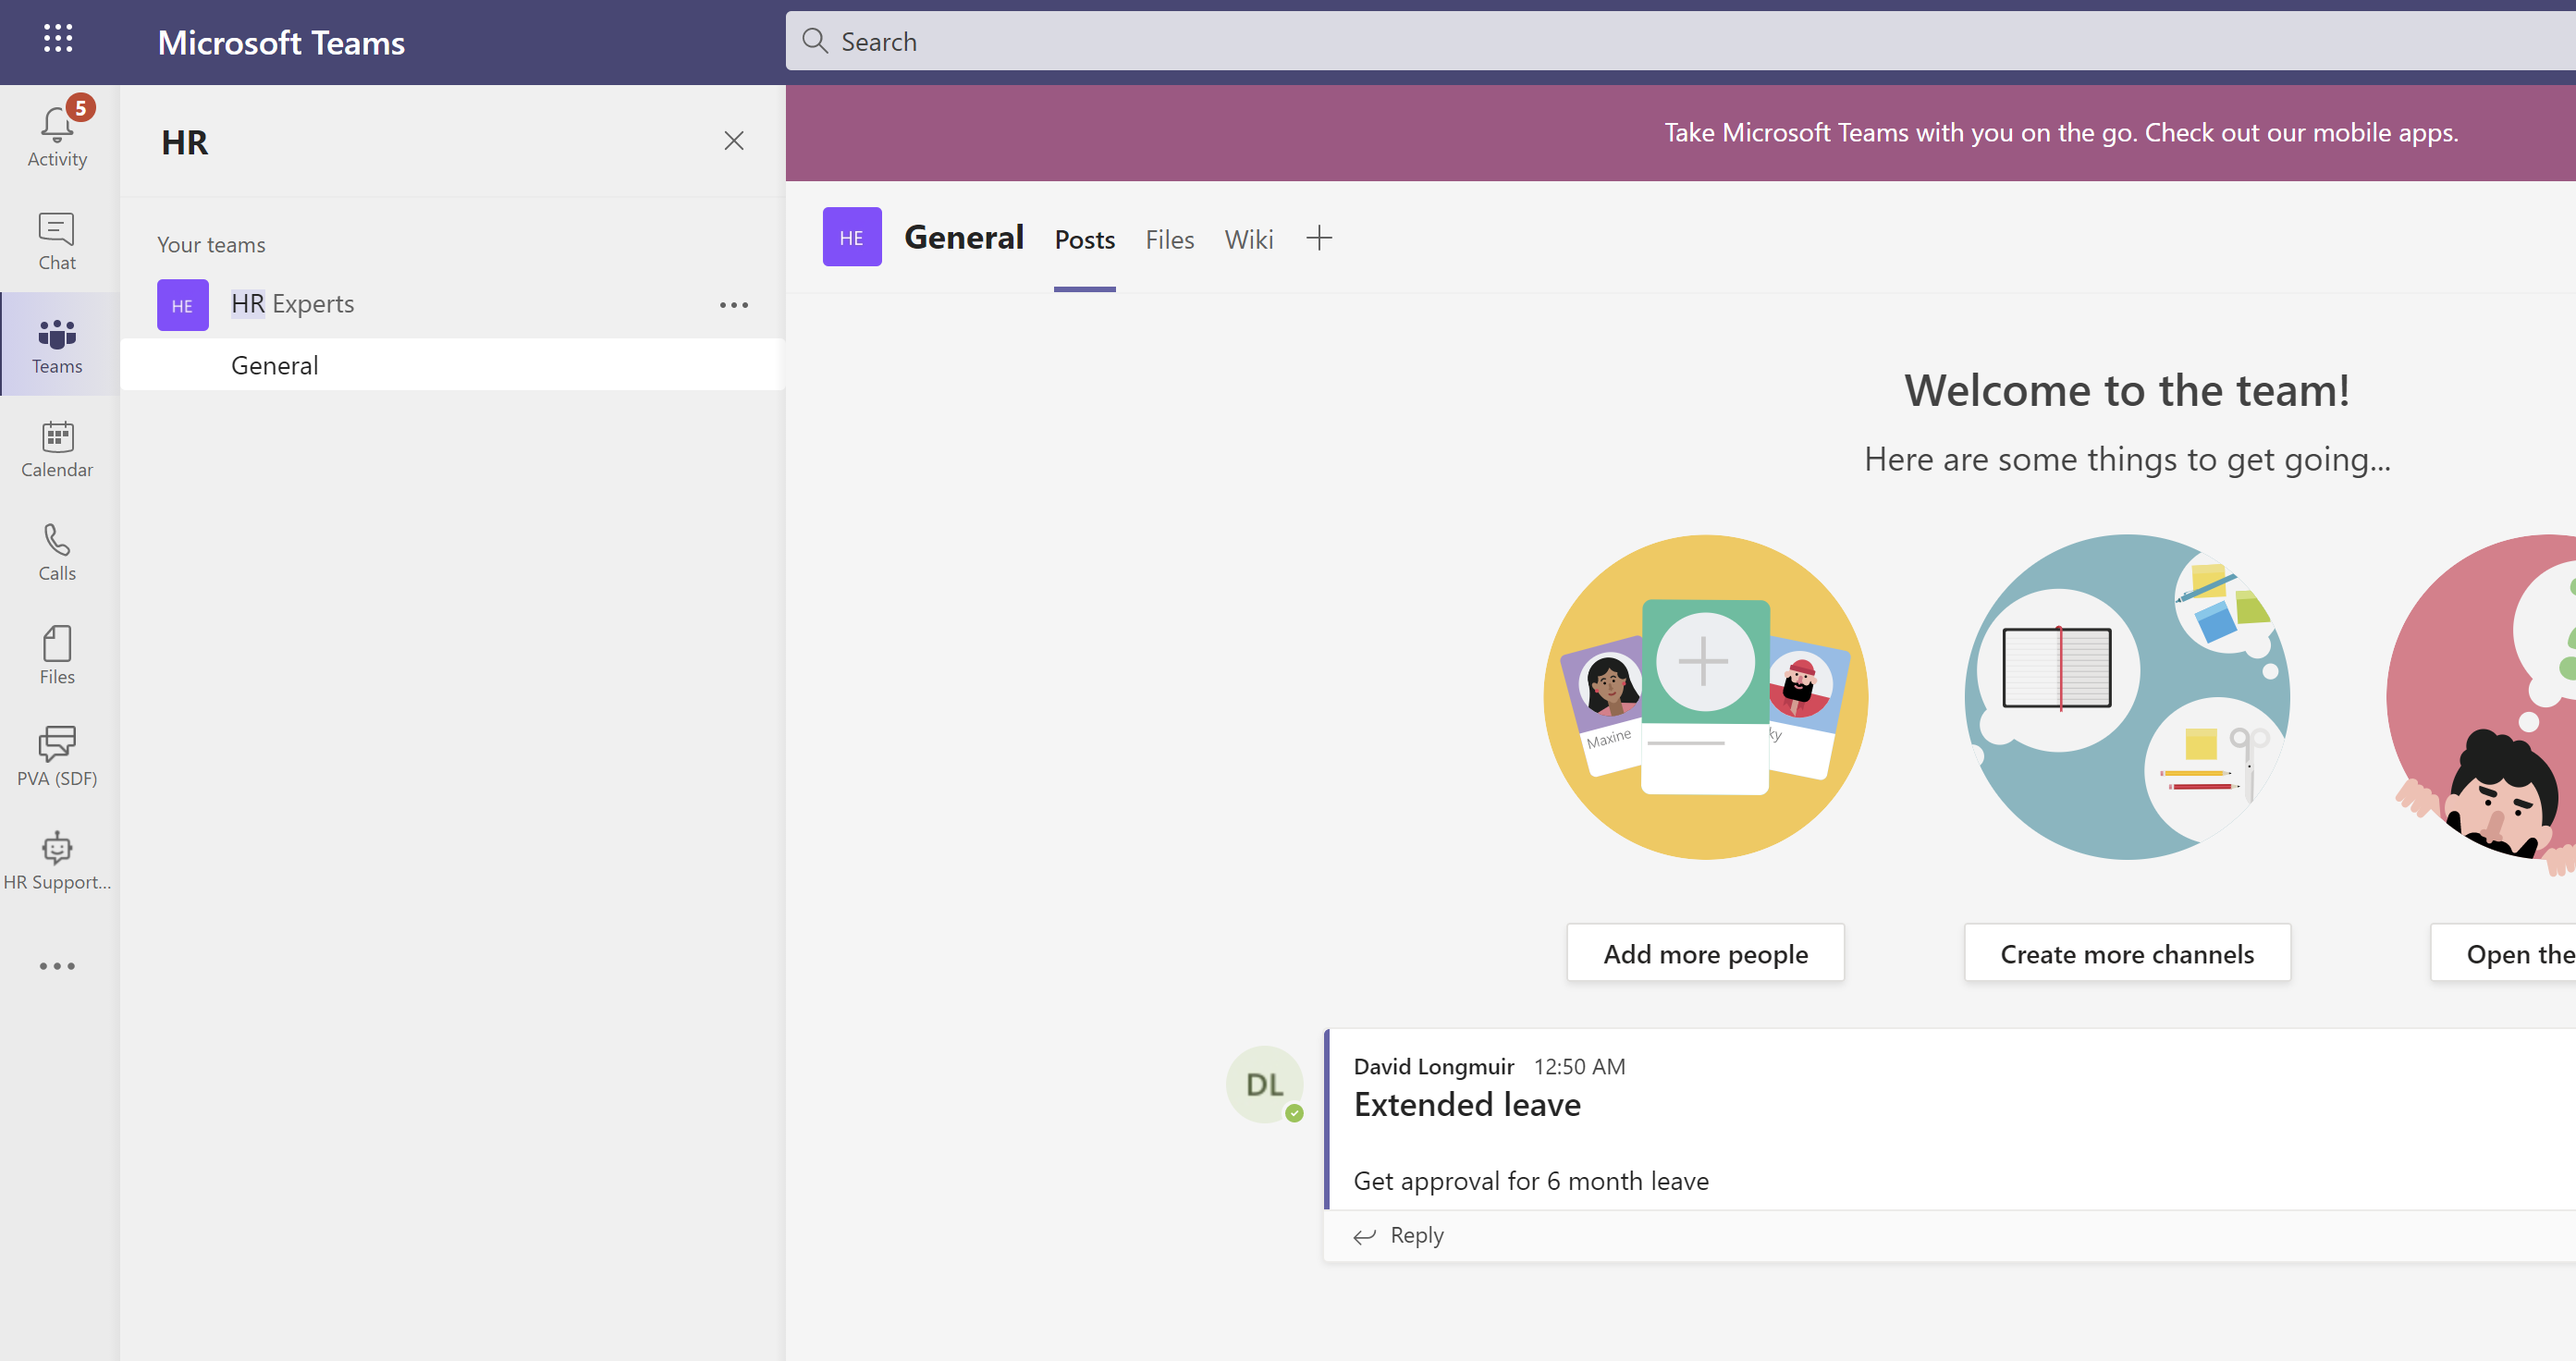
HR Support Copilot is a friendly question and answer copilot that brings a support professional expert from the HR team, when HR personnel is unable to help. An employee can ask the copilot a question and the copilot responds with an answer if the copilot has content for it.
If the copilot doesn't have an answer, the employee can submit a query. The query is sent to a preconfigured team of experts who respond to a query notification.
Scenario
You work in human resources (HR) at Contoso and need to build an HR support copilot in Microsoft Teams. The copilot answers common HR questions, such as employee time-off, with relevant information from the company's internal knowledge base. The copilot contacts human HR experts and notifies them that an employee needs assistance for uncommon scenarios.
Once the copilot is published, Contoso employees can access HR information in Teams without needing to search the company's intranet.
Install the Copilot Studio app in Microsoft Teams
Start by launching the Copilot Studio app in Teams:
Go to the Teams app store and search for Power Virtual Agents.
Select Add or Open, if you already added it, for the Power Virtual Agents app.
Note
All Power Virtual Agents names will soon be renamed to Microsoft Copilot Studio.
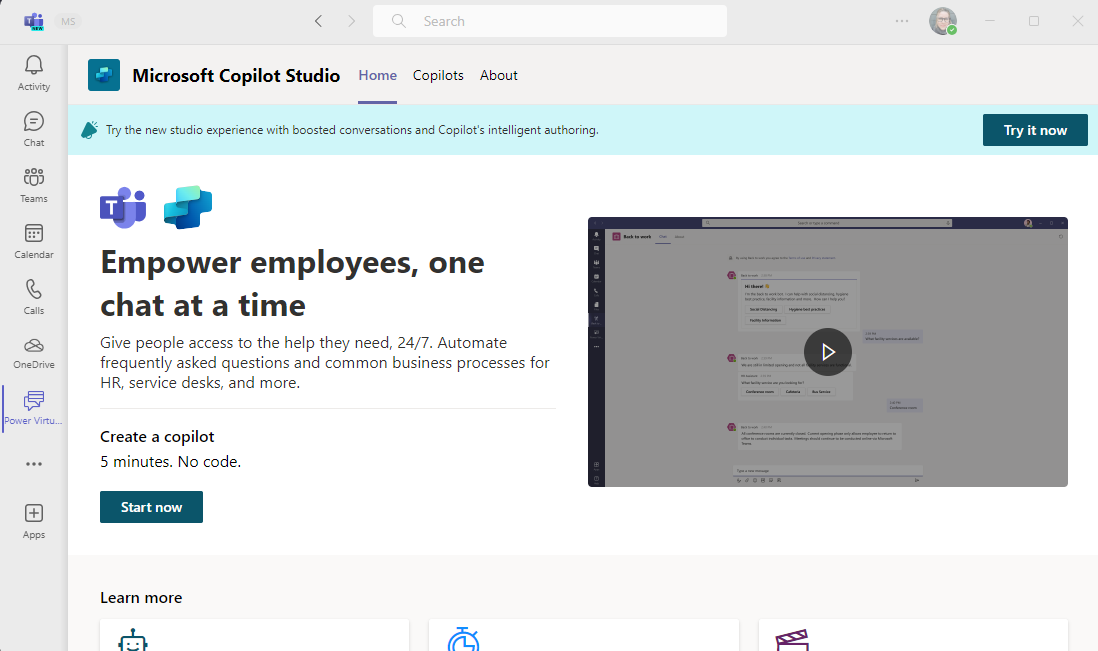
The app opens to the Copilot Studio home page. Teams users can build copilots here without leaving the Teams app.
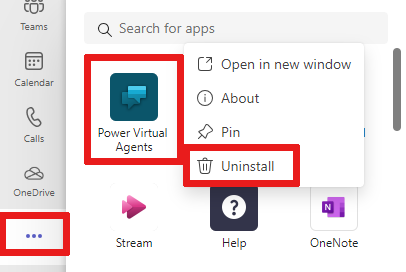
Tip
Select "..." in the side bar of Teams to show your added apps. Select and hold (or right-click) the Power Virtual Agents icon and select Pin. The Power Virtual Agents app appears in your side bar. You can now return to the app more easily.
Create a new copilot in a team
Select Start now on the Home page.
Pick which team manages the copilot. Create the copilot in the Contoso HR Team since you're part of Contoso HR. You can create a new team if necessary, before you add a copilot to it.
Fill in the copilot name and language in the copilot creation window. Use HR Support Copilot for the name. For more information about choosing a language, see Supported languages.
Select Create.

Build an employee time-off topic for common time-off queries
Go to the topic list by selecting Topics in the navigation menu.
A copilot comes with a collection of topics that defines the copilot's interaction with end users. Let's build a topic to answer employee questions about taking time-off.
Select + New topic > From blank on the menu bar to create a new topic.

Select Details on the Overview menu and name the topic Employee time off. Give it an appropriate description.
Select Save at the top. Close your Details pane.
Select the Trigger Phrases box to add phrases.
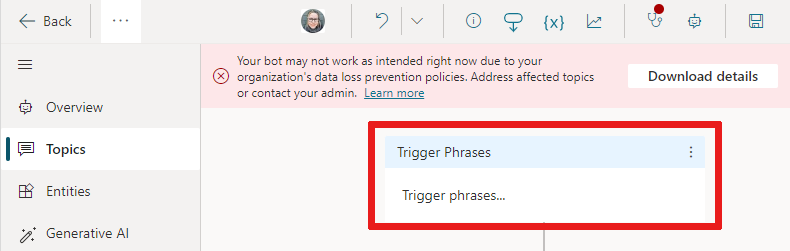
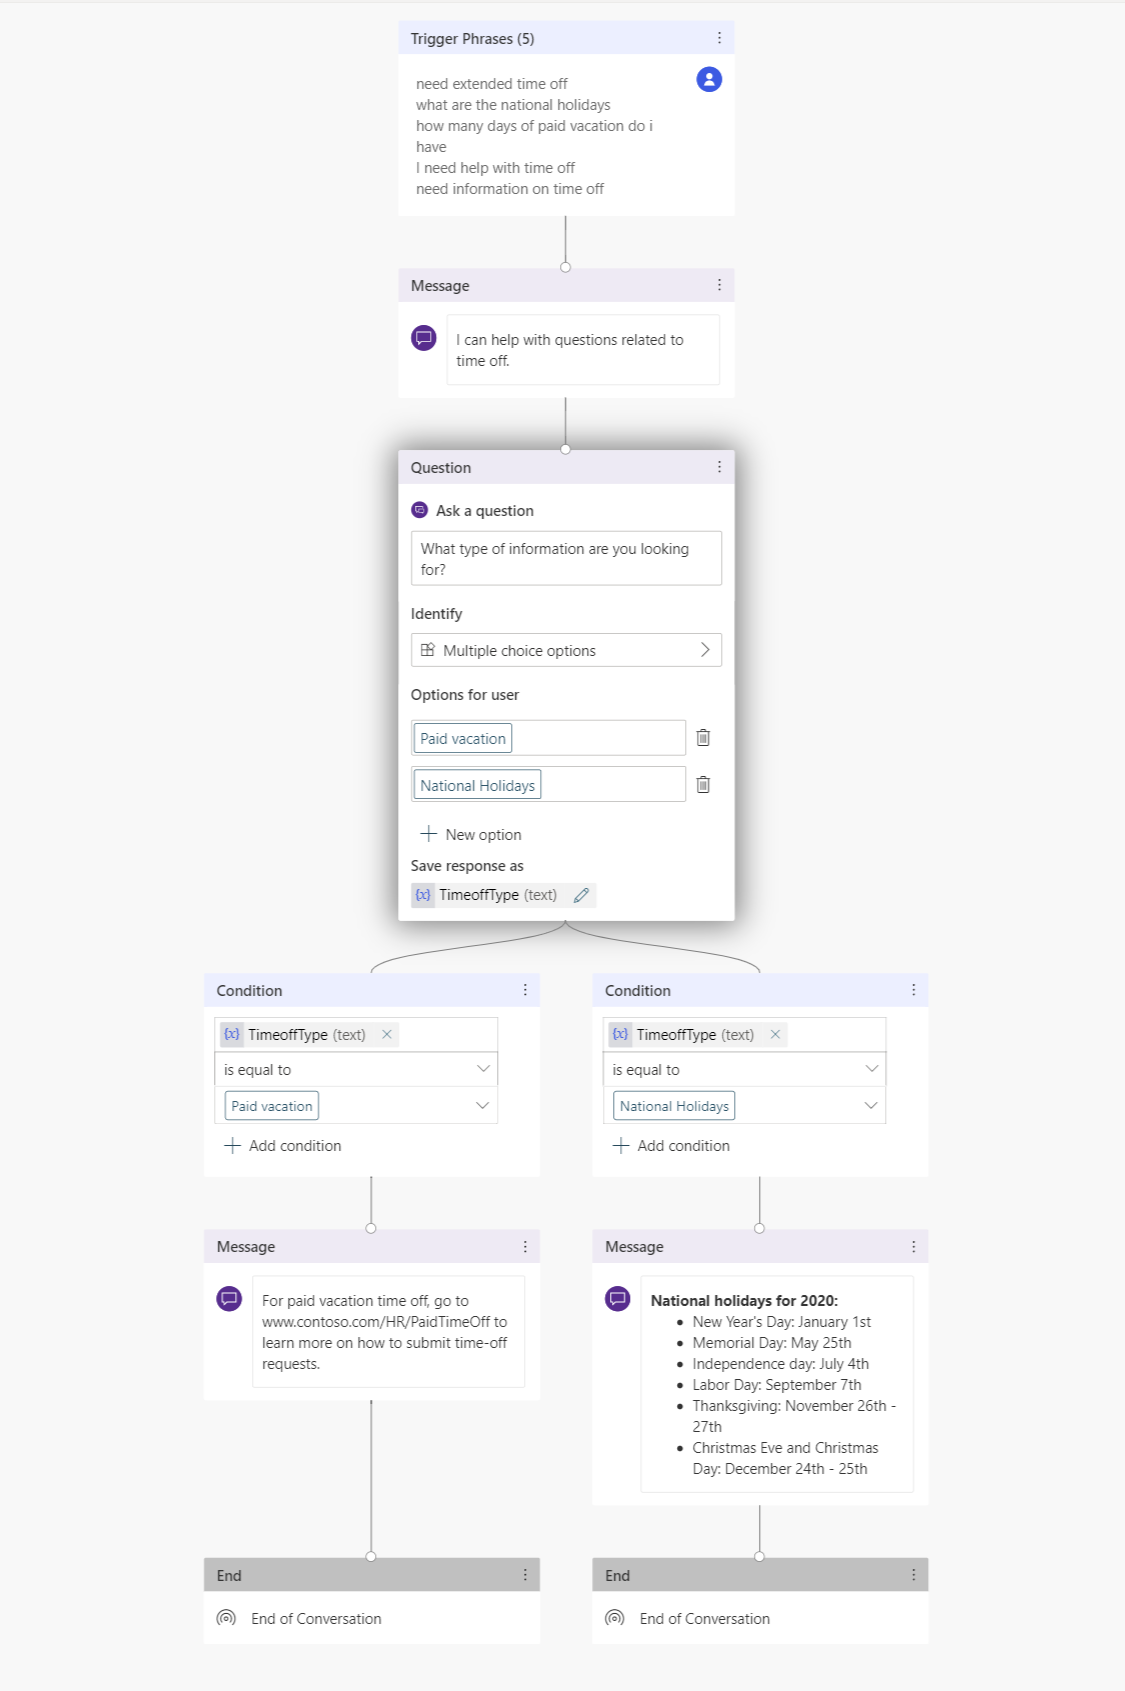
Create several trigger phrases in the Add phrases fields:
- Need information on time off
- I need help with time off
- How many days of paid vacation do I have
- What are the national holidays
- I need extended leave
Trigger phrases for each topic define the ways users ask questions about that topic. These phrases are how we expect employees to ask about time off.
Copilot Studio comes with built-in natural language capabilities. You only need to define a few trigger phrases about time-off and the copilot can accurately trigger the topic based on the employee's input.
Select Save to add the phrases to your topic list.
Define the copilot's interaction with a user topic
Give the employee a message that the copilot is here to help with time-off questions using a message node.
Enter the text in the existing message node I can help with questions related to time-off.
As an HR employee, you know the most common time-off questions are about paid vacation time and national holidays. When a question node with user response options is added, the topic automatically gets a forked branch for each response.
Select the (+) icon below the message node, then select Ask a question to add a question node to the topic.
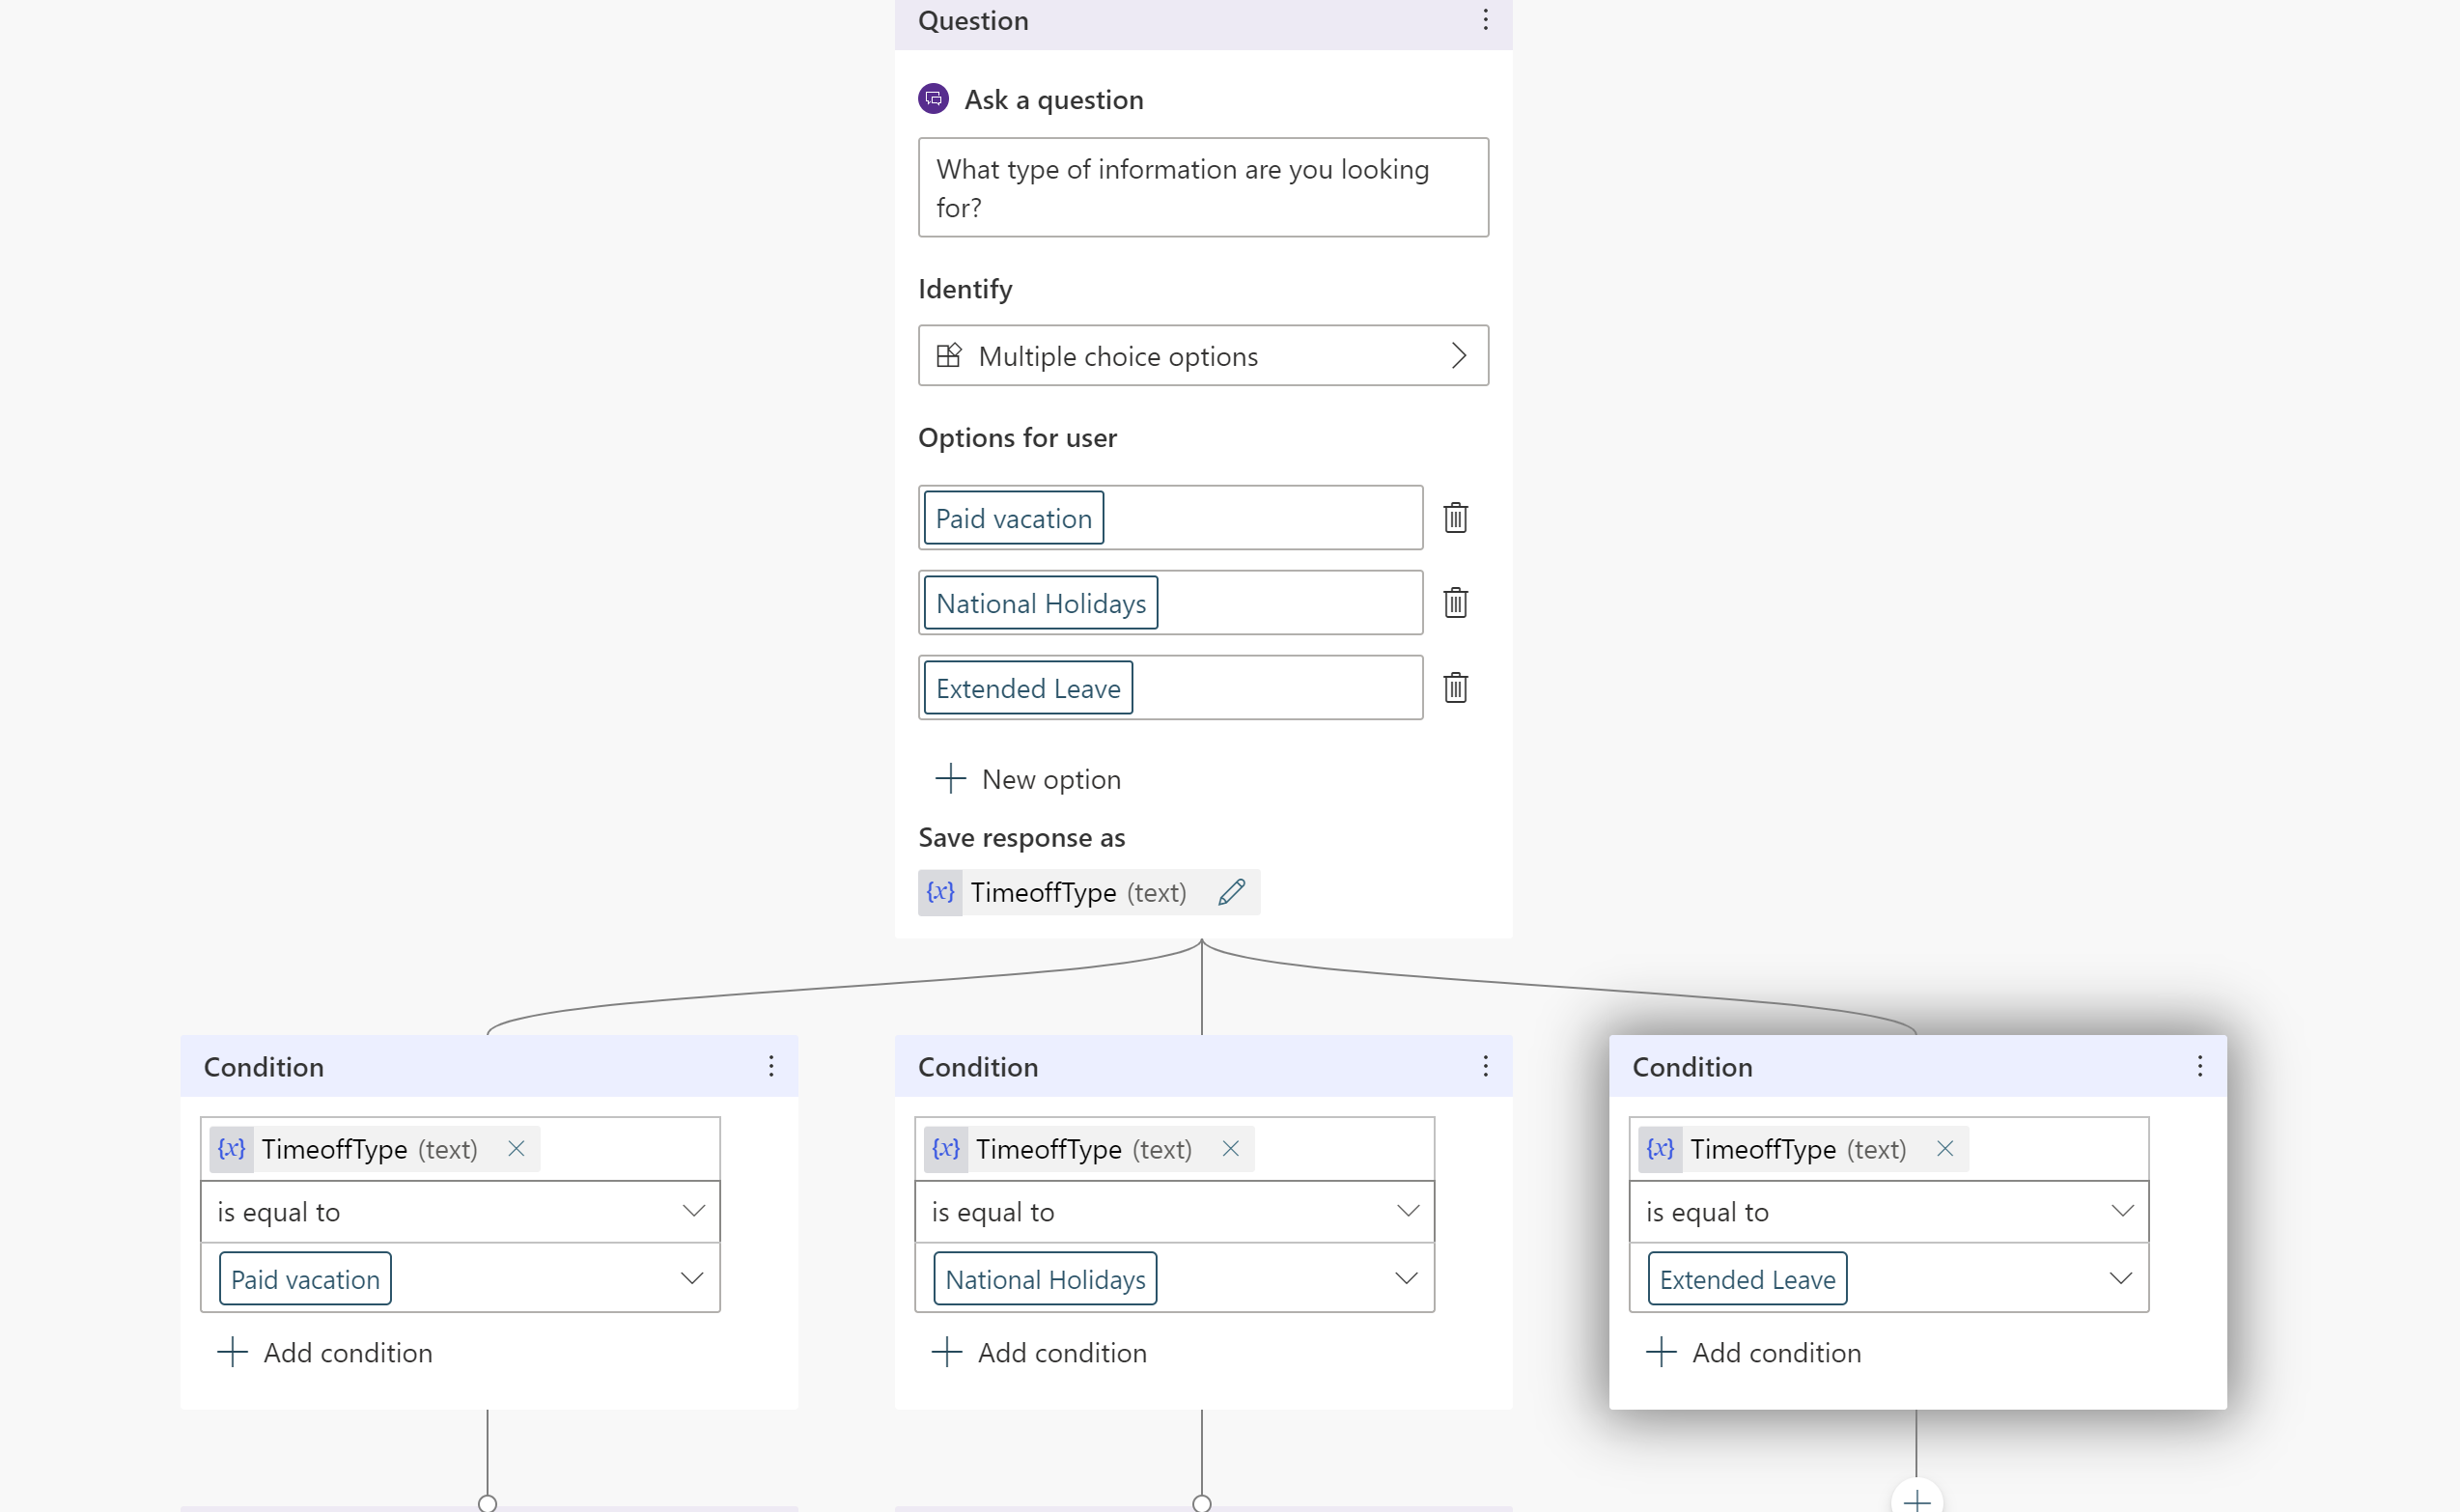
Enter What information are you looking for? in the Ask a question text box. The employee might ask this question.
Under Options for user, add Paid vacation and National Holidays as two options.

User choices are stored in a variable and the topic branches off, based on the option the user chooses. You can rename the variable to track it better in the topic.
On the variable, under Save response as, select the pencil icon to edit the variable properties.
The Variable properties pane opens. Rename the variable to TimeoffType. Close the Variable properties pane and you see the changes reflected in the authoring canvas.

You can add different responses for each option. For paid vacation, the copilot can point employees to an internal HR website to look up paid time-off policies.
Add a message node for the Paid vacation branch with this message to the user: For paid vacation time-off, go to www.contoso.com/HR/PaidTimeOff to submit time-off requests.
Add a node by selecting the (+) icon to end the conversation with a survey. Select End the conversation, then End with survey. This survey is the customer satisfaction survey prebuilt in the copilot for use in topics.
In the National Holidays path, add a message node with the following text:
National holidays for 2020:
-   New Year's Day: January 1st
-   Memorial Day: May 25th
-   Independence day: July 4th
-   Labor Day: September 7th
-   Thanksgiving: November 26th - 27th
-   Christmas Eve and Christmas Day: December 24th - 25th
End this path in the topic with a survey as well. Add a node by selecting the (+) icon then End the conversation and End with survey.
Test copilot for expected behavior
Copilot Studio comes with a built-in test copilot that lets you test the copilot in real time. You can test the copilot by launching the test copilot canvas and providing the employee's input. When you save the topic, the test copilot is refreshed with the latest content.
Select the copilot icon at the bottom of the screen to launch the test copilot canvas.
Type I need time off information into the copilot chat.
Even though I need time off information doesn't match the trigger phrases exactly, Copilot Studio processes the user's input and triggers the employee time off topic.
As you chat with the copilot in the test copilot canvas, you see where the copilot is in the conversation in real-time by following the green highlights.
Select Paid vacation.
The topic branches off based on the user's response. You can open the TimeoffType variable to see the value of Paid time-off by the user. However, what happens if the user is looking for national holidays in their inquiry? The user might feel annoyed if the copilot asks them to repeat themselves. Let's give it a try.
Above the test copilot pane, select Reset.
Enter Need information on national holidays.
The copilot bypasses its response question on vacation type and directly provides information on national holidays. This choice is because Copilot Studio supports entity extraction and can determine that the user asks about national holidays.

Enhance topic to handle complex queries by escalating to HR experts
Now that you performed the basics, you can add a more complex option to the topic of extended leave.
Return to the topic you created and go to the authoring canvas.
In the Ask a question node, add an option named Extended leave.
Since each employee's personal situation is different, questions about extended leave require a discussion with an HR expert You can build the copilot to connect HR experts with your employees.
Add a message node that says Extended leave needs HR expert approval. Let me connect you with them..
Copilot Studio copilots can take actions by adding Power Automate flows into a topic. In this example, you add a previous flow that notifies an HR expert. This flow sends an adaptive card to the HR expert channel in Teams to let experts know a user needs them to reach out.
You can create the flow to send a message to a Teams channel and then call it with the appropriate input.
Add a question node asking for a description for the issue and add the text How would you describe the issue?
Save the description in a variable named Description.

Add a node under the question and select Call an action.
Select Create a flow, which launches Power Automate within the Copilot Studio app in Teams.
Choose the template Send a message to a Teams channel, then select Continue.
The flow template takes in two inputs from the copilot, the Subject (title for the message) and Message text (actual message) to post to the channel.
Under the Post a message (v3) flow definition, select the Team ID and the Team channel ID where the message should be posted.
(Optional) Add text to the message, in addition to the description entered by the user, and complete the Message field.
Give the flow a name and save it.
Close the flow authoring canvas.
You return to the authoring canvas. You can now add an action and call this newly created flow.
Pass in the variable you created earlier called TimeOffType for the Subject and the Description gathered in the chat. When the flow posts a message on the Expert channel, it shows Extended leave as the title and the message defined in the flow.
Tip
Copilot Studio is directly integrated with Teams, so the copilot knows which user from Teams it's chatting with. This feature allows copilot authors to build personal and customized copilot responses.
To use the name of the person chatting with the copilot, there's a pre-defined variable named bot.UserDisplayName that be used like any other variable.
You can let the employee know their request notified the experts, who will reach out to them soon.
Add a message node with the message We notified the expert. They'll reach out shortly.
End the conversation with a survey.
Save the topic.
You can add more topics so that HR Copilot can more answer questions from Contoso employees.
Tip
Always test your copilot to ensure it's working as expected for the best employee experience.
You see a message posted to the Teams channel when the flow executes in the test canvas.
Publish your copilot - Teams
A copilot with topics and that's ready to publish. Publishing the copilot makes the latest copilot content updates available to end users.
In the navigation menu, select Publish. Select Publish again.
You need to do a few more actions to make the copilot available to employees.
Tip
If you're already in conversation with the copilot, you can type start over after publishing your latest copilot content. This restarts the conversation with the latest content published.
Make your copilot available to other employees
On the Publish page, find the option to Open the copilot. You can test your copilot before sharing it.
Select Share the bot, which opens a pane of customization options.
Employees can now find your published copilot in the Teams app store.
Edit copilot details
In the customization pane, you can edit the copilot icon that displays in Teams and change the short and long descriptions for your copilot. These settings are prepopulated with starter content, but can be customized.

Share your copilot with your team
You can add your copilot to the Built by your colleagues section in the Teams app store.
Select Add to Teams. You see a checkmark indicating the copilot was added to Teams.
Viewing the copilot in the app store is a workaround to test it, since admin approval isn't required and avoids any spam to the admin. Once you're fully satisfied, share the copilot with your organization, which requires admin approval.
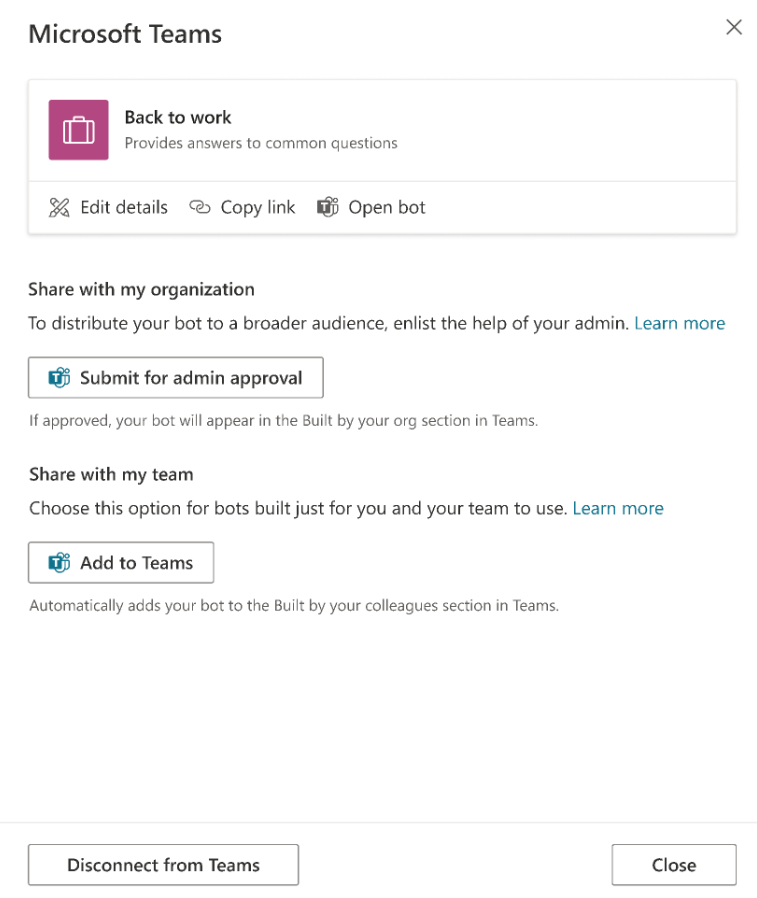
Share your copilot with your organization
Sharing your copilot with the entire organization makes it appear in the Built by your org section in the Teams app store. Access requires admin approval.
Select Submit for admin approval.
Confirm the copilot icon, short description, and long description are correct.
Confirm you want to share the copilot with everyone in the organization.
Submit for admin approval. This part of the process can't be completed right away and requires follow up with the admin for approval.
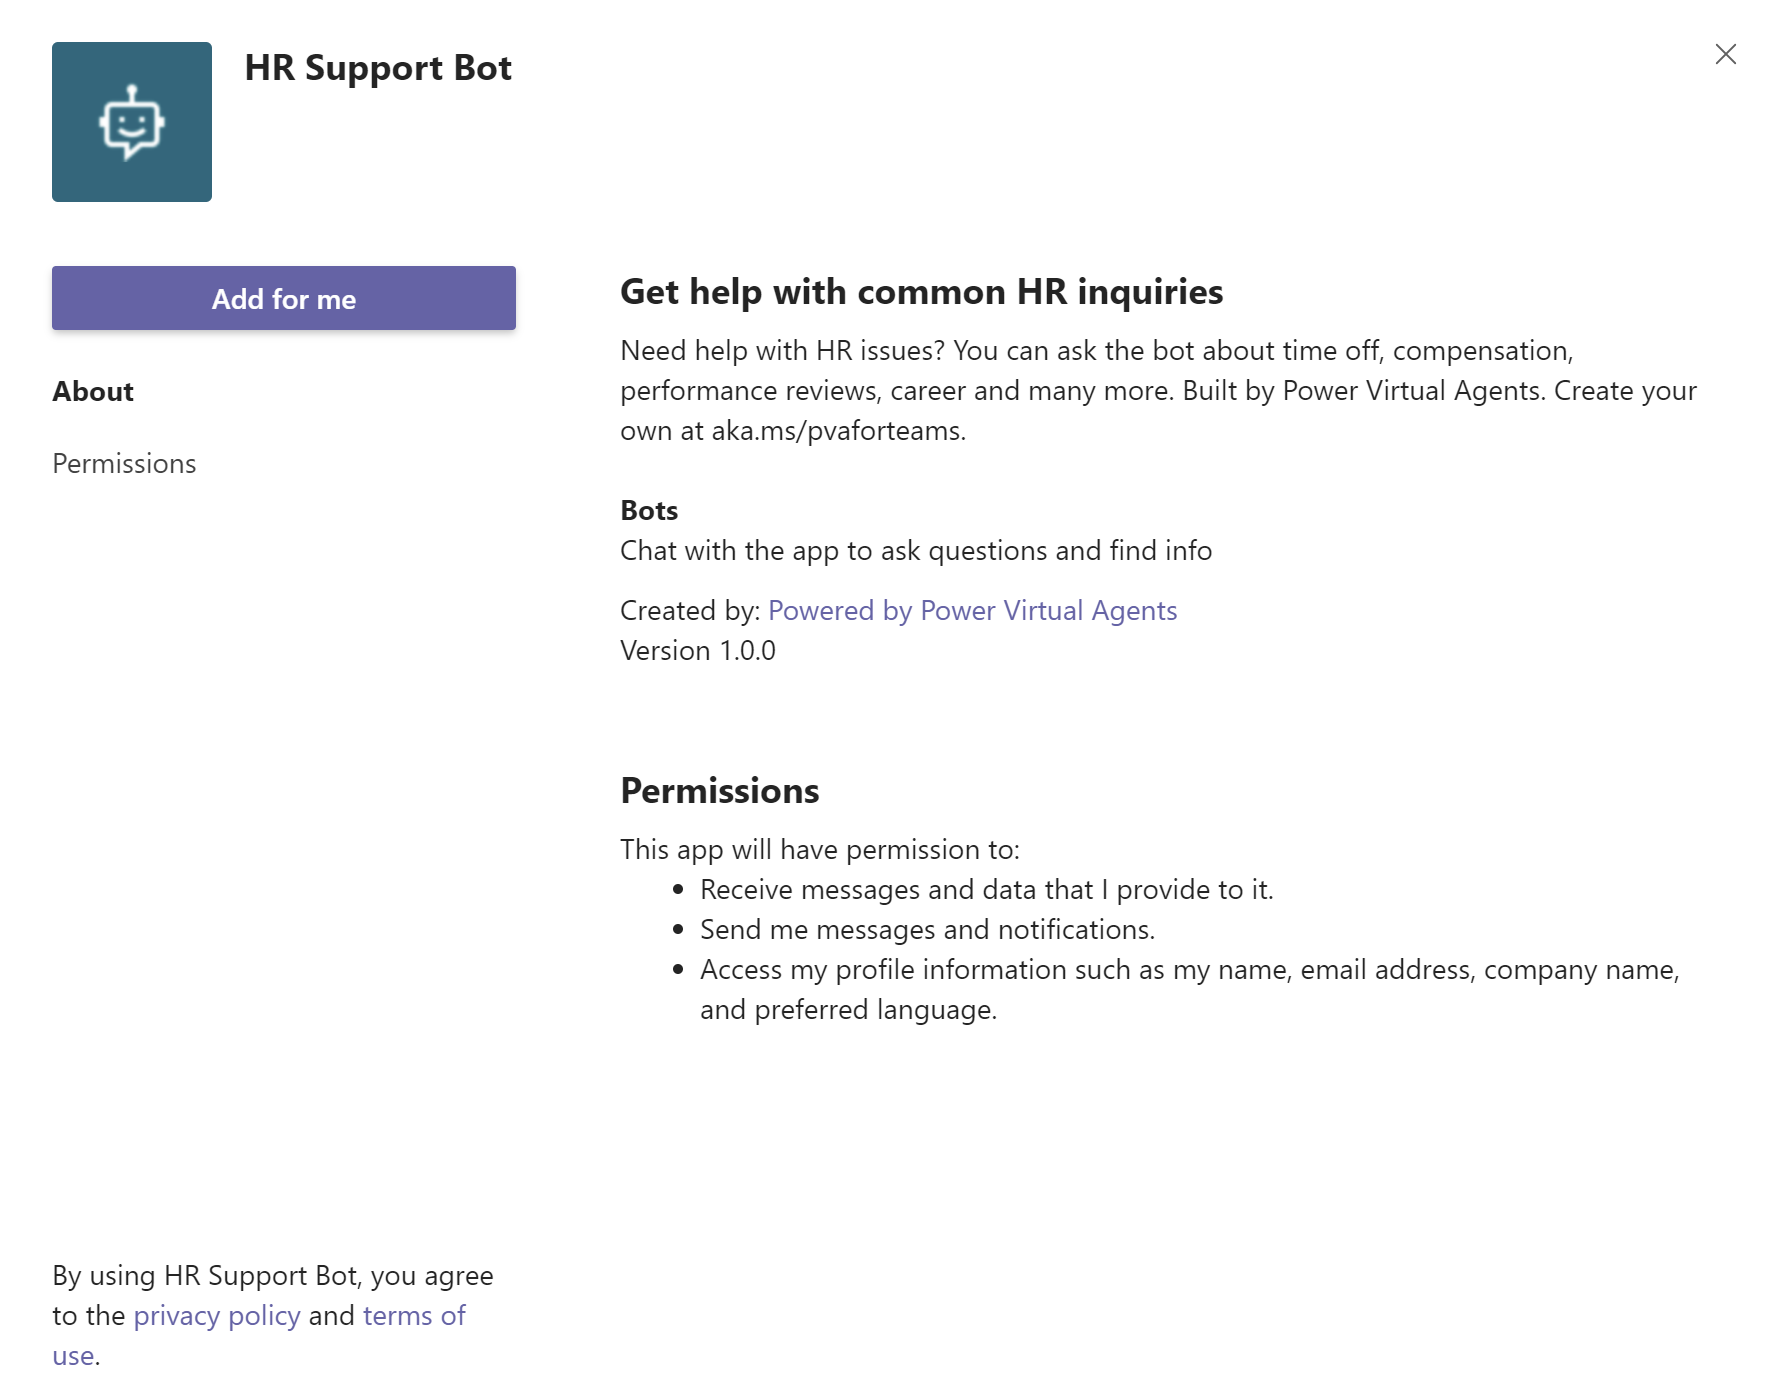
Finding your copilot in the Teams app store
An employee named Melissa can find the copilot you built in the Teams app store.
Depending on where the copilot was shared, Melissa can find it in the Built by your colleagues section or the Built by your org section. To find the copilot in the Built by your org section, the copilot should be approved by an admin first.
Melissa selects the copilot app and selects Add for me. The copilot appears in the Teams side bar.
The Greeting topic is available as a default or "system" topic and triggers automatically to welcome Melissa.
Employee chats with the copilot to ask about time-off
Melissa needs time-off in July and August for personal reasons and enters Need time-off information. Melissa selects Paid vacation and a website appears where she can learn more about paid time-off.
The copilot then gathers customer satisfaction data and ends the conversation.
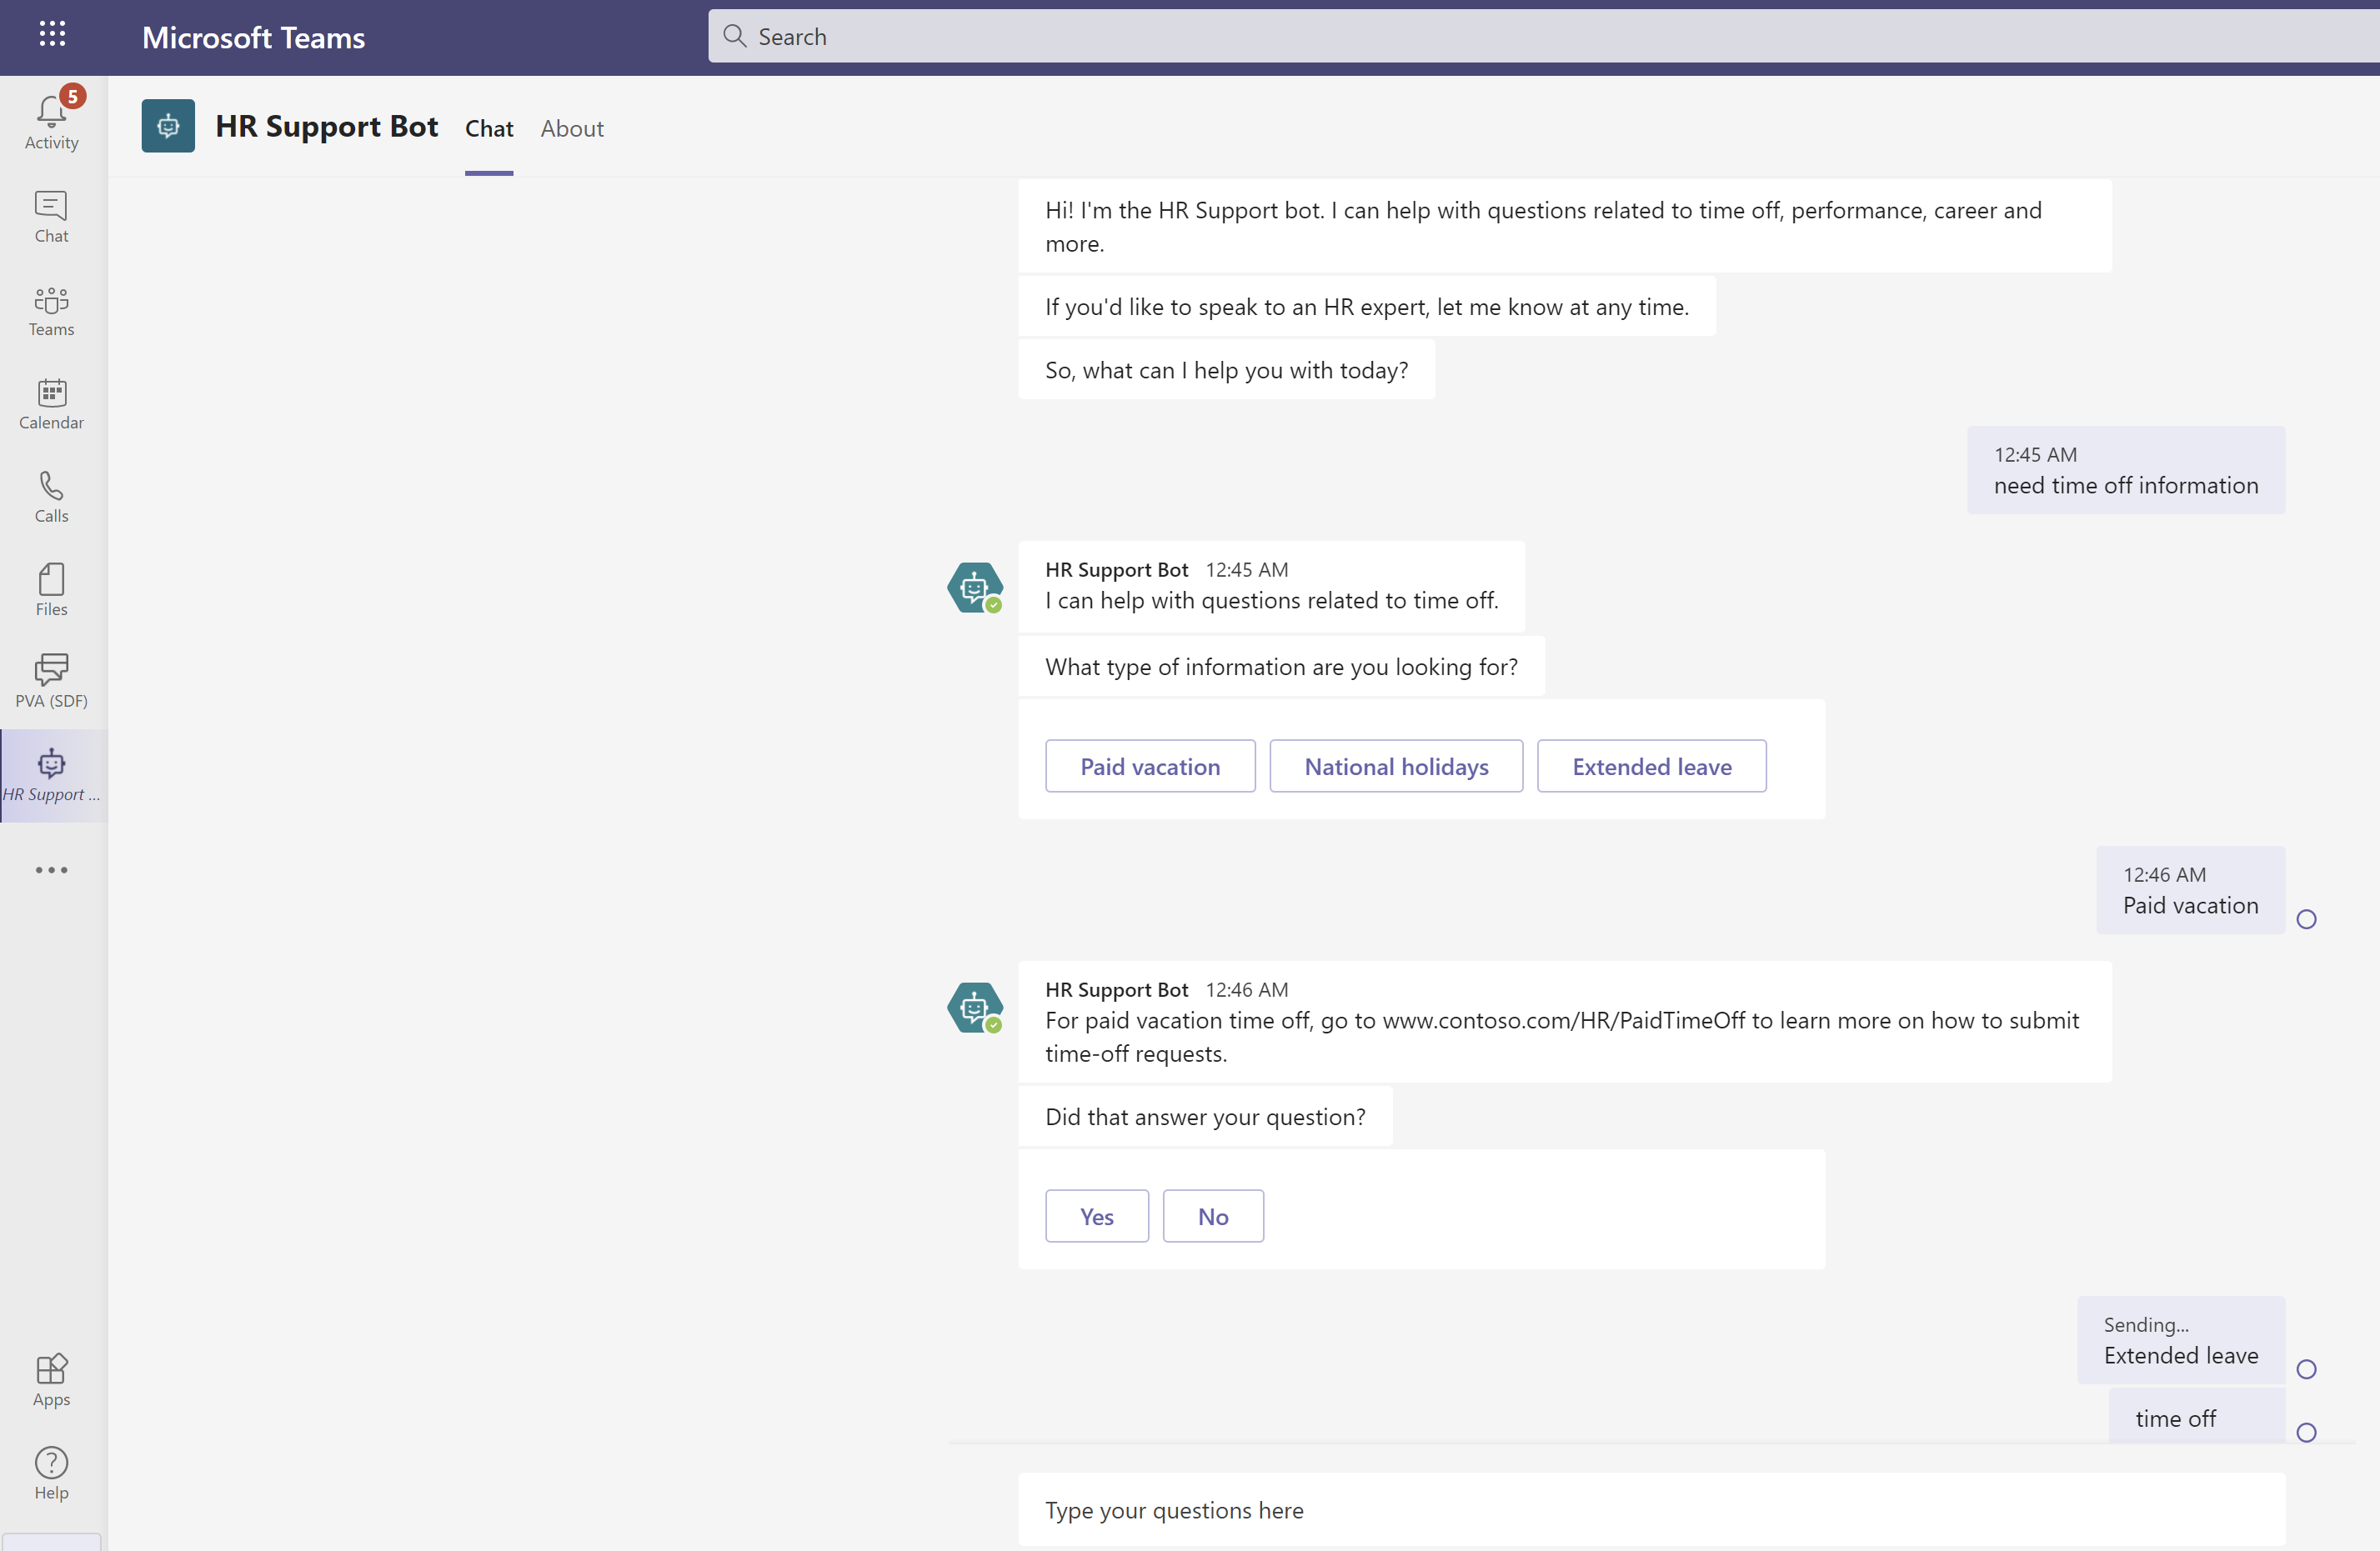
Melissa reviews the HR site for paid time-off and understands she needs an extended leave. Melissa returns to the copilot and types I need extended leave.
The copilot lets Melissa know that an HR expert is needed for the extended leave request and asks Melissa for a description of the issue.
The copilot notifies an expert, who will reach out to Melissa shortly.
Return to the author's view and go to the HR team's experts channel
You see the copilot ran the flow you added earlier and posted Melissa's request to the channel.