Working with environments in Microsoft Copilot Studio
Important
Power Virtual Agents capabilities and features are now part of Microsoft Copilot Studio following significant investments in generative AI and enhanced integrations across Microsoft Copilot.
Some articles and screenshots may refer to Power Virtual Agents while we update documentation and training content.
With Microsoft Copilot Studio, you can create copilots in different environments and easily switch between them.
An environment is a space to store, manage, and share your organization's business data. The copilots you create are stored in an environment (apps and flows are also stored in environments). Environments may also have different roles, security requirements and target audiences, and each environment is created in a separate location. See the following topics for more information:
Use environments
There are many strategies for using multiple environments. For example, you can:
- Create separate environments that correspond to specific teams or departments in your company, each containing the relevant data and copilots for each audience.
- Create separate environments for different global branches of your company.
- Create separate environments to satisfy data residency requirements.
You can also build all your copilots in a single environment if you don't need or want to use different ones.
Note
We recommend using a non-default production environment for copilots that you want to deploy to production.
Create a new environment for your copilots
When you first sign in and create a new copilot, a default environment is created for you.
You can, however, create more environments as needed by using the Power Platform Admin Center.
Go to https://admin.powerplatform.com and sign in using your work account. Use the same tenant that you use for Microsoft Copilot Studio.
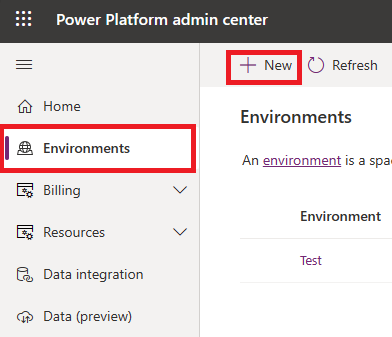
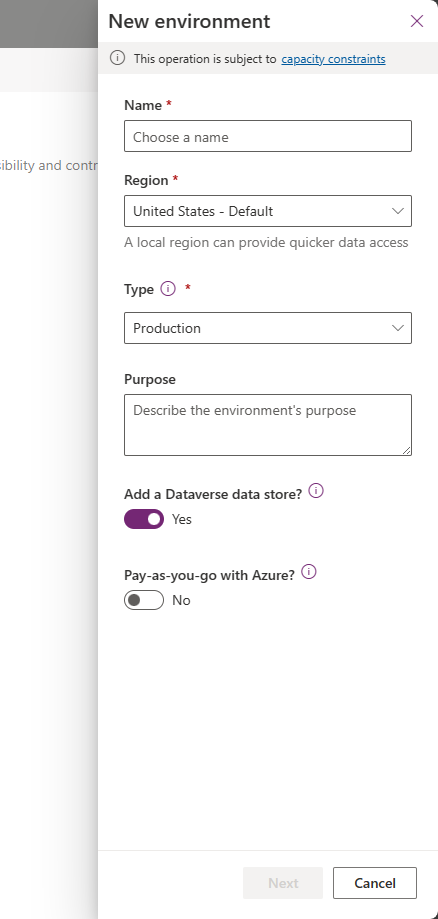
Go to the Environments tab and select + New to open the New environment pane.
For Name, specify a unique name for the environment.
For Type select the environment type.
Note
A production environment is intended for production scenarios and won't be subject to the same restrictions as a trial environment. If you are trying out Microsoft Copilot Studio for free, you'll need to make sure you set the environment to Trial. The standard limitations for trial environments apply.
For Region select the support data region where you want the environment to be created.
Set Add a Dataverse data store? to Yes.
Select Next.
Note
The environment needs to be created in a supported region, otherwise you won't be able to use it when creating a copilot. For more information, see: Supported data locations.
Specify the details of the Dataverse data store, such as the language, currency type, and security group and then select Save.
You are returned to the Environments tab. Select Refresh to see the environment. It may take a few minutes to fully create the environment.
After the environment is created, you can return to the Microsoft Copilot Studio portal and use the environment to create a new copilot.
Create a copilot in an existing environment
- Select the environment in the environment switcher on the top menu bar.
Create a copilot in an existing environment where you don't have access
To create a copilot in an environment, you need access to the environment. If you don't have access, you need to be a system administrator or contact the system administrator to grant access. You then need to complete the following steps:
Create a copilot in the environment (this step installs the necessary Microsoft Copilot Studio solutions).
Assign the security role of "copilot author" to yourself in the environment.
Return to the Microsoft Copilot Studio portal and create a copilot in the environment.
Trial environments
When you trial Microsoft Copilot Studio, you can create trial environments that expire after 30 days. When the environment expires, all the copilots in the environment are deleted. This causes all the data associated with the copilot, including any flows and resources you have been using, to be lost.
If you created your own environment and selected Trial as the environment type, you receive email messages shortly before the environment expires. In the Microsoft Copilot Studio portal, you also see a notification if you have copilots created in a trial environment that is going to expire in less than two weeks.
Important
There's a difference between an expiring environment and an expiring license. If your license is expiring, you can extend it without losing any data.
Converting a trial environment to a production environment
When using a trial environment and you want to retain the copilots for longer than 30 days, you must convert the trial environment to a production environment.
Supported operations
Microsoft Copilot Studio supports the following environment lifecycle operations, as described in Power Platform environments overview:
The following operation is unsupported:
Known issues with creating a copilot
When you're creating your copilot, you might encounter the following issues.
Insufficient permissions for the selected environment
In this case, you see this error: "You do not have permissions to any environments. Get access from an administrator."
You need to create a new environment. Use that environment to create your copilot.
The environment doesn't show up in the drop-down menu of Microsoft Copilot Studio
Your environment might not show up in the drop-down menu due to one of the following causes:
- The environment doesn't have a database created. To resolve this issue, go to admin.powerplatform.com to create a database in your environment.
- The environment is created in an unsupported region. For more information, see: Supported data locations.
Related links
Feedback
Coming soon: Throughout 2024 we will be phasing out GitHub Issues as the feedback mechanism for content and replacing it with a new feedback system. For more information see: https://aka.ms/ContentUserFeedback.
Submit and view feedback for