Manage Microsoft Entra Health
This section describes various operations you can perform by using Microsoft Entra Connect Health.
Enable email notifications
You can configure the Microsoft Entra Connect Health service to send email notifications when alerts indicate that your identity infrastructure is not healthy. This occurs when an alert is generated, and when it is resolved.

Note
Email notifications are enabled by default.
To enable Microsoft Entra Connect Health email notifications
- Open the Alerts blade for the service for which you want to receive email notification.
- From the action bar, click Notification Settings.
- At the email notification switch, select ON.
- Select the check box if you want all global administrators to receive email notifications.
- If you want to receive email notifications at any other email addresses, specify them in the Additional Email Recipients box. To remove an email address from this list, right-click the entry and select Delete.
- To finalize the changes, click Save. Changes take effect only after you save.
Note
When there are issues processing synchronization requests in our back-end service, this service sends a notification email with the details of the error to the administrative contact email address(es) of your tenant. We heard feedback from customers that in certain cases the volume of these messages is prohibitively large so we are changing the way we send these messages.
Instead of sending a message for every sync error every time it occurs we will send out a daily digest of all errors the back-end service has returned. This enables customers to process these errors in a more efficient manner and reduces the number of duplicate error messages.
Delete a server or service instance
Note
Microsoft Entra ID premium license is required for the deletion steps.
In some instances, you might want to remove a server from being monitored. Here's what you need to know to remove a server from the Microsoft Entra Connect Health service.
When you're deleting a server, be aware of the following:
- This action stops collecting any further data from that server. This server is removed from the monitoring service. After this action, you are not able to view new alerts, monitoring, or usage analytics data for this server.
- This action does not uninstall the Health Agent from your server. If you have not uninstalled the Health Agent before performing this step, you might see errors related to the Health Agent on the server.
- This action does not delete the data already collected from this server. That data is deleted in accordance with the Azure data retention policy.
- After performing this action, if you want to start monitoring the same server again, you must uninstall and reinstall the Health Agent on this server.
Delete a server from the Microsoft Entra Connect Health service
Note
Microsoft Entra ID premium license is required for the deletion steps.
Microsoft Entra Connect Health for Active Directory Federation Services (AD FS) and Microsoft Entra Connect (Sync):
Open the Server blade from the Server List blade by selecting the server name to be removed.
On the Server blade, from the action bar, click Delete.
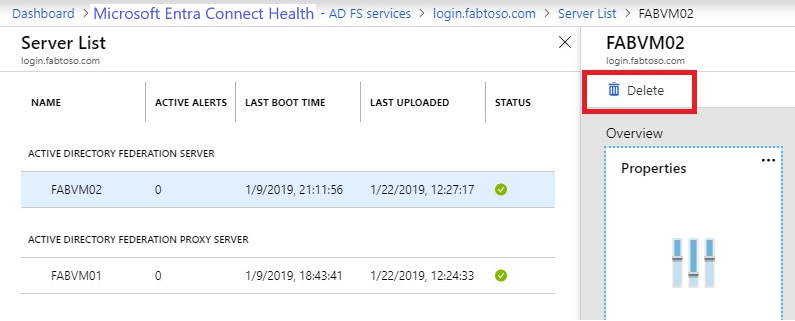
Confirm by typing the server name in the confirmation box.
Click Delete.
Microsoft Entra Connect Health for Microsoft Entra Domain Services:
- Open the Domain Controllers dashboard.
- Select the domain controller to be removed.
- From the action bar, click Delete Selected.
- Confirm the action to delete the server.
- Click Delete.
Delete a service instance from Microsoft Entra Connect Health service
In some instances, you might want to remove a service instance. Here's what you need to know to remove a service instance from the Microsoft Entra Connect Health service.
When you're deleting a service instance, be aware of the following:
- This action removes the current service instance from the monitoring service.
- This action does not uninstall or remove the Health Agent from any of the servers that were monitored as part of this service instance. If you have not uninstalled the Health Agent before performing this step, you might see errors related to the Health Agent on the servers.
- All data from this service instance is deleted in accordance with the Azure data retention policy.
- After performing this action, if you want to start monitoring the service, uninstall and reinstall the Health Agent on all the servers. After performing this action, if you want to start monitoring the same server again, uninstall, reinstall, and register the Health Agent on that server.
To delete a service instance from the Microsoft Entra Connect Health service
Open the Service blade from the Service List blade by selecting the service identifier (farm name) that you want to remove.
On the Service blade, from the action bar, click Delete.
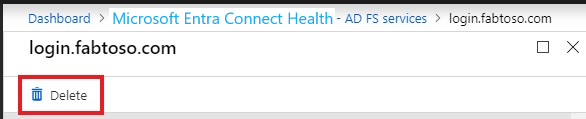
Confirm by typing the service name in the confirmation box (for example: sts.contoso.com).
Click Delete.
Manage access with Azure Role Based Access Control
Azure role-based access control (Azure RBAC) for Microsoft Entra Connect Health provides access to users and groups other than global administrators. Azure RBAC assigns roles to the intended users and groups, and provides a mechanism to limit the global administrators within your directory.
Roles
Microsoft Entra Connect Health supports the following built-in roles:
| Role | Permissions |
|---|---|
| Owner | Owners can manage access (for example, assign a role to a user or group), view all information (for example, view alerts) from the portal, and change settings (for example, email notifications) within Microsoft Entra Connect Health. By default, Microsoft Entra global administrators are assigned this role, and this cannot be changed. |
| Contributor | Contributors can view all information (for example, view alerts) from the portal, and change settings (for example, email notifications) within Microsoft Entra Connect Health. |
| Reader | Readers can view all information (for example, view alerts) from the portal within Microsoft Entra Connect Health. |
All other roles (such as User Access Administrators or DevTest Labs Users) have no impact to access within Microsoft Entra Connect Health, even if the roles are available in the portal experience.
Access scope
Microsoft Entra Connect Health supports managing access at two levels:
- All service instances: This is the recommended path in most cases. It controls access for all service instances (for example, an AD FS farm) across all role types that are being monitored by Microsoft Entra Connect Health.
- Service instance: In some cases, you might need to segregate access based on role types or by a service instance. In this case, you can manage access at the service instance level.
Permission is granted if an end user has access either at the directory or service instance level.
Allow users or groups access to Microsoft Entra Connect Health
The following steps show how to allow access.
Step 1: Select the appropriate access scope
To allow a user access at the all service instances level within Microsoft Entra Connect Health, open the main blade in Microsoft Entra Connect Health.
Step 2: Add users and groups, and assign roles
From the Configure section, click Users.
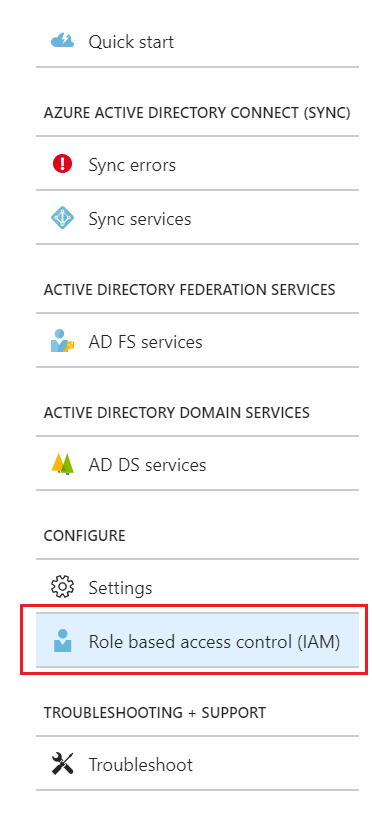
Select Add.
In the Select a role pane, select a role (for example, Owner).

Type the name or identifier of the targeted user or group. You can select one or more users or groups at the same time. Click Select.
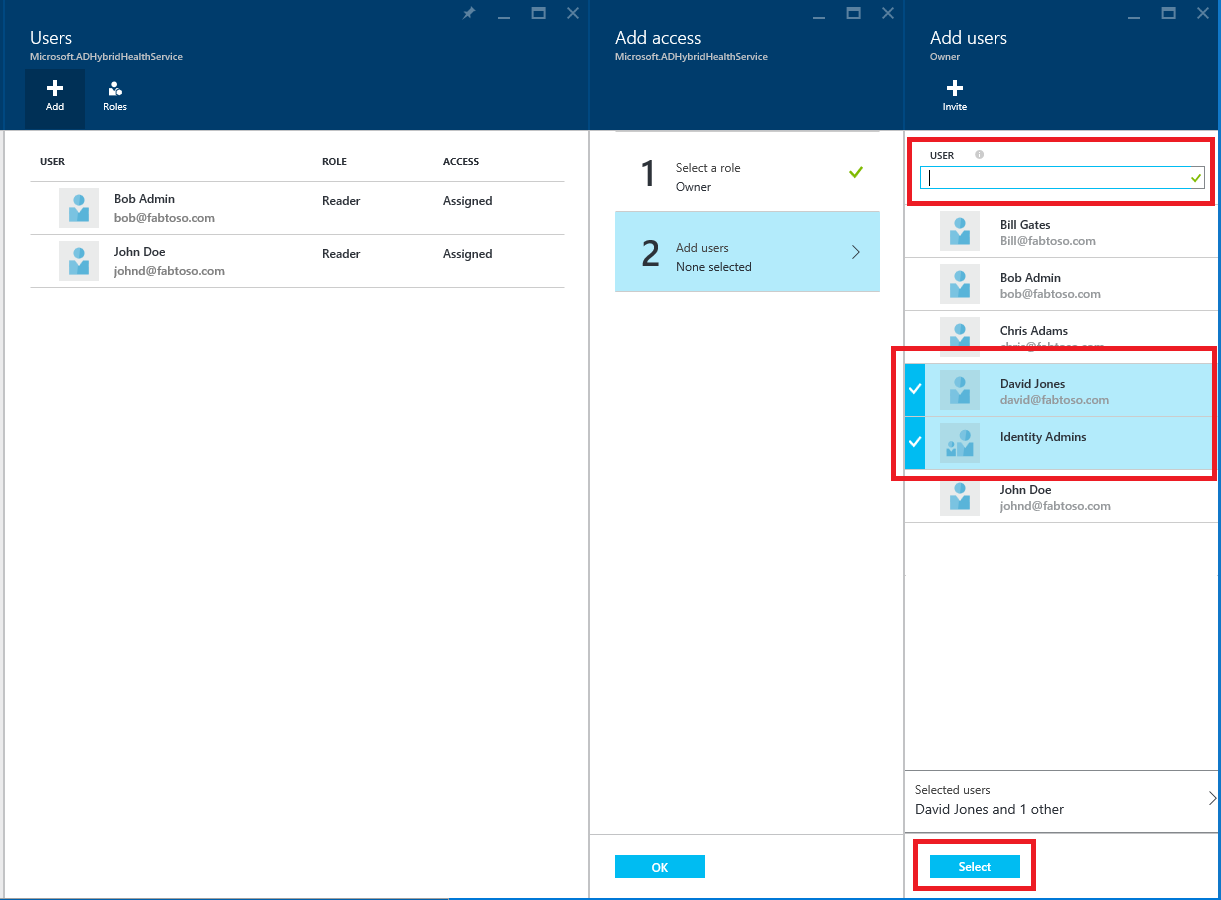
Select OK.
After the role assignment is complete, the users and groups appear in the list.
Now the listed users and groups have access, according to their assigned roles.
Note
Global administrators always have full access to all the operations, but global administrator accounts are not present in the preceding list.
- The Invite Users feature is not supported within Microsoft Entra Connect Health.
Step 3: Share the blade location with users or groups
After you assign permissions, a user can access Microsoft Entra Connect Health by going here.
On the blade, the user can pin the blade, or different parts of it, to the dashboard. Simply click the Pin to dashboard icon.

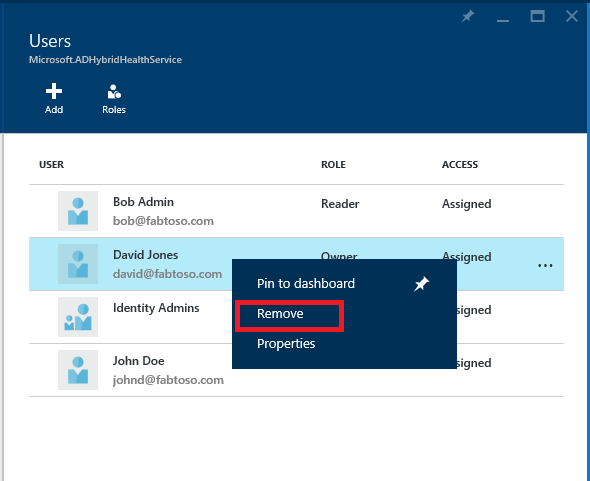
Remove users or groups
You can remove a user or a group added to Microsoft Entra Connect Health and Azure RBAC. Simply right-click the user or group, and select Remove.
Diagnose and remediate duplicated attribute sync errors
Overview
Taking one step farther to highlight sync errors, Microsoft Entra Connect Health introduces self-service remediation. It troubleshoots duplicated attribute sync errors and fixes objects that are orphaned from Microsoft Entra ID. The diagnosis feature has these benefits:
- It provides a diagnostic procedure that narrows down duplicated attribute sync errors. And it gives specific fixes.
- It applies a fix for dedicated scenarios from Microsoft Entra ID to resolve the error in a single step.
- No upgrade or configuration is required to enable this feature.
Problems
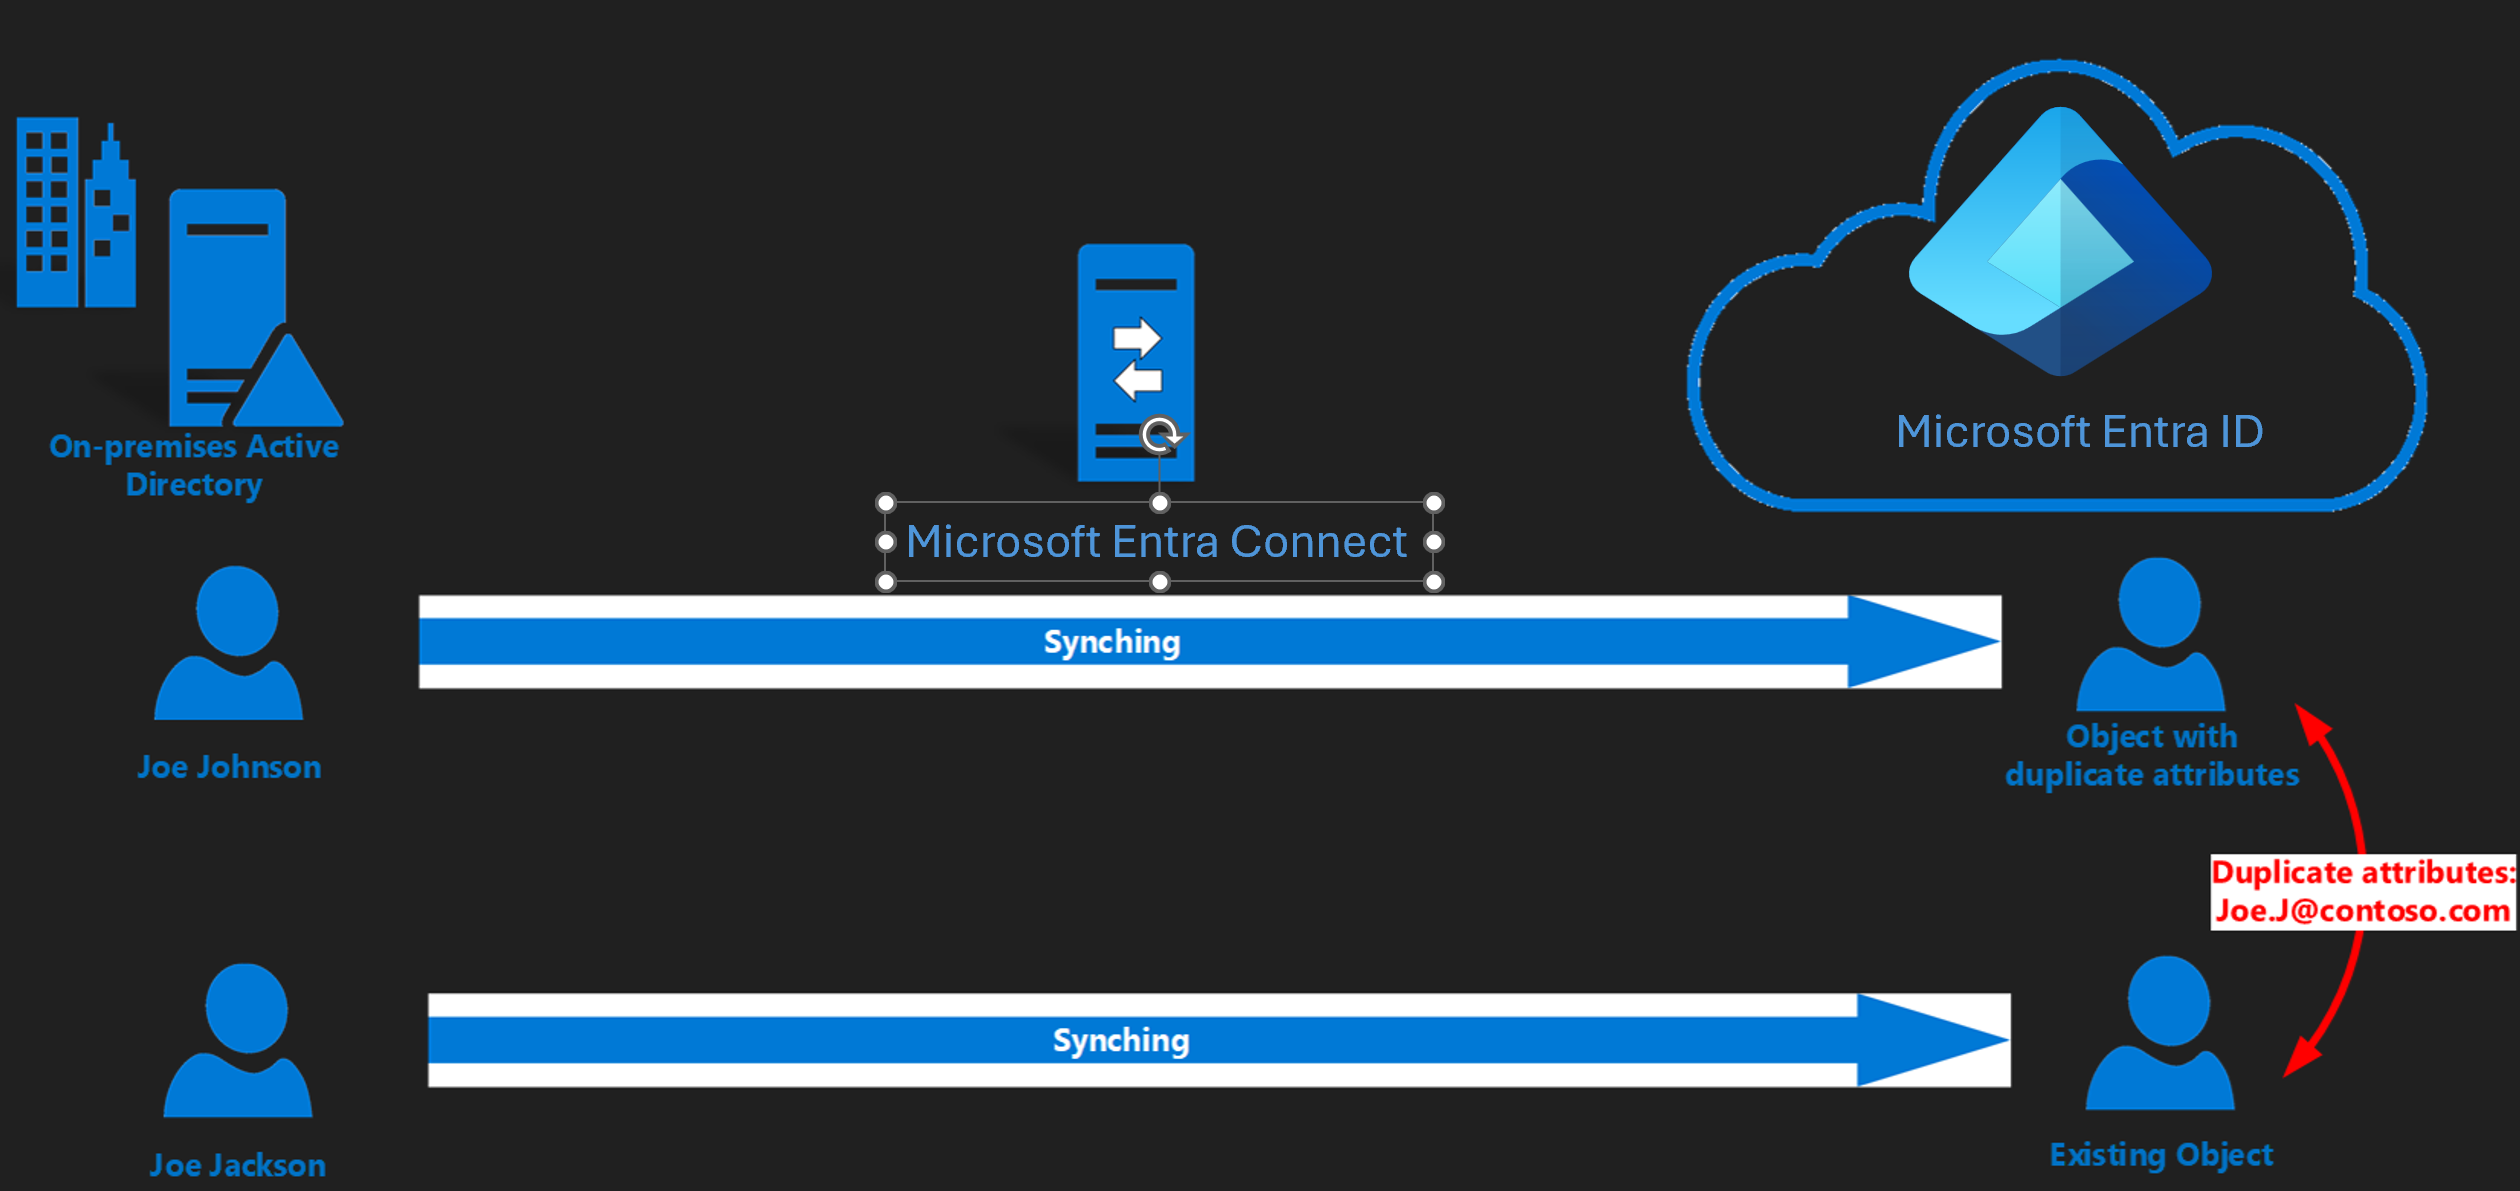
A common scenario
When QuarantinedAttributeValueMustBeUnique and AttributeValueMustBeUnique sync errors happen, it's common to see a UserPrincipalName or Proxy Addresses conflict in Microsoft Entra ID. You might solve the sync errors by updating the conflicting source object from the on-premises side. The sync error will be resolved after the next sync. For example, this image indicates that two users have a conflict of their UserPrincipalName. Both are Joe.J@contoso.com. The conflicting objects are quarantined in Microsoft Entra ID.
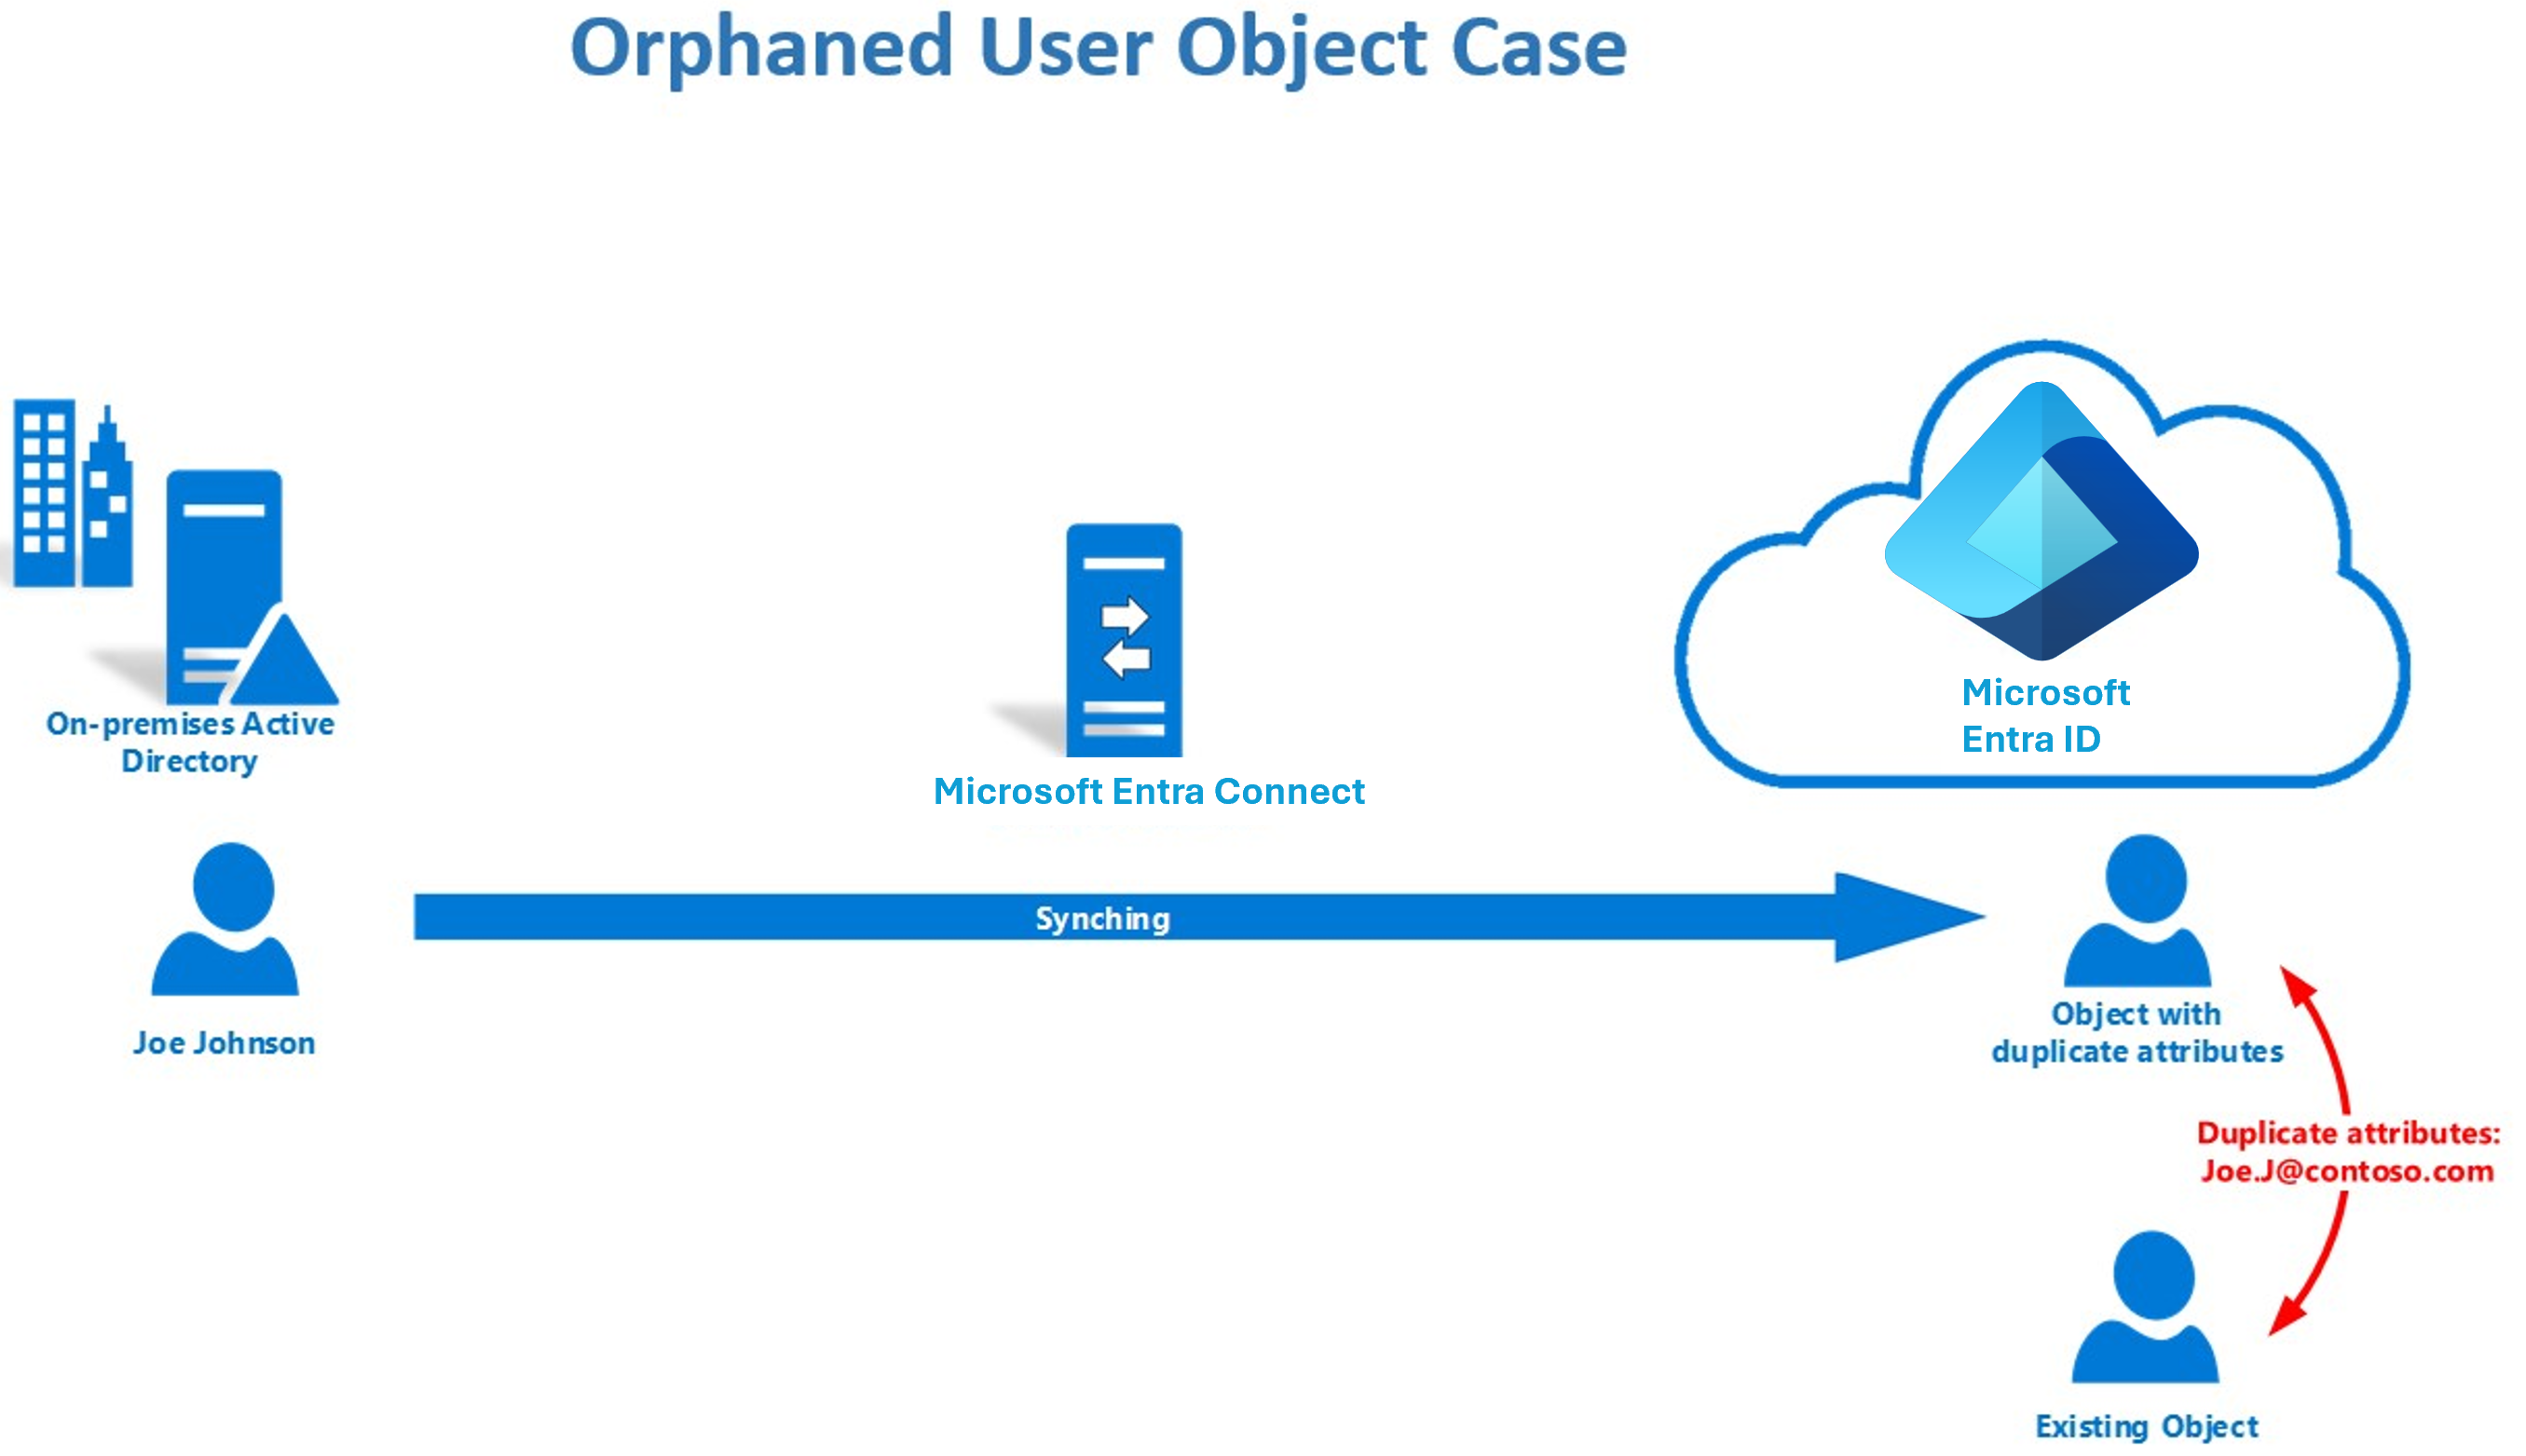
Orphaned object scenario
Occasionally, you might find that an existing user loses the Source Anchor. The deletion of the source object happened in on-premises Active Directory. But the change of deletion signal never got synchronized to Microsoft Entra ID. This loss happens for reasons like sync engine issues or domain migration. When the same object gets restored or recreated, logically, an existing user should be the user to sync from the Source Anchor.
When an existing user is a cloud-only object, you can also see the conflicting user synchronized to Microsoft Entra ID. The user can't be matched in sync to the existing object. There's no direct way to remap the Source Anchor.
As an example, the existing object in Microsoft Entra ID preserves the license of Joe. A newly synchronized object with a different Source Anchor occurs in a duplicated attribute state in Microsoft Entra ID. Changes for Joe in on-premises Active Directory won't be applied to Joe’s original user (existing object) in Microsoft Entra ID.
Diagnostic and troubleshooting steps in Connect Health
The diagnose feature supports user objects with the following duplicated attributes:
| Attribute name | Synchronization error types |
|---|---|
| UserPrincipalName | QuarantinedAttributeValueMustBeUnique or AttributeValueMustBeUnique |
| ProxyAddresses | QuarantinedAttributeValueMustBeUnique or AttributeValueMustBeUnique |
| SipProxyAddress | AttributeValueMustBeUnique |
| OnPremiseSecurityIdentifier | AttributeValueMustBeUnique |
Important
To access this feature, Global Admin permission, or Contributor permission from Azure RBAC, is required.
Follow the steps from the Azure portal to narrow down the sync error details and provide more specific solutions:
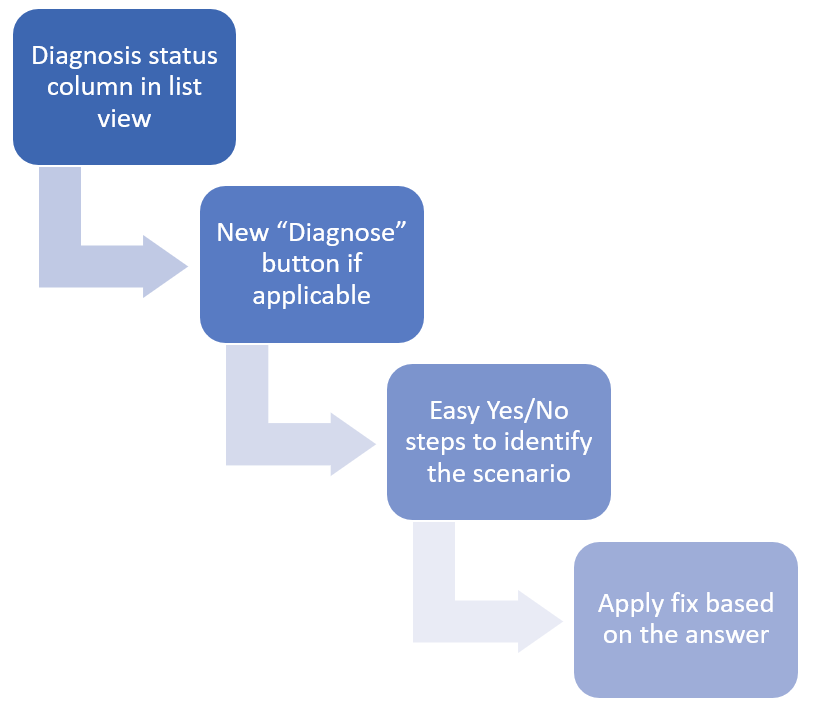
From the Azure portal, take a few steps to identify specific fixable scenarios:
Check the Diagnose status column. The status shows if there's a possible way to fix a sync error directly from Microsoft Entra ID. In other words, a troubleshooting flow exists that can narrow down the error case and potentially fix it.
Status What does it mean? Not Started You haven't visited this diagnosis process. Depending on the diagnostic result, there's a potential way to fix the sync error directly from the portal. Manual Fix Required The error doesn't fit the criteria of available fixes from the portal. Either conflicting object types aren't users, or you already went through the diagnostic steps, and no fix resolution was available from the portal. In the latter case, a fix from the on-premises side is still one of the solutions. Pending Sync A fix was applied. The portal is waiting for the next sync cycle to clear the error. Select the Diagnose button under the error details. You'll answer a few questions and identify the sync error details. Answers to the questions help identify an orphaned object case.
If a Close button appears at the end of the diagnostics, there's no quick fix available from the portal based on your answers. Refer to the solution shown in the last step. Fixes from on-premises are still the solutions. Select the Close button. The status of the current sync error switches to Manual fix required. The status stays during the current sync cycle.
After an orphaned object case is identified, you can fix the duplicated attributes sync errors directly from the portal. To trigger the process, select the Apply Fix button. The status of the current sync error updates to Pending sync.
After the next sync cycle, the error should be removed from the list.