Purchase and manage app subscriptions and licenses
This article helps you understand the user's purchase experience for apps in Teams. Users can purchase subscriptions and manage licenses from the Microsoft Teams Store for an individual, team, or an organization. You can add more features and functionality to your Teams app through subscriptions.
Subscription experience
To purchase a subscription plan for a Teams app, follow these steps:
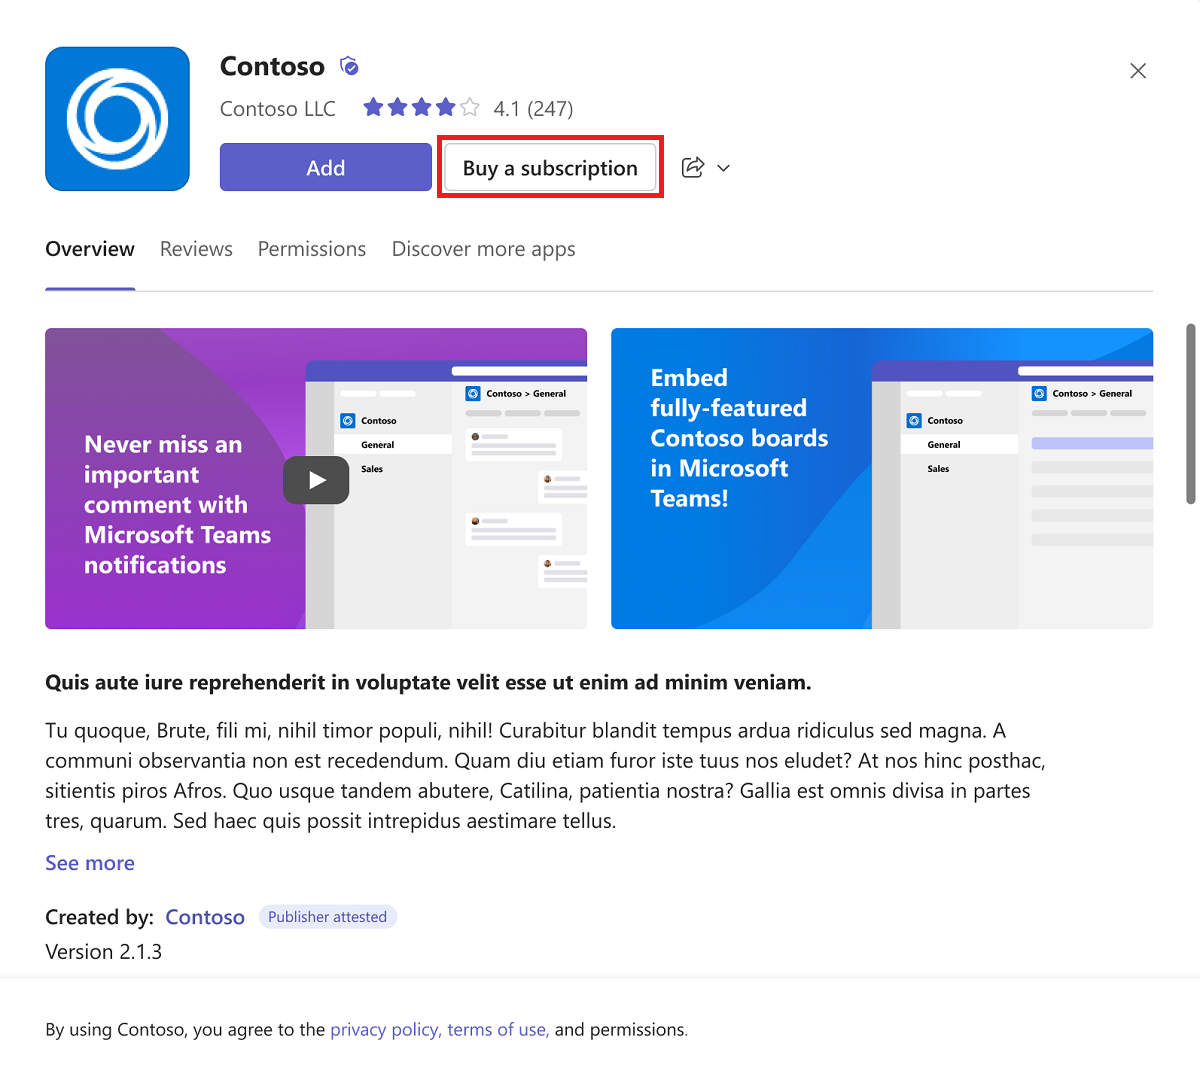
In the Teams Store, find and select the app for which you want to purchase the subscription.
In the app details dialog, select Buy a subscription.
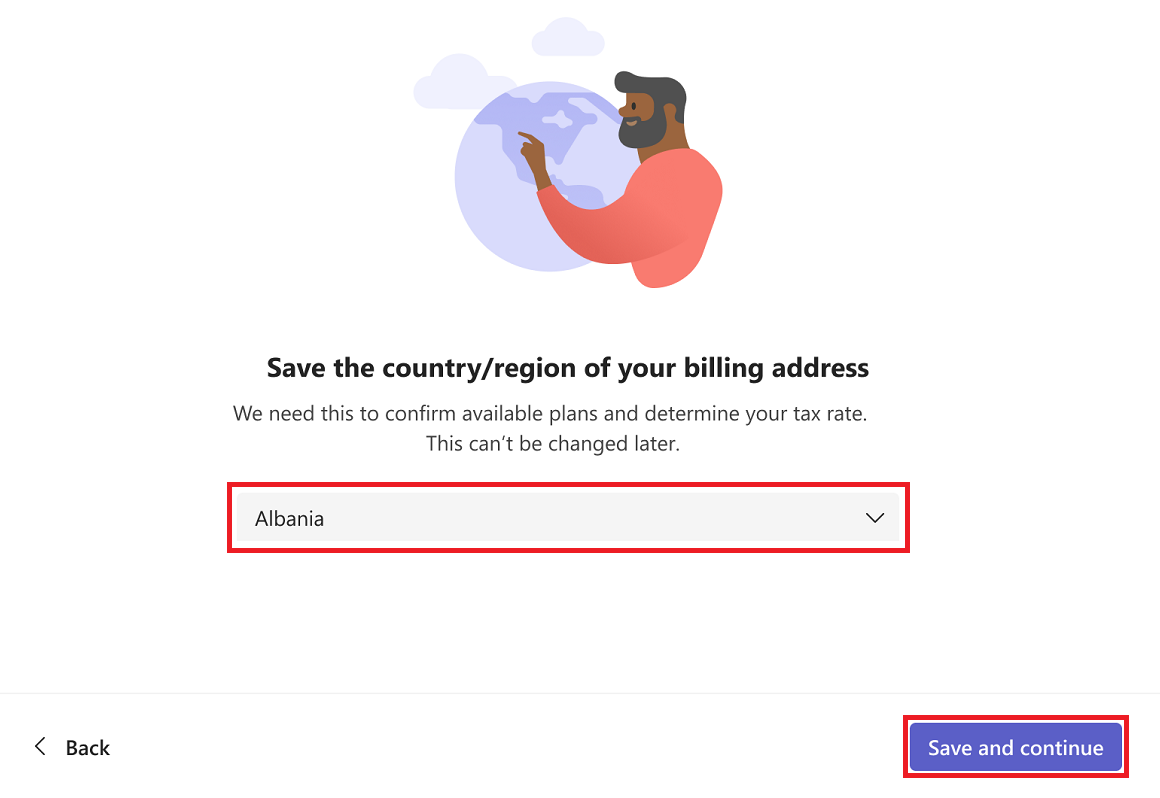
To view the available plans for your location, select your country or region.
Select Save and continue.
In the Choose a subscription plan dialog, select Start trail for the plan you want to purchase.
Note
Private plans are visible only to users of the organization you're providing the specific offer. A Private offer
 icon indicates such private plans.
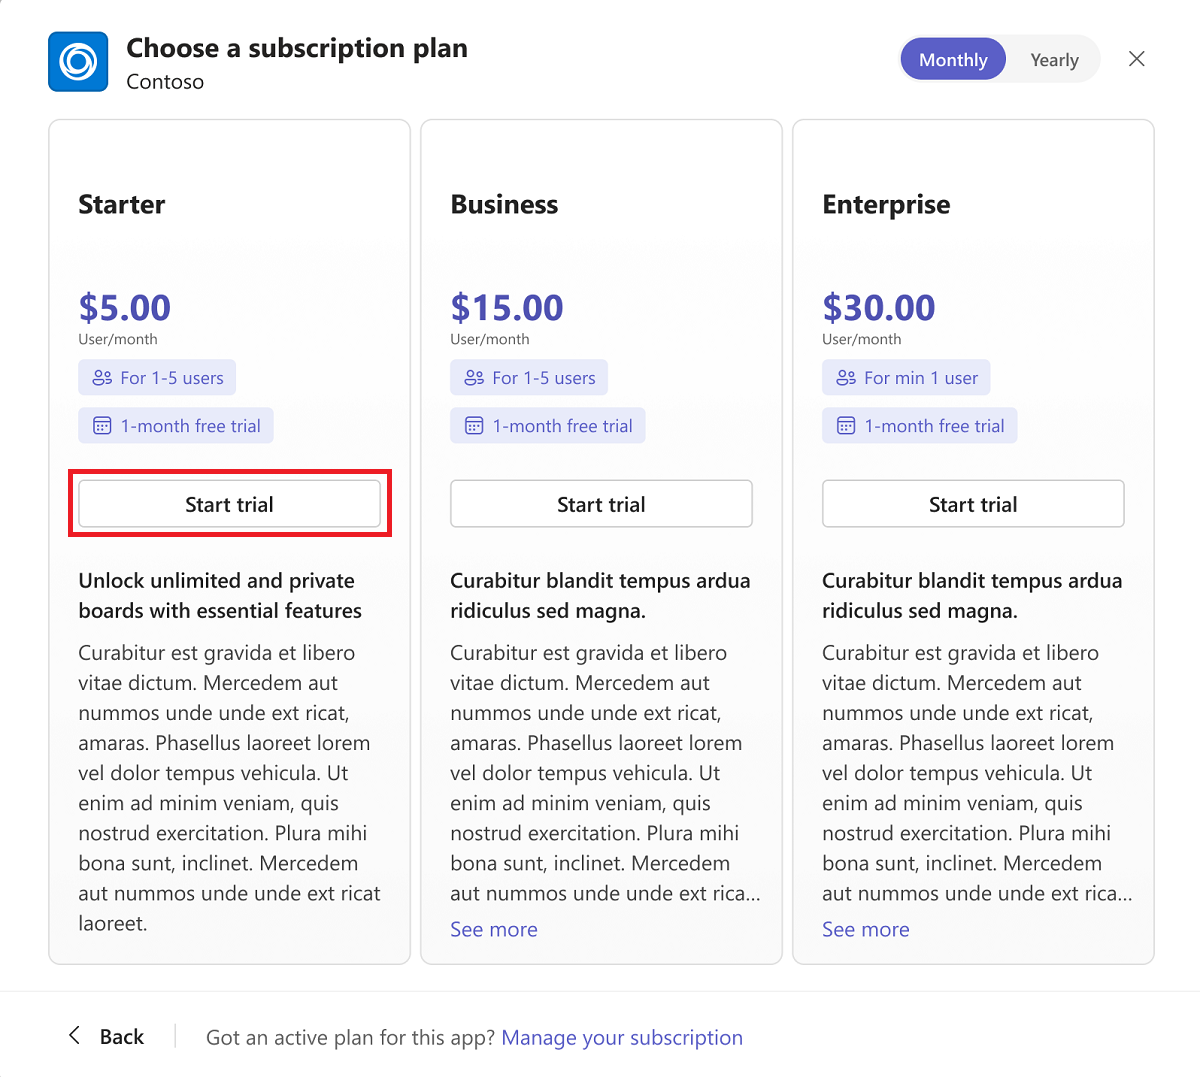
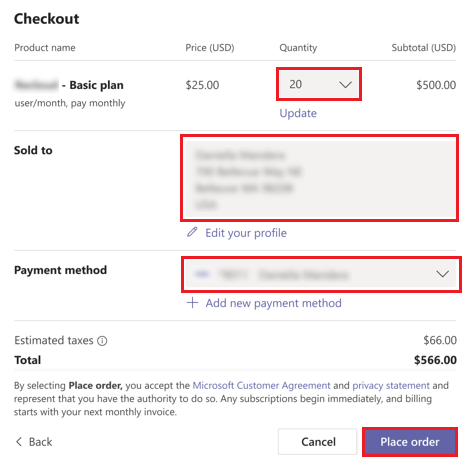
In the Checkout dialog, enter the following information:
- Under Basic plan > Quantity, select the number of plans.
- Under Sold to, add the name and address. For Sold-to address, enter the address of the legal entity responsible for payment and identified on the invoice (business or residence). The Sold-to address determines the estimated tax rate for your purchase.
- Under Payment method, add the payment details.
Select Place order.
When prompted, select Set up now to activate your subscription.

You're redirected to the app website (also known as a landing page) where you can manage your subscriptions.
When a new user launches the app for the first time, they're requested to provide consent to the app.
Note
Consent dialog is part of the flow to get the user's license information and may vary based on Independent software vendors (ISVs) integration approach.
Following is an example of the consent screen:

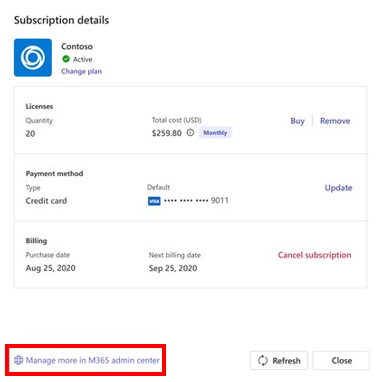
Manage subscriptions
If you've purchased a Teams app subscription or if you want to manage one for your team, you can view the list of subscriptions and their details:
- Change a plan.
- Buy or remove licenses.
- Update a payment method.
- Cancel a subscription.
- View your invoices.
Filter your subscriptions
Go to Microsoft Teams.
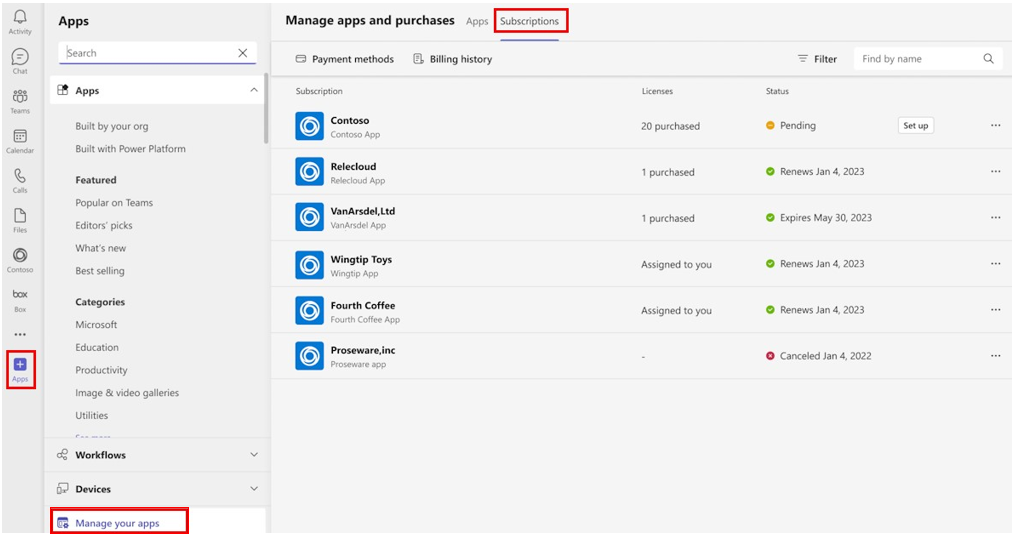
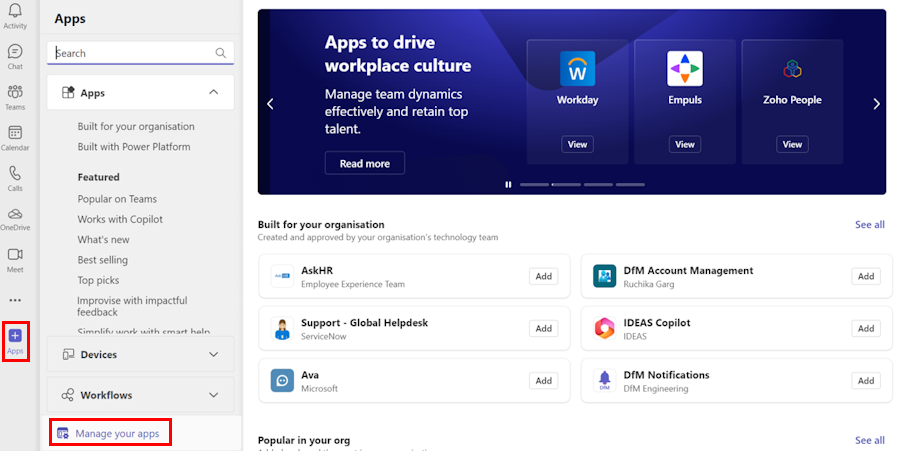
Select Apps > Manage your apps.
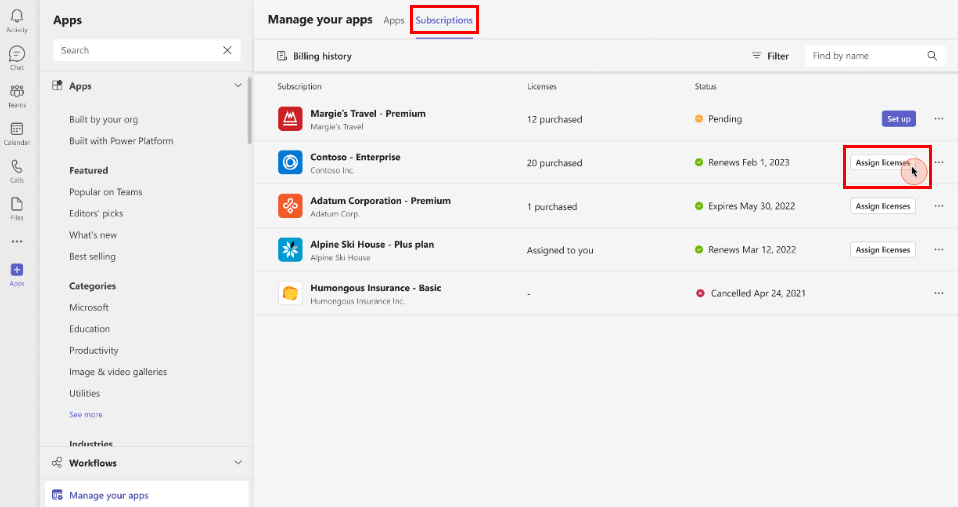
Select the Subscriptions tab to view your list of subscriptions.
To filter subscriptions by status, select Filter and then select the type(s) of subscriptions:
- Pending: Subscription still needs to be set up.
- Active: Subscription is set up and the service can be used.
- Deleted: Subscription is no longer available.
To find a specific subscription, type the name of the app in the search box.
Manage licenses
Go to Microsoft Teams.
Select Apps > Manage your apps.
Select the Subscriptions tab to view your list of subscriptions.
Find the app subscription that you want to manage and select More options ....
Manage licenses by selecting Buy licenses or Remove licenses.
Cancel a subscription
Go to Microsoft Teams.
Select Apps > Manage your apps.
Select the Subscriptions tab to view your list of subscriptions.
Find the app that you want to cancel and select More options ... > View subscription.
Select Cancel subscription.
Note
You can only manage subscriptions you purchased.
You can take additional actions related to your subscription, such as editing your billing profile or recurring billing settings in M365 admin center.
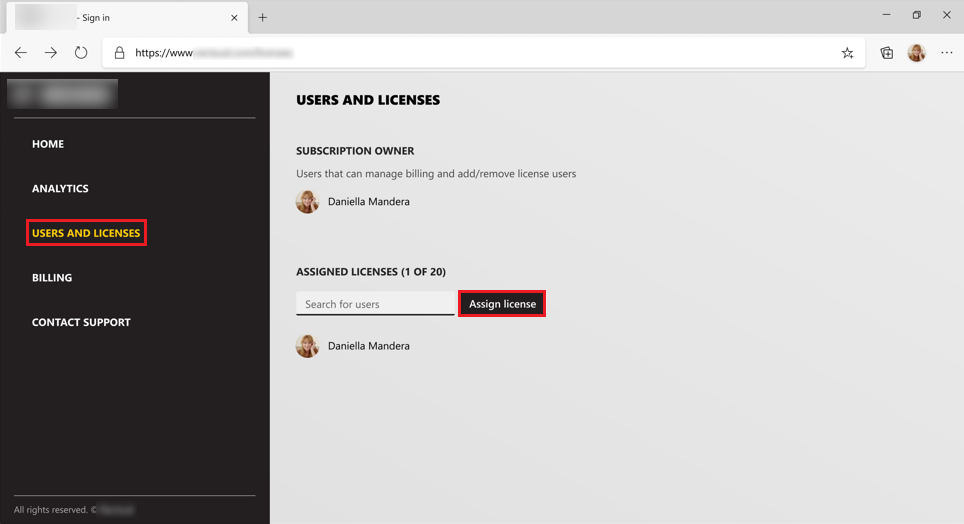
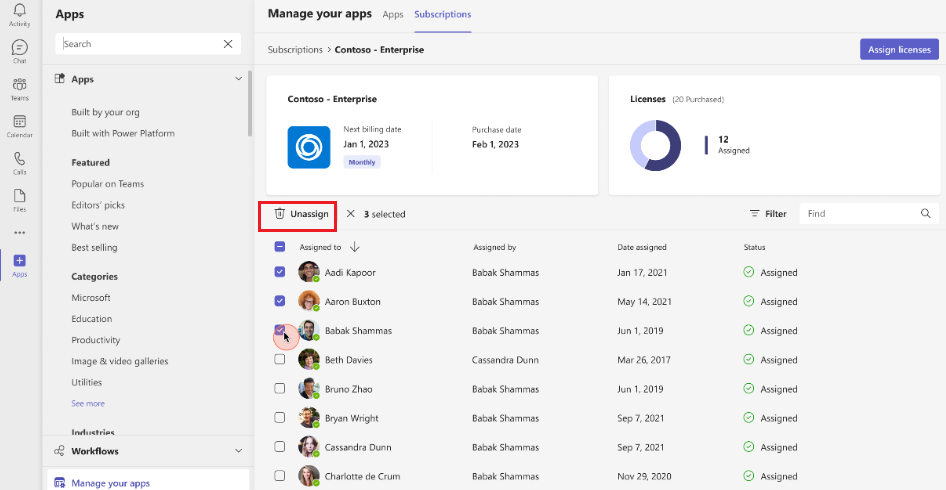
License management experience
The following example shows how users can manage licenses for third-party apps from the Teams Store:
Go to Microsoft Teams.
Select Apps > Manage your apps.
Select Subscriptions. A tab appears with a list of purchases made in the tenant.
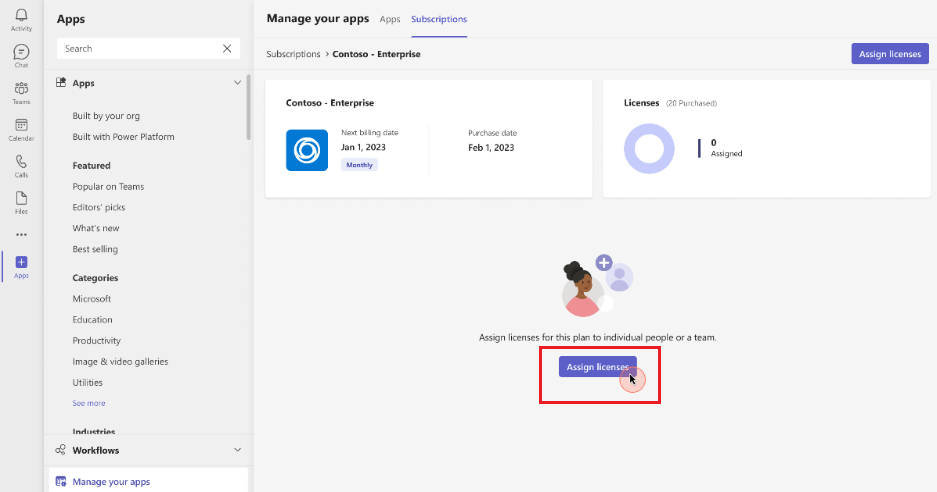
Select an existing subscription from the list and then select Assign licenses.
To view license utilization and assign licenses, select Assign licenses.
Search for the users or a team in the search box and select Assign. The users or a team are assigned with the license.
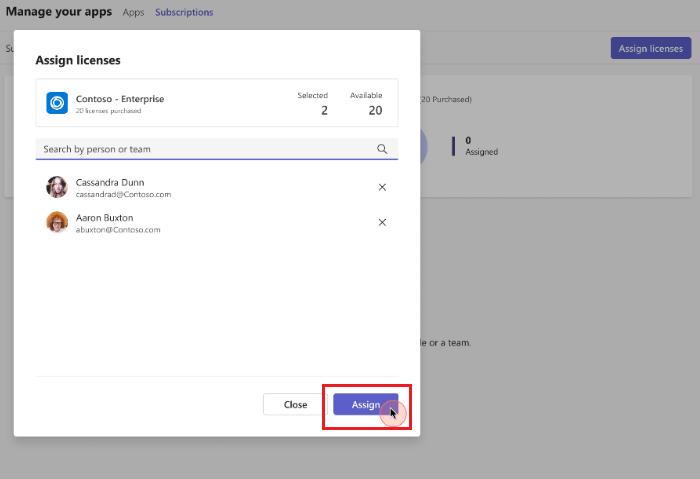
You can view the list of assigned users or teams for the subscription and also check the status of the assignment.

If you want to unassign a license for a user or a team, select the users or a team from the list and select Unassign.
Admin purchasing experience
Admins can manage the app subscriptions and licenses in the Teams admin center. For more information, see Purchase third-party Teams apps and manage subscriptions.
See also
Platform Docs
Feedback
Coming soon: Throughout 2024 we will be phasing out GitHub Issues as the feedback mechanism for content and replacing it with a new feedback system. For more information see: https://aka.ms/ContentUserFeedback.
Submit and view feedback for