More user interface features
Business Central offers some navigational and working assistance with features that focus on how data and pages in the application are displayed. Each of the features provides you with the capability to better access information or helps you be more efficient when you're working in Business Central.
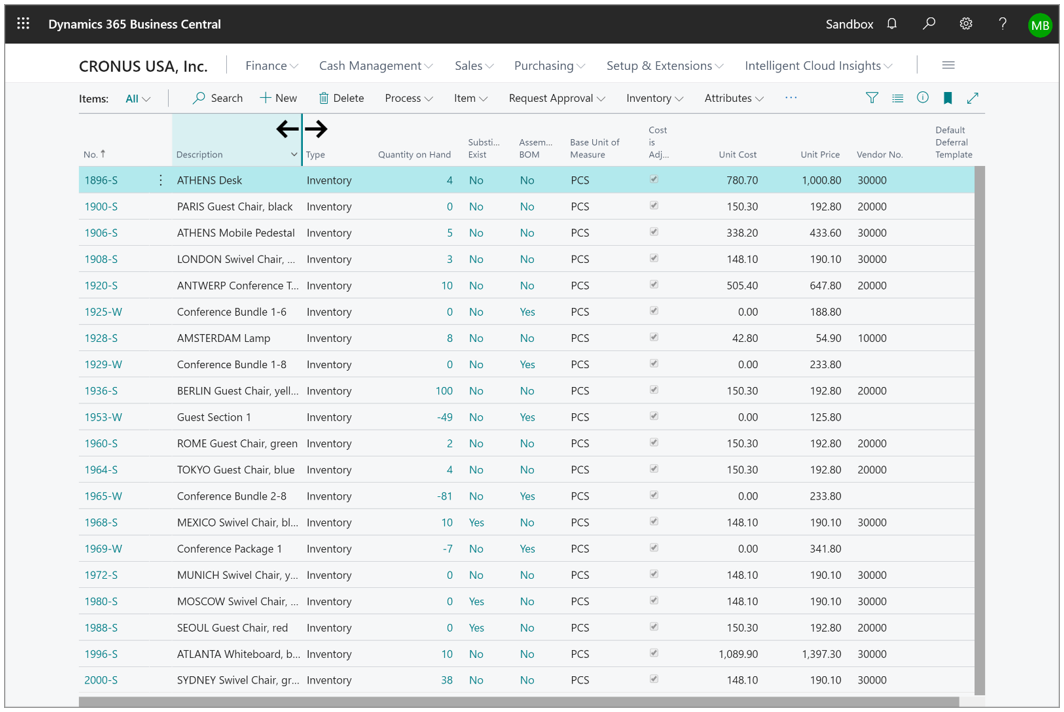
Adjust list page columns
You can easily adjust the width of any column in a list page. Just drag the border of a column header to resize it. Or you can double-click the border (AutoFit) to automatically size the column so that the caption and value of all columns on the screen are displayed efficiently. The adjustments you make are personal and roam with you on all your devices.
Multitask across multiple pages
Users can open several card or document pages together to perform multiple tasks at the same time. Select the Open this page in a new window button in the upper-right corner of every card or document page, or by pressing Alt+Shift+W.
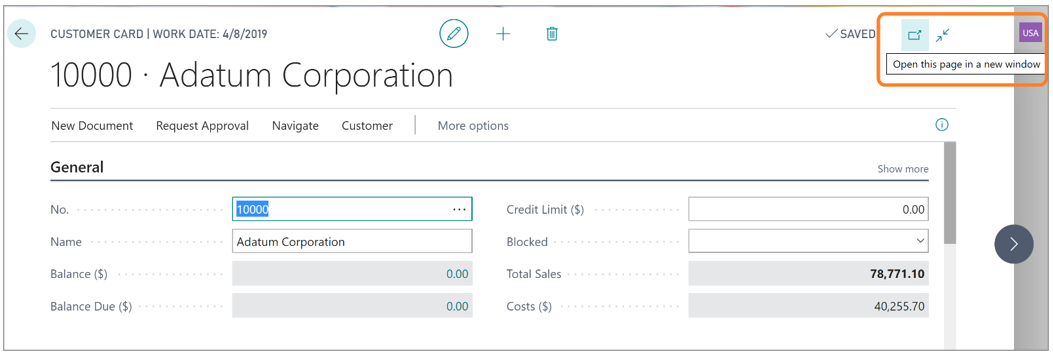
The page opens in a separate pop-out window for quick and easy data comparison. This enhances productivity both when working with multiple screens and if users want to place the new windows on top of each other on one screen.

All pages that are popped out using this functionality are linked to the main page so that users can observe data being updated across both windows. Since the pages are opened within the same context, this functionality is more useful when working on similar tasks, such as comparing two posted sales invoices, editing data for an invoice while having the customer card open, or popping out an item card to update it while editing a sales order.
Distinguish between browser tabs when multitasking
Users work more efficiently in Business Central when they use multiple browser tabs or windows to compare data, even across companies, or deal with new tasks as they appear. But navigating across open windows—for example, by selecting the Alt+Tab keys—quickly becomes challenging when all windows look alike. In this wave, Business Central helps to distinguish one open window from the next, making it easier to switch context.
Business Central uses a simple and clear schema for naming browser tabs and windows:
Context: The tab name for list, card, and document pages reflects the current record, page, or view, no matter how you navigated to that page.
Readability: To improve readability, the tab name is trimmed of all secondary information. For example, the full product branding is no longer included, and the view or edit state of the page is also omitted.
Current: The tab name is automatically updated while you navigate within the web client.
Multicompany: The company badge is included in the tab name, if the company is assigned a badge.

Company badge
With the company badge functionality, you can visually identify which company you're working in Business Central. The Company Badge icon is published in the top-right corner of a page and shows the description that you configured for it. When you select the company badge, it shows you the company name and tenant information in a pop-up box. The company badge is useful when you multitask across multiple pages. You can configure a description and a color for the badge in the Company Information page.
![]()
In the Company Badge field, you can select Custom or None. Select None if you don't want to work with a company badge. Select a style for the company badge in the Company Badge Style field. You can enter any text or code up to four characters maximum in the Company Badge Text field.
Add notes and links to data
You can add internal notes to business data and they're shown next to the data in a panel in the Attachments area of the Factbox pane. Recently added notes are always placed first.
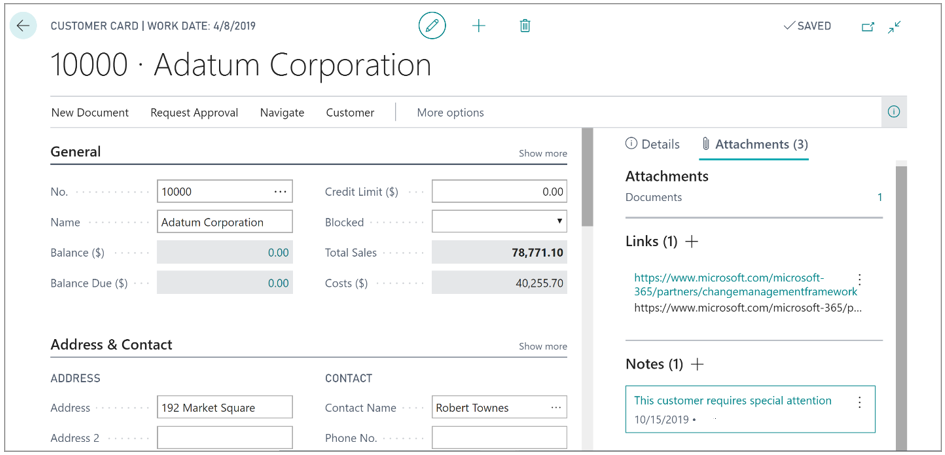
To add a note, you can use the Alt+O keyboard shortcut or select + (New) in the Attachments group in the Factbox pane. To switch focus between groups, use the Alt+Shift+F2 keyboard shortcut or just click with your mouse. The process to add Links is similar. You can add hyperlinks to online content or other information.
Share readable deep links to pages and records
Like many web applications, Business Central offers deep linking to pages and records, enabling users to copy the current URL and share that with others, or add links to their browser favorites. In this wave, the Business Central web client introduces a simple and consistent naming convention. So pasting a link to any Business Central page or record results in a readable hyperlink that clearly indicates context, but hides the full URL, which is often daunting to work with. Not only does this feature enrich hyperlinks pasted into rich text editors such as in Outlook, OneNote, or Teams, it also delivers a better experience when you use Business Central with modern browser features, such as collections in Microsoft Edge.
Business Central uses a simple and consistent naming convention for deep links when you copy the URL in the browser or use the Copy link action and paste the link into any rich text editor:
Context: The hyperlink for a list, card, or document page reflects the current record, page, or view, no matter how you got to that page.
Readability: To improve readability, secondary information is trimmed from the hyperlink. For example, the full product branding is no longer included, and the view or edit state of the page is also omitted.
Multicompany: If the company has a badge, the hyperlink includes it.
When you paste a link into a simple text field or plain text editor, the URL is pasted instead of a readable hyperlink.
You can experience this enhancement today by signing in to the Business Central Web client. For example, you can navigate to the Item Card for any item, select the Copy link action, then use the Ctrl+V shortcut to paste into a draft email.
Filter your reports
If you run a report, a request page is presented. The request page allows you to filter the data you want to show, calculate, and analyze in the report.
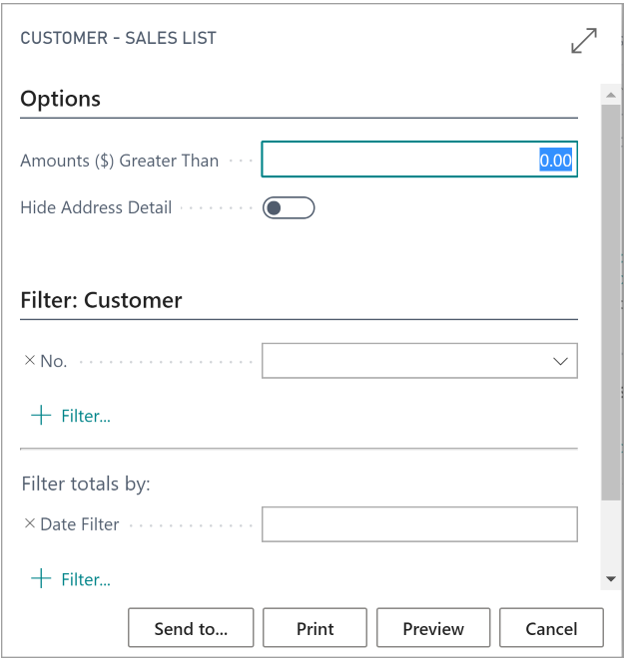
Depending on the specific report, the request page offers specific options relevant for that report. In the filter section of the request page, you can filter on the fields that are provided and add more filter fields that you need. Select + Filter to add more fields.
You can also filter totals with one or more values that influence the calculation formula of the calculated field. Reports often display aggregated or computed values through calculated fields (flow fields), such as currency amount totals. For example, in the sample request page displayed above, you could influence the calculation by adding a date filter field. The calculated fields on your report would in this example use the date filter in the calculation.