Defender for Identity VPN integration in Microsoft Defender XDR
Article
Microsoft Defender for Identity can integrate with your VPN solution by listening to RADIUS accounting events forwarded to Defender for Identity sensors, such as the IP addresses and locations where connections originated. VPN accounting data can help your investigations by providing more information about user activity, such as the locations from where computers are connecting to the network, and an extra detection for abnormal VPN connections.
Defender for Identity's VPN integration is based on standard RADIUS Accounting (RFC 2866), and supports the following VPN vendors:
Microsoft
F5
Check Point
Cisco ASA
VPN integration is not supported in environments adhering to Federal Information Processing Standards (FIPS)
Defender for Identity's VPN integration supports both primary UPNs and alternate user principal names. Calls to resolve external IP addresses to a location are anonymous and no personal identifier is sent in the call.
The ability to configure RADIUS on your VPN system.
This article provides an example of how to configure Microsoft Defender for Identity to collect accounting information from VPN solutions, using Microsoft Routing and Remote Access Server (RRAS). If you're using a third-party VPN solution, consult their documentation for instructions on how to enable RADIUS Accounting.
Note
When you configure the VPN integration, the Defender for Identity sensor enables a pre-provisioned Windows firewall policy called Microsoft Defender for Identity Sensor. This policy allows incoming RADIUS Accounting on port UDP 1813.
Configure RADIUS accounting on your VPN system
This procedure describes how to configure RADIUS accounting on an RRAS server for integrating a VPN system with Defender for Identity. Your system's instructions may differ.
On your RRAS server:
Open the Routing and Remote Access console.
Right-click the server name and select Properties.
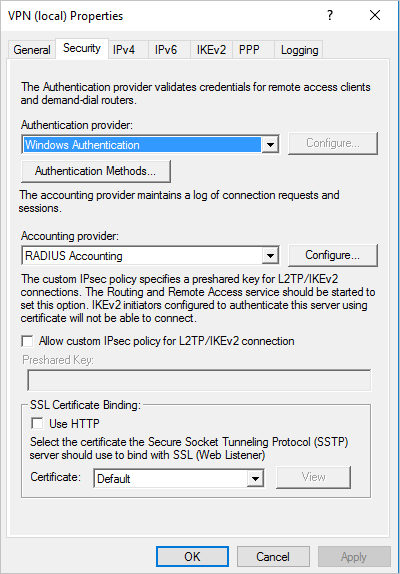
In the Security tab, under Accounting provider, select RADIUS Accounting > Configure. For example:
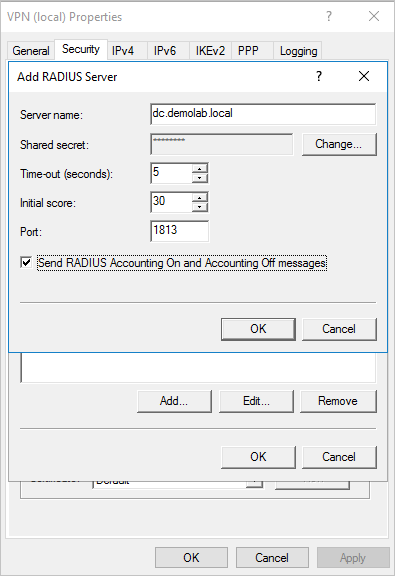
In the Add RADIUS Server dialog, enter the Server name of the closest Defender for Identity sensor with network connectivity. For high availability, you can add more Defender for Identity sensors as RADIUS Servers.
Under Port, make sure the default value of 1813 is configured.
Select Change and enter a new shared secret string of alphanumeric characters. Take note of the new shared secret string, as you'll need it later when configuring the VPN integration in Defender for Identity.
Check the Send RADIUS Account On and Accounting Off messages box and select OK on all open dialog boxes. For example:
Configure VPN in Defender for Identity
This procedure describes how to configure Defender for Identity's VPN integration in Microsoft Defender XDR.
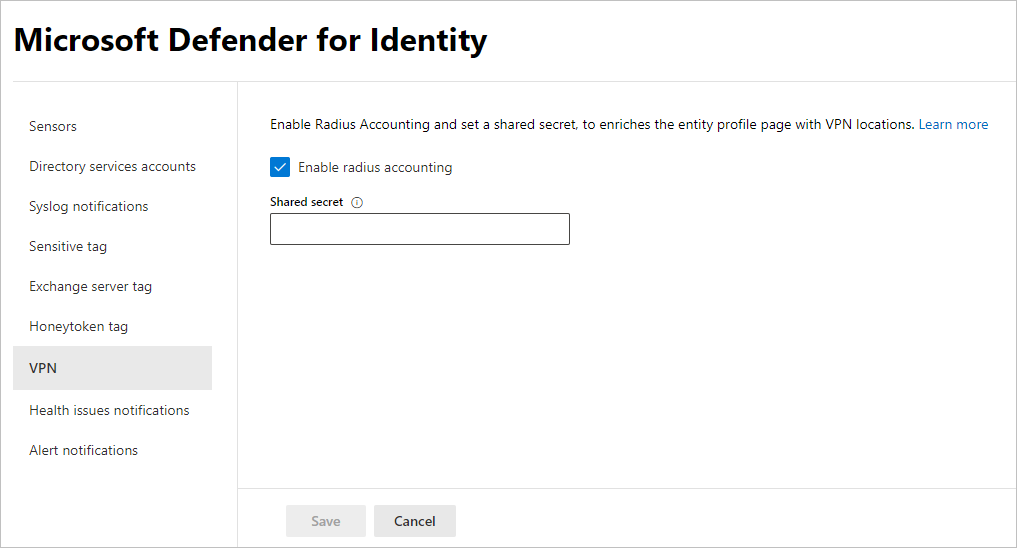
Select Enable radius accounting and enter the Shared Secret you'd previously configured on your RRAS VPN server. For example:
Select Save to continue.
After you've saved your selection, your Defender for Identity sensors start listening on port 1813 for RADIUS accounting events, and your VPN setup is complete.
When the Defender for Identity sensor receives VPN events and sends them to the Defender for Identity cloud service for processing, the entity profile indicates distinct VPN locations that were accessed, and profile activities indicate locations.