Microsoft Entra SSO integration with AWS Single-Account Access
Article
03/25/2025
In this article, you learn how to integrate AWS Single-Account Access with Microsoft Entra ID. When you integrate AWS Single-Account Access with Microsoft Entra ID, you can:
Control in Microsoft Entra ID who has access to AWS Single-Account Access.
Enable your users to be automatically signed-in to AWS Single-Account Access with their Microsoft Entra accounts.
Manage your accounts in one central location.
Understanding the different AWS applications in the Microsoft Entra application gallery
Use the information below to make a decision between using the AWS Single Sign-On and AWS Single-Account Access applications in the Microsoft Entra application gallery.
AWS Single Sign-On
AWS Single Sign-On was added to the Microsoft Entra application gallery in February 2021. It makes it easy to manage access centrally to multiple AWS accounts and AWS applications, with sign-in through Microsoft Entra ID. Federate Microsoft Entra ID with AWS SSO once, and use AWS SSO to manage permissions across all of your AWS accounts from one place. AWS SSO provisions permissions automatically and keeps them current as you update policies and access assignments. End users can authenticate with their Microsoft Entra credentials to access the AWS Console, Command Line Interface, and AWS SSO integrated applications.
AWS Single-Account Access
AWS Single-Account Access has been used by customers over the past several years and enables you to federate Microsoft Entra ID to a single AWS account and use Microsoft Entra ID to manage access to AWS IAM roles. AWS IAM administrators define roles and policies in each AWS account. For each AWS account, Microsoft Entra administrators federate to AWS IAM, assign users or groups to the account, and configure Microsoft Entra ID to send assertions that authorize role access.
Feature
AWS Single Sign-On
AWS Single-Account Access
Conditional Access
Supports a single Conditional Access policy for all AWS accounts.
Supports a single Conditional Access policy for all accounts or custom policies per account
Centralize account management in Microsoft Entra ID (likely requires a Microsoft Entra enterprise application per account).
SAML certificate
Single certificate
Separate certificates per app / account
AWS Single-Account Access architecture
You can configure multiple identifiers for multiple instances. For example:
https://signin.aws.amazon.com/saml#1
https://signin.aws.amazon.com/saml#2
With these values, Microsoft Entra ID removes the value of #, and sends the correct value https://signin.aws.amazon.com/saml as the audience URL in the SAML token.
We recommend this approach for the following reasons:
Each application provides you with a unique X509 certificate. Each instance of an AWS app instance can then have a different certificate expiry date, which can be managed on an individual AWS account basis. Overall certificate rollover is easier in this case.
You can enable user provisioning with an AWS app in Microsoft Entra ID, and then our service fetches all the roles from that AWS account. You don't have to manually add or update the AWS roles on the app.
You can assign the app owner individually for the app. This person can manage the app directly in Microsoft Entra ID.
Note
Make sure you use a gallery application only.
Prerequisites
To get started, you need the following items:
A Microsoft Entra subscription. If you don't have a subscription, you can get a free account.
An AWS IAM IdP enabled subscription.
Along with Cloud Application Administrator, Application Administrator can also add or manage applications in Microsoft Entra ID.
For more information, see Azure built-in roles.
Note
Roles shouldn't be manually edited in Microsoft Entra ID when doing role imports.
Scenario description
In this article, you configure and test Microsoft Entra SSO in a test environment.
AWS Single-Account Access supports SP and IDP initiated SSO.
Note
Identifier of this application is a fixed string value so only one instance can be configured in one tenant.
Adding AWS Single-Account Access from the gallery
To configure the integration of AWS Single-Account Access into Microsoft Entra ID, you need to add AWS Single-Account Access from the gallery to your list of managed SaaS apps.
Browse to Identity > Applications > Enterprise applications > New application.
In the Add from the gallery section, type AWS Single-Account Access in the search box.
Select AWS Single-Account Access from results panel and then add the app. Wait a few seconds while the app is added to your tenant.
Alternatively, you can also use the Enterprise App Configuration Wizard. In this wizard, you can add an application to your tenant, add users/groups to the app, assign roles, and walk through the SSO configuration as well. You can learn more about Microsoft 365 wizards here.
Configure and test Microsoft Entra SSO for AWS Single-Account Access
Configure and test Microsoft Entra SSO with AWS Single-Account Access using a test user called B.Simon. For SSO to work, you need to establish a link relationship between a Microsoft Entra user and the related user in AWS Single-Account Access.
To configure and test Microsoft Entra SSO with AWS Single-Account Access, perform the following steps:
Browse to Identity > Applications > Enterprise applications > AWS Single-Account Access > Single sign-on.
On the Select a single sign-on method page, select SAML.
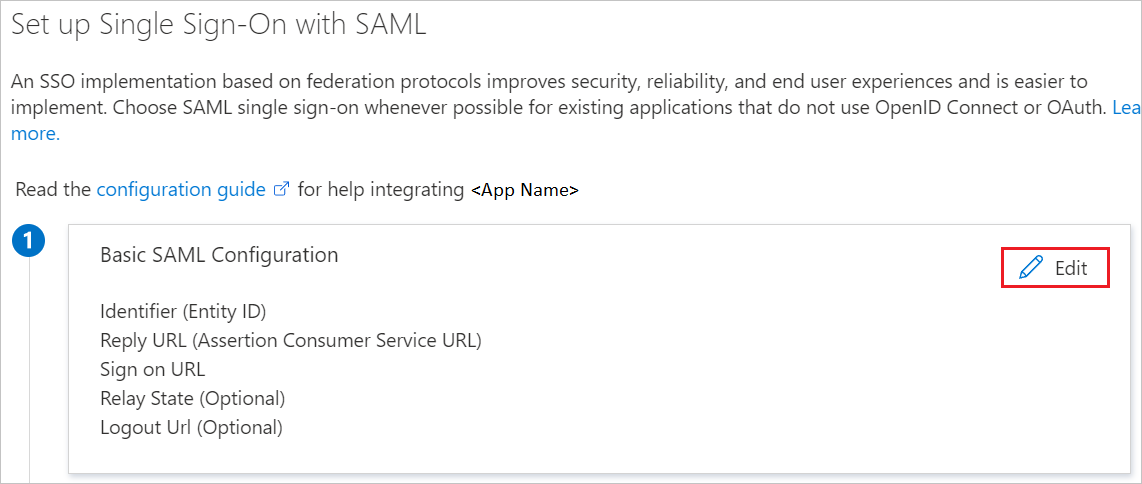
On the Set up single sign-on with SAML page, select the pencil icon for Basic SAML Configuration to edit the settings.
In the Basic SAML Configuration section, update both Identifier (Entity ID) and Reply URL with the same default value: https://signin.aws.amazon.com/saml. You must select Save to save the configuration changes.
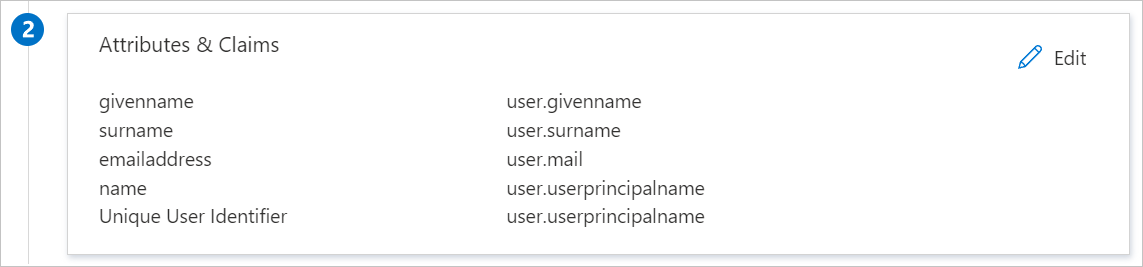
AWS application expects the SAML assertions in a specific format, which requires you to add custom attribute mappings to your SAML token attributes configuration. The following screenshot shows the list of default attributes.
In addition to above, AWS application expects few more attributes to be passed back in SAML response which are shown below. These attributes are also pre populated but you can review them as per your requirements.
Name
Source attribute
Namespace
RoleSessionName
user.userprincipalname
https://aws.amazon.com/SAML/Attributes
Role
user.assignedroles
https://aws.amazon.com/SAML/Attributes
SessionDuration
user.sessionduration
https://aws.amazon.com/SAML/Attributes
Note
AWS expects roles for users assigned to the application. Please set up these roles in Microsoft Entra ID so that users can be assigned the appropriate roles. To understand how to configure roles in Microsoft Entra ID, see here
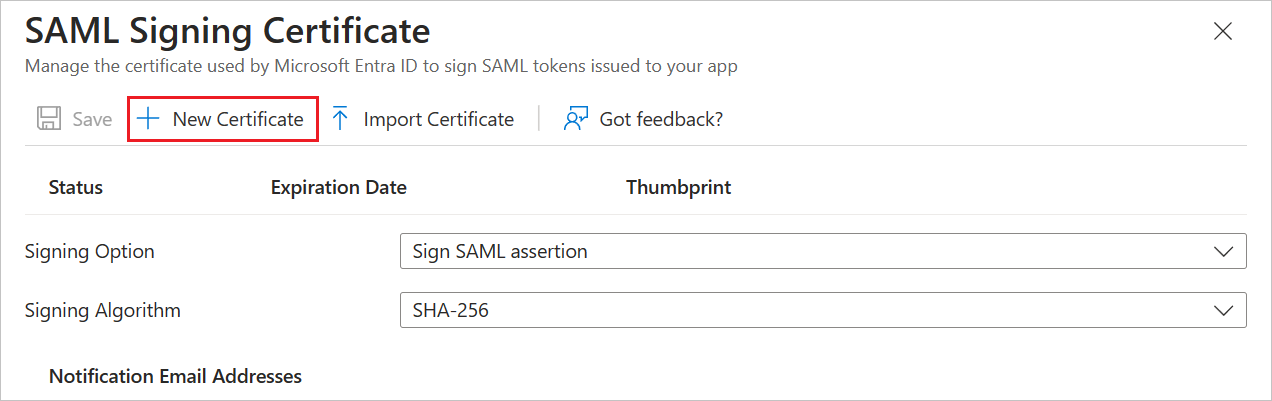
On the Set up single sign-on with SAML page, in the SAML Signing Certificate (Step 3) dialog box, select Add a certificate.
Generate a new SAML signing certificate, and then select New Certificate. Enter an email address for certificate notifications.
(Optional) You can select Make certificate active.
In the SAML Signing Certificate section, find Federation Metadata XML and select Download to download the certificate and save it on your computer.
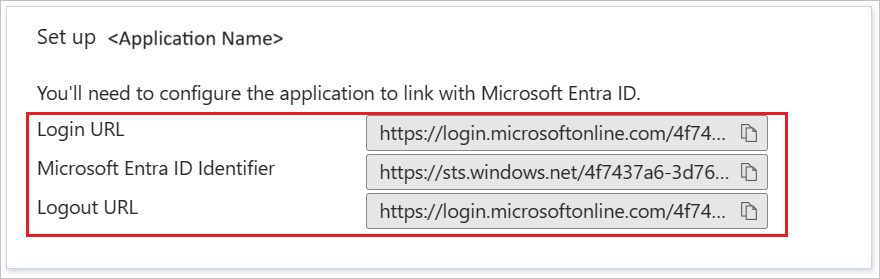
In the Set up AWS Single-Account Access section, copy the appropriate URL(s) based on your requirement.
In a different browser window, sign-on to your AWS company site as an administrator.
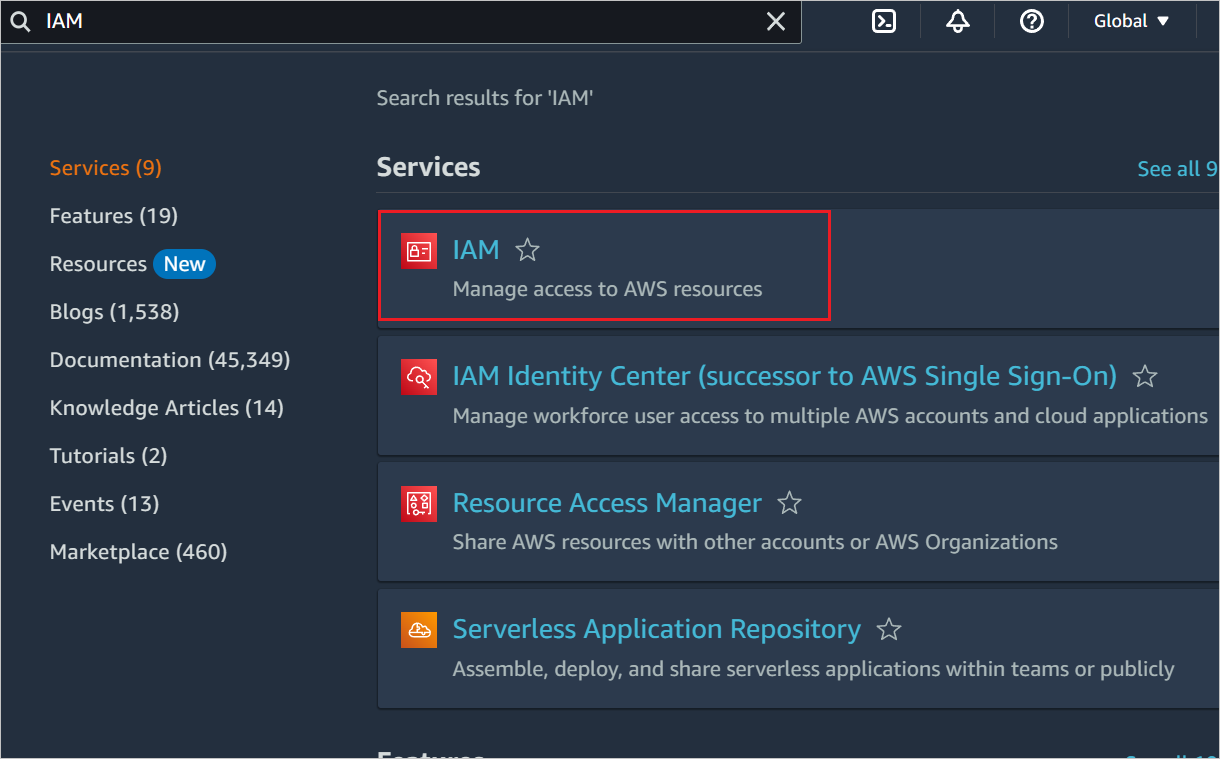
In AWS home page, search for IAM and select it.
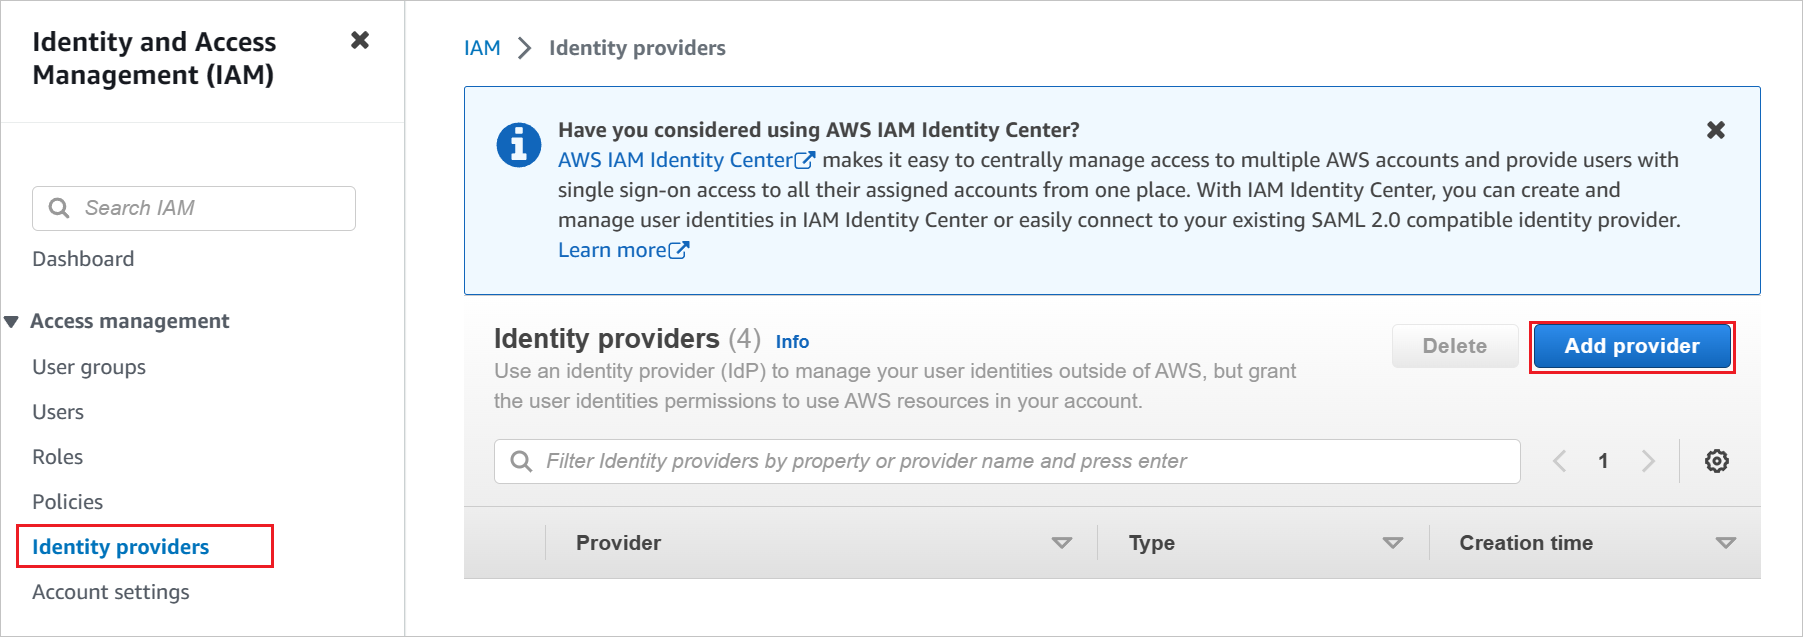
Go to Access management -> Identity Providers and select Add provider button.
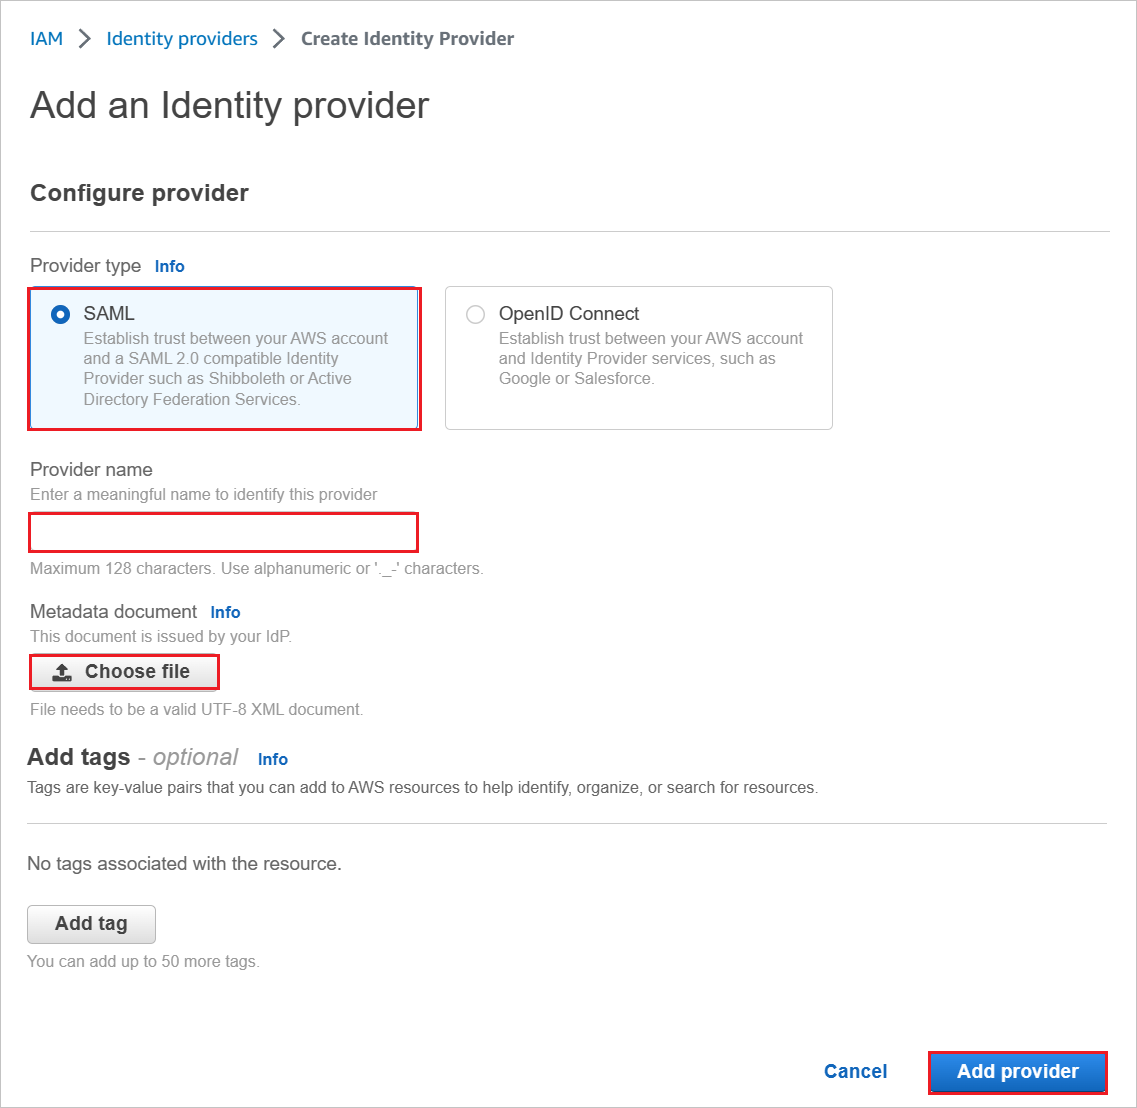
In the Add an Identity provider page, perform the following steps:
a. For Provider type, select SAML.
b. For Provider name, type a provider name (for example: WAAD).
c. To upload your downloaded metadata file, select Choose file.
d. Select Add provider.
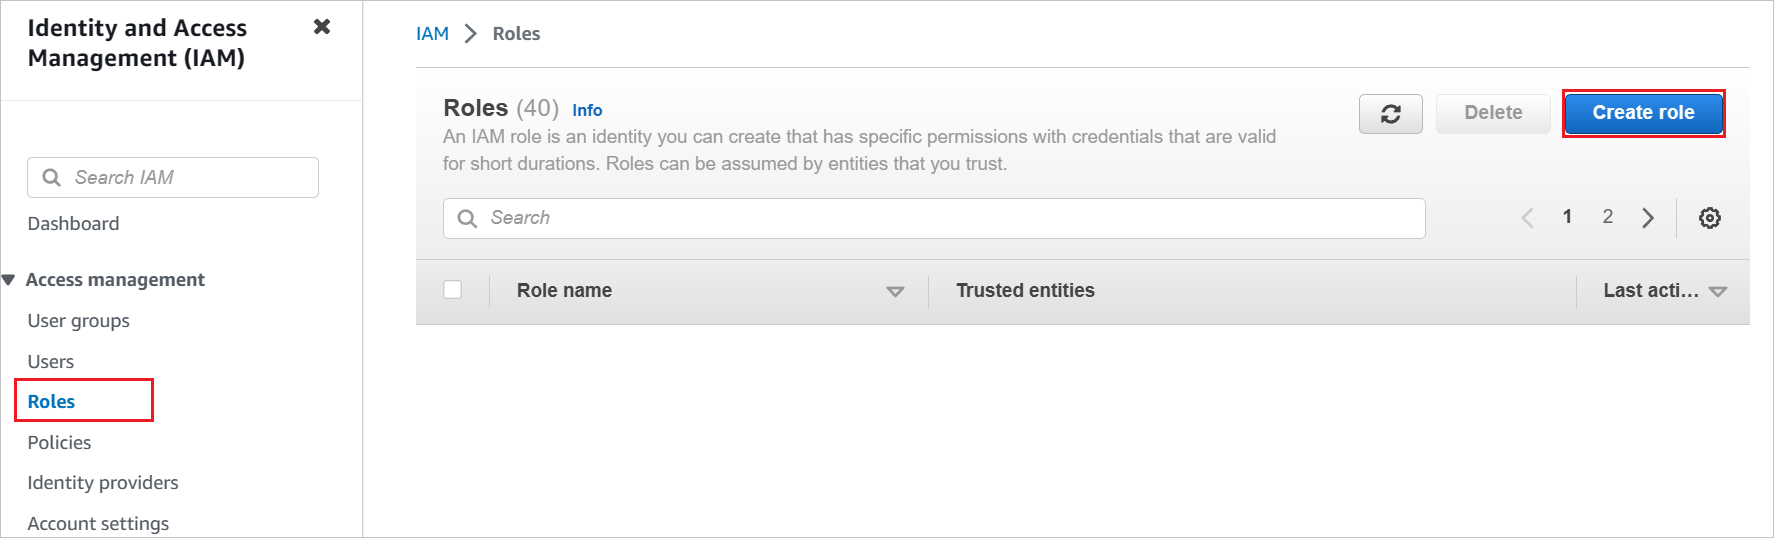
Select Roles > Create role.
On the Create role page, perform the following steps:
a. Choose Trusted entity type, select SAML 2.0 federation.
b. Under SAML 2.0 based provider, select the SAML provider you created previously (for example: WAAD).
c. Select Allow programmatic and AWS Management Console access.
d. Select Next.
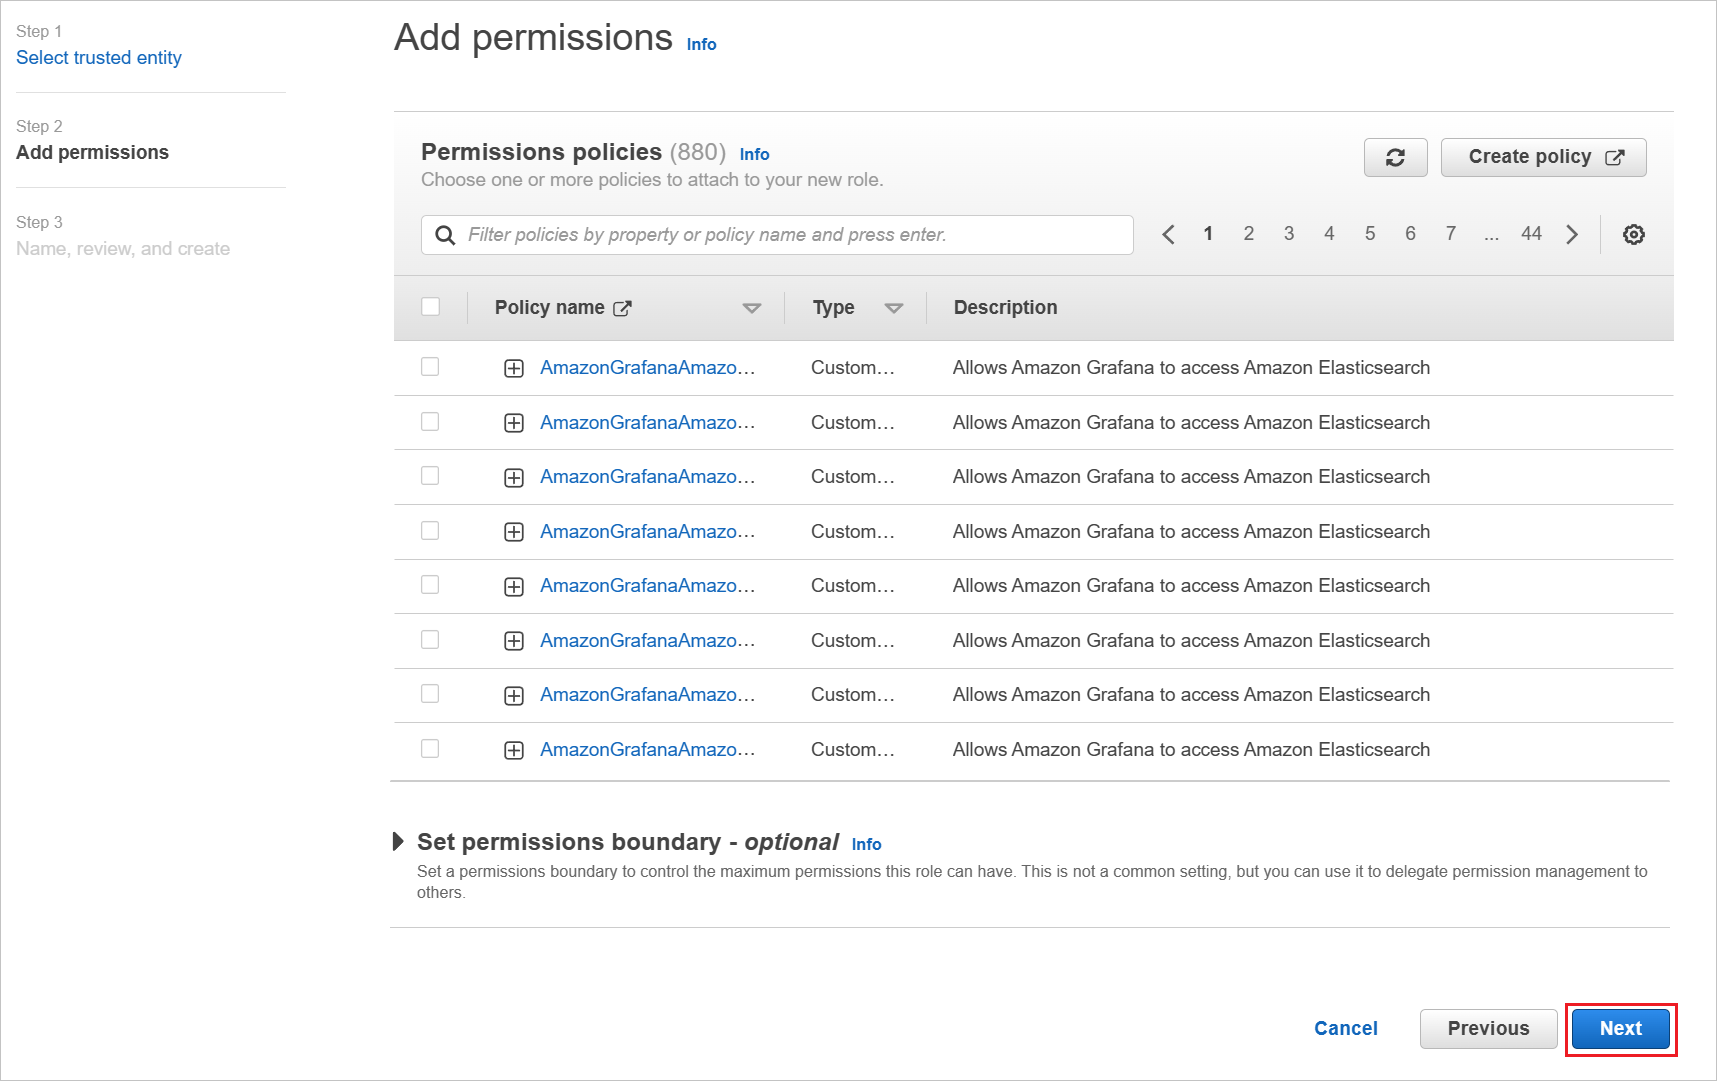
On the Permissions policies dialog box, attach the appropriate policy, per your organization. Then select Next.
On the Review dialog box, perform the following steps:
a. In Role name, enter your role name.
b. In Description, enter the role description.
c. Select Create role.
d. Create as many roles as needed and map them to the identity provider.
Use AWS service account credentials for fetching the roles from the AWS account in Microsoft Entra user provisioning. For this, open the AWS console home.
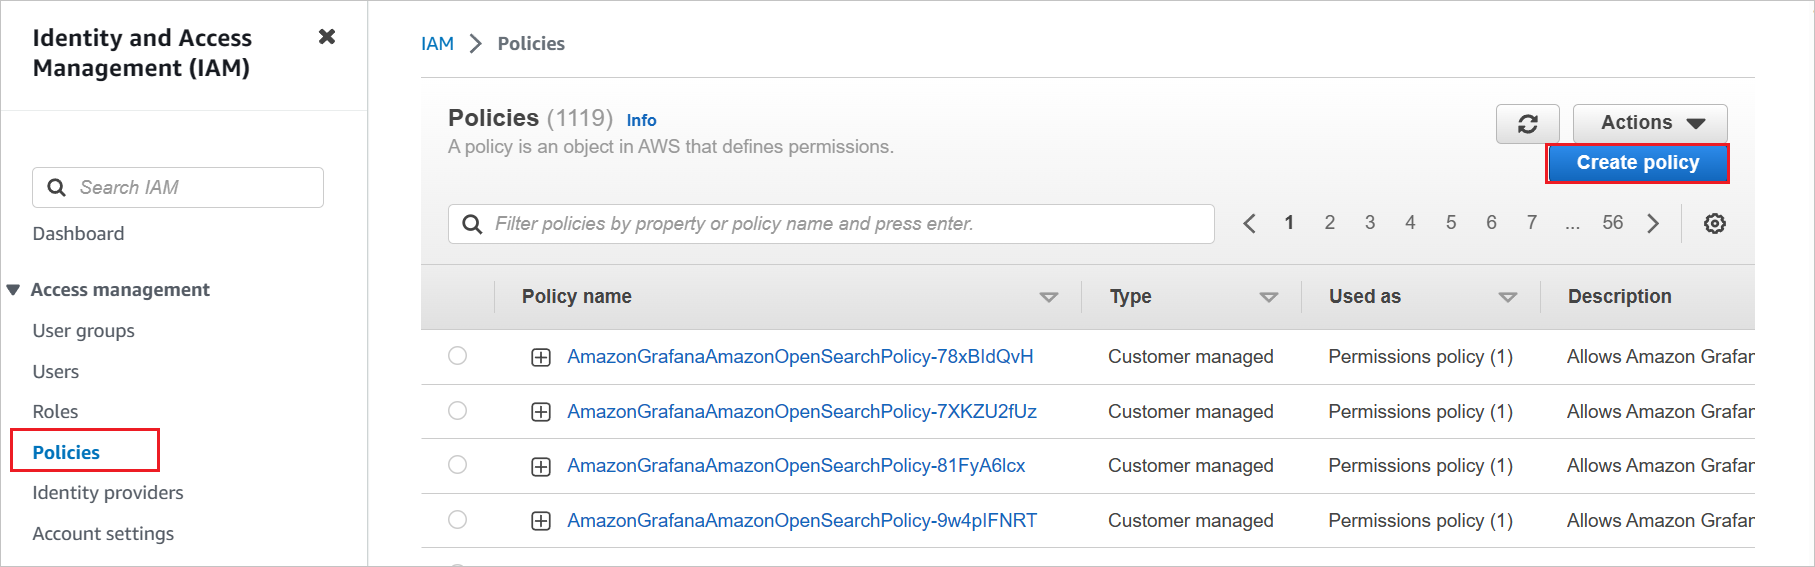
In the IAM section, select Policies and select Create policy.
Create your own policy to fetch all the roles from AWS accounts.
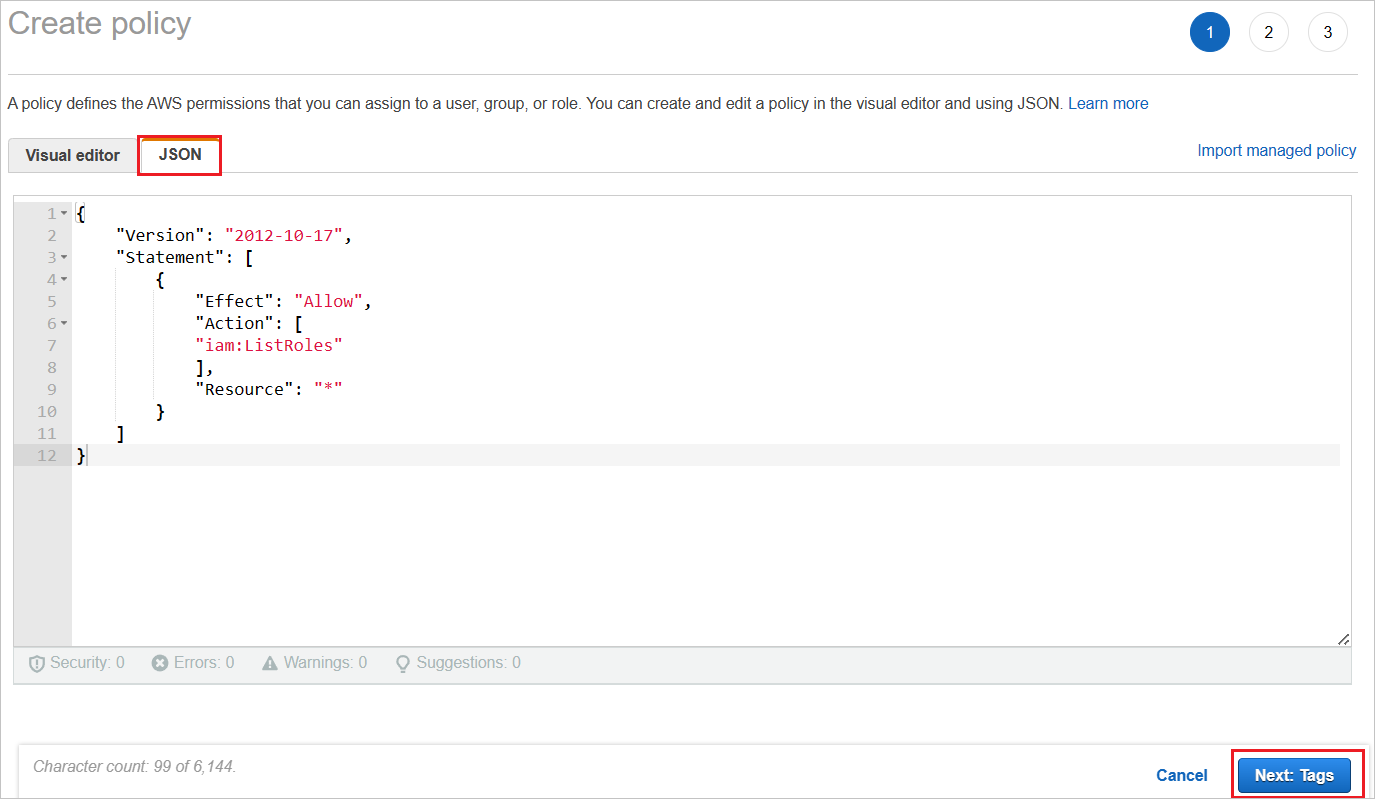
a. In Create policy, select the JSON tab.
b. In the policy document, add the following JSON:
You can also add the required tags in the below page and select Next: Review.
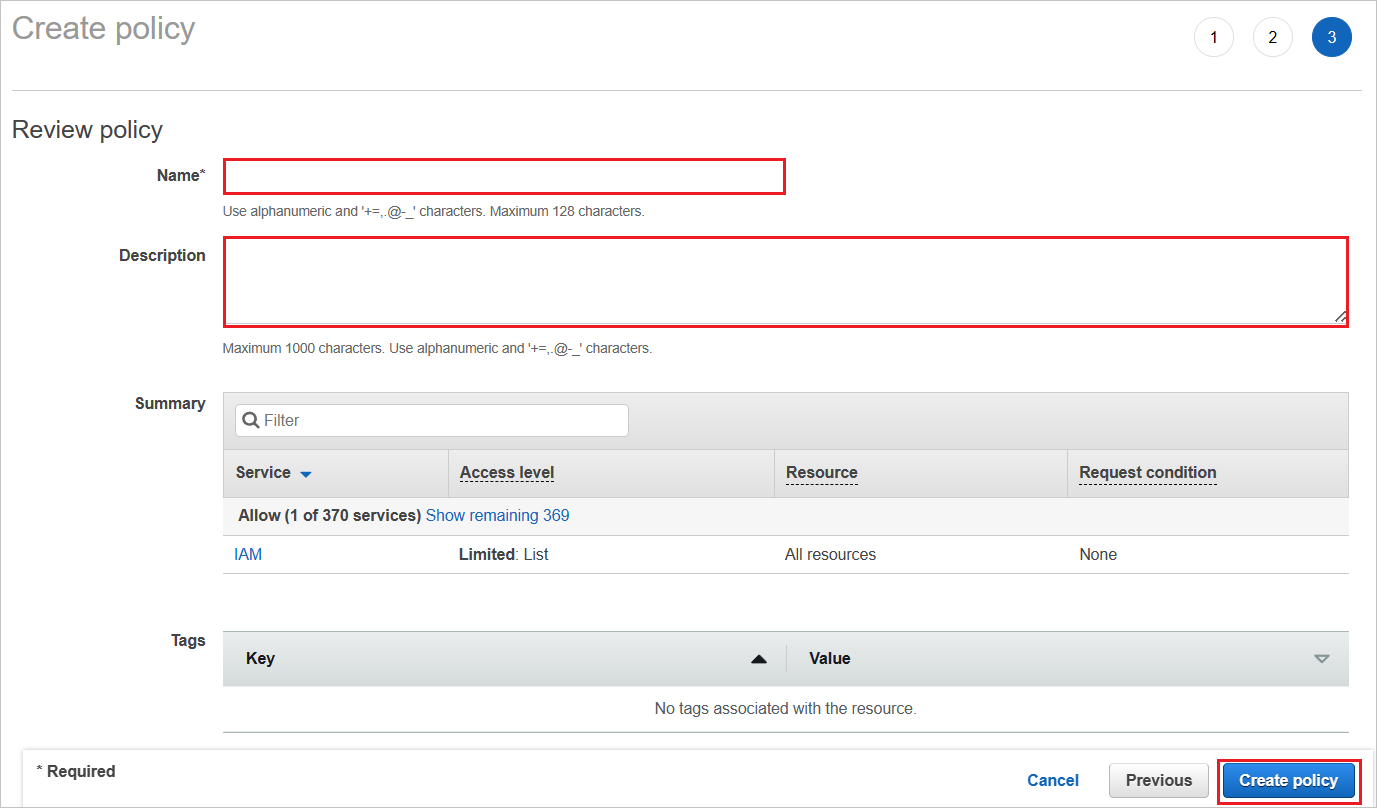
Define the new policy.
a. For Name, enter AzureAD_SSOUserRole_Policy.
b. For Description, enter This policy will allow to fetch the roles from AWS accounts.
c. Select Create policy.
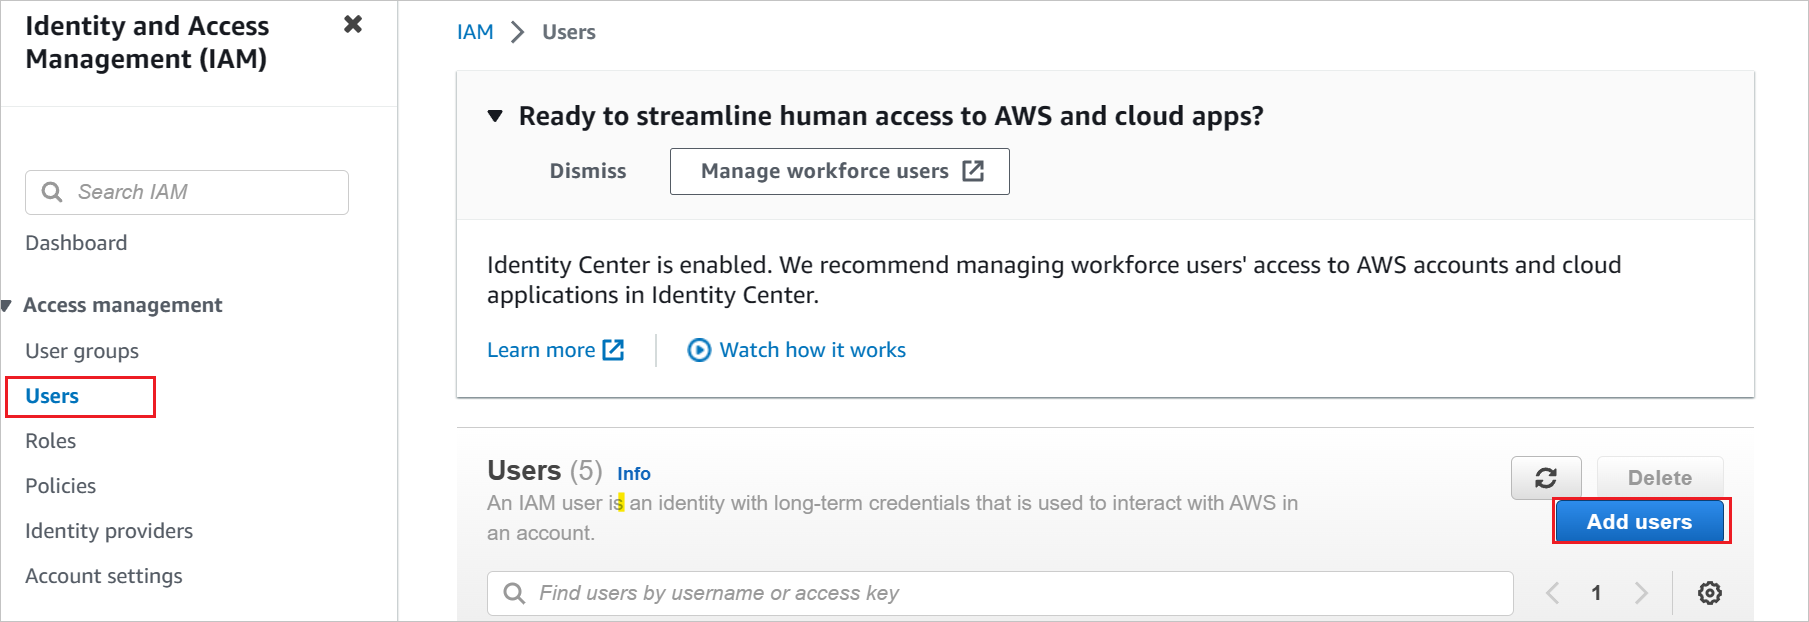
Create a new user account in the AWS IAM service.
a. In the AWS IAM console, select Users and select Add users.
b. In the Specify user details section, enter the user name as AzureADRoleManager and select Next.
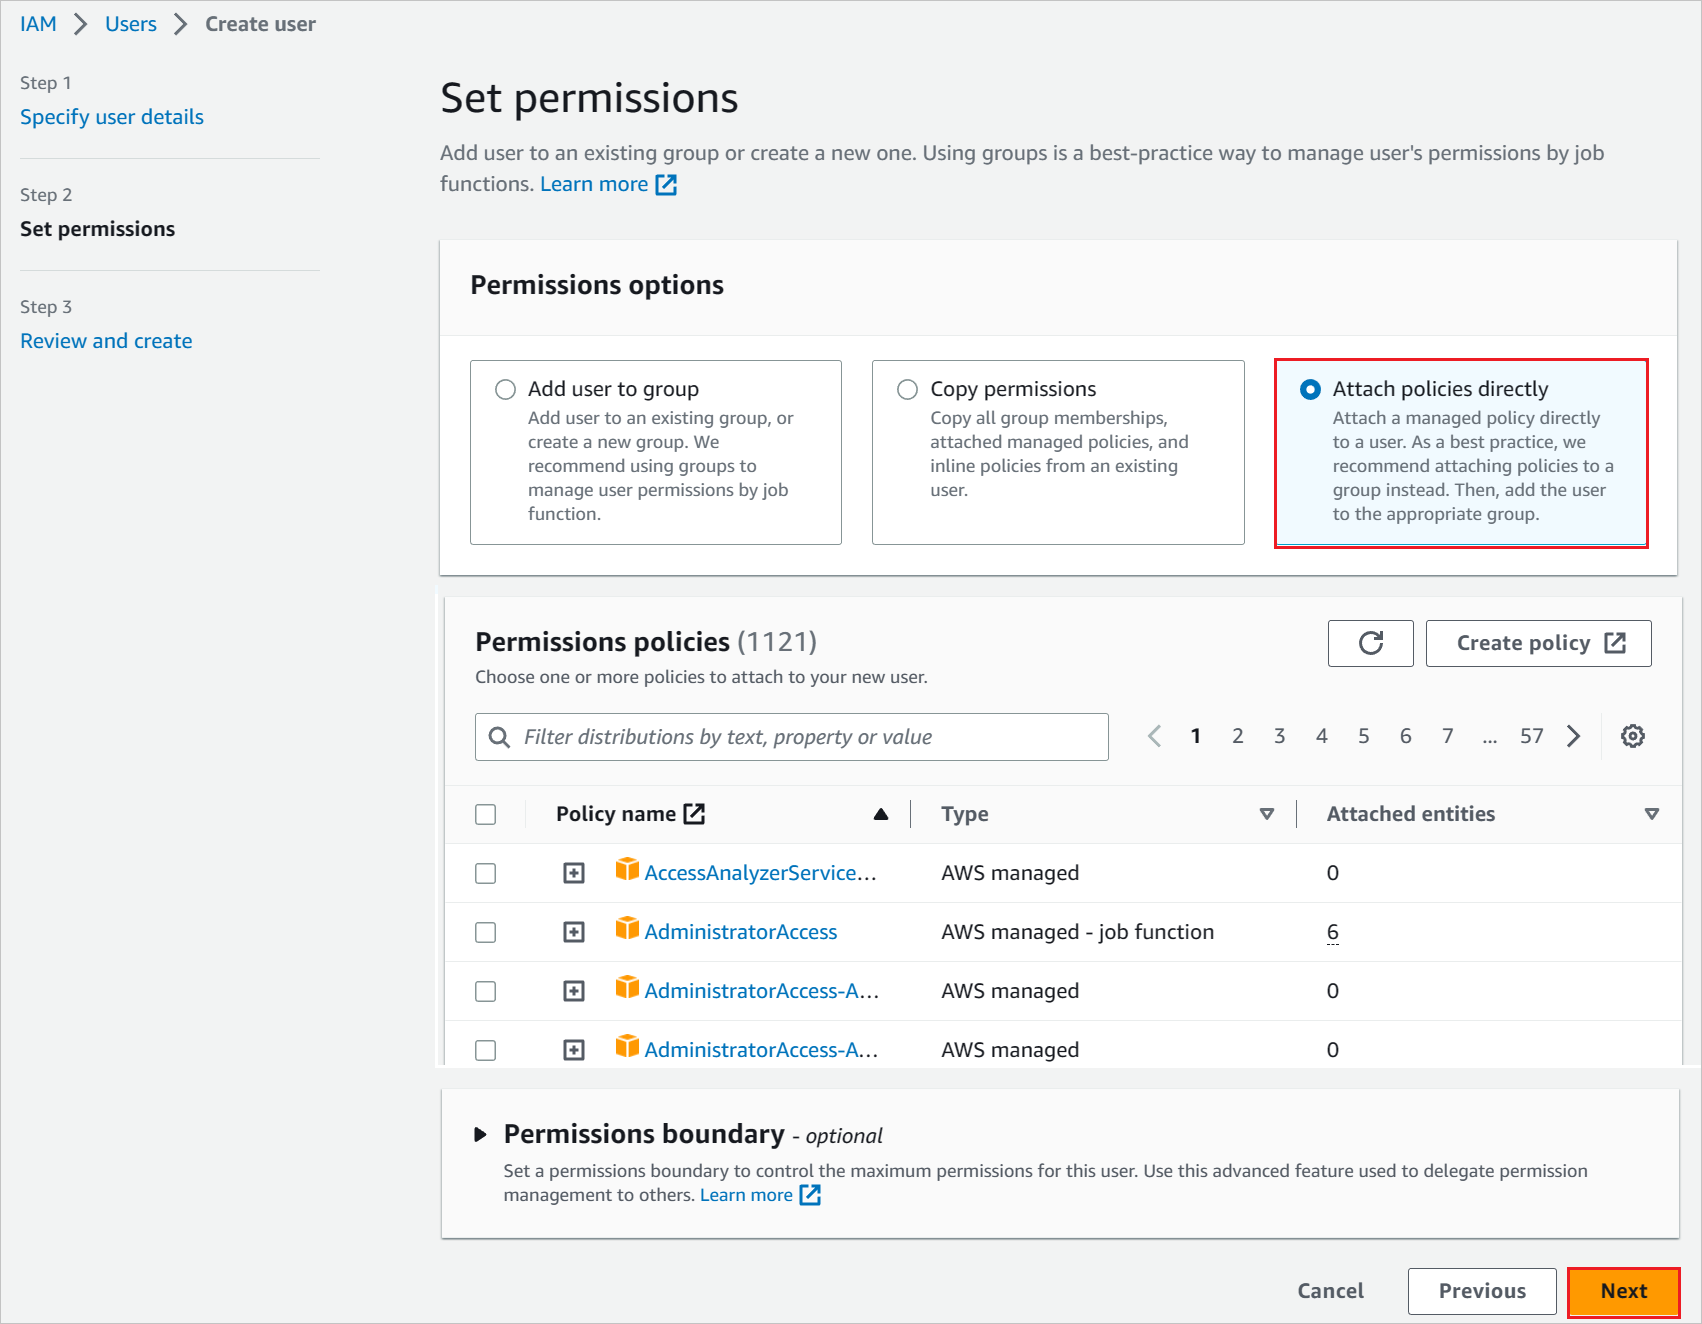
c. Create a new policy for this user.
d. Select Attach existing policies directly.
e. Search for the newly created policy in the filter section AzureAD_SSOUserRole_Policy.
f. Select the policy, and then select Next.
Review your choices and select Create user.
Note
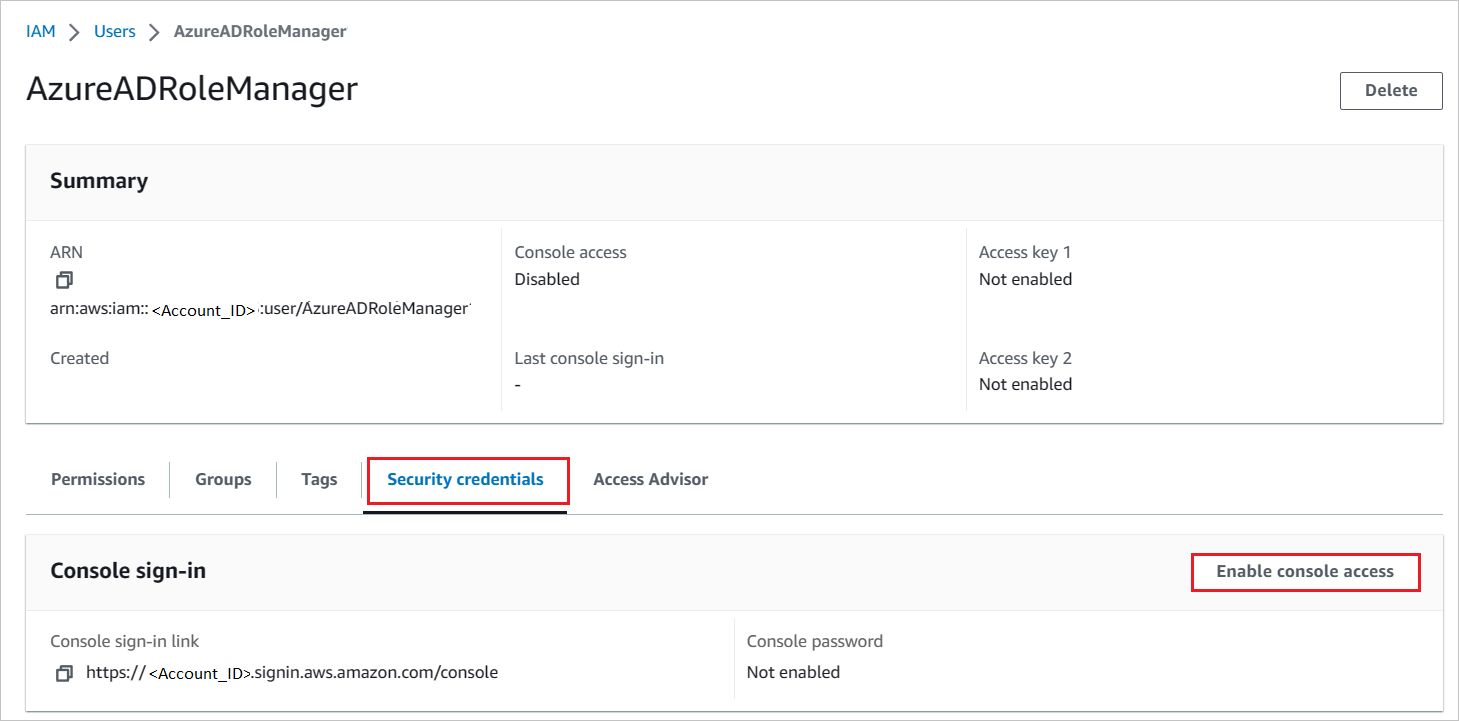
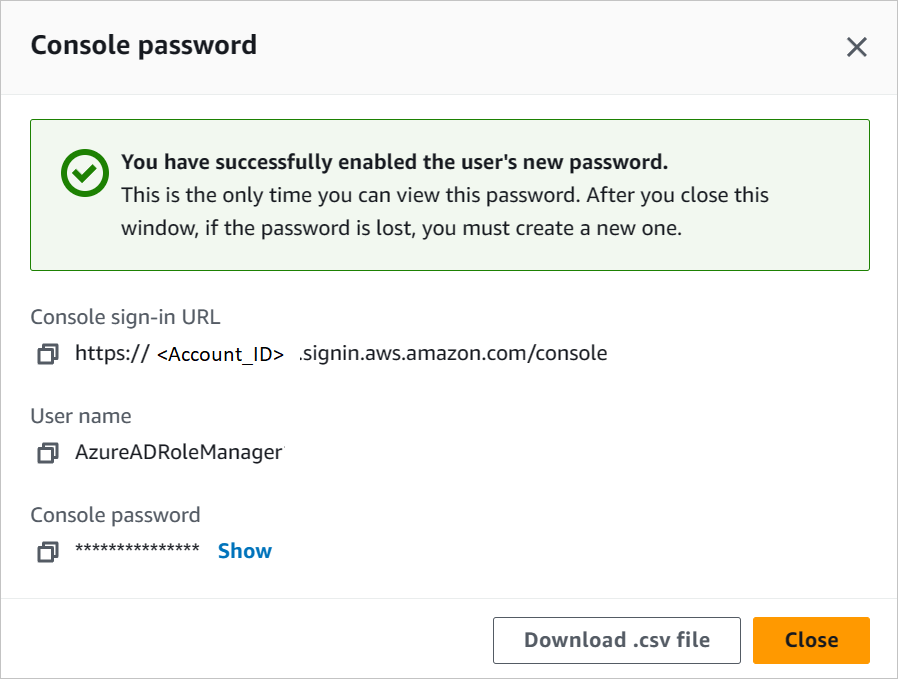
Ensure to create and download the third-party access key for this user. This key is used in the Microsoft Entra user provisioning section to fetch the roles from the AWS console.
To download the user credentials of a user, enable the console access in Security credentials tab.
Enter these credentials into the Microsoft Entra user provisioning section to fetch the roles from the AWS console.
Note
AWS has a set of permissions/limits are required to configure AWS SSO. To know more information on AWS limits, please refer this page.
How to configure role provisioning in AWS Single-Account Access
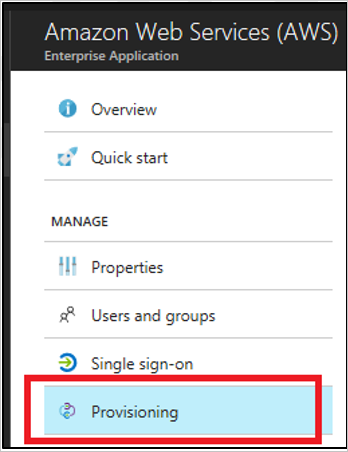
In the Microsoft Entra management portal, in the AWS app, go to Provisioning.
Note: The username and password returned when enabling console access aren't what is needed for the clientsecret and Secret Token values. Instead, create a third-party access key for this step.
Enter the access key and secret in the clientsecret and Secret Token fields, respectively.
a. Enter the AWS user access key in the clientsecret field.
b. Enter the AWS user secret in the Secret Token field.
c. Select Test Connection.
d. Save the setting by selecting Save.
In the Settings section, for Provisioning Status, select On. Then select Save.
Note
The provisioning service imports roles only from AWS to Microsoft Entra ID. The service doesn't provision users and groups from Microsoft Entra ID to AWS.
Note
After you save the provisioning credentials, you must wait for the initial sync cycle to run. Sync usually takes around 40 minutes to finish. You can see the status at the bottom of the Provisioning page, under Current Status.
Create AWS Single-Account Access test user
The objective of this section is to create a user called B.Simon in AWS Single-Account Access. AWS Single-Account Access doesn't need a user to be created in their system for SSO, so you don't need to perform any action here.
Test SSO
In this section, you test your Microsoft Entra single sign-on configuration with following options.
SP initiated:
Select Test this application, this option redirects to AWS Single-Account Access Sign on URL where you can initiate the login flow.
Go to AWS Single-Account Access Sign-on URL directly and initiate the login flow from there.
IDP initiated:
Select Test this application, and you should be automatically signed in to the AWS Single-Account Access for which you set up the SSO.
You can also use Microsoft My Apps to test the application in any mode. When you select the AWS Single-Account Access tile in the My Apps, if configured in SP mode you would be redirected to the application sign on page for initiating the login flow and if configured in IDP mode, you should be automatically signed in to the AWS Single-Account Access for which you set up the SSO. For more information about the My Apps, see Introduction to the My Apps.
Known issues
AWS Single-Account Access provisioning integration can't be used in the AWS China regions.
In the Provisioning section, the Mappings subsection shows a "Loading..." message, and never displays the attribute mappings. The only provisioning workflow supported today is the import of roles from AWS into Microsoft Entra ID for selection during a user or group assignment. The attribute mappings for this are predetermined, and aren't configurable.
The Provisioning section only supports entering one set of credentials for one AWS tenant at a time. All imported roles are written to the appRoles property of the Microsoft Entra ID servicePrincipal object for the AWS tenant.
Multiple AWS tenants (represented by servicePrincipals) can be added to Microsoft Entra ID from the gallery for provisioning. There's a known issue, however, with not being able to automatically write all of the imported roles from the multiple AWS servicePrincipals used for provisioning into the single servicePrincipal used for SSO.
As a workaround, you can use the Microsoft Graph API to extract all of the appRoles imported into each AWS servicePrincipal where provisioning is configured. You can subsequently add these role strings to the AWS servicePrincipal where SSO is configured.
Roles must meet the following requirements to be eligible to be imported from AWS into Microsoft Entra ID:
Roles must have exactly one saml-provider defined in AWS
The combined length of the ARN(Amazon Resource Name) for the role and the ARN for the associated saml-provider must be less than 240 characters.
Change log
01/12/2020 - Increased role length limit from 119 characters to 239 characters.
Related content
Once you configure AWS Single-Account Access you can enforce Session Control, which protects exfiltration and infiltration of your organization's sensitive data in real time. Session Control extends from Conditional Access. Learn how to enforce session control with Microsoft Defender for Cloud Apps.
Deploying and monitoring enterprise applications to Azure solutions can ensure security. Explore how to deploy on-premises and cloud based apps to users.