Events
Apr 9, 3 PM - Apr 10, 12 PM
Code the Future with AI and connect with Java peers and experts at JDConf 2025.
Register NowThis browser is no longer supported.
Upgrade to Microsoft Edge to take advantage of the latest features, security updates, and technical support.
In this article, you learn how to integrate EasySSO for BitBucket with Microsoft Entra ID. When you integrate EasySSO for BitBucket with Microsoft Entra ID, you can:
The scenario outlined in this article assumes that you already have the following prerequisites:
In this article, you configure and test Microsoft Entra SSO in a test environment.
To configure the integration of EasySSO for BitBucket into Microsoft Entra ID, you need to add EasySSO for BitBucket from the gallery to your list of managed SaaS apps.
Alternatively, you can also use the Enterprise App Configuration Wizard. In this wizard, you can add an application to your tenant, add users/groups to the app, assign roles, and walk through the SSO configuration as well. Learn more about Microsoft 365 wizards.
Configure and test Microsoft Entra SSO with EasySSO for BitBucket by using a test user called B.Simon. For SSO to work, you need to establish a linked relationship between a Microsoft Entra user and the related user in EasySSO for BitBucket.
To configure and test Microsoft Entra SSO with EasySSO for BitBucket, perform the following steps:
Follow these steps to enable Microsoft Entra SSO.
Sign in to the Microsoft Entra admin center as at least a Cloud Application Administrator.
Browse to Identity > Applications > Enterprise applications > EasySSO for BitBucket application integration page, find the Manage section. Select single sign-on.
On the Select a single sign-on method page, select SAML.
On the Set up single sign-on with SAML page, select the pencil icon for Basic SAML Configuration to edit the settings.
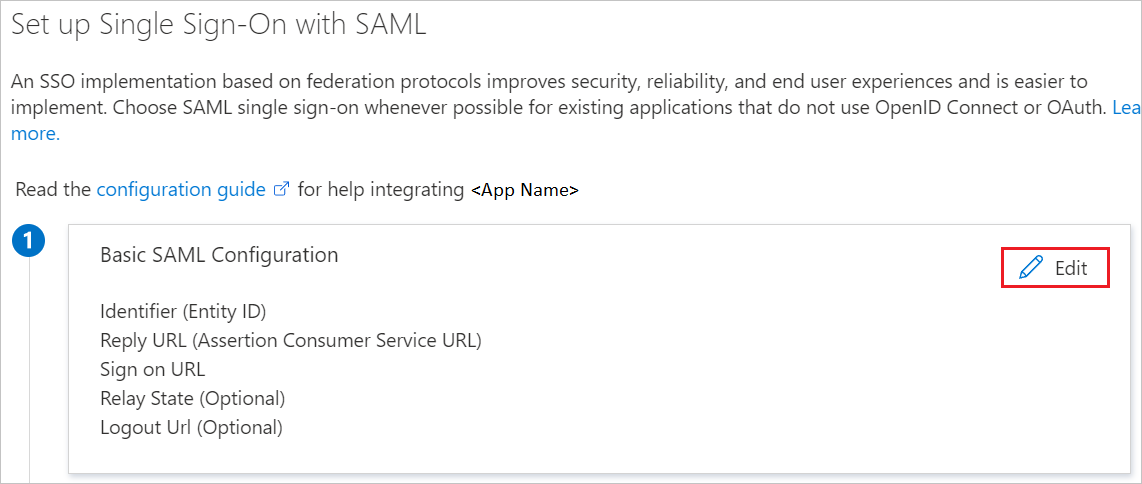
In the Basic SAML Configuration section, if you want to configure the application in IdP initiated mode, enter the values for the following fields:
a. In the Identifier text box, type a URL that uses the following pattern:
https://<server-base-url>/plugins/servlet/easysso/saml
b. In the Reply URL text box, type a URL that uses the following pattern:
https://<server-base-url>/plugins/servlet/easysso/saml
Select Set additional URLs, and do the following step if you want to configure the application in SP initiated mode:
https://<server-base-url>/login.jspNote
These values aren't real. Update these values with the actual Identifier, Reply URL and Sign-on URL. Contact the EasySSO support team to get these values if in doubt. You can also refer to the patterns shown in the Basic SAML Configuration section.
The EasySSO for BitBucket application expects the SAML assertions in a specific format, which requires you to add custom attribute mappings to your SAML token attributes configuration. The following screenshot shows the list of default attributes.
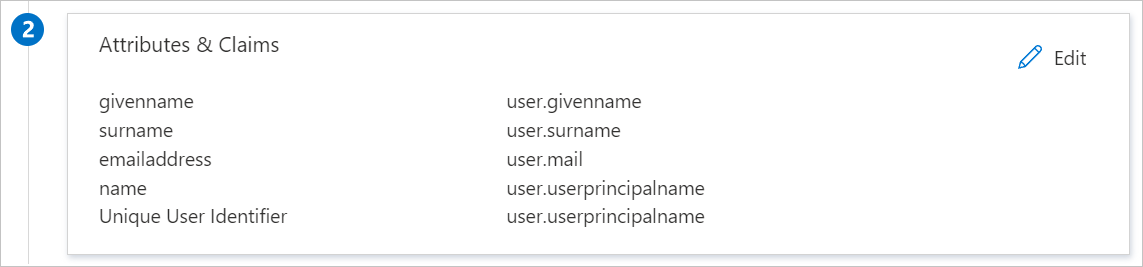
The EasySSO for BitBucket application also expects a few more attributes to be passed back in the SAML response. The following table shows these. These attributes are also pre-populated, but you can review them per your requirements.
| Name | Source attribute |
|---|---|
| urn:oid:0.9.2342.19200300.100.1.1 | user.userprincipalname |
| urn:oid:0.9.2342.19200300.100.1.3 | user.mail |
| urn:oid:2.16.840.1.113730.3.1.241 | user.displayname |
| urn:oid:2.5.4.4 | user.surname |
| urn:oid:2.5.4.42 | user.givenname |
If your Microsoft Entra users have sAMAccountName configured, you have to map urn:oid:0.9.2342.19200300.100.1.1 onto the sAMAccountName attribute.
On the Set up single sign-on with SAML page, in the SAML Signing Certificate section, select the download links for the Certificate (Base64) or Federation Metadata XML options. Save either or both to your computer. You need it later to configure BitBucket EasySSO.

If you plan to configure EasySSO for BitBucket manually with a certificate, you also need to copy Login URL and Microsoft Entra Identifier, and save those on your computer.
Follow the guidelines in the create and assign a user account quickstart to create a test user account called B.Simon.
In a different web browser window, sign in to your Zoom company site as an administrator
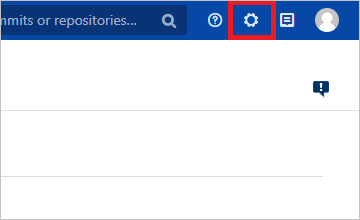
Go to the Administration section.
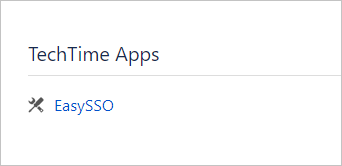
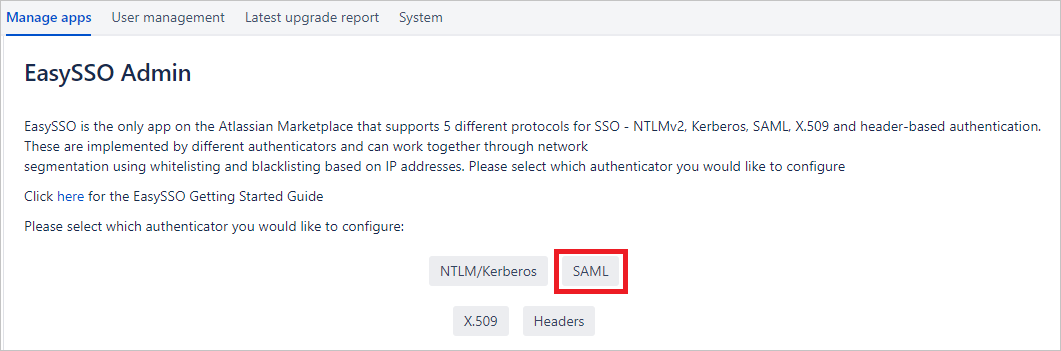
Locate and select EasySSO.
Select SAML. This takes you to the SAML configuration section.
Select the Certificates tab, and you're presented with the following screen:
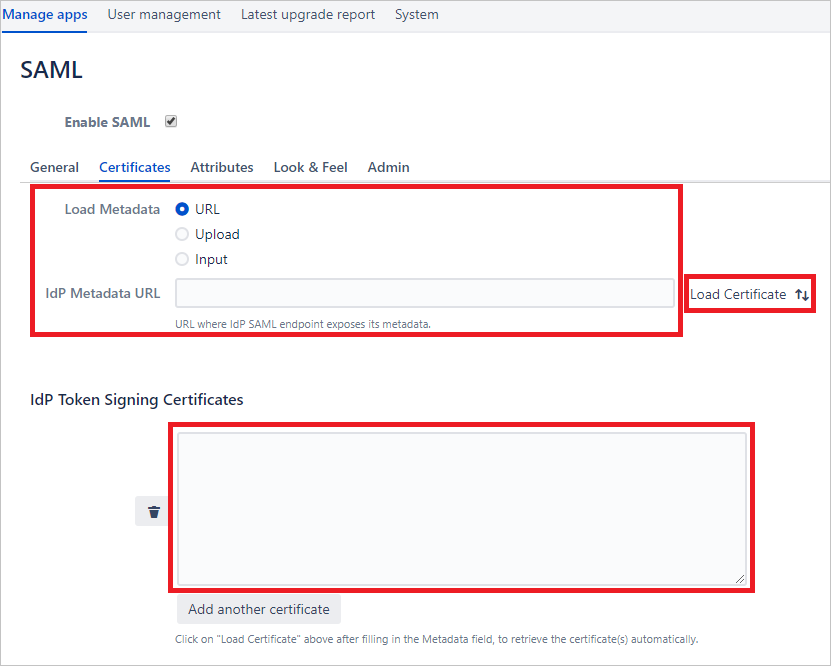
Locate the Certificate (Base64) or Metadata File that you saved in the preceding section of this article. You can proceed in one of the following ways:
Use the App Federation Metadata File you downloaded to a local file on your computer. Select the Upload radio button, and follow the path specific to your operating system.
Open the App Federation Metadata File to see the content of the file, in any plain-text editor. Copy it onto the clipboard. Select Input, and paste the clipboard content into the text field.
Do a fully manual configuration. Open the App Federation Certificate (Base64) to see the content of the file, in any plain-text editor. Copy it onto the clipboard, and paste it into the IdP Token Signing Certificates text field. Then go to the General tab, and fill the POST Binding URL and Entity ID fields with the respective values for Login URL and Microsoft Entra Identifier that you saved previously.
Select Save on the bottom of the page. You'll see that the content of the metadata or certificate files is parsed into the configuration fields. EasySSO for BitBucket configuration is complete.
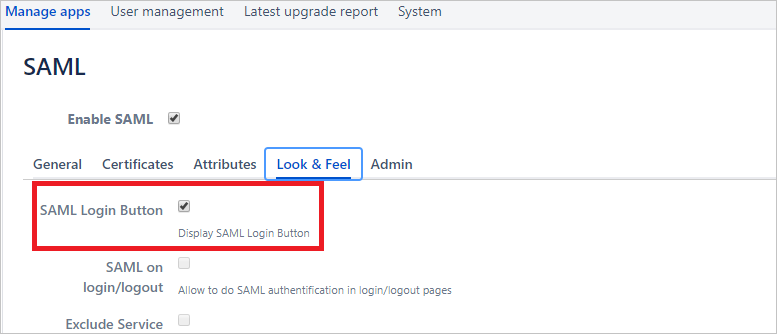
To test the configuration, go to the Look & Feel tab, and select SAML Login Button. This enables a separate button on the BitBucket sign-in screen, specifically to test your Microsoft Entra SAML integration end-to-end. You can leave this button on, and configure its placement, color, and translation for production mode, too.
Note
If you have any problems, contact the EasySSO support team.
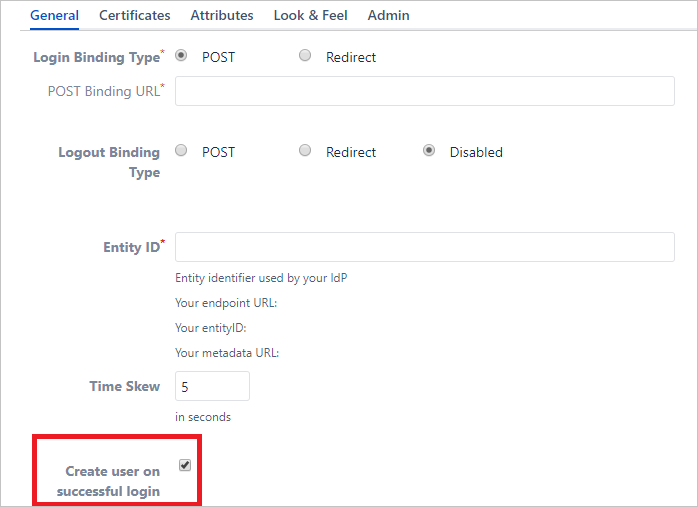
In this section, you create a user called Britta Simon in BitBucket. EasySSO for BitBucket supports just-in-time user provisioning, which is disabled by default. To enable it, you have to explicitly check Create user on successful login in the General section of EasySSO plug-in configuration. If a user doesn't already exist in BitBucket, a new one is created after authentication.
However, if you don't want to enable automatic user provisioning when the user first signs in, users must exist in user directories that the instance of BitBucket makes use of. For example, this directory might be LDAP or Atlassian Crowd.
In this section, you test your Microsoft Entra single sign-on configuration with following options.
Select Test this application, this option redirects to EasySSO for BitBucket Sign on URL where you can initiate the login flow.
Go to EasySSO for BitBucket Sign-on URL directly and initiate the login flow from there.
You can also use Microsoft My Apps to test the application in any mode. When you select the EasySSO for BitBucket tile in the My Apps, if configured in SP mode you would be redirected to the application sign on page for initiating the login flow and if configured in IDP mode, you should be automatically signed in to the EasySSO for BitBucket for which you set up the SSO. For more information about the My Apps, see Introduction to the My Apps.
Once you configure EasySSO for BitBucket, you can enforce session control, which protects exfiltration and infiltration of your organization’s sensitive data in real time. Session control extends from Conditional Access. Learn how to enforce session control with Microsoft Defender for Cloud Apps.
Events
Apr 9, 3 PM - Apr 10, 12 PM
Code the Future with AI and connect with Java peers and experts at JDConf 2025.
Register NowTraining
Module
Implement and monitor the integration of enterprise apps for SSO - Training
Deploying and monitoring enterprise applications to Azure solutions can ensure security. Explore how to deploy on-premises and cloud based apps to users.
Certification
Microsoft Certified: Identity and Access Administrator Associate - Certifications
Demonstrate the features of Microsoft Entra ID to modernize identity solutions, implement hybrid solutions, and implement identity governance.