Note
Access to this page requires authorization. You can try signing in or changing directories.
Access to this page requires authorization. You can try changing directories.
Defender for Cloud collects, analyzes, and integrates log data from your Azure, hybrid, and multicloud resources, the network, and connected partner solutions, such as firewalls and endpoint agents. Defender for Cloud uses the log data to detect real threats and reduce false positives. A list of prioritized security alerts is shown in Defender for Cloud along with the information you need to quickly investigate the problem and the steps to take to remediate an attack.
This article shows you how to view and process Defender for Cloud's alerts and protect your resources.
When triaging security alerts, you should prioritize alerts based on their alert severity, addressing higher severity alerts first. Learn more about how alerts are classified.
Tip
You can connect Microsoft Defender for Cloud to SIEM solutions including Microsoft Sentinel and consume the alerts from your tool of choice. Learn more how to stream alerts to a SIEM, SOAR, or IT Service Management solution.
For prerequisites and requirements, see Support matrices for Defender for Cloud.
Follow these steps:
Sign in to the Azure portal.
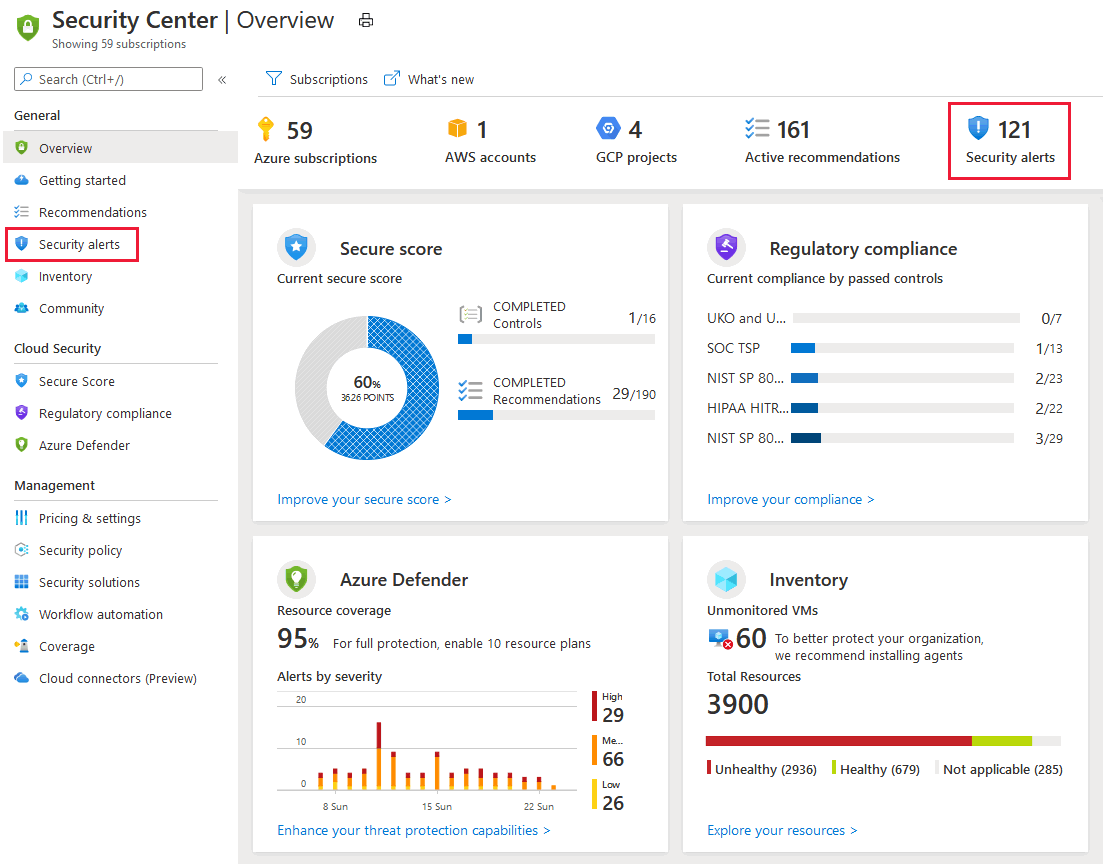
Navigate to Microsoft Defender for Cloud > Security alerts.
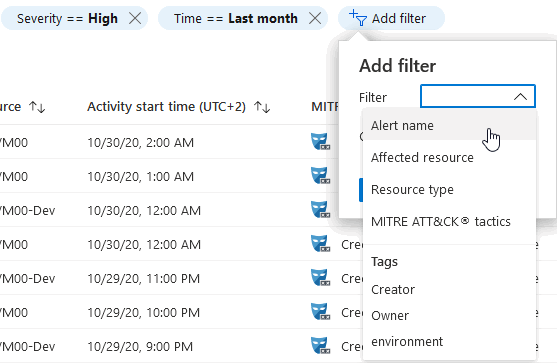
(Optional) Filter the alerts list with any of the relevant filters. You can add extra filters with the Add filter option.
The list updates according to the filters selected. For example, you might you want to address security alerts that occurred in the last 24 hours because you're investigating a potential breach in the system.

Each alert contains information regarding the alert that assists you in your investigation.
To investigate a security alert:
Select an alert. A side pane opens and shows a description of the alert and all the affected resources.
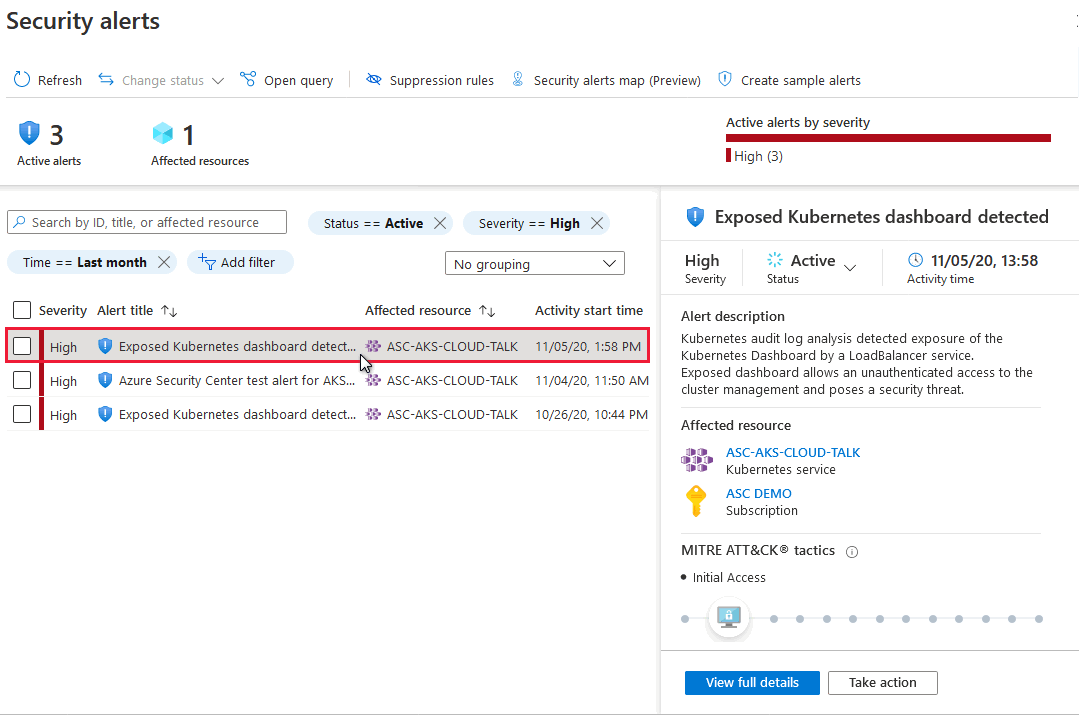
Review the high-level information about the security alert.
- Alert severity, status, and activity time
- Description that explains the precise activity that was detected
- Affected resources
- Kill chain intent of the activity on the MITRE ATT&CK matrix (if applicable)
Select View full details.
The right pane includes the Alert details tab containing further details of the alert to help you investigate the issue: IP addresses, files, processes, and more.
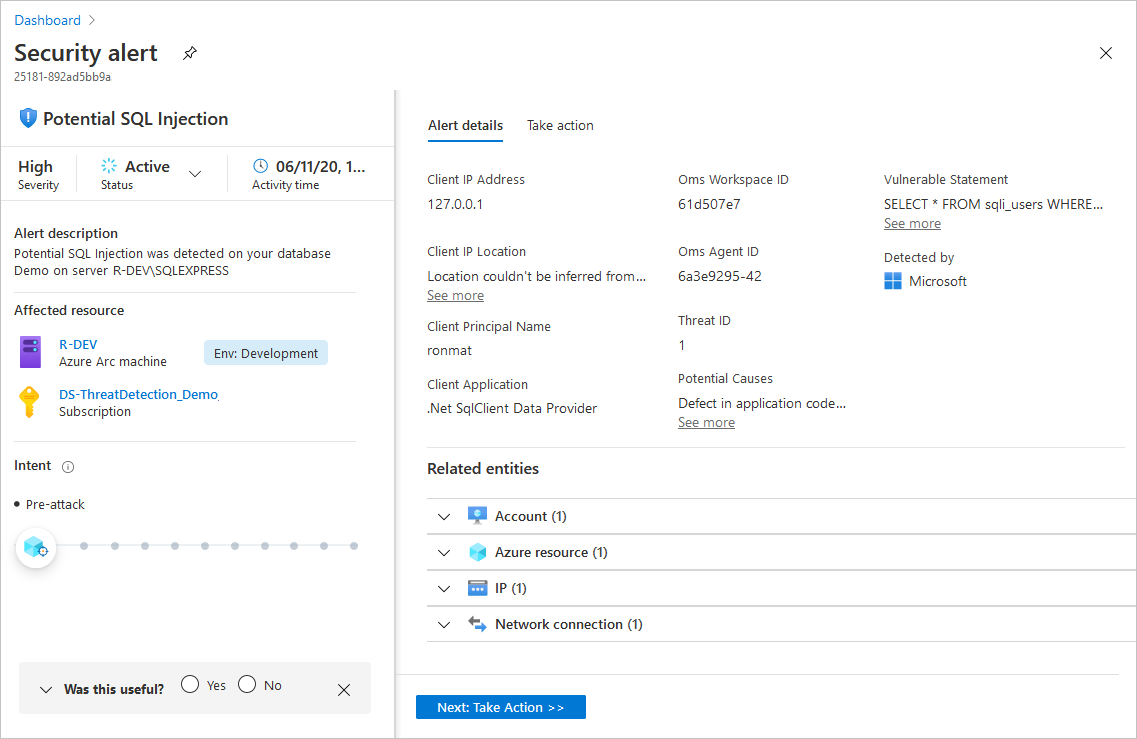
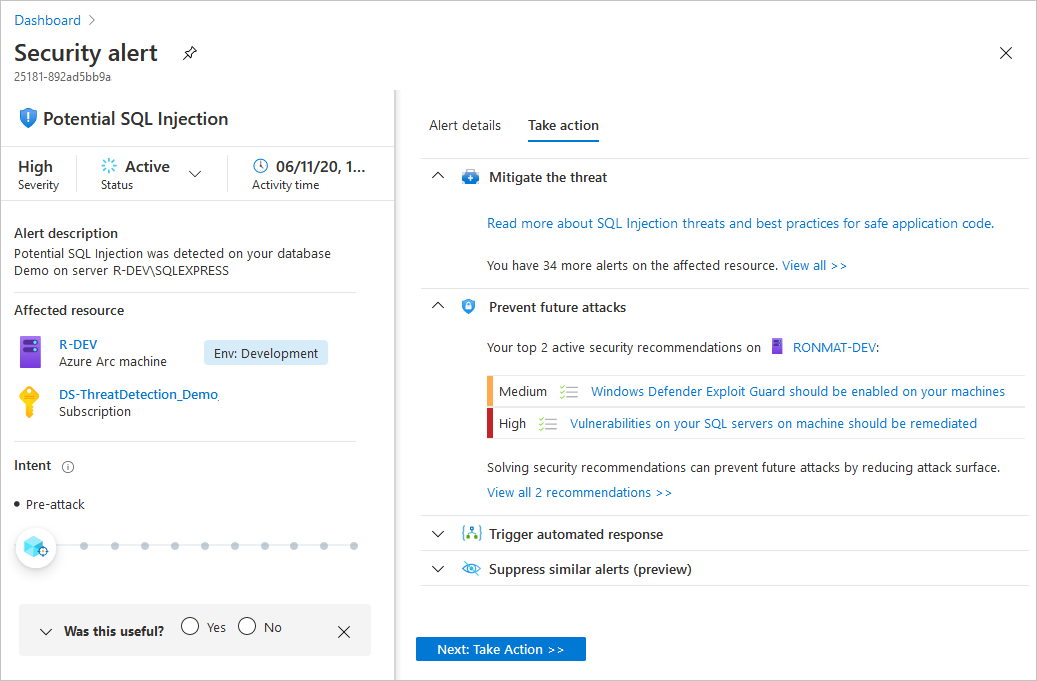
Also in the right pane is the Take action tab. Use this tab to take further actions regarding the security alert. Actions such as:
- Inspect resource context - sends you to the resource's activity logs that support the security alert
- Mitigate the threat - provides manual remediation steps for this security alert
- Prevent future attacks - provides security recommendations to help reduce the attack surface, increase security posture, and thus prevent future attacks
- Trigger automated response - provides the option to trigger a logic app as a response to this security alert
- Suppress similar alerts - provides the option to suppress future alerts with similar characteristics if the alert isn’t relevant for your organization
For further details, contact the resource owner to verify whether the detected activity is a false positive. You can also, investigate the raw logs generated by the attacked resource.
The alerts list includes checkboxes so you can handle multiple alerts at once. For example, for triaging purposes you might decide to dismiss all informational alerts for a specific resource.
Filter according to the alerts you want to handle in bulk.
In this example, the alerts with severity of
Informationalfor the resourceASC-AKS-CLOUD-TALKare selected.
Use the checkboxes to select the alerts to be processed.
In this example, all alerts are selected. The Change status button is now available.

Use the Change status options to set the desired status.

The alerts shown in the current page have their status changed to the selected value.
After investigating a security alert, you can respond to the alert from within Microsoft Defender for Cloud.
To respond to a security alert:
Open the Take action tab to see the recommended responses.

Review the Mitigate the threat section for the manual investigation steps necessary to mitigate the issue.
To harden your resources and prevent future attacks of this kind, remediate the security recommendations in the Prevent future attacks section.
To trigger a logic app with automated response steps, use the Trigger automated response section and select Trigger logic app.
If the detected activity isn’t malicious, you can suppress future alerts of this kind using the Suppress similar alerts section and select Create suppression rule.
Select Configure email notification settings, to view who receives emails regarding security alerts on this subscription. Contact the subscription owner, to configure the emails settings.
When you complete the investigation into the alert and responded in the appropriate way, change the status to Dismissed.

The alert is removed from the main alerts list. You can use the filter from the alerts list page to view all alerts with Dismissed status.
We encourage you to provide feedback about the alert to Microsoft:
- Marking the alert as Useful or Not useful.
- Select a reason and add a comment.

Tip
We review your feedback to improve our algorithms and provide better security alerts.
To learn about the different types of alerts, see Security alerts - a reference guide.
For an overview of how Defender for Cloud generates alerts, see How Microsoft Defender for Cloud detects and responds to threats.
Review the agentless scan's results
Results for both the agent-based and agentless scanner appear on the Security alerts page.

Note
Remediating one of these alerts will not remediate the other alert until the next scan is completed.

