This article references CentOS, a Linux distribution that is End Of Life (EOL) status. Please consider your use and plan accordingly. For more information, see the CentOS End Of Life guidance.
Learn how to set up an OpenFrame environment on Azure suitable for development, demos, testing, or production workloads. This tutorial walks you through each step.
OpenFrame includes multiple components that create the mainframe emulation environment on Azure. For example, OpenFrame online services replace the mainframe middleware such as IBM Customer Information Control System (CICS), and OpenFrame Batch, with its TJES component, replaces the IBM mainframe's Job Entry Subsystem (JES).
OpenFrame works with any relational database, including Oracle Database, Microsoft SQL Server, IBM Db2, and MySQL. This installation of OpenFrame uses the TmaxSoft Tibero relational database. Both OpenFrame and Tibero run on a Linux operating system. This tutorial installs CentOS 7.3, although you can use other supported Linux distributions. The OpenFrame application server and the Tibero database are installed on one virtual machine (VM).
The tutorial steps you through the installation of the OpenFrame suite components. Some must be installed separately.
Main OpenFrame components:
Required installation packages.
Tibero database.
Open Database Connectivity (ODBC) is used by applications in OpenFrame to communicate with the Tibero database.
OpenFrame Base, the middleware that manages the entire system.
OpenFrame Batch, the solution that replaces the mainframe's batch systems.
TACF, a service module that controls user access to systems and resources.
ProSort, a sort tool for batch transactions.
OFCOBOL, a compiler that interprets the mainframe's COBOL programs.
OFASM, a compiler that interprets the mainframe's assembler programs.
OpenFrame Server Type C (OSC), the solution that replaces the mainframe's middleware and IBM CICS.
Java Enterprise User Solution (JEUS), a web application server that is certified for Java Enterprise Edition 6.
OFGW, the OpenFrame gateway component that provides a 3270 listener.
OFManager, a solution that provides OpenFrame's operation and management functions in the web environment.
Other required OpenFrame components:
OSI, the solution that replaces the mainframe middleware and IMS DC.
TJES, the solution that provides the mainframe's JES environment.
OFTSAM, the solution that enables (V)SAM files to be used in the open system.
OFHiDB, the solution that replaces the mainframe's IMS DB.
OFPLI, a compiler that interprets the mainframe's PL/I programs.
PROTRIEVE, a solution that executes the mainframe language CA-Easytrieve.
OFMiner, a solution that analyzes the mainframes assets and then migrates them to Azure.
Architecture
The following figure provides an overview of the OpenFrame 7.0 architectural components installed in this tutorial:
Azure system requirements
The following table lists the requirements for the installation on Azure.
WinSCP: A popular SFTP client and FTP client you can use
Eclipse for Windows: A development platform supported by TmaxSoft
(Microsoft Visual Studio is not supported at this time)
Requirement
Description
Supported Linux distributions on Azure
Linux x86 2.6 (32-bit, 64-bit)
Red Hat 7.x
CentOS 7.x
Plan on spending a few days to assemble all the required software and complete all the manual processes.
Before getting started, do the following:
Get the OpenFrame installation media from TmaxSoft. If you are an existing TmaxSoft customer, contact your TmaxSoft representative for a licensed copy. Otherwise, request a trial version from TmaxSoft.
Get an Azure subscription if you don't already have one. You can also create a free account before you begin.
Optional. Set up a site-to-site VPN tunnel or a jumpbox that restricts access to the Azure VM to the permitted users in your organization. This step is not required, but it is a best practice.
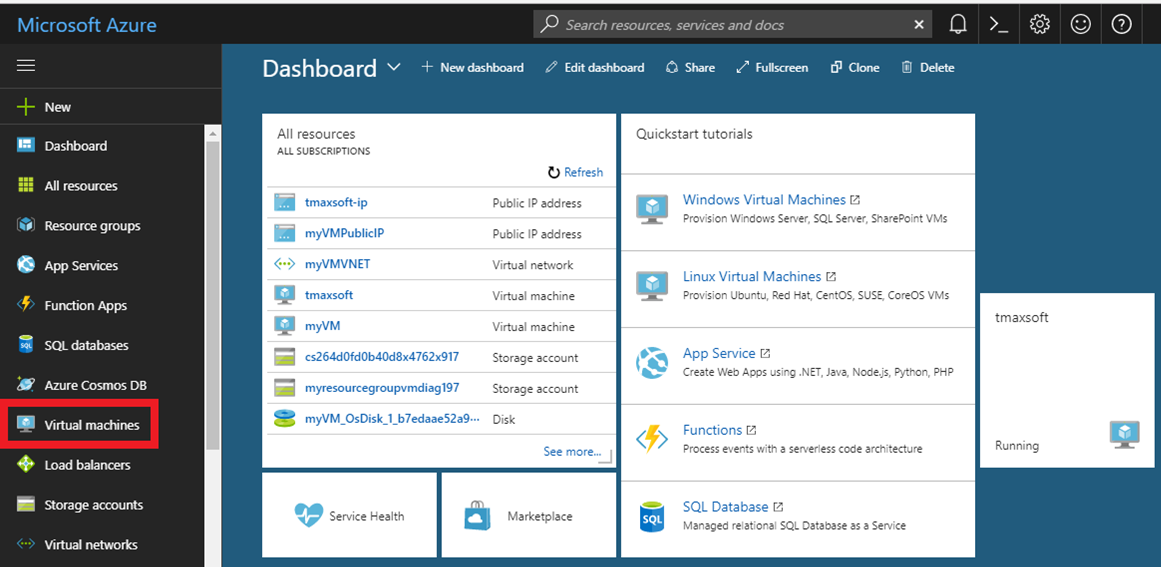
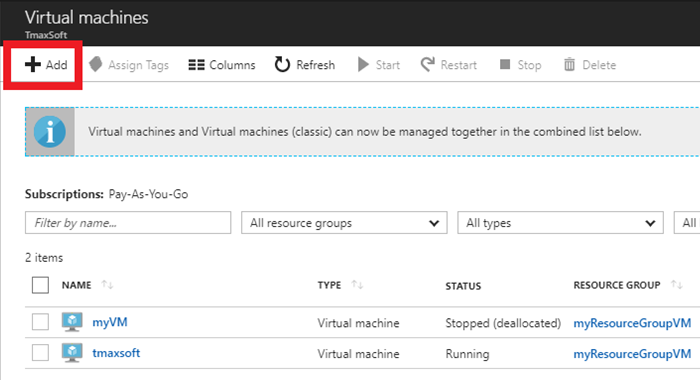
Set up a VM on Azure for OpenFrame and Tibero
You can set up the OpenFrame environment using various deployment patterns, but the following procedure shows how to deploy the OpenFrame application server and the Tibero database on one VM. In larger environments and for sizeable workloads, a best practice is to deploy the database separately on its own VM for better performance.
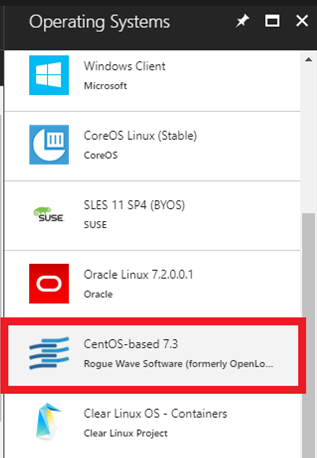
Click CentOS-based 7.3 to follow this walk-through exactly, or you can choose another supported Linux distribution.
In the Basics settings, enter Name, User name, Authentication type, Subscription (Pay-As-You-Go is the AWS style of payment), and Resource group (use an existing one or create a TmaxSoft group).
When complete (including the public/private key pair for Authentication type), click Submit.
Note
If using an SSH public key for Authentication type, see the steps in the next section to generate the public/private key pair, then resume the steps here.
Generate a public/private key pair
The public key can be freely shared, but the private key should be kept entirely secret and should never be shared with another party. After generating the keys, you must paste the SSH public key into the configuration in effect, uploading it to the Linux VM. It is stored inside authorized_keys within the ~/.ssh directory of the user account's home directory. The Linux VM is then
able to recognize and validate the connection once you provide the associated SSH private key in the SSH client.
When giving new individuals access the VM:
Each new individual generates their own public/private keys.
Individuals store their own private keys separately and send the public key information to the administrator of the VM.
The administrator pastes the contents of the public key to the ~/.ssh/authorized_keys file.
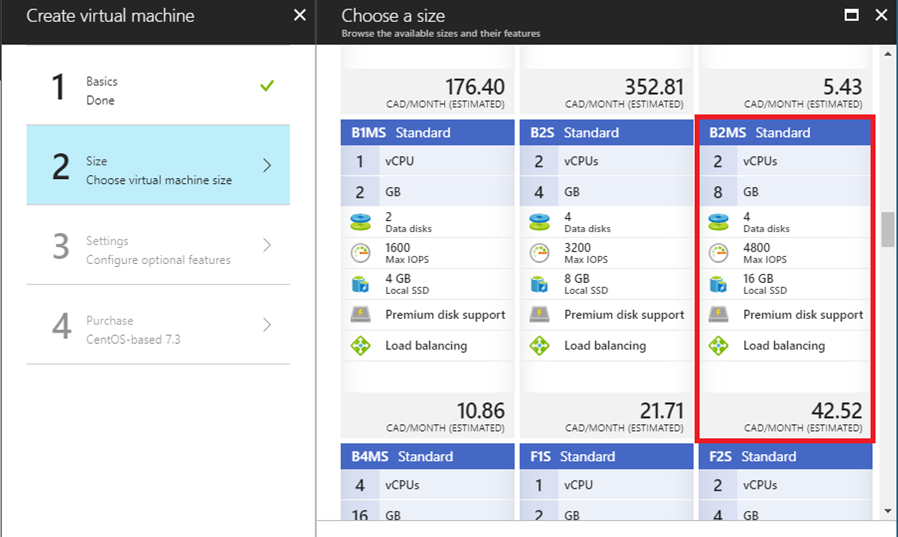
In Azure portal, in the Choose a size blade, choose the Linux machine hardware settings you want. The minimum requirements for installing both Tibero and OpenFrame are 2 CPUs and 4 GB RAM as shown in this example installation:
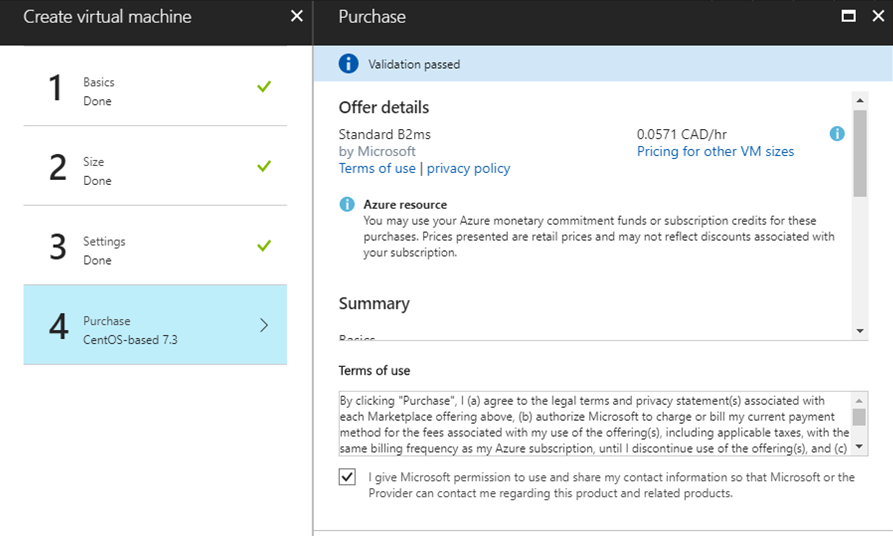
Click 3 Settings and use the default settings to configure optional features.
Review your payment details.
Submit your selections. Azure begins to deploy the VM. This process typically takes a few minutes.
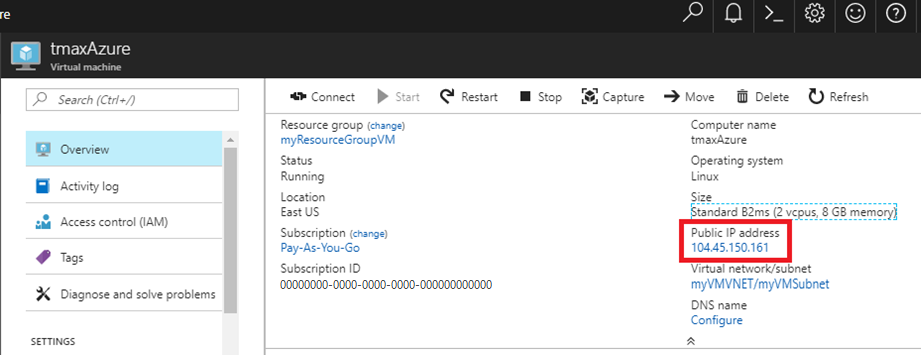
When the VM is deployed, its dashboard is displayed, showing all the settings that were selected during the configuration. Make a note of the Public IP address.
Open bash or a PowerShell prompt.
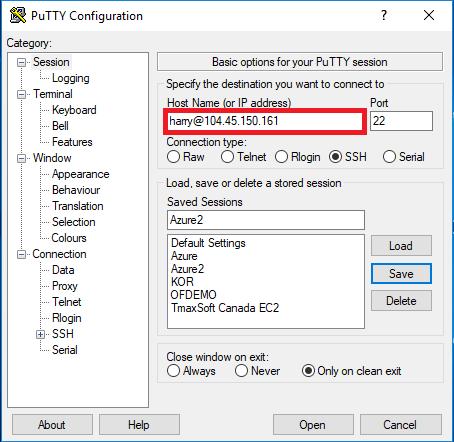
For Host Name, type your username and the public IP address you copied. For example, username@publicip.
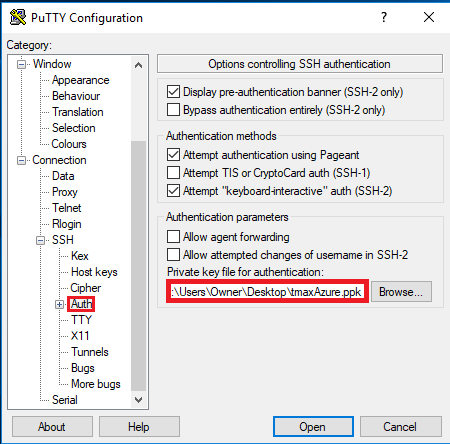
In the Category box, click Connection > SSH > Auth. Provide the path to your private key file.
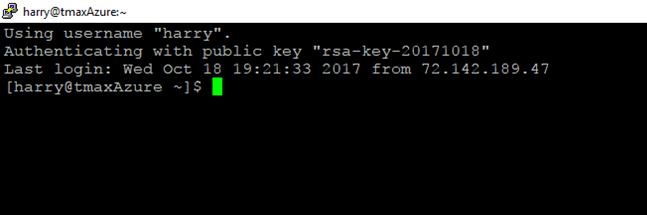
Click Open to launch the PuTTY window. If successful, you are connected to your new CentOS VM running on Azure.
To log on as root user, type sudo bash.
Set up the environment and packages
Now that the VM is created and you are logged on, you must perform a few setup steps and install the required preinstallation packages.
Map the name ofdemo to the local IP address, modify /etc/hosts using any text editor. Assuming our IP is 192.168.96.148, this is before the change:
Create the database. The following output appears:
Change core dump dir to /opt/tmaxdb/tibero6/bin/prof.
Listener port = 8629
Tibero 6
TmaxData Corporation Copyright (c) 2008-. All rights reserved.
Tibero instance started up (NOMOUNT mode).
 /--------------------- newmount sql ------------------------/
create database character set MSWIN949 national character set UTF16;
/-----------------------------------------------------------/
Database created.
Change core dump dir to /opt/tmaxdb/tibero6/bin/prof.
Listener port = 8629
Tibero 6
TmaxData Corporation Copyright (c) 2008-. All rights reserved.
Tibero instance started up (NORMAL mode).
/opt/tmaxdb/tibero6/bin/tbsvr
………………………..
Creating agent table...
Done.
For details, check /opt/tmaxdb/tibero6/instance/TVSAM/log/system_init.log.
**************************************************
* Tibero Database TVSAM is created successfully on Fri Aug 12 19:10:43 UTC 2016.
*     Tibero home directory ($TB_HOME) =
*         /opt/tmaxdb/tibero6
*     Tibero service ID ($TB_SID) = TVSAM
*     Tibero binary path =
*         /opt/tmaxdb/tibero6/bin:/opt/tmaxdb/tibero6/client/bin
*     Initialization parameter file =
*         /opt/tmaxdb/tibero6/config/TVSAM.tip
*
* Make sure that you always set up environment variables $TB_HOME and
* $TB_SID properly before you run Tibero.
 ******************************************************************************
To recycle Tibero, first shut it down using the tbdown command. For example:
tbdown
Tibero instance terminated (NORMAL mode).
Now boot Tibero using tbboot. For example:
tbboot
Change core dump dir to /opt/tmaxdb/tibero6/bin/prof. Listener port = 8629

Tibero 6
TmaxData Corporation Copyright (c) 2008-. All rights reserved.
Tibero instance started up (NORMAL mode).
To create a tablespace, access the database using SYS user (sys/tmax), then create the necessary tablespace for the default volume and TACF:
tbsql tibero/tmax
tbSQL 6
TmaxData Corporation Copyright (c) 2008-. All rights reserved.
Connected to Tibero.
By default, unixODBC is installed in /usr /local, so --prefix passes a value to change the location. Similarly, configuration files are installed in /etc by default, so --sysconfdir passes the value of the desired location.
Execute Makefile: make
Copy the executable file in the program directory after compiling. For example:
make install
Edit the bash profile ~/.bash_profile using any text editor and add the following:
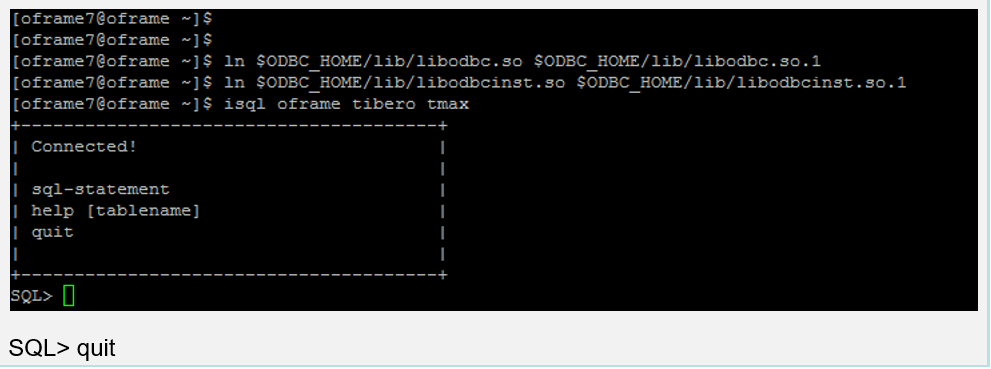
Apply the ODBC. Edit the following files accordingly. For example:
source ~/.bash_profile
cd
odbcinst -j unixODBC 2.3.4
DRIVERS............: /home/oframe7/odbcinst.ini
SYSTEM DATA SOURCES: /home/oframe7/odbc.ini
FILE DATA SOURCES..: /home/oframe7/ODBCDataSources
USER DATA SOURCES..: /home/oframe7/unixODBC/etc/odbc.ini
SQLULEN Size.......: 8
SQLLEN Size........: 8
SQLSETPOSIROW Size.: 8
Modify odbcinst.ini using any text editor, and add the following contents:
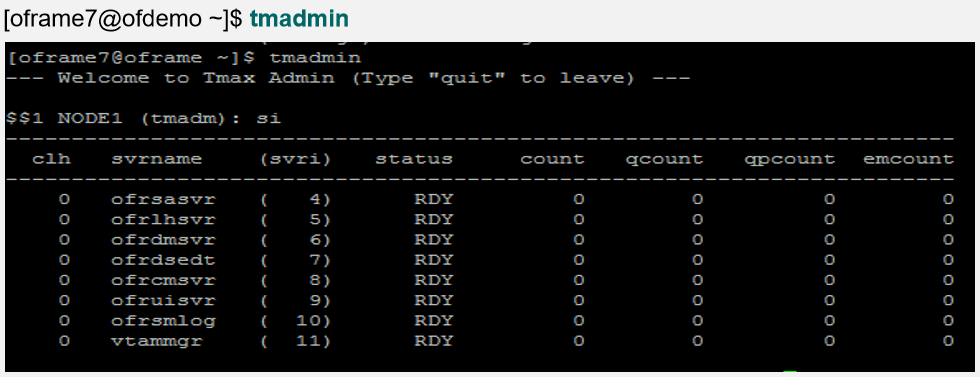
The Base application server is installed before the individual services that OpenFrame uses to manage the system on Azure, including the transaction handling server processes.
To install OpenFrame Base
Make sure the Tibero installation succeeded, then verify that the following OpenFrame_Base7_0_Linux_x86_64.bin installer file and base.properties configuration file are present.
Update the bash profile with the following Tibero-specific information:
alias ofhome='cd $OPENFRAME_HOME'
alias ulog='cd $OPENFRAME_HOME/log/tmax/ulog'
alias sysjcl='cd $OPENFRAME_HOME/volume_default/SYS1.JCLLIB'
alias sysload='cd $OPENFRAME_HOME/volume_default/SYS1.LOADLIB'
alias sysproc='cd $OPENFRAME_HOME/volume_default/SYS1.PROCLIB'
alias oscsrc='cd $OPENFRAME_HOME/osc/oivp'
alias osisrc='cd $OPENFRAME_HOME/osi/oivp'
alias defvol='cd $OPENFRAME_HOME/volume_default'
Execute the bash profile:. .bash_profile
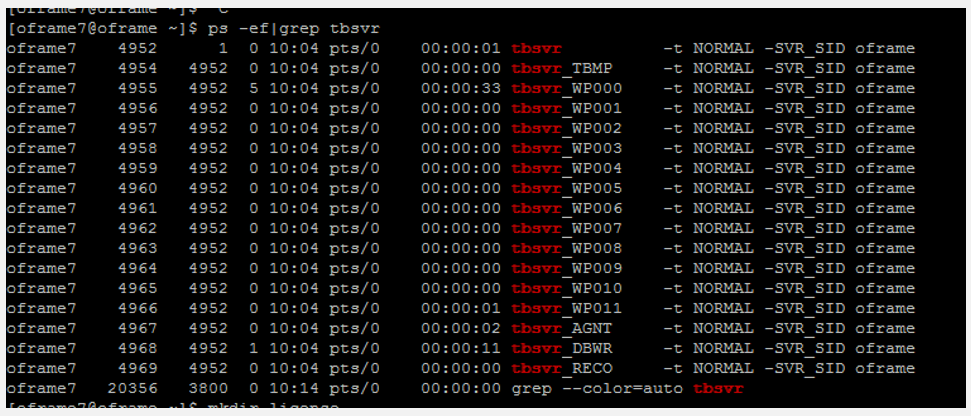
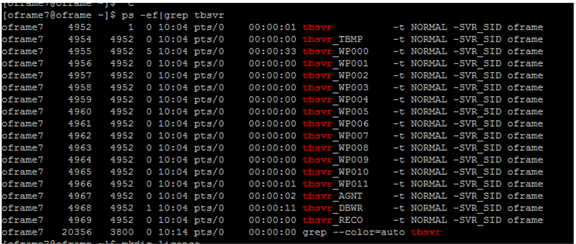
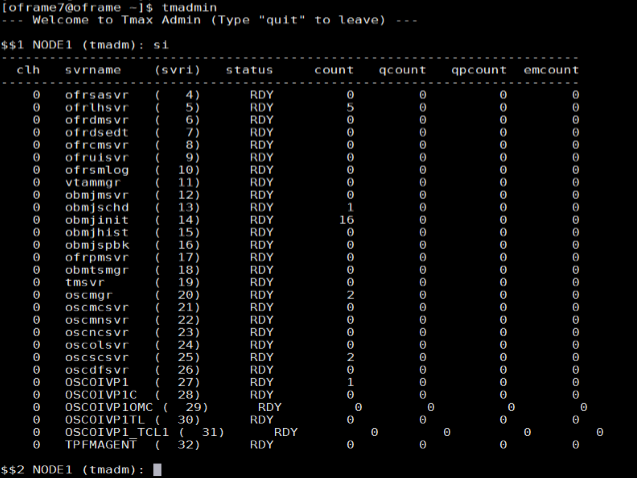
Ensure that the Tibero processes are running. For example:
ps -ef|grep tbsvr
Important
Make sure you start Tibero before installation.
Generate license at technet.tmaxsoft.com and PUT the OpenFrame Base, Batch, TACF, OSC licenses in the appropriate folder:
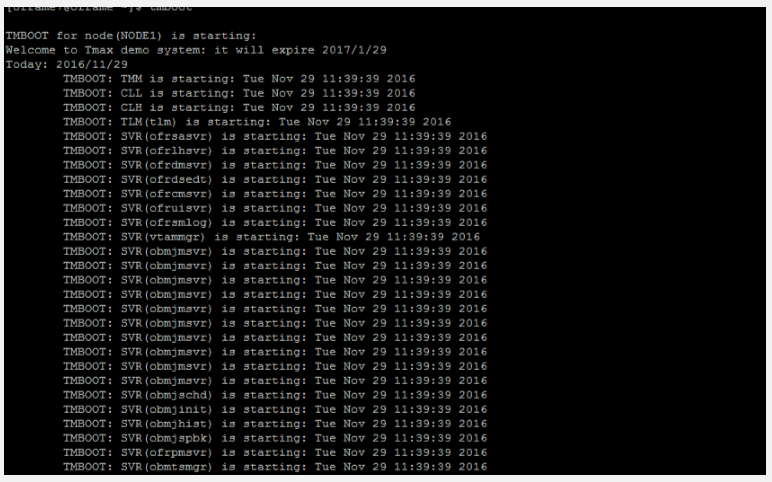
OpenFrame Batch consists of several components that simulate mainframe batch environments and is used to run batch jobs on Azure.
To install Batch
Make sure the base installation succeeded, then verify that the OpenFrame_Batch7_0_Fix2_MVS_Linux_x86_64.bin installer file and batch.properties configuration file are present:
Modify the file vi batch.properties using any text editor.
To execute the bash profile, at the command prompt, type: . .bash_profile
Create the configuration file. For example:
cd /opt/tmaxapp/prosort/config
./gen_tip.sh
Using PROSORT_SID "gbg"
 /home/oframe7/prosort/config/gbg.tip generated
Create the symbolic link. For example:
cd /opt/tmaxapp/OpenFrame/util/
ln -s DFSORT SORT
Verify the ProSort installation by executing the prosort -h command. For example:
prosort -h
Usage: prosort [options] [sort script files]
options ------
-h             Display this information
-v             Display version information
-s             Display state information
-j             Display profile information
-x             Use SyncSort compatible mode
Install OFCOBOL
OFCOBOL is the OpenFrame compiler that interprets the mainframe's COBOL programs.
To install OFCOBOL
Make sure that the Batch/Online installation succeeded, then verify that the OpenFrame_COBOL3_0_40_Linux_x86_64.bin installer file is present.
To execute the OFCOBOL installer, at the command prompt, type:
./OpenFrame_COBOL3_0_40_Linux_x86_64.bin
Read the licensing agreement and press Enter to continue.
Accept the licensing agreement. When the installation is complete, the following appears:
Choose Install Folder
--------------------
Where would you like to install?
Default Install Folder: /home/oframe7/OFCOBOL

ENTER AN ABSOLUTE PATH, OR PRESS <ENTER> TO ACCEPT THE DEFAULT : /opt/tmaxapp/OFCOBOL

INSTALL FOLDER IS: /opt/tmaxapp/OFCOBOL
IS THIS CORRECT? (Y/N): Y[oframe7@ofdemo ~]$ vi .bash_profile

============================================================================ Installing...
------------
[==================|==================|==================|==================]
[------------------|------------------|------------------|------------------]

=============================================================================== Installation Complete
--------------------
Congratulations. OpenFrame_COBOL has been successfully installed
PRESS <ENTER> TO EXIT THE INSTALLER
Modify the bash profile file (bash_profile) using any text editor, and verify that is updated with OFCOBOL variables.
Execute the bash profile. At the command prompt, type:
source ~/.bash_profile
Copy the OFCOBOL license to the installed folder. For example:
mv licofcob.dat $OFCOB_HOME/license
Modify the OpenFrame $OPENFRAME_HOME/config/tjclrun.conf configuration file using any text editor. For example:
Reboot OpenFrame by issuing one of the following commands:
tmdown / tmboot
—or—
oscdown / oscboot
Install OSC
OSC is the OpenFrame environment similar to IBM CICS that supports high-speed OLTP transactions and other management functions.
To install OSC
Make sure the base installation succeeded, then verify that the OpenFrame_OSC7_0_Fix2_Linux_x86_64.bin installer file and osc.properties configuration file are present.
Edit the following parameters in the osc.properties file:
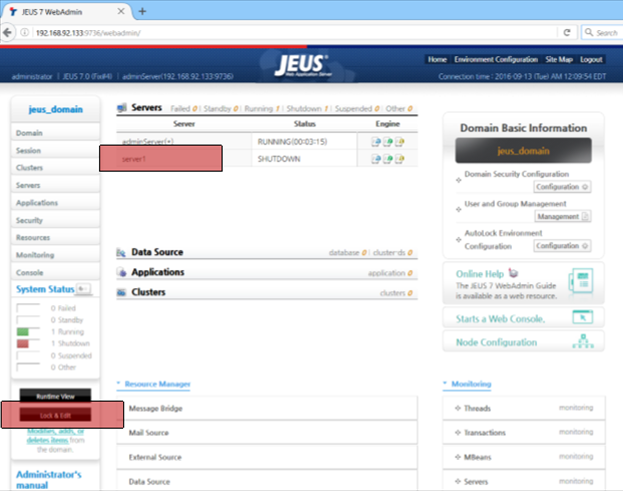
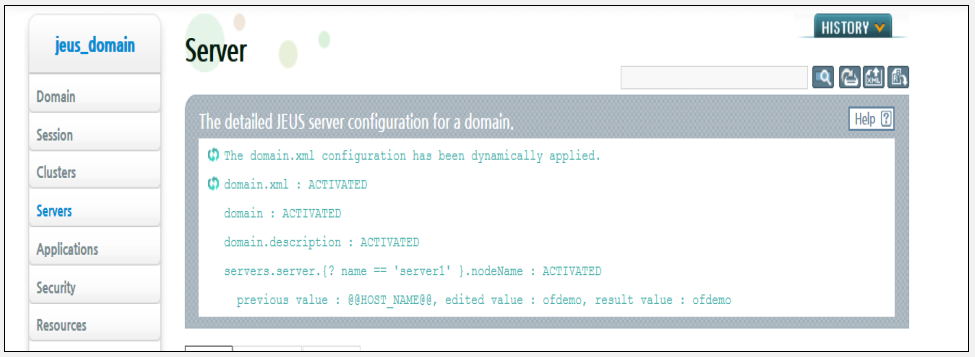
Open the domain-config-template.properties file using any text editor, and change jeus.password=jeusadmin nodename=Tmaxsoft to jeus.password=tmax1234 nodename=ofdemo
Execute the ant install command to build JEUS.
Update the ~/.bash_profile file with the JEUS variables as shown:
OFGW Is the OpenFrame gateway that supports communication between the 3270 terminal emulator and the OSI base and manages the sessions between the terminal emulator and OSI.
To install OFGW
Make sure that JEUS was installed successfully, then verify that the OFGW7_0_1_Generic.bin installer file is present.
Execute the installer. For example:
./OFGW7_0_1_Generic.bin
Use the following locations for the corresponding prompts:
JEUS Home directory
JEUS Domain Name
JEUS Server Name
Tibero Driver
Tmax Node ID ofdemo
Accept the rest of the defaults, then press Enter to exit the installer.
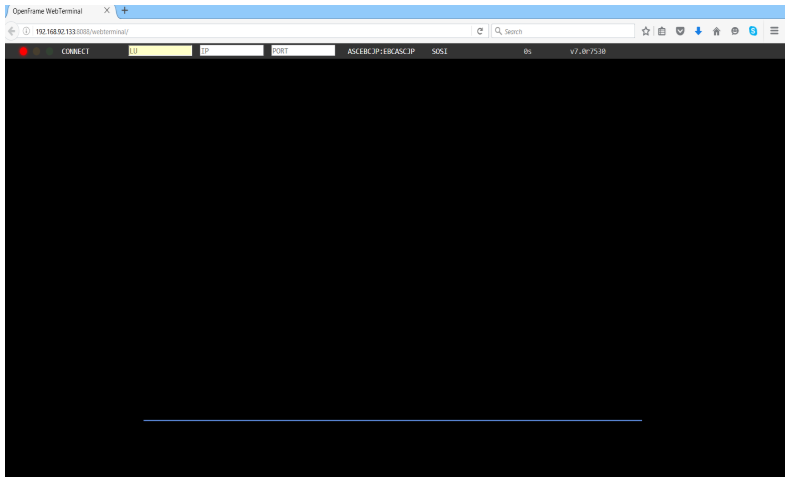
Verify that the URL for OFGW is working as expected:
Type URL
http://192.168.92.133:8088/webterminal/ and press enter
 < IP >               :8088/webterminal/
The following screen appears:
Install OFManager
OFManager provides operation and management functions for OpenFrame in the web environment.
To install OFManager
Verify that the OFManager7_Generic.bin installer file is present.
Execute the installer. For example:
./OFManager7_Generic.bin
Press Enter to continue, then accept the license agreement.
Choose the install folder.
Accept the defaults.
Choose Tibero as the database.
Press Enter to exit the installer.
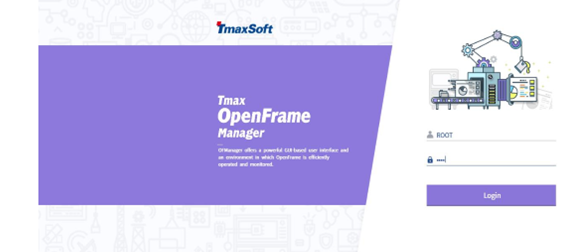
Verify that the URL for OFManager is working as expected:
Type URL http://192.168.92.133:8088/ofmanager and press enter <  IP >  : < PORT >  ofmanager Enter ID:   ROOT
Password: SYS1
The start screen appears:
That completes the installation of the OpenFrame components.
Next steps
If you are considering a mainframe migration, our expanding partner ecosystem is available to help you. For detailed guidance about choosing a partner solution, refer to the Platform Modernization Alliance.
By using batch jobs, you can avoid slowing down your computer or the server during typical working hours. You can run many tasks in finance and operations apps as part of batch jobs. For example, batch jobs can include tasks for printing reports, performing maintenance, or sending electronic documents.