Events
Power BI DataViz World Championships
Feb 14, 4 PM - Mar 31, 4 PM
With 4 chances to enter, you could win a conference package and make it to the LIVE Grand Finale in Las Vegas
Learn moreThis browser is no longer supported.
Upgrade to Microsoft Edge to take advantage of the latest features, security updates, and technical support.
Important
This article only applies to outbound marketing, which will be removed from the product on June 30, 2025. To avoid interruptions, transition to real-time journeys before this date. More information: Transition overview
Dynamics 365 Customer Insights - Journeys provides several artificial intelligence (AI), which include:
When you first install Customer Insights - Journeys, the smart scheduler is disabled by default. This feature includes privacy settings that may affect compliance with privacy laws and regulations.
To enable the smart scheduler and make privacy settings for it:
Go to Settings > Overview > Feature switches.
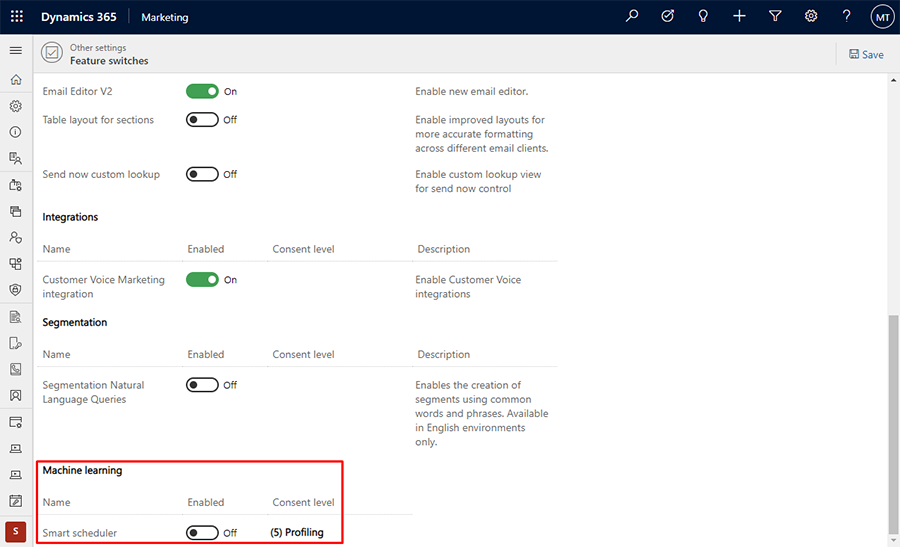
Under Machine learning > Smart scheduler, set the Enabled slider to On.
For the Consent level setting, choose the level of consent that each contact must provide before being processed.
Select the Save button near the top of the page to save your settings.
The level of consent required for the smart scheduler depends on your geographic location and that of your contacts. It may also depend on the way you have set up the data-protection features of Dynamics 365 Customer Insights - Journeys. It is your organization's responsibility to ensure that you are following all applicable laws in the countries/regions where you operate. More information: Data protection and privacy
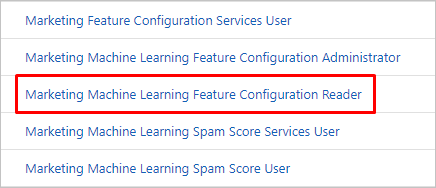
Each user who needs access to the Customer Insights - Journeys AI features needs to be granted the Marketing Machine Learning Feature Configuration Reader role. To inspect and customize a user's security roles:
Open the Settings menu ![]() at the top of the page and select Advanced settings.
at the top of the page and select Advanced settings.
The advanced-settings area opens in a new browser tab. Note that this area uses a horizontal navigator at the top of the page instead of a side navigator. Navigate to Settings > System > Security.
Select the Security roles icon.
You now see a list of security roles. Select a role to open the Security role window, which shows individual access levels for each available entity. Most entities are named intuitively to map to various features and areas of the app.
Ensure that the user's Business Unit contains the Marketing Machine Learning Feature Configuration Reader role.
Events
Power BI DataViz World Championships
Feb 14, 4 PM - Mar 31, 4 PM
With 4 chances to enter, you could win a conference package and make it to the LIVE Grand Finale in Las Vegas
Learn more