Configure Git credentials & connect a remote repo to Azure Databricks
Article
This article describes how to configure your Git credentials in Databricks so that you can connect a remote repo using Databricks Git folders (formerly Repos).
For a list of supported Git providers (cloud and on-premises), read Supported Git providers.
Although this article walks you through configuring Git credentials for a user, you can also configure Git credentials for a service principal. Service principals are a better choice when implementing jobs, CI/CD pipelines, or any other automated workflows that you don't want to associate with a user.
The following information applies to GitHub and GitHub AE users.
Why use the Databricks GitHub App instead of a PAT?
Databricks Git folders allows you to choose the Databricks GitHub App for user authentication instead of PATs if you are using a hosted GitHub account. The GitHub App has the following benefits over PATs:
It uses OAuth 2.0 for user authentication. OAuth 2.0 repo traffic is encrypted for strong security.
It is easier to integrate (see the steps below) and does not require individual tracking of tokens.
Token renewal is handled automatically.
The integration can be scoped to specific attached Git repos, allowing you more granular control over access.
Important
Per standard OAuth 2.0 integration, Databricks stores a user’s access and refresh tokens. GitHub manages all other access control. Access and refresh tokens follow GitHub’s default expiry rules, with access tokens expiring after 8 hours (which minimizes risk in the event of credentials leaking). Refresh tokens have a 6-month lifetime if unused. Linked credentials expire after 6 months of inactivity, requiring users to reconfigure them.
Link your GitHub account using Databricks GitHub App
Note
This feature is not supported in GitHub Enterprise Server. Use a personal access token instead.
In Azure Databricks, link your GitHub account on the User Settings page:
In the upper-right corner of any page, click your username, then select Settings.
Click the Linked accounts tab.
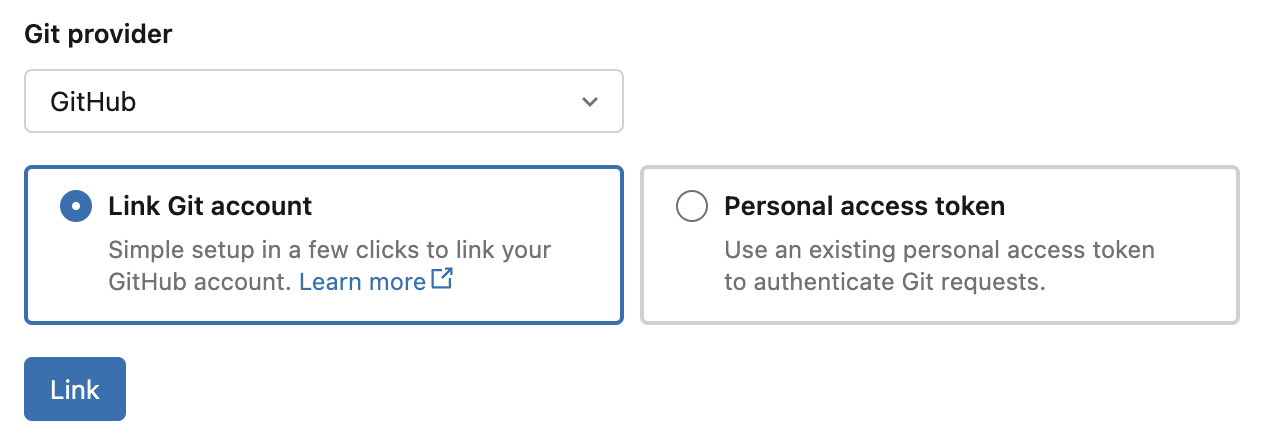
Change your provider to GitHub, select Link Git account, and click Link.
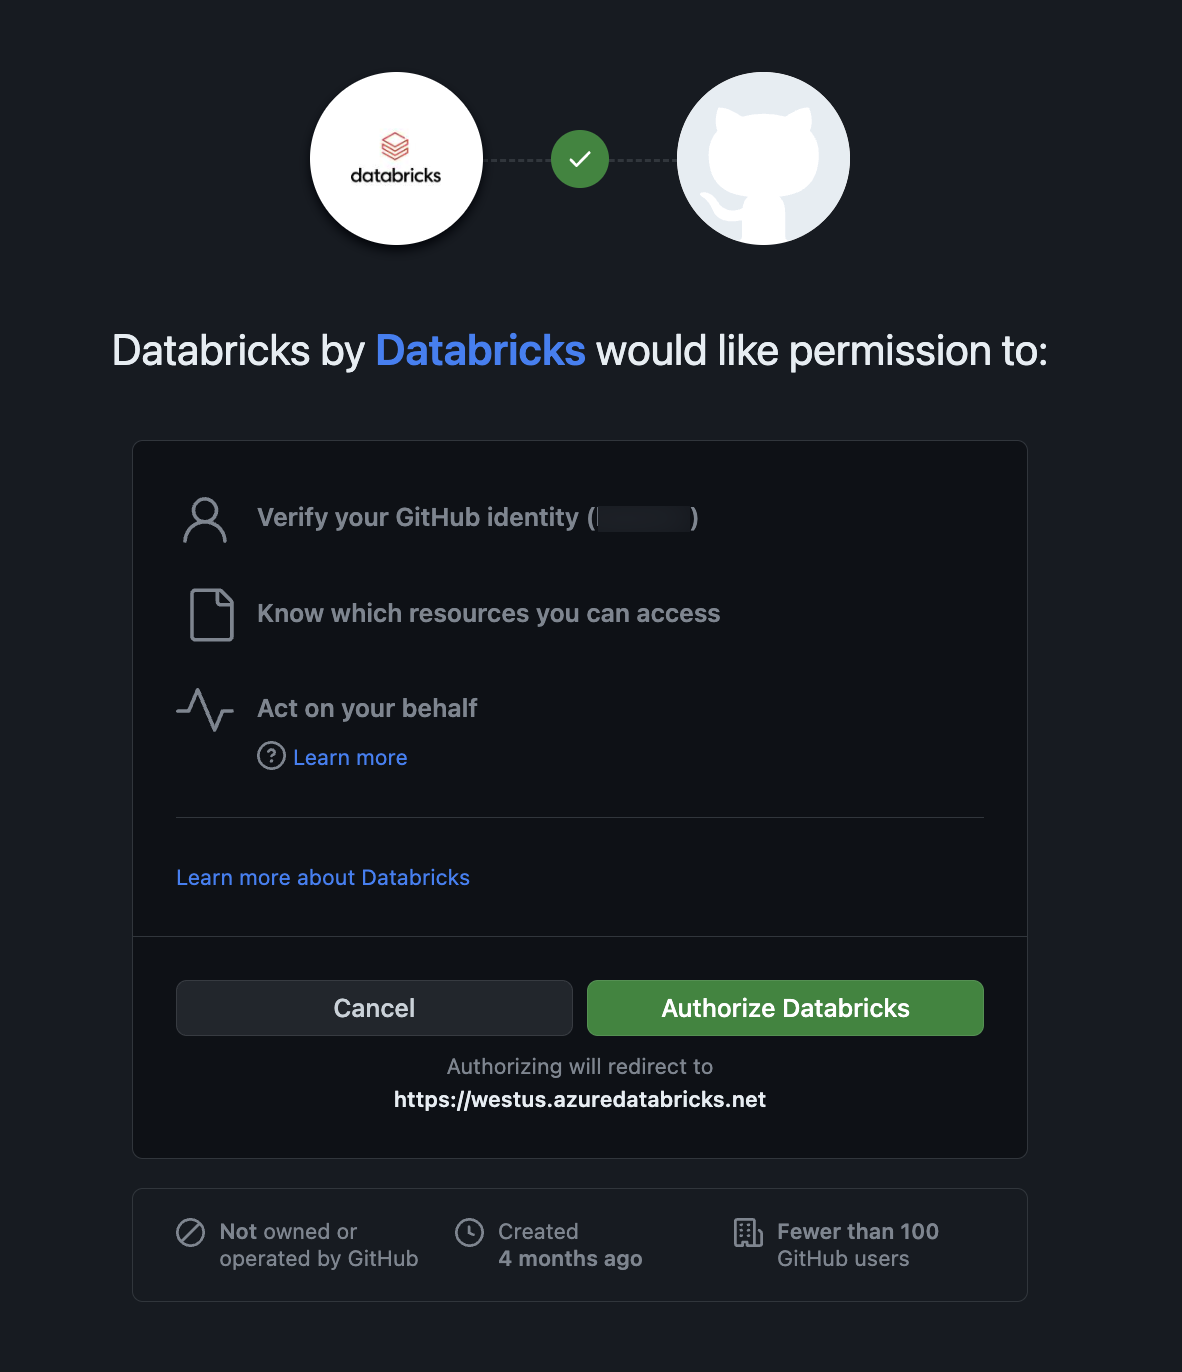
The Databricks GitHub App authorization page appears. Authorize the GitHub App to complete the setup, which allows Databricks to act on your behalf when you perform Git operations in Git folders (such as cloning a repository). See the GitHub documentation for more details on app authorization.
To allow access to GitHub repositories, follow the steps below to install and configure the Databricks GitHub app.
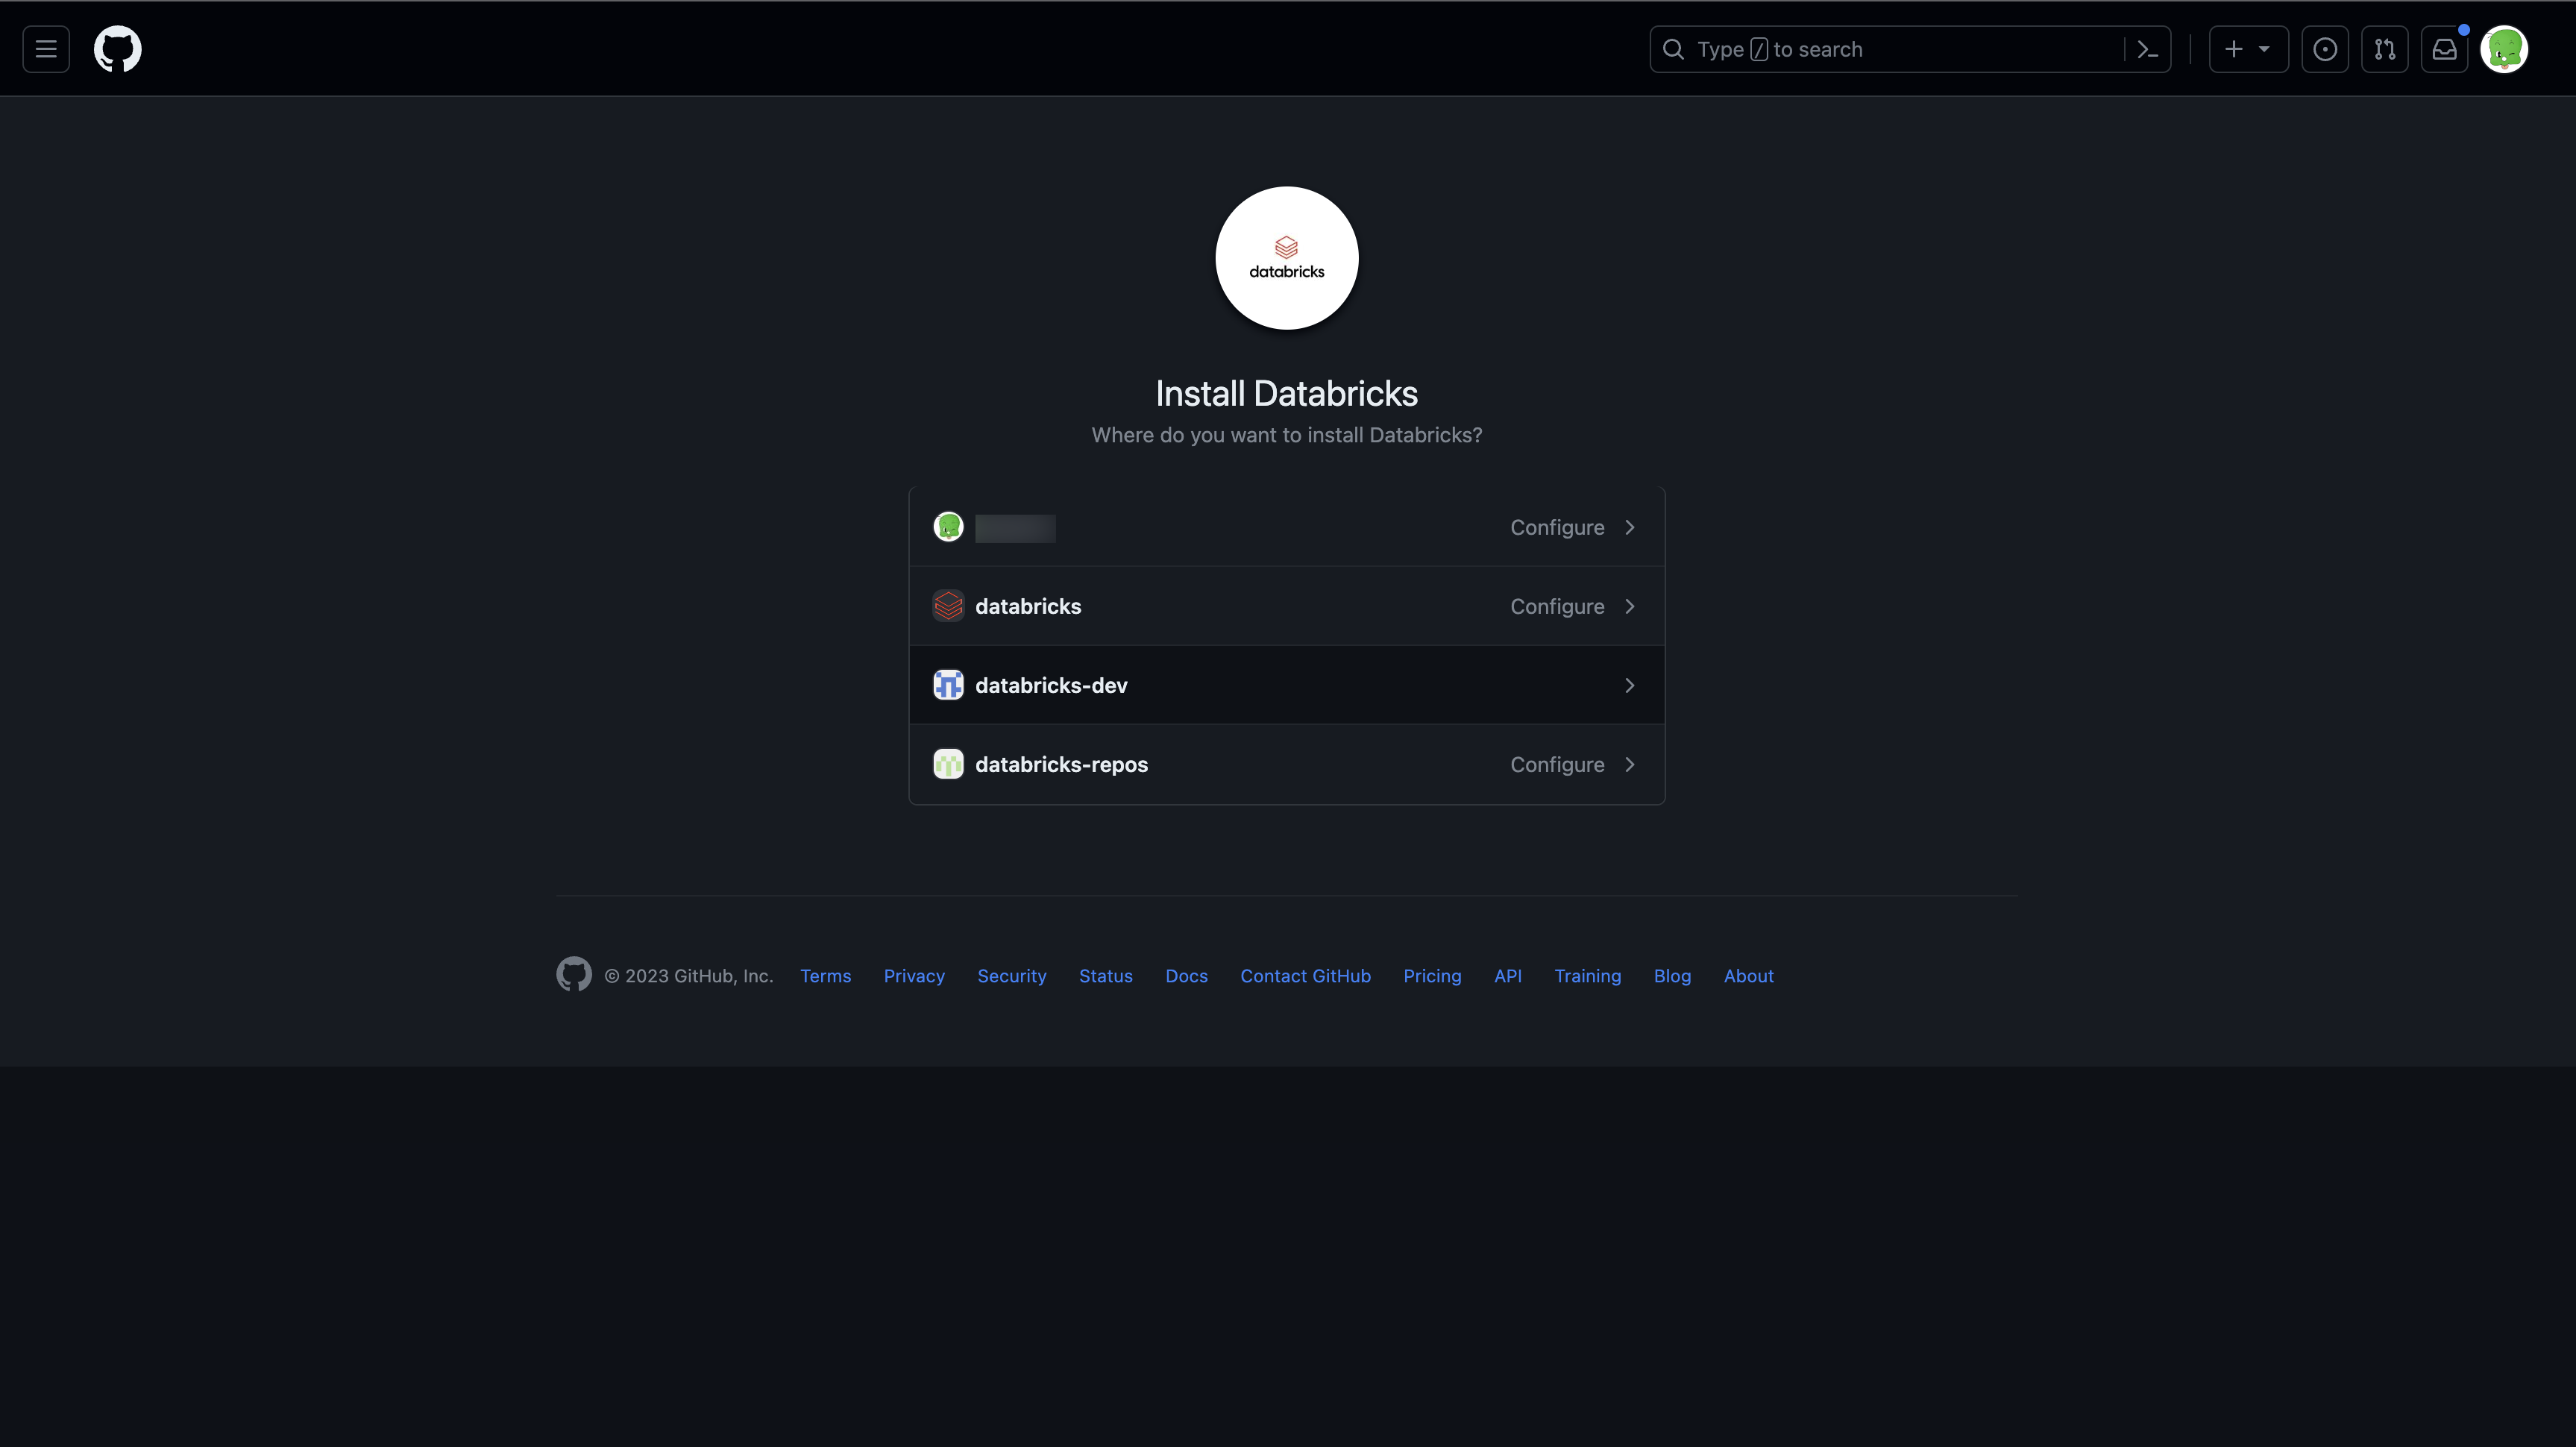
You can install and configure the Databricks GitHub App on GitHub repositories that you want to access from Databricks Git folders. See the GitHub documentation for more details on app installation.
Select the account that owns the repositories you want to access.
If you are not an owner of the account, you must have the account owner install and configure the app for you.
If you are the account owner, install the GitHub App. Installing it gives read and write access to code. Code is only accessed on behalf of users (for example, when a user clones a repository in Databricks Git folders).
Optionally, you can give access to only a subset of repositories by selecting the Only select repositories option.
Connect to a GitHub repo using a personal access token
In GitHub, follow these steps to create a personal access token that allows access to your repositories:
In the upper-right corner of any page, click your profile photo, then click Settings.
Click Developer settings.
Click the Personal access tokens tab in the left-hand pane, and then Tokens (classic).
Click the Generate new token button.
Enter a token description.
Select the repo scope and workflow scope, and click the Generate token button. workflow scope is needed in case your repository has GitHub Action workflows.
Copy the token to your clipboard. You enter this token in Azure Databricks under User Settings > Linked accounts.
Having trouble installing Databricks Github App on your account or organization? See the GitHub App installation documentation for troubleshooting guidance.
Connect to a GitHub repo using a fine-grained personal access token
As a best practice, use a fine-grained PAT that only grants access to the resources you will access in your project. In GitHub, follow these steps to create a fine-grained PAT that allows access to your repositories:
In the upper-right corner of any page, click your profile photo, then click Settings.
Click Developer settings.
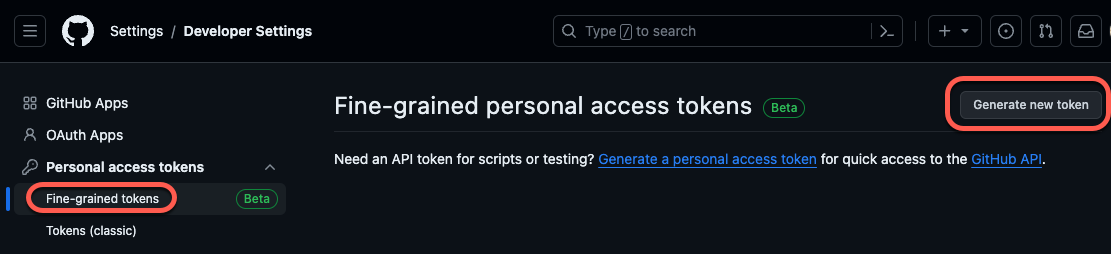
Click the Personal access tokens tab in the left-hand pane, and then Fine-grained tokens.
Click the Generate new token button in the upper-right of the page to open the New fine-grained personal access token page.
Configure your new fine-grained token from the following settings:
Token name: Provide a unique token name. Write it down somewhere so you don’t forget or lose it!
Expiration: Select the time period for token expiry. The default is “30 days”.
Description: Add some short text describing the purpose of the token.
Resource owner: The default is your current GitHub ID. Set this to the GitHub organization that owns the repo(s) you will access.
Under Repository access, choose the access scope for your token. As a best practice, select only those repositories that you will be using for Git folder version control.
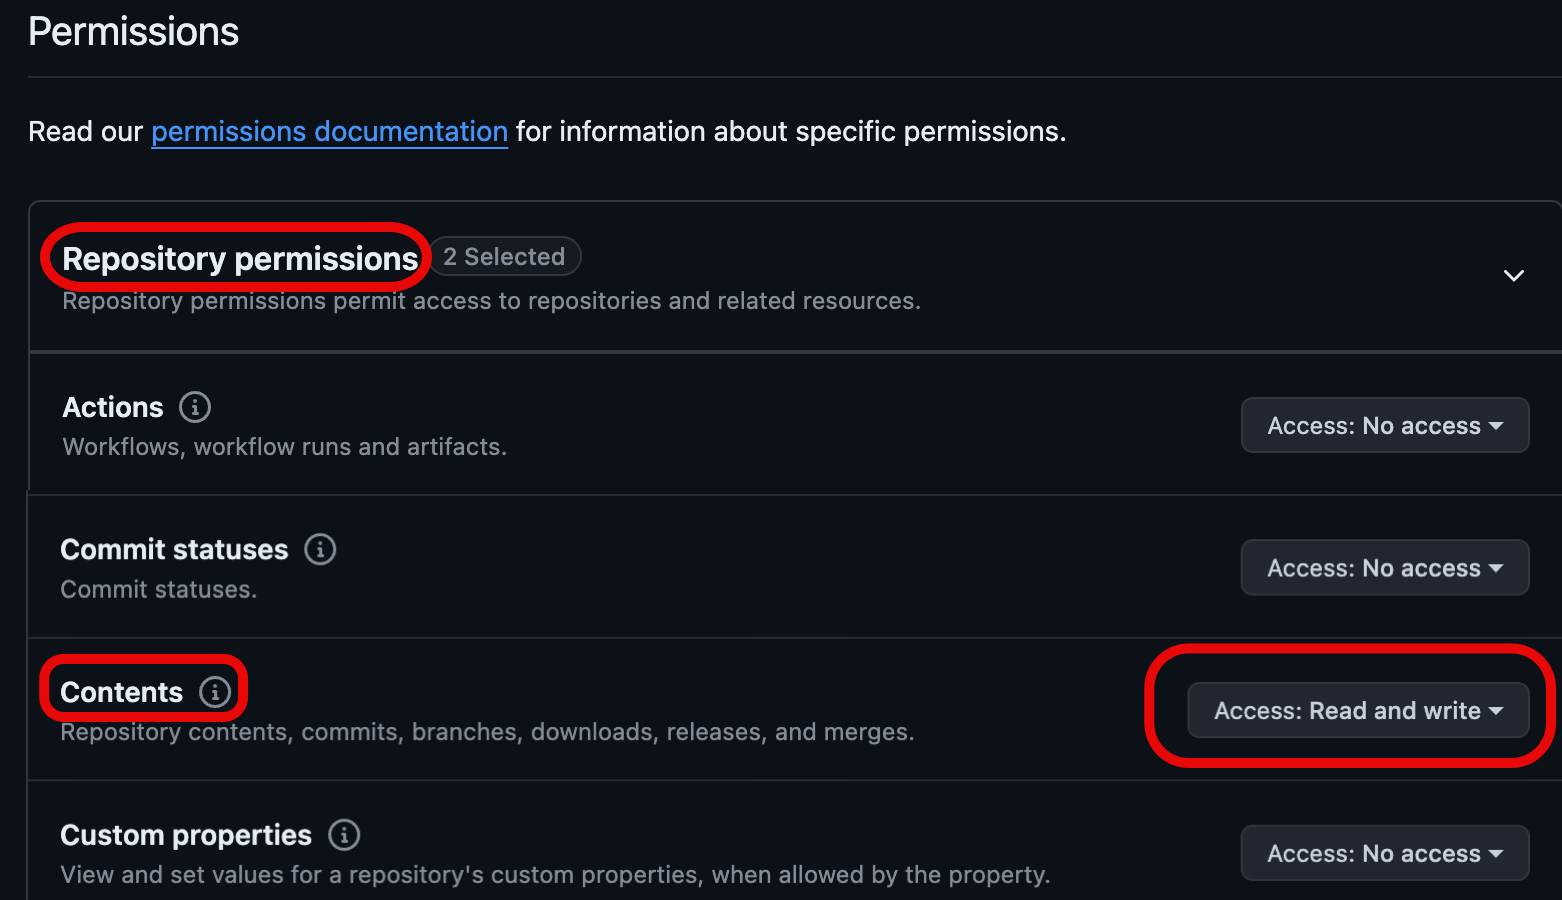
Under Permissions, configure the specific access levels granted by this token for the repositories and account you will work with. For more details on the permission groups, read Permissions required for fine-grained personal access tokens in the GitHub documentation.
Set the access permissions for Contents to Read and write. (You find the Contents scope under Repository permissions.) For details on this scope, see the GitHub documentation on the Contents scope.
Click the Generate token button.
Copy the token to your clipboard. You enter this token in Azure Databricks under User Settings > Linked accounts.
GitLab
In GitLab, follow these steps to create a personal access token that allows access to your repositories:
From GitLab, click your user icon in the upper-left corner of the screen and select Preferences.
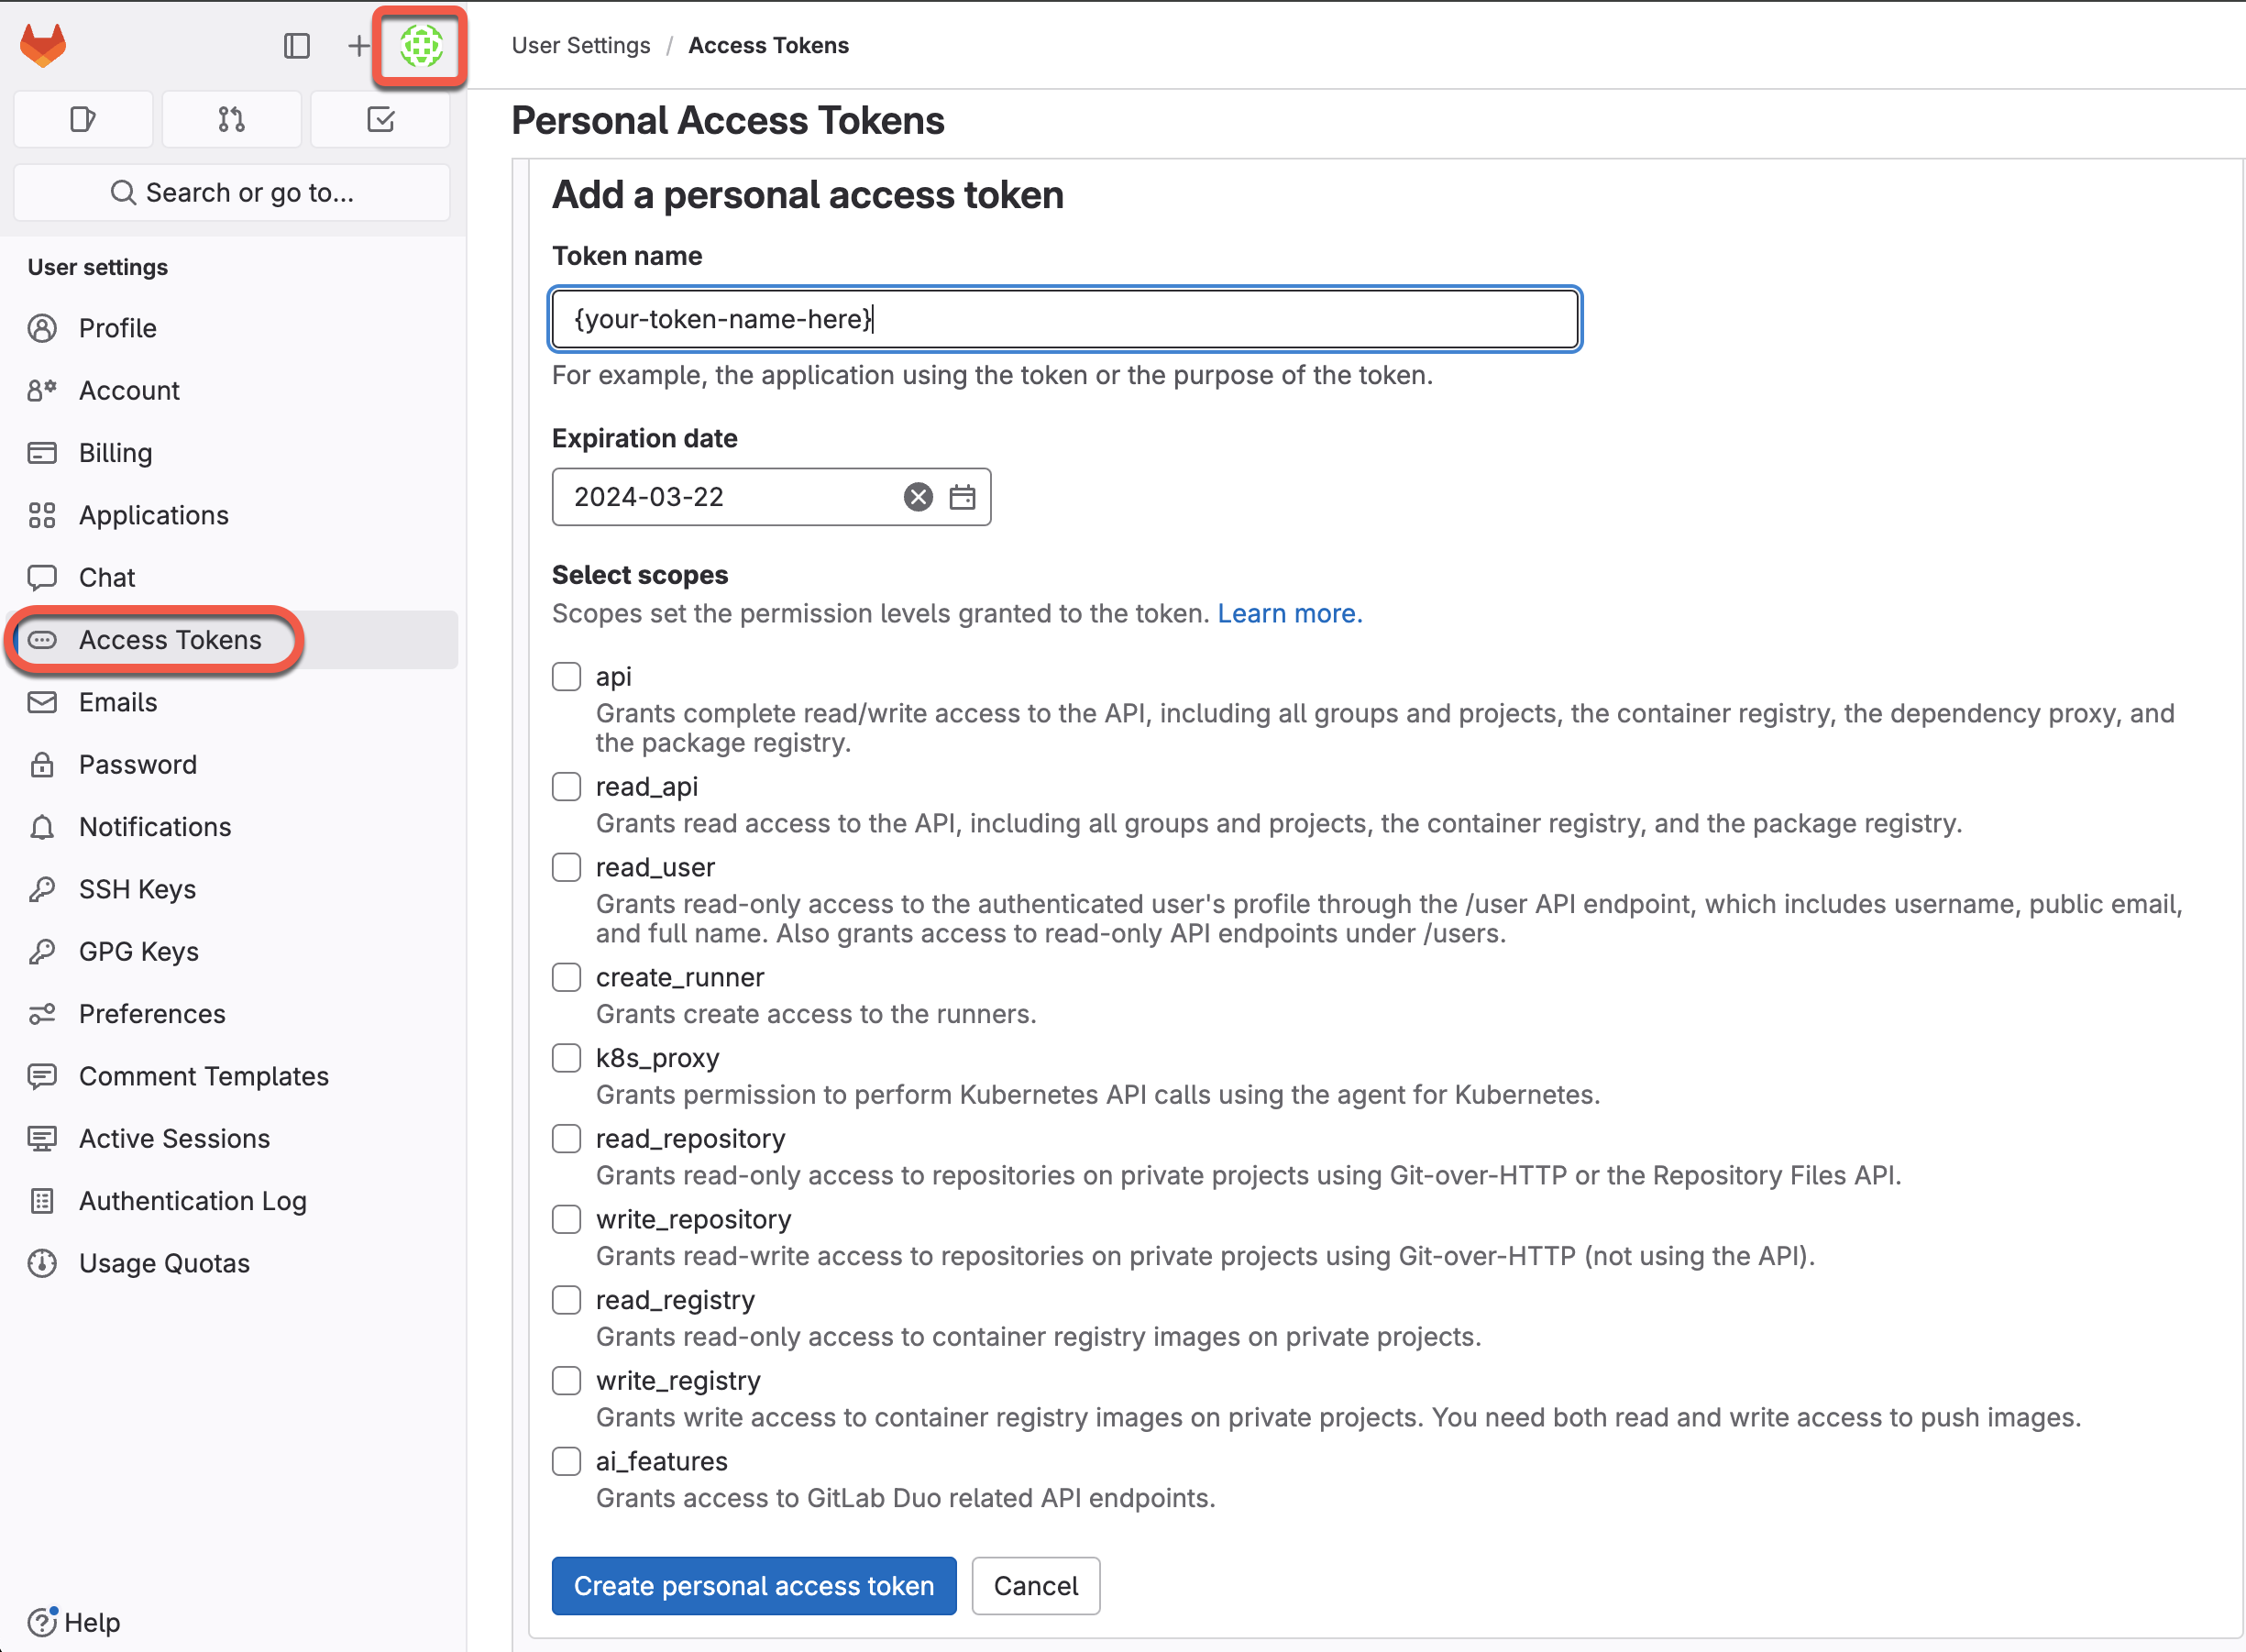
Click Access Tokens in the sidebar.
Click Add new token in the Personal Access Tokens section of the page.
Enter a name for the token.
Select the specific scopes to provide access by checking the boxes for your desired permission levels. For more details on the scope options, read the GitLab documentation on PAT scopes.
Click Create personal access token.
Copy the token to your clipboard. Enter this token in Azure Databricks under User Settings > Linked accounts.
See the GitLab documentation to learn more about how to create and manage personal access tokens.
GitLab also provides support for fine-grained access using “Project Access Tokens”. You can use Project Access Tokens to scope access to a GitLab project. For more details, read GitLab’s documentation on Project Access Tokens.
Azure DevOps Services
Connect to an Azure DevOps repo using Microsoft Entra ID
Authentication with Azure DevOps Services is done automatically when you authenticate using Microsoft Entra ID. The Azure DevOps Services organization must be linked to the same Microsoft Entra ID tenant as Databricks. The service endpoint for Microsoft Entra ID must be accessible from both the private and public subnets of the Databricks workspace. For more information, see Deploy Azure Databricks in your Azure virtual network (VNet injection).
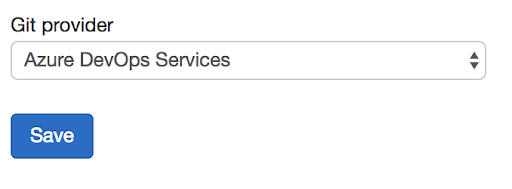
In Azure Databricks, set your Git provider to Azure DevOps Services on the User Settings page:
In the upper-right corner of any page, click your username, then select Settings.
Click the Linked accounts tab.
Change your provider to Azure DevOps Services.
Connect to an Azure DevOps repo using a token
The following steps show you how to connect an Azure Databricks repo to an Azure DevOps repo when they aren’t in the same Microsoft Entra ID tenancy.
Get an access token for the repository in Azure DevOps:
Go to dev.azure.com, and then sign in to the DevOps organization containing the repository you want to connect Azure Databricks to.
In the upper-right side, click the User Settings icon and select Personal Access Tokens.
Click + New Token.
Enter information into the form:
Name the token.
Select the organization name, which is the repo name.
Set an expiration date.
Choose the the scope required, such as Full access.
Copy the access token displayed.
Enter this token in Azure Databricks under User Settings > Linked accounts.
In Git provider username or email, enter the email address you use to log in to the DevOps organization.
Bitbucket
Note
By default, you cannot use Bitbucket Repository Access Tokens or Project Access Tokens. To override this for specific workspaces, contact support.
In Bitbucket, follow these steps to create an app password that allows access to your repositories:
Go to Bitbucket Cloud and create an app password that allows access to your repositories. See the Bitbucket Cloud documentation.
Record the password in a secure manner.
In Azure Databricks, enter this password under User Settings > Linked accounts.
Other Git providers
If your Git provider is not listed, selecting “GitHub” and providing it the PAT you obtained from your Git provider often works, but is not guaranteed to work.
Administer an SQL Server database infrastructure for cloud, on-premises and hybrid relational databases using the Microsoft PaaS relational database offerings.