
Events
Apr 9, 3 PM - Apr 10, 12 PM
Code the Future with AI and connect with Java peers and experts at JDConf 2025.
Register NowThis browser is no longer supported.
Upgrade to Microsoft Edge to take advantage of the latest features, security updates, and technical support.
In this article, you learn how to integrate ServiceNow with Microsoft Entra ID. When you integrate ServiceNow with Microsoft Entra ID, you can:
The scenario outlined in this article assumes that you already have the following prerequisites:
Note
This integration is also available to use from Microsoft Entra US Government Cloud environment. You can find this application in the Microsoft Entra US Government Cloud Application Gallery and configure it in the same way as you do from public cloud.
In this article, you configure and test Microsoft Entra SSO in a test environment.
ServiceNow supports SP initiated SSO.
ServiceNow supports Automated user provisioning.
You can configure the ServiceNow Agent (Mobile) application with Microsoft Entra ID for enabling SSO. It supports both Android and iOS users. In this article, you configure and test Microsoft Entra SSO in a test environment.
To configure the integration of ServiceNow into Microsoft Entra ID, you need to add ServiceNow from the gallery to your list of managed SaaS apps.
Alternatively, you can also use the Enterprise App Configuration Wizard. In this wizard, you can add an application to your tenant, add users/groups to the app, assign roles, and walk through the SSO configuration as well. Learn more about Microsoft 365 wizards.
Configure and test Microsoft Entra SSO with ServiceNow by using a test user called B.Simon. For SSO to work, you need to establish a link relationship between a Microsoft Entra user and the related user in ServiceNow.
To configure and test Microsoft Entra SSO with ServiceNow, perform the following steps:
Follow these steps to enable Microsoft Entra SSO.
Sign in to the Microsoft Entra admin center as at least a Cloud Application Administrator.
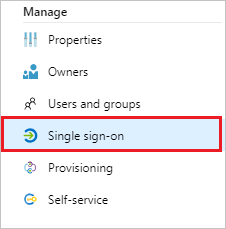
Browse to Identity > Applications > Enterprise applications > ServiceNow application integration page, find the Manage section. Select single sign-on.
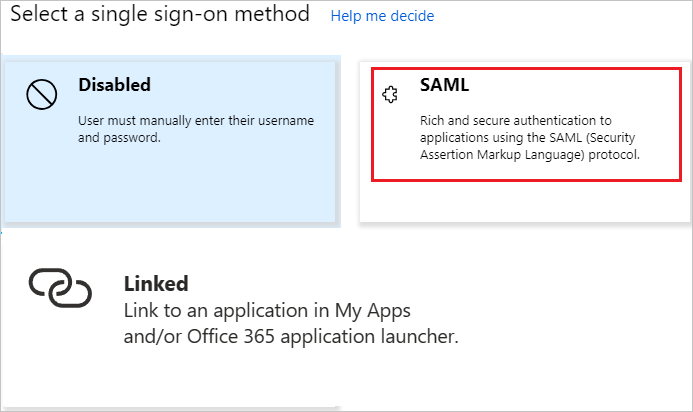
On the Select a single sign-on method page, select SAML.
On the Set up single sign-on with SAML page, select the pen icon for Basic SAML Configuration to edit the settings.
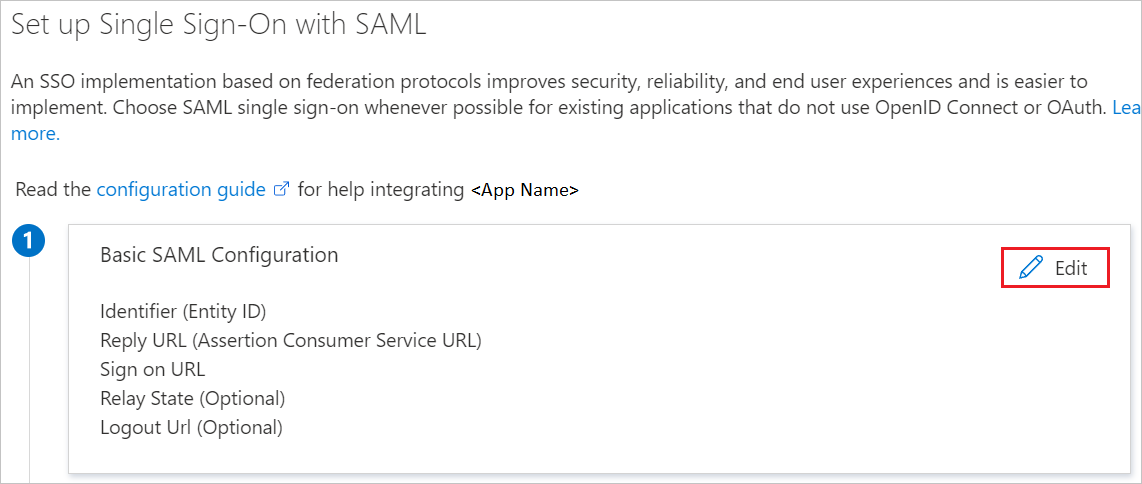
In the Basic SAML Configuration section, perform the following steps:
a. In Sign on URL, enter one of the following URL patterns:
| Sign on URL |
|---|
https://<instancename>.service-now.com/navpage.do |
https://<instance-name>.service-now.com/login_with_sso.do?glide_sso_id=<sys_id of the sso configuration> |
Note
Please copy the sys_id value from Configure ServiceNow section which is explained later in the article.
b. In Identifier (Entity ID), enter a URL that uses the following pattern:
https://<instance-name>.service-now.com
c. For Reply URL, enter one of the following URL patterns:
| Reply URL |
|---|
https://<instancename>.service-now.com/navpage.do |
https://<instancename>.service-now.com/consumer.do |
d. In Logout URL, enter a URL that uses the following pattern:
https://<instancename>.service-now.com/navpage.do
Note
If "/ " is added in the Identifier value, please remove that manually.
Note
These values aren't real. You need to update these values with the actual sign-on URL, Reply URL, Logout URL and identifier, which is explained later in the article. You can also refer to the patterns shown in the Basic SAML Configuration section.
On the Set up single sign-on with SAML page, in the SAML Signing Certificate section, find Certificate (Base64).
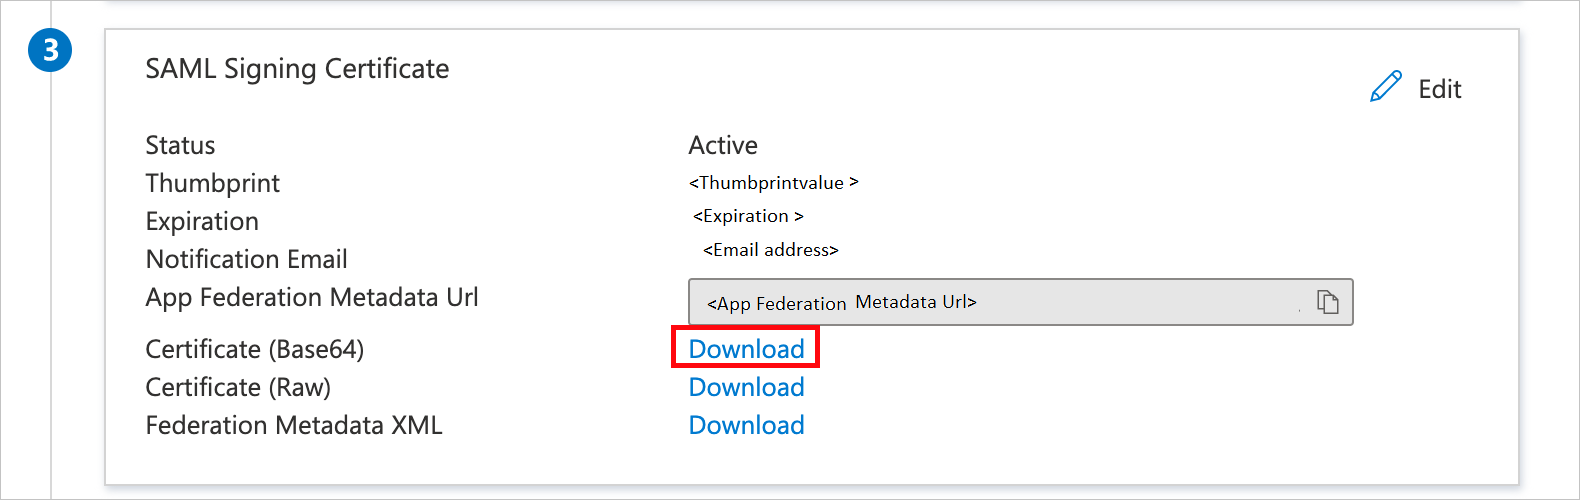
a. Select the copy button to copy App Federation Metadata Url, and paste it into Notepad. This URL is used later in the article.
b. Select Download to download Certificate(Base64), and then save the certificate file on your computer.
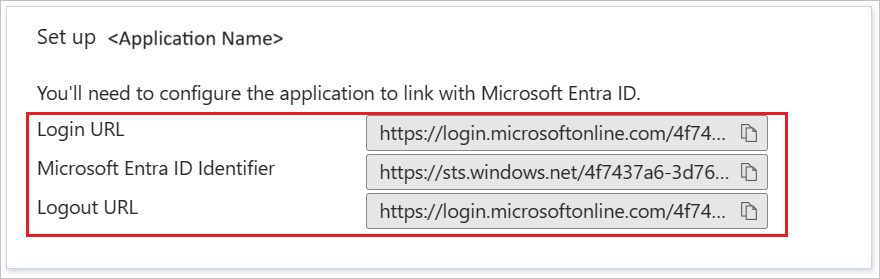
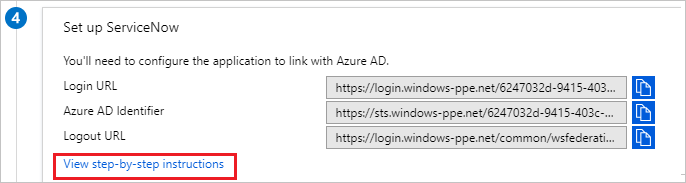
In the Set up ServiceNow section, copy the appropriate URLs, based on your requirement.
Follow the guidelines in the create and assign a user account quickstart to create a test user account called B.Simon.
Sign in to the Microsoft Entra admin center as at least a Cloud Application Administrator.
Browse to Identity > Applications > Enterprise applications > ServiceNow application integration page, select single sign-on.
In the Select a single sign-on method dialog box, select SAML/WS-Fed mode to enable single sign-on.
On the Set up single sign-on with SAML page, select the pen icon to open the Basic SAML Configuration dialog box.
In the Basic SAML Configuration section, perform the following steps:
a. For Sign on URL, enter one of the following URL patterns:
| Sign on URL |
|---|
https://<instance-name>.service-now.com/login_with_sso.do?glide_sso_id=<sys_id of the sso configuration> |
https://<instancename>.service-now.com/consumer.do |
b. For Identifier (Entity ID), enter a URL that uses the following pattern:
https://<instance-name>.service-now.com
c. For Reply URL, enter one of the following URL patterns:
| Reply URL |
|---|
https://<instancename>.service-now.com/navpage.do |
https://<instancename>.service-now.com/consumer.do |
d. In Logout URL, enter a URL that uses the following pattern:
https://<instancename>.service-now.com/navpage.do
Note
If "/ " is added in the Identifier value, please remove that manually.
Note
These values aren't real. You need to update these values with the actual sign-on URL, Reply URL, Logout URL and identifier, which is explained later in the article. You can also refer to the patterns shown in the Basic SAML Configuration section.
On the Set up single sign-on with SAML page, in the SAML Signing Certificate section, select Download to download the Certificate (Base64) from the specified options, as per your requirement. Save it on your computer.
You can have Microsoft Entra ID automatically configure ServiceNow for SAML-based authentication. To enable this service, go to the Set up ServiceNow section, and select View step-by-step instructions to open the Configure sign-on window.
In the Configure sign-on form, enter your ServiceNow instance name, admin username, and admin password. Select Configure Now. The admin username provided must have the security_admin role assigned in ServiceNow for this to work. Otherwise, to manually configure ServiceNow to use Microsoft Entra ID as a SAML Identity Provider, select Manually configure single sign-on. Copy the Logout URL, Microsoft Entra Identifier, and Login URL from the Quick Reference section.

Sign on to your ServiceNow application as an administrator.
Activate the Integration - Multiple Provider single sign-on Installer plug-in by following these steps:
a. In the left pane, search for the System Definition section from the search box, and then select Plugins.

b. Search for Integration - Multiple Provider single sign-on Installer then, Install and activate it.

In the left pane, search for the Multi-Provider SSO section from the search bar, and then select Properties in the Administration.

In the Multiple Provider SSO Properties dialog box, perform the following steps:

For Enable multiple provider SSO, select Yes.
For Enable Auto Importing of users from all identity providers into the user table, select Yes.
For Enable debug logging for the multiple provider SSO integration, select Yes.
For The field on the user table that..., enter email.
Select Save.
You can configure ServiceNow automatically or manually. To configure ServiceNow automatically, follow these steps:
Return to the ServiceNow single sign-on page.
One-select configure service is provided for ServiceNow. To enable this service, go to the ServiceNow Configuration section, and select Configure ServiceNow to open the Configure sign-on window.
In the Configure sign-on form, enter your ServiceNow instance name, admin username, and admin password. Select Configure Now. The admin username provided must have the security-admin role assigned in ServiceNow for this to work. Otherwise, to manually configure ServiceNow to use Microsoft Entra ID as a SAML Identity Provider, select Manually configure single sign-on. Copy the Sign-Out URL, SAML Entity ID, and SAML single sign-on Service URL from the Quick Reference section.
Sign on to your ServiceNow application as an administrator.
In the automatic configuration, all the necessary settings are configured on the ServiceNow side, but the X.509 Certificate isn't enabled by default and give the Single Sign-On Script value as MultiSSOv2_SAML2_custom. You have to map it manually to your identity provider in ServiceNow. Follow these steps:
In the left pane, search for the Multi-Provider SSO section from the search box, and select Identity Providers.

Select the automatically generated identity provider.

On the Identity Provider section, perform the following steps:

a. Right select the grey bar at the top of the screen and select Copy sys_id and use this value to the Sign on URL in Basic SAML Configuration section.
b. For Name, enter a name for your configuration (for example, Microsoft Azure Federated single sign-on).
c. Copy the ServiceNow Homepage value, and paste it in Sign-on URL in the ServiceNow Basic SAML Configuration section.
Note
The ServiceNow instance homepage is a concatenation of your ServiceNow tenant URL and /navpage.do (for example:https://fabrikam.service-now.com/navpage.do).
d. Copy the Entity ID / Issuer value, and paste it in Identifier in the ServiceNow Basic SAML Configuration section.
e. Confirm that NameID Policy is set to urn:oasis:names:tc:SAML:1.1:nameid-format:unspecified value.
f. Select Advanced and give the Single Sign-On Script value as MultiSSOv2_SAML2_custom.
Scroll down to the X.509 Certificate section, and select Edit.

Select the certificate, and select the right arrow icon to add the certificate

Select Save.
At the upper-right corner of the page, select Test Connection.

Note
If the Test Connection is failing and you aren't able to activate this connection then ServiceNow does offer the override switch. You have to enter Sys_properties.LIST in the Search Navigation and it will open the new page of System Properties. Here you have to create a new property with the name as glide.authenticate.multisso.test.connection.mandatory with datatype as True/False and then set the value as False.
When asked for your credentials, enter them. You'll see the following page. The SSO Logout Test Results error is expected. Ignore the error and select Activate.

To configure ServiceNow manually, follow these steps:
Sign on to your ServiceNow application as an administrator.
In the left pane, select Identity Providers.
In the Identity Providers dialog box, select New.

In the Identity Providers dialog box, select SAML.

In Import Identity Provider Metadata, perform the following steps:

Enter the App Federation Metadata Url that you've copied.
Select Import.
It reads the IdP metadata URL, and populates all the fields information.

a. Right select the grey bar at the top of the screen and select Copy sys_id and use this value to the Sign on URL in Basic SAML Configuration section.
b. For Name, enter a name for your configuration (for example, Microsoft Azure Federated single sign-on).
c. Copy the ServiceNow Homepage value. Paste it in Sign-on URL in the ServiceNow Basic SAML Configuration section.
Note
The ServiceNow instance homepage is a concatenation of your ServiceNow tenant URL and /navpage.do (for example:https://fabrikam.service-now.com/navpage.do).
d. Copy the Entity ID / Issuer value. Paste it in Identifier in ServiceNow Basic SAML Configuration section.
e. Confirm that NameID Policy is set to urn:oasis:names:tc:SAML:1.1:nameid-format:unspecified value.
f. Select Advanced. In User Field, enter email.
Note
You can configure Microsoft Entra ID to emit either the Microsoft Entra user ID (user principal name) or the email address as the unique identifier in the SAML token. Do this by going to the ServiceNow > Attributes > Single sign-on section of the Azure portal, and mapping the desired field to the nameidentifier attribute. The value stored for the selected attribute in Microsoft Entra ID (for example, user principal name) must match the value stored in ServiceNow for the entered field (for example, user_name).
g. Select Test Connection at the upper-right corner of the page.
Note
If the Test Connection is failing and you aren't able to activate this connection then ServiceNow does offer the override switch. You have to enter Sys_properties.LIST in the Search Navigation and it will open the new page of System Properties. Here you have to create a new property with the name as glide.authenticate.multisso.test.connection.mandatory with datatype as True/False and then set the value as False.
h. When asked for your credentials, enter them. You'll see the following page. The SSO Logout Test Results error is expected. Ignore the error and select Activate.
The objective of this section is to create a user called B.Simon in ServiceNow. ServiceNow supports automatic user provisioning, which is enabled by default.
Note
If you need to create a user manually, contact the ServiceNow Client support team.
Sign on to your ServiceNow Express application as an administrator.
In the left pane, select Single Sign-On.

In the Single Sign-On dialog box, select the configuration icon on the upper right, and set the following properties:

a. Toggle Enable multiple provider SSO to the right.
b. Toggle Enable debug logging for the multiple provider SSO integration to the right.
c. In The field on the user table that..., enter user_name.
In the Single Sign-On dialog box, select Add New Certificate.

In the X.509 Certificates dialog box, perform the following steps:

a. For Name, enter a name for your configuration (for example: TestSAML2.0).
b. Select Active.
c. For Format, select PEM.
d. For Type, select Trust Store Cert.
e. Open your Base64 encoded certificate downloaded from Azure portal in Notepad. Copy the content of it into your clipboard, and then paste it to the PEM Certificate text box.
f. Select Update
In the Single Sign-On dialog box, select Add New IdP.

In the Add New Identity Provider dialog box, under Configure Identity Provider, perform the following steps:

a. For Name, enter a name for your configuration (for example: SAML 2.0).
b. For Identity Provider URL, paste the value of the identity provider ID that you copied.
c. For Identity Provider's AuthnRequest, paste the value of the authentication request URL that you copied.
d. For Identity Provider's SingleLogoutRequest, paste the value of the logout URL that you copied.
e. For Identity Provider Certificate, select the certificate you created in the previous step.
Select Advanced Settings. Under Additional Identity Provider Properties, perform the following steps:

a. For Protocol Binding for the IDP's SingleLogoutRequest, enter urn:oasis:names:tc:SAML:2.0:bindings:HTTP-Redirect.
b. For NameID Policy, enter urn:oasis:names:tc:SAML:1.1:nameid-format:unspecified.
c. For AuthnContextClassRef Method, enter http://schemas.microsoft.com/ws/2008/06/identity/authenticationmethod/password.
d. For Create an AuthnContextClass, toggle it to off (unselected).
Under Additional Service Provider Properties, perform the following steps:

a. For ServiceNow Homepage, enter the URL of your ServiceNow instance homepage.
Note
The ServiceNow instance homepage is a concatenation of your ServiceNow tenant URL and /navpage.do (for example: https://fabrikam.service-now.com/navpage.do).
b. For Entity ID / Issuer, enter the URL of your ServiceNow tenant.
c. For Audience URI, enter the URL of your ServiceNow tenant.
d. For Clock Skew, enter 60.
e. For User Field, enter email.
Note
You can configure Microsoft Entra ID to emit either the Microsoft Entra user ID (user principal name) or the email address as the unique identifier in the SAML token. Do this by going to the ServiceNow > Attributes > Single sign-on section of the Azure portal, and mapping the desired field to the nameidentifier attribute. The value stored for the selected attribute in Microsoft Entra ID (for example, user principal name) must match the value stored in ServiceNow for the entered field (for example, user_name).
f. Select Save.
When you select the ServiceNow tile in the Access Panel, you should be automatically signed in to the ServiceNow for which you set up SSO. For more information about the Access Panel, see Introduction to the Access Panel.
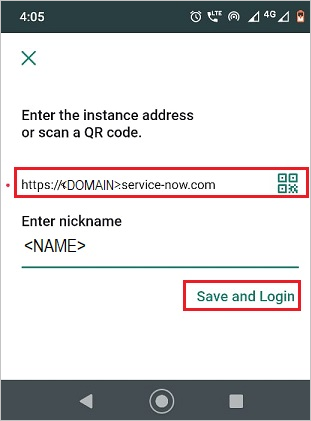
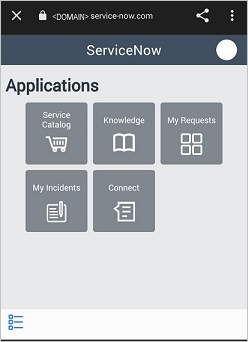
Open your ServiceNow Agent (Mobile) application, and perform the following steps:
b. Enter your ServiceNow instance address, nickname and select Save and Login.
c. On the Log in page, perform the following steps:
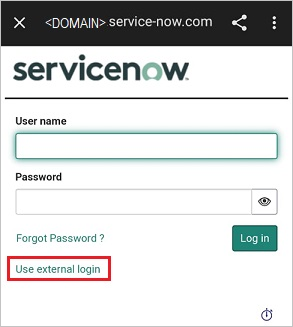
Enter Username, like B.simon@contoso.com.
Select Use external login. You're redirected to the Microsoft Entra ID page for sign-in.
Enter your credentials. If there is any third-party authentication, or any other security feature enabled, the user must respond accordingly. The application Home page appears.
Once you configure ServiceNow you can enforce session controls, which protect exfiltration and infiltration of your organization’s sensitive data in real time. Session controls extend from Conditional Access. Learn how to enforce session control with Microsoft Defender for Cloud Apps.
Events
Apr 9, 3 PM - Apr 10, 12 PM
Code the Future with AI and connect with Java peers and experts at JDConf 2025.
Register NowTraining
Module
Discover how Microsoft Entra External ID can provide secure, seamless sign-in experiences for your consumers and business customers. Explore tenant creation, app registration, flow customization, and account security.
Certification
Microsoft Certified: Identity and Access Administrator Associate - Certifications
Demonstrate the features of Microsoft Entra ID to modernize identity solutions, implement hybrid solutions, and implement identity governance.