
Events
May 19, 6 PM - May 23, 12 AM
Calling all developers, creators, and AI innovators to join us in Seattle @Microsoft Build May 19-22.
Register todayThis browser is no longer supported.
Upgrade to Microsoft Edge to take advantage of the latest features, security updates, and technical support.
Note
Starting June 1, 2024, newly created App Service apps can generate a unique default host name that uses the naming convention <app-name>-<random-hash>.<region>.azurewebsites.net. For example: myapp-ds27dh7271aah175.westus-01.azurewebsites.net. Existing app names remain unchanged.
For more information, see the blog post about creating a web app with a unique default host name.
Azure App Service provides a highly scalable, self-patching web hosting service. This guide shows you how to map an existing custom Domain Name System (DNS) name to App Service. To migrate a live site and its DNS domain name to App Service with no downtime, see Migrate an active DNS name to Azure App Service.
The DNS record type you need to add with your domain provider depends on the domain you want to add to App Service.
| Scenario | Example | Recommended DNS record |
|---|---|---|
| Root domain | contoso.com | A record. Don't use the CNAME record for the root record. (For information, see RFC 1912, section 2.4.) |
| Subdomain | www.contoso.com, my.contoso.com | CNAME record. You can map a subdomain to the app's IP address directly with an A record, but it's possible for the IP address to change. The CNAME maps to the app's default hostname instead, which is less susceptible to change. |
| Wildcard | *.contoso.com | CNAME record. |
Note
For an end-to-end tutorial that shows you how to configure a www subdomain and a managed certificate, see Tutorial: Secure your Azure App Service app with a custom domain and a managed certificate.
contoso.com and www.contoso.com, you must be able to configure the DNS settings for the contoso.com root domain. Your custom domains must be in a public DNS zone; private DNS zones are not supported.In the Azure portal, navigate to your app's management page.
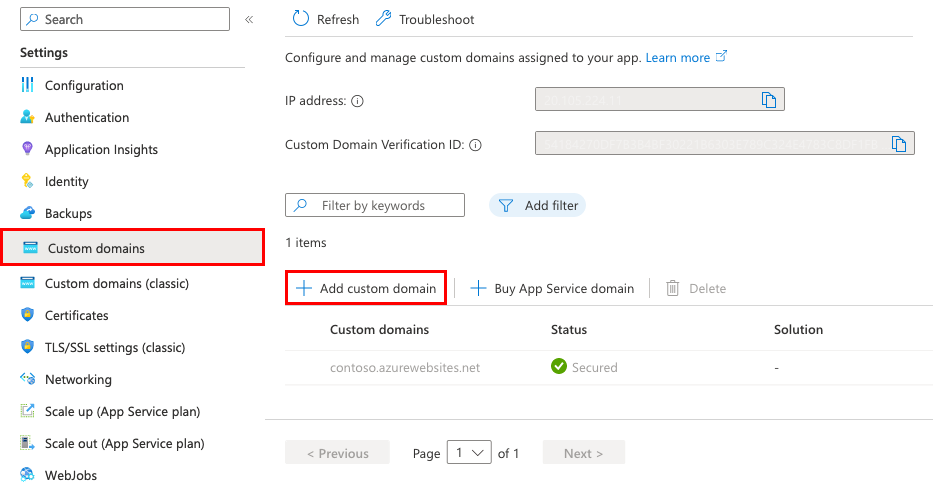
In the left menu for your app, select Custom domains.
Select Add custom domain.
For Domain provider, select All other domain services to configure a third-party domain.
Note
To configure an App Service domain, see Buy a custom domain name for Azure App Service.
For TLS/SSL certificate, select App Service Managed Certificate if your app is in the Basic tier or higher. If you want to remain in the Shared tier, or if you want to use your own certificate, select Add certificate later.
For TLS/SSL type, select the binding type you want.
| Setting | Description |
|---|---|
| Custom domain | The domain name to add the TLS/SSL binding for. |
| Private Certificate Thumbprint | The certificate to bind. |
| TLS/SSL Type | - SNI SSL: Multiple SNI SSL bindings may be added. This option allows multiple TLS/SSL certificates to secure multiple domains on the same IP address. Most modern browsers (including Internet Explorer, Chrome, Firefox, and Opera) support SNI (for more information, see Server Name Indication). - IP SSL: Only one IP SSL binding may be added. This option allows only one TLS/SSL certificate to secure a dedicated public IP address. After you configure the binding, follow the steps in Remap records for IP based SSL. IP SSL is supported only in Standard tier or above. |
For Domain, specify a fully qualified domain name you want based on the domain you own. The Hostname record type box defaults to the recommended DNS record to use, depending on whether the domain is a root domain (like contoso.com), a subdomain (like www.contoso.com), or a wildcard domain (like *.contoso.com).
Don't select Validate yet.
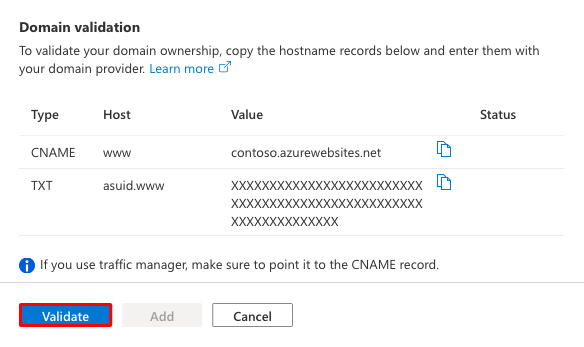
For each custom domain in App Service, you need two DNS records with your domain provider. The Domain validation section shows you two DNS records that you must add with your domain provider. You can use the copy buttons to copy the value or values that you need in the next section.
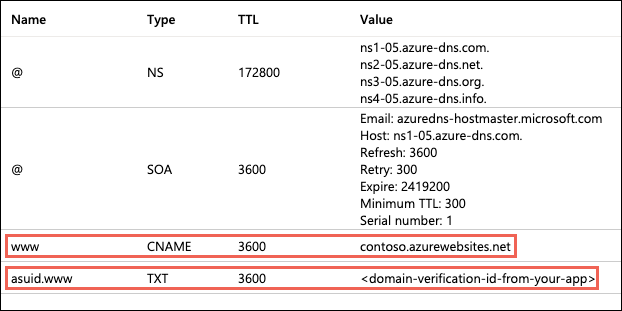
The following screenshot shows the default selections for a www.contoso.com domain. It shows a CNAME record and a TXT record to add.

Warning
While it's not absolutely required to add the TXT record, it's highly recommended for security. The TXT record is a domain verification ID that helps avoid subdomain takeovers from other App Service apps. For custom domains you previously configured without this verification ID, you should protect them from the same risk by adding the verification ID (the TXT record) to your DNS configuration. For more information on this common high-severity threat, see Subdomain takeover.
Sign in to the website of your domain provider.
You can use Azure DNS to manage DNS records for your domain and configure a custom DNS name for Azure App Service. For more information, see Tutorial: Host your domain in Azure DNS.
Find the page for managing DNS records.
Every domain provider has its own DNS records interface, so consult the provider's documentation. Look for areas of the site labeled Domain Name, DNS, or Name Server Management.
Often, you can find the DNS records page by viewing your account information and then looking for a link such as My domains. Go to that page, and then look for a link that's named something like Zone file, DNS Records, or Advanced configuration.
The following screenshot is an example of a DNS records page:
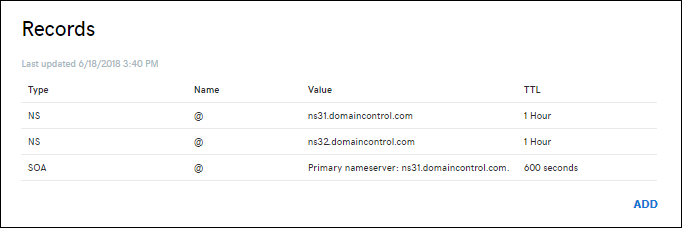
Select Add or the appropriate widget to create a record.
Note
For certain providers, such as GoDaddy, changes to DNS records don't become effective until you select a separate Save Changes link.
Select the type of record to create and follow the instructions. You can use either a CNAME record or an A record to map a custom DNS name to App Service. When your function app is hosted in a Consumption plan, only the CNAME option is supported.
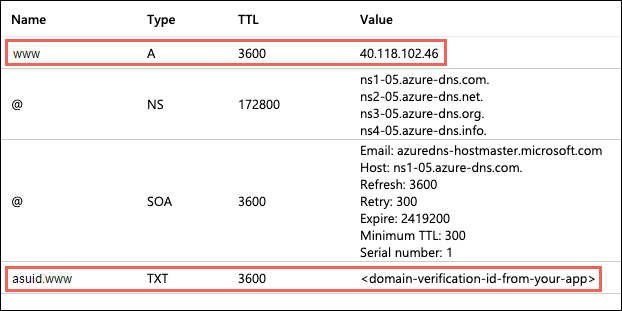
Create two records, as described in the following table:
| Record type | Host | Value | Comments |
|---|---|---|---|
| A | @ |
The app's IP address shown in the Add custom domain dialog. | The domain mapping itself. (@ typically represents the root domain.) |
| TXT | asuid |
The domain verification ID shown in the Add custom domain dialog. | For the root domain, App Service accesses the asuid TXT record to verify your ownership of the custom domain. |

Back in the Add custom domain dialog in the Azure portal, select Validate.
If the Domain validation section shows green check marks next to both domain records, you've configured them correctly. Select Add. If you see any errors or warnings, resolve them in the DNS record settings on your domain provider's website.
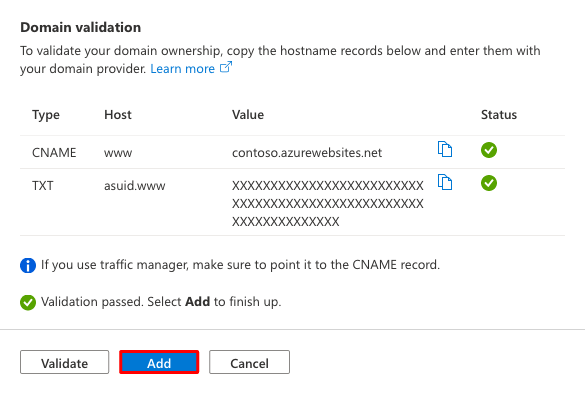
Note
If you configured the TXT record but not the A or CNAME record, App Service treats the change as a domain migration scenario and allows the validation to succeed, but you won't see green check marks next to the records.
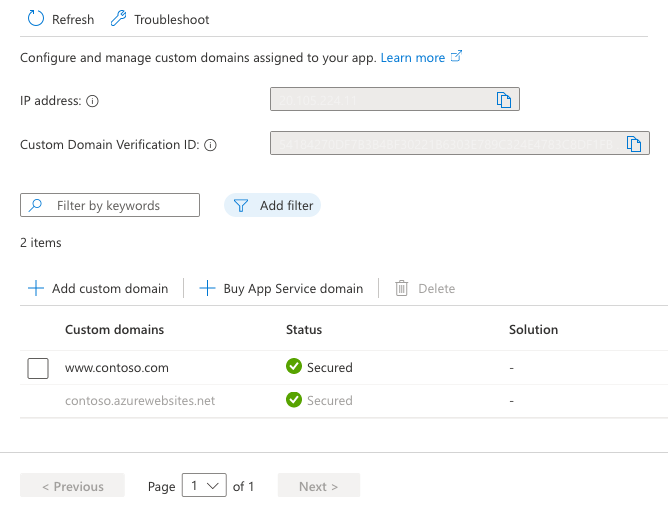
You should see the custom domain added to the list. You might also see a red X and the text No binding.
If you selected App Service Managed Certificate earlier, wait a few minutes for App Service to create the managed certificate for your custom domain. When the process is complete, the red X becomes a green check mark and you see the word Secured. If you selected Add certificate later, the red X will remain until you add a private certificate for the domain and configure the binding.
Note
Unless you configure a certificate binding for your custom domain, any HTTPS request from a browser to the domain will receive an error or warning, depending on the browser.
Browse to the DNS names that you configured.
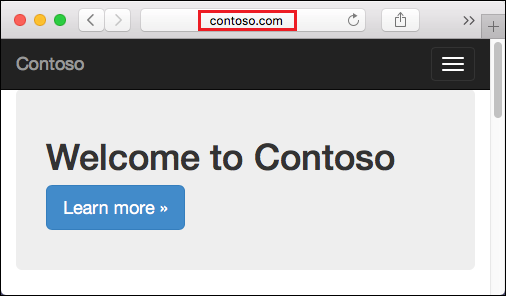
If you receive an HTTP 404 (Not Found) error when you browse to the URL of your custom domain, the two most likely causes are:
ipconfig /flushdns.If you receive a Page not secure warning or error, it's because your domain doesn't have a certificate binding yet. Add a private certificate for the domain and configure the binding.
You can automate management of custom domains with scripts by using the Azure CLI or Azure PowerShell.
The following command adds a configured custom DNS name to an App Service app.
az webapp config hostname add \
    --webapp-name <app-name> \
    --resource-group <resource_group_name> \
    --hostname <fully_qualified_domain_name>
For more information, see Map a custom domain to a web app.
Events
May 19, 6 PM - May 23, 12 AM
Calling all developers, creators, and AI innovators to join us in Seattle @Microsoft Build May 19-22.
Register todayTraining
Module
Add a custom domain in Microsoft 365 - Training
This module provides instruction on how to add a custom domain to your Microsoft 365 deployment. It also examines the DNS requirements that are necessary to support a new domain.
Certification
Microsoft Certified: Azure Administrator Associate - Certifications
Demonstrate key skills to configure, manage, secure, and administer key professional functions in Microsoft Azure.