
Training
Module
Using Azure NetApp Files application volume group - Training
Learn how to use Azure NetApp Files application volume groups to optimize deployments with Oracle and SAP HANA.
This browser is no longer supported.
Upgrade to Microsoft Edge to take advantage of the latest features, security updates, and technical support.
This article shows you how to quickly set up Azure NetApp Files and create an NFS volume.
In this quickstart, you set up the following items:
If you don't have an Azure subscription, create a free account before you begin.
To see all features that you can enable for an NFS volume and relevant considerations, see Create an NFS volume.
Note
The registration process can take some time to complete.
For registration steps using Portal, open a Cloud Shell session as indicated above and follow these Azure CLI steps:
Specify the subscription that has been approved for Azure NetApp Files:
az account set --subscription <subscriptionId>
Register the Azure Resource Provider:
az provider register --namespace Microsoft.NetApp --wait
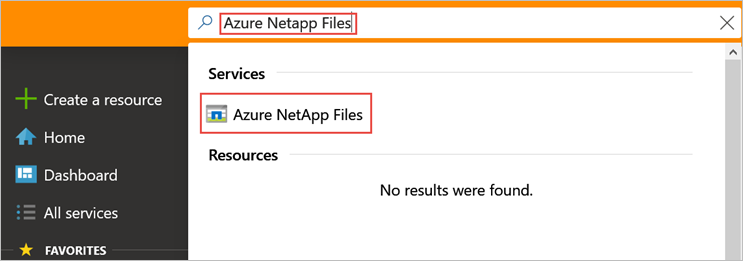
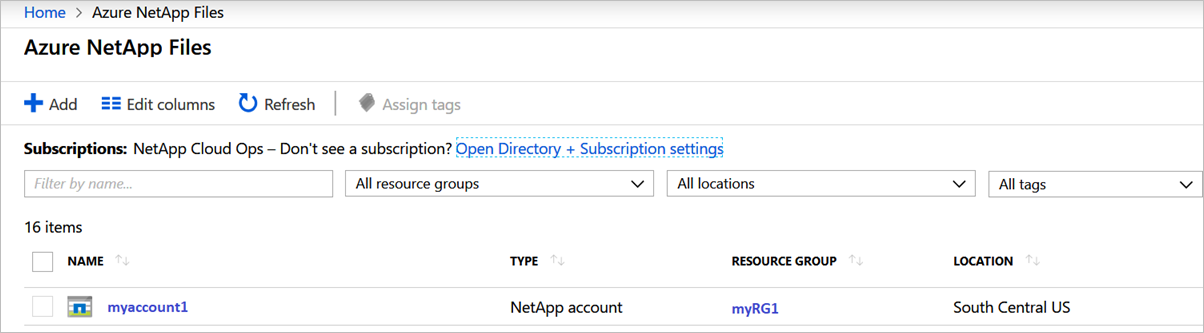
In the Azure portal's search box, enter Azure NetApp Files and then select Azure NetApp Files from the list that appears.
Select + Create to create a new NetApp account.
In the New NetApp Account window, provide the following information:
Enter myaccount1 for the account name.
Select your subscription.
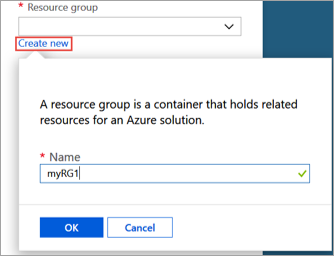
Select Create new to create new resource group. Enter myRG1 for the resource group name. Select OK.
Select your account location.

Select Create to create your new NetApp account.
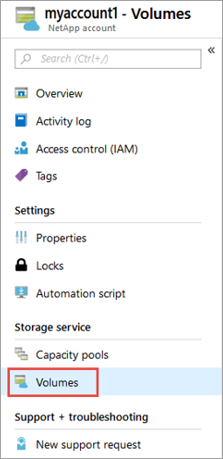
From the Azure NetApp Files management blade, select your NetApp account (myaccount1).

From the Azure NetApp Files management blade of your NetApp account, select Capacity pools.

Select + Add pools.
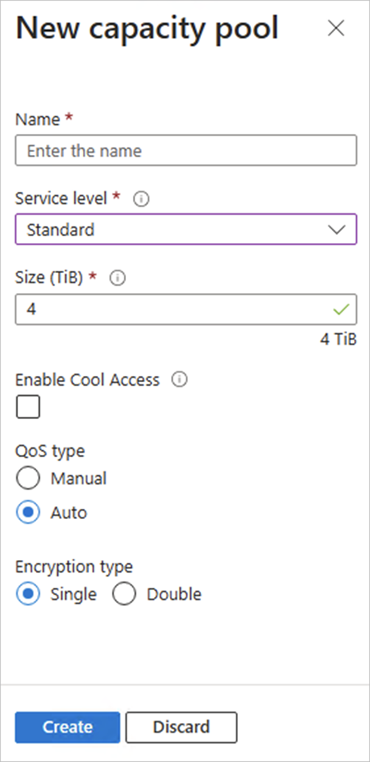
Provide information for the capacity pool:
Select Create.
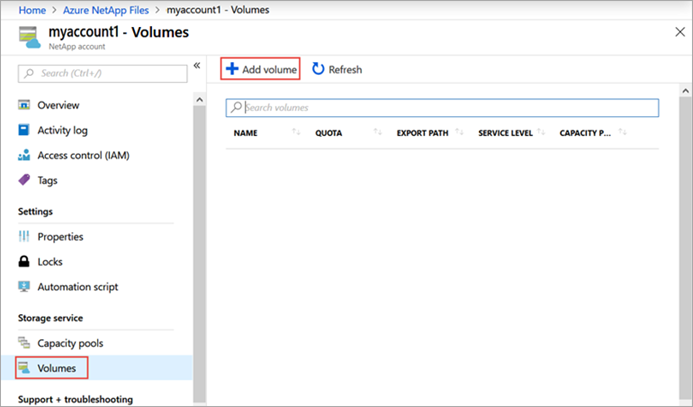
From the Azure NetApp Files management blade of your NetApp account, select Volumes.
Select + Add volume.
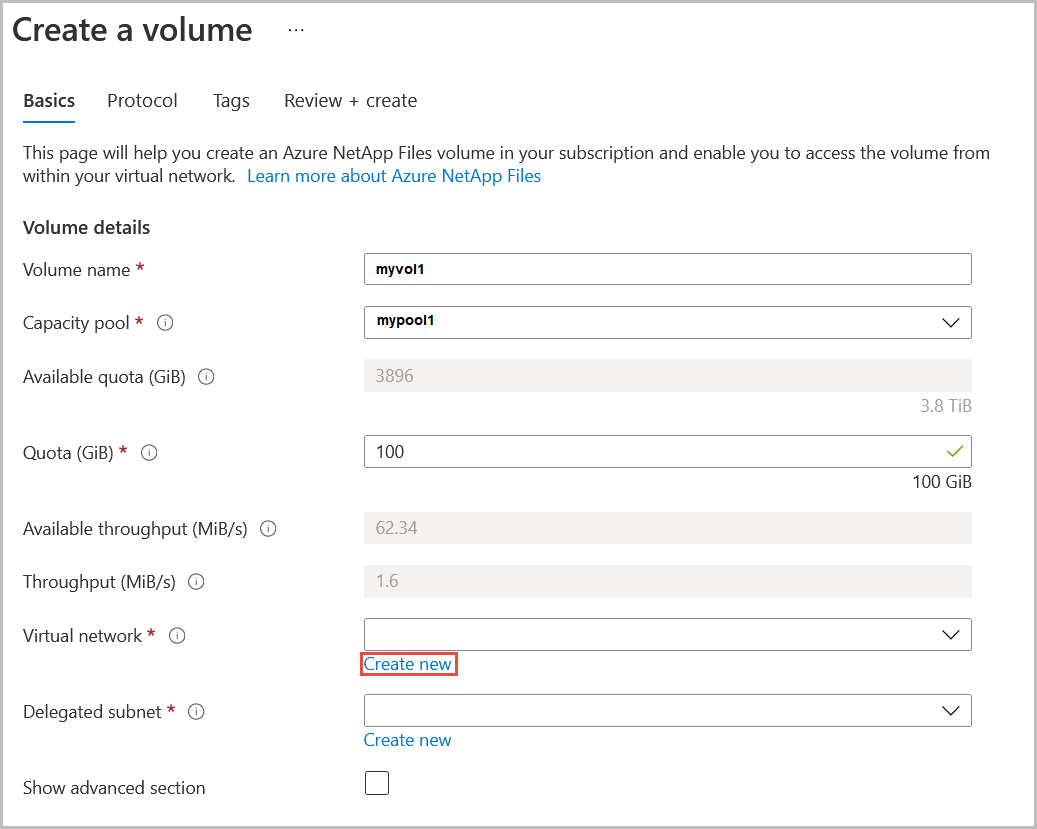
In the Create a Volume window, provide information for the volume:
Enter myvol1 as the volume name.
Select your capacity pool (mypool1).
Use the default value for quota.
Under virtual network, select Create new to create a new Azure virtual network (VNet). Then fill in the following information:
In subnet, select the newly created Vnet (myvnet1) as the delegate subnet.

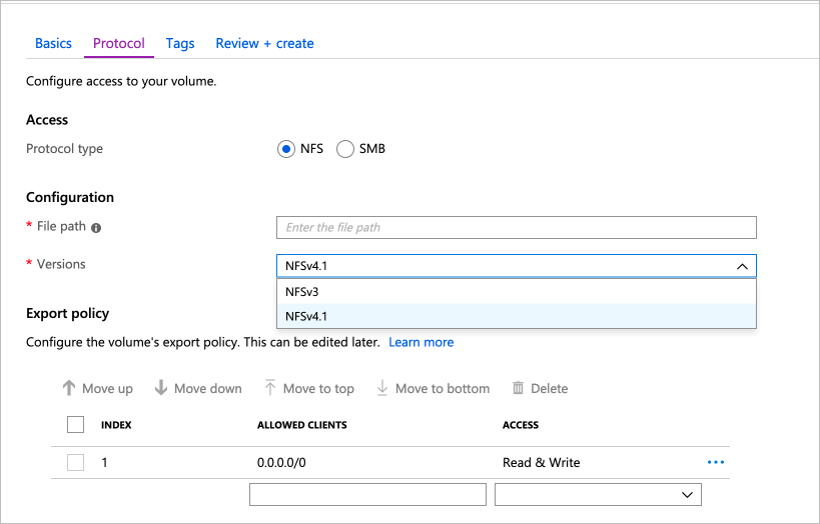
Select Protocol, and then complete the following actions:
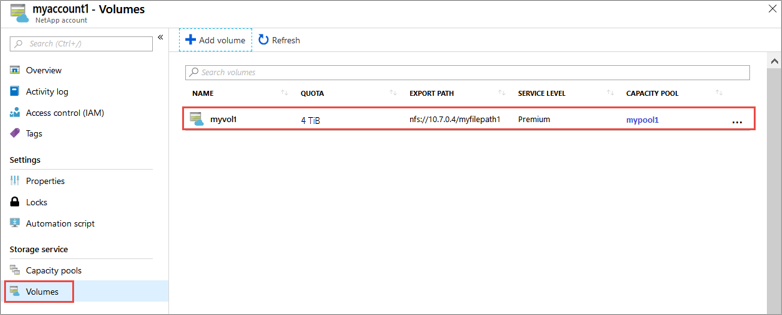
Select Review + create to display information for the volume you're creating.
Select Create to create the volume. The created volume appears in the Volumes blade.
When you're done and if you want to, you can delete the resource group. The action of deleting a resource group is irreversible.
Important
Deleting a resource group also deletes all resources within it. The action can't be undone.
Important
Before you delete a resource group, you must first delete the backups. Deleting a resource group doesn't delete the backups. You can preemptively delete backups on volumes by manually delete the backups. If you delete the resource group without deleting all the backups, you lose the ability to see the backups. The backups, however, can continue to incur costs. If you're wrongly billed for some backups, open a support case ticket to get this issue resolved.
In the Azure portal's search box, enter Azure NetApp Files and then select Azure NetApp Files from the list that appears.
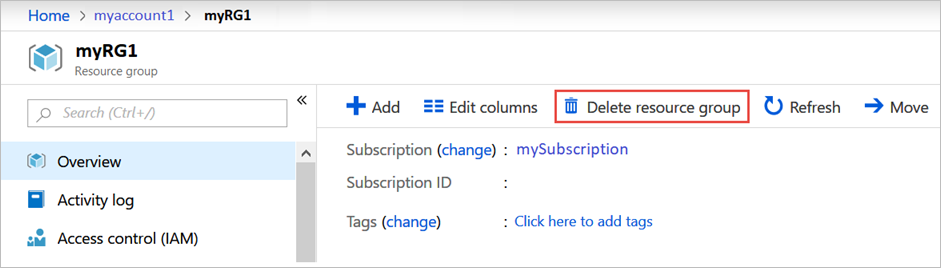
In the list of subscriptions, select the resource group (myRG1) you want to delete.
In the resource group page, select Delete resource group.
A window opens and displays a warning about the resources to be deleted with the resource group.
Enter the name of the resource group (myRG1) to confirm that you want to permanently delete the resource group and all resources in it, and then select Delete.

Training
Module
Using Azure NetApp Files application volume group - Training
Learn how to use Azure NetApp Files application volume groups to optimize deployments with Oracle and SAP HANA.