Quickstart: Incorporate Web PubSub for Socket.IO in your app
Article
This quickstart demonstrates how to create a Web PubSub for Socket.IO resource and quickly incorporate it in your Socket.IO app to simplify development, speed up deployment, and achieve scalability without complexity.
Raw connection strings appear in this article for demonstration purposes only.
A connection string includes the authorization information required for your application to access Azure Web PubSub service. The access key inside the connection string is similar to a root password for your service. In production environments, always protect your access keys. Use Azure Key Vault to manage and rotate your keys securely and secure your connection with WebPubSubServiceClient.
Avoid distributing access keys to other users, hard-coding them, or saving them anywhere in plain text that is accessible to others. Rotate your keys if you believe they may have been compromised.
Prerequisites
An Azure account with an active subscription. If you don't have one, you can create a free account.
Some familiarity with the Socket.IO library.
Create a Web PubSub for Socket.IO resource
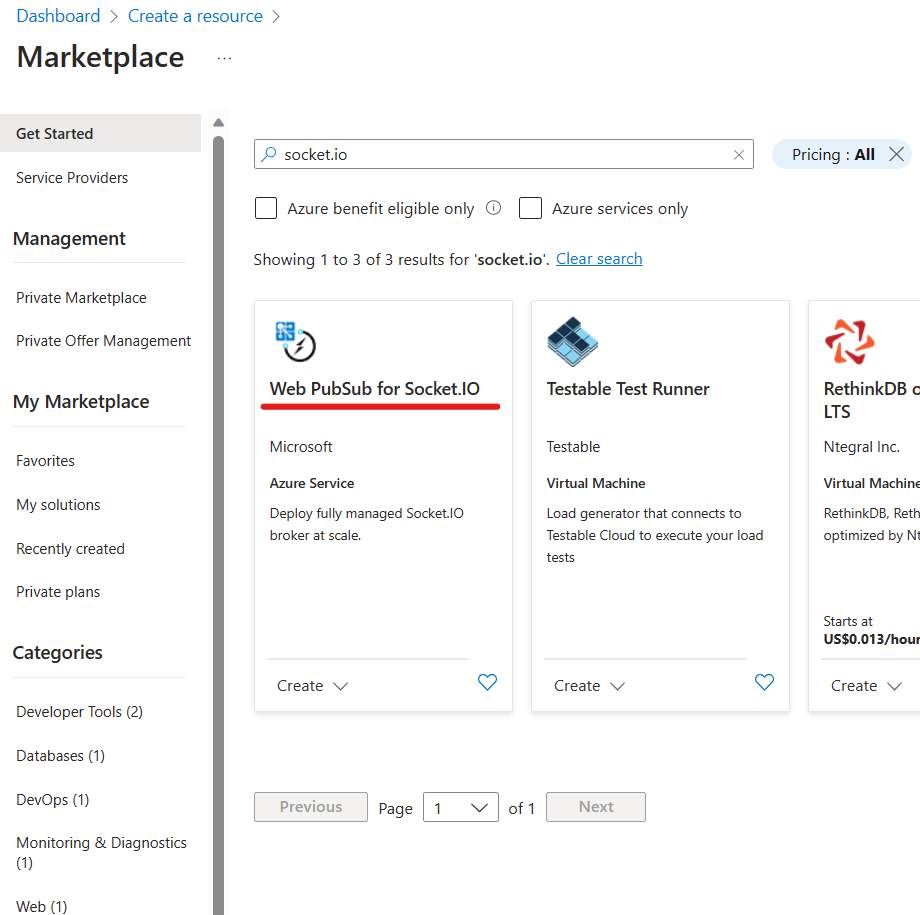
To create a Web PubSub for Socket.IO, you can use the following one-click button to create or follow the actions below to search in Azure portal.
Use the following button to create a Web PubSub for Socket.IO resource in Azure
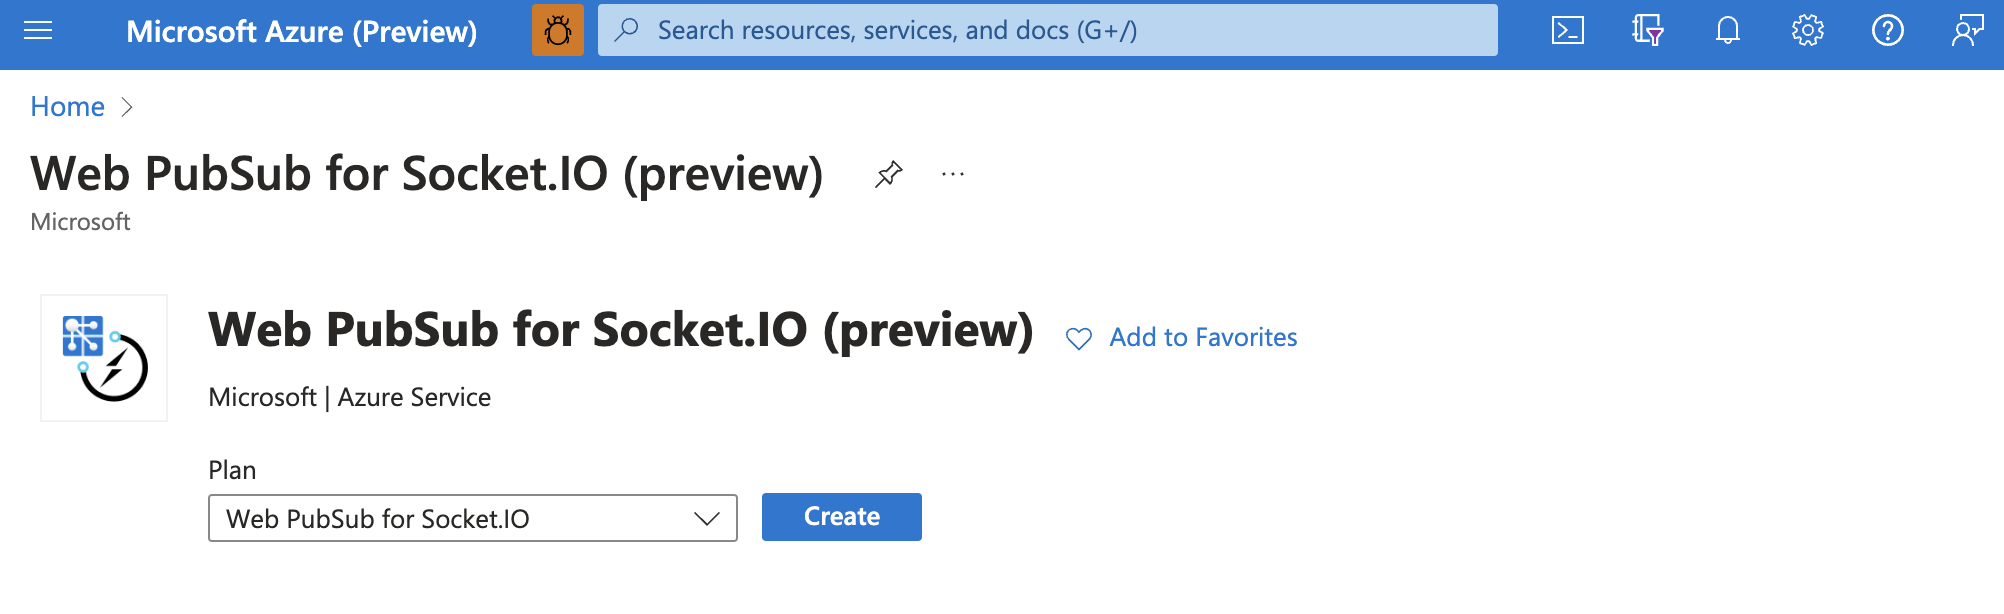
Select the Create a resource button found on the upper left-hand corner of the Azure portal. Type socket.io in the search box and press enter. Select the Web PubSub for Socket.IO in the search result.
Click Create in the pop out page.
Sending messages with Socket.IO libraries and Web PubSub for Socket.IO
In the following steps, you create a Socket.IO project and integrate with Web PubSub for Socket.IO.
Initialize a Node project and install required packages
mkdir quickstart
cd quickstart
npm init
npm install @azure/web-pubsub-socket.io socket.io-client
Write server code
Create a server.js file and add following code to create a Socket.IO server and integrate with Web PubSub for Socket.IO.
Raw connection strings appear in this article for demonstration purposes only. In production environments, always protect your access keys. Use Azure Key Vault to manage and rotate your keys securely and secure your connection with WebPubSubServiceClient.
/*server.js*/
const { Server } = require("socket.io");
const { useAzureSocketIO } = require("@azure/web-pubsub-socket.io");

let io = new Server(3000);

// Use the following line to integrate with Web PubSub for Socket.IO
useAzureSocketIO(io, {
    hub: "Hub", // The hub name can be any valid string.
    connectionString: process.argv[2]
});

io.on("connection", (socket) => {
    // Sends a message to the client
    socket.emit("hello", "world");

    // Receives a message from the client
    socket.on("howdy", (arg) => {
        console.log(arg);   // Prints "stranger"
    })
});
Write client code
Create a client.js file and add following code to connect the client with Web PubSub for Socket.IO.
/*client.js*/
const io = require("socket.io-client");

const socket = io("<web-pubsub-socketio-endpoint>", {
    path: "/clients/socketio/hubs/Hub",
});

// Receives a message from the server
socket.on("hello", (arg) => {
    console.log(arg);
});

// Sends a message to the server
socket.emit("howdy", "stranger")
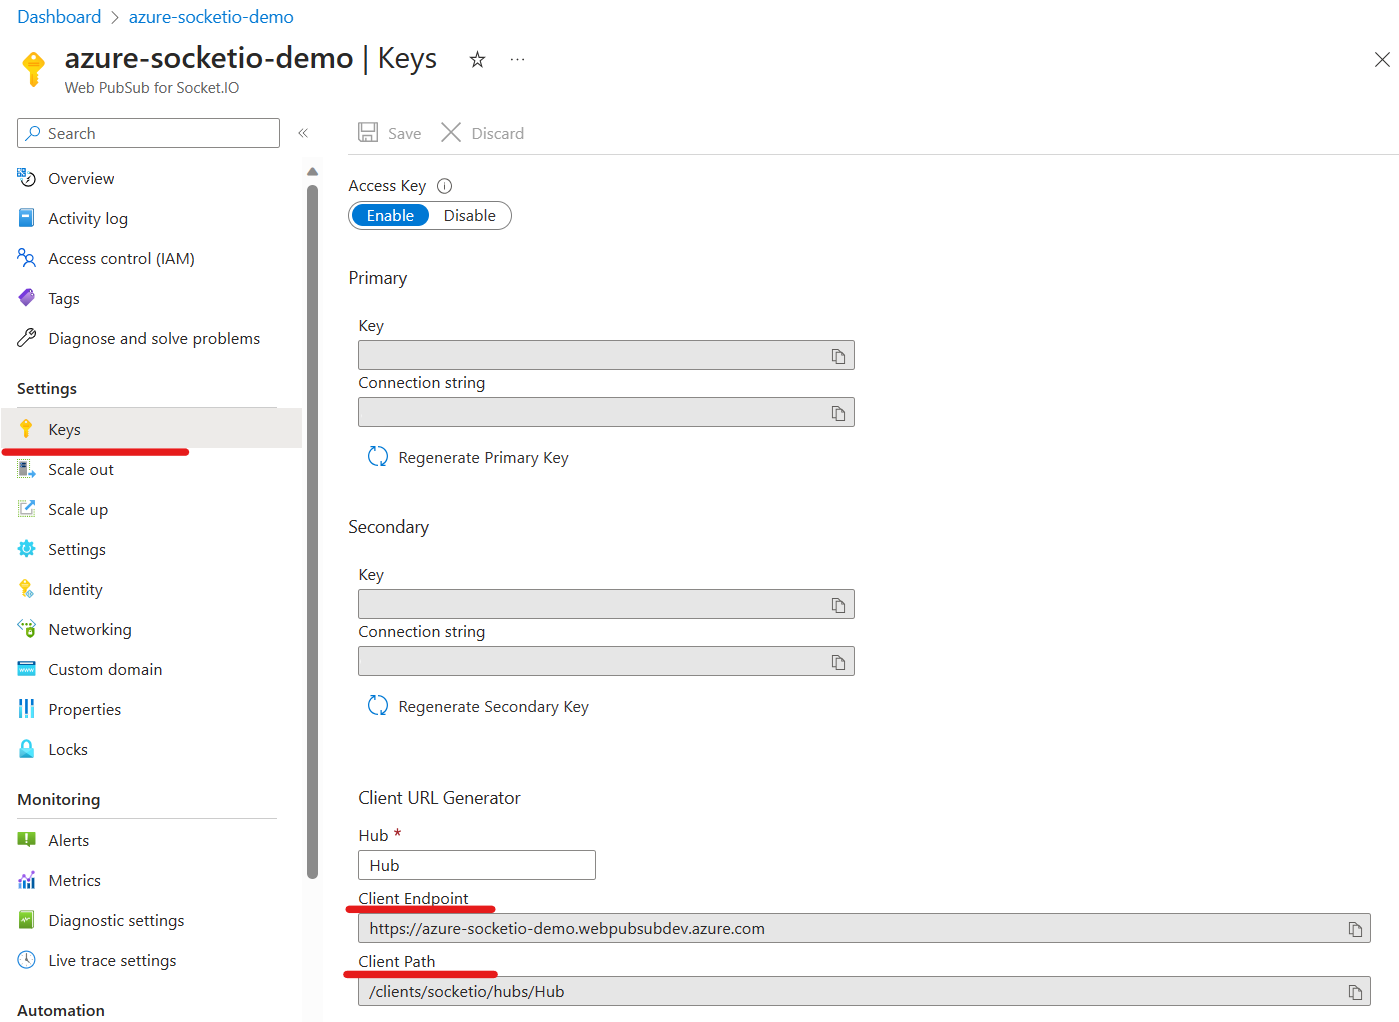
When you use Web PubSub for Socket.IO, <web-pubsub-socketio-endpoint> and path are required for the client to connect to the service. The <web-pubsub-socketio-endpoint> and path can be found in Azure portal.
Go to the key blade of Web PubSub for Socket.IO
Type in your hub name and copy the Client Endpoint and Client Path
Run the app
Run the server app:
node server.js "<connection-string>"
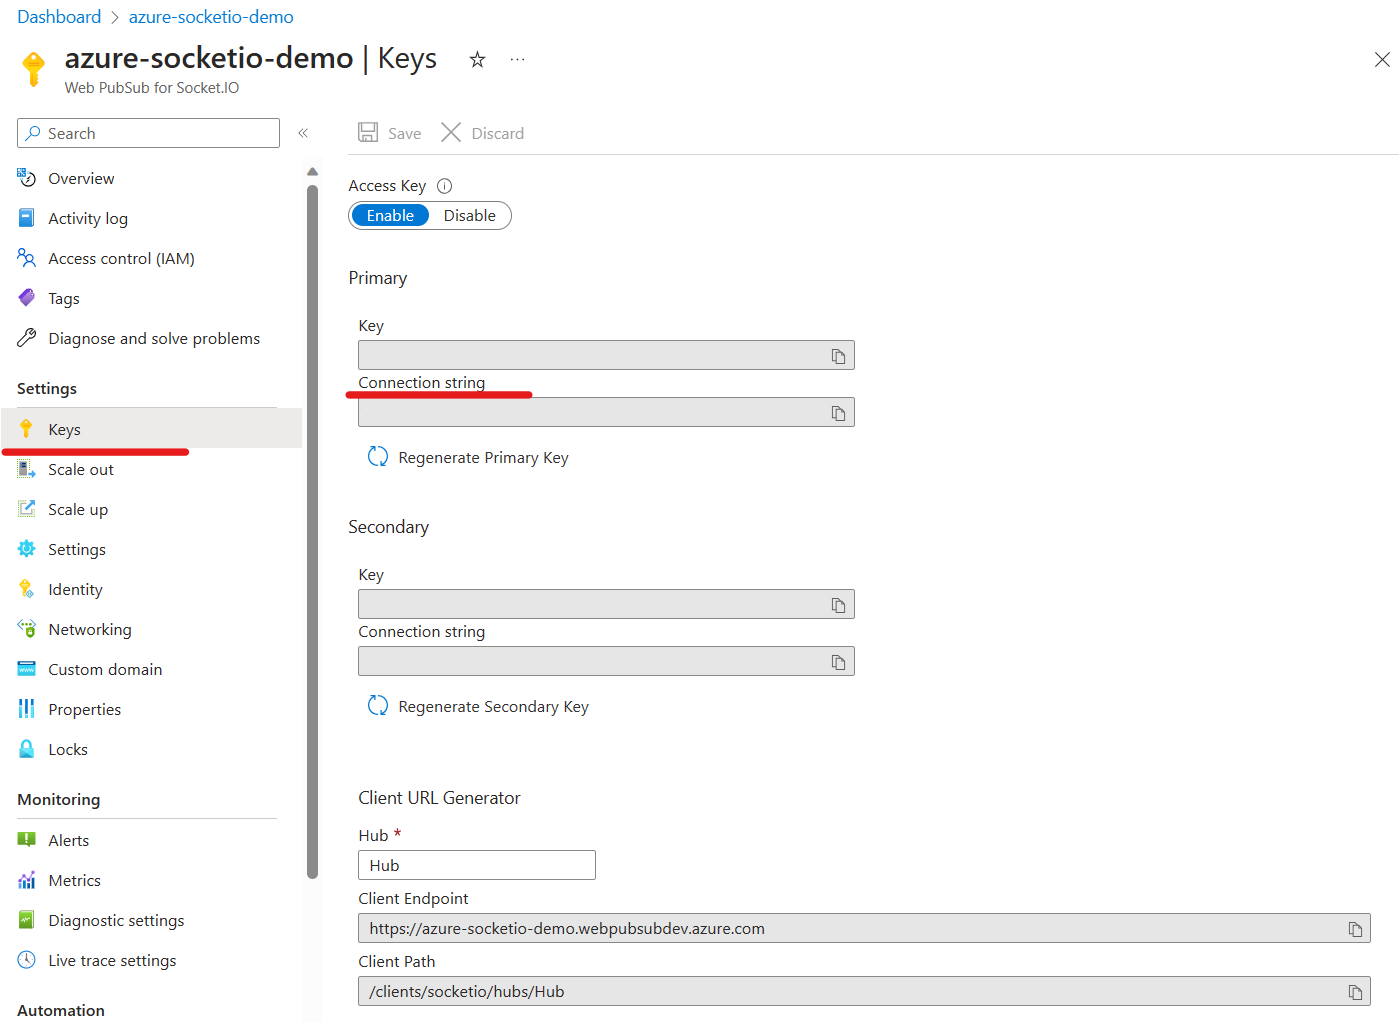
The <connection-string> is the connection string that contains the endpoint and keys to access your Web PubSub for Socket.IO resource. You can also find the connection string in Azure portal
Change a JavaScript web app update mechanism from polling to real-time push-based architecture with SignalR Service, Azure Cosmos DB and Azure Functions. Use Vue.js and JavaScript to use SignalR using Visual Studio Code.