Events
Mar 17, 9 PM - Mar 21, 10 AM
Join the meetup series to build scalable AI solutions based on real-world use cases with fellow developers and experts.
Register nowThis browser is no longer supported.
Upgrade to Microsoft Edge to take advantage of the latest features, security updates, and technical support.
Note
The QnA Maker service is being retired on the 31st of March, 2025. A newer version of the question and answering capability is now available as part of Azure AI Language. For question answering capabilities within the Language Service, see question answering. Starting 1st October, 2022 you won’t be able to create new QnA Maker resources. For information on migrating existing QnA Maker knowledge bases to question answering, consult the migration guide.
You can create a QnA Maker knowledge base (KB) from your own content, such as FAQs or product manuals. This article includes an example of creating a QnA Maker knowledge base from a simple FAQ webpage, to answer questions.
Sign in to the QnAMaker.ai portal with your Azure credentials.
In the QnA Maker portal, select Create a knowledge base.
On the Create page, skip Step 1 if you already have your QnA Maker resource.
If you haven't created the service yet, select Stable and Create a QnA service. You are directed to the Azure portal to set up a QnA Maker service in your subscription. Remember your Microsoft Entra ID, Subscription, QnA resource name you selected when you created the resource.
When you are done creating the resource in the Azure portal, return to the QnA Maker portal, refresh the browser page, and continue to Step 2.
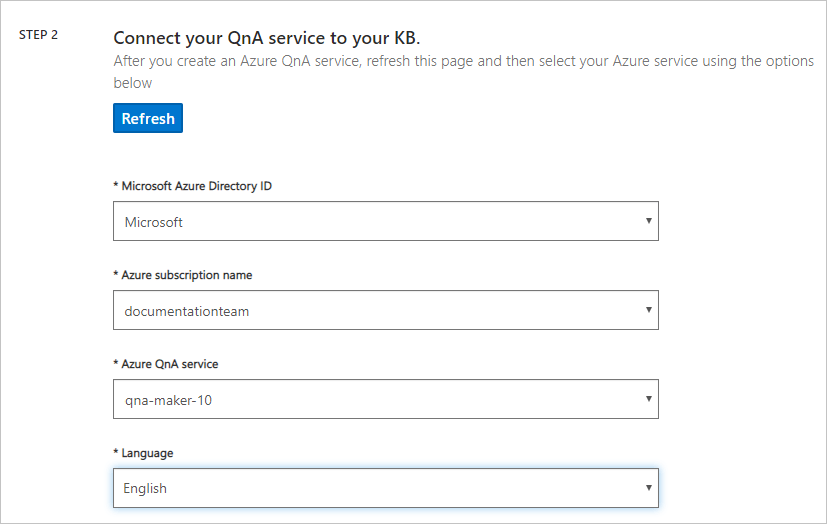
In Step 2, select your Active directory, subscription, service (resource), and the language for all knowledge bases created in the service.
In Step 3, name your knowledge base My Sample QnA KB.
In Step 4, configure the settings with the following table:
| Setting | Value |
|---|---|
| Enable multi-turn extraction from URLs, .pdf or .docx files. | Checked |
| Multi-turn default text | Select an option |
| + Add URL | https://www.microsoft.com/download/faq.aspx |
| Chit-chat | Select Professional |
In Step 5, Select Create your KB.
The extraction process takes a few moments to read the document and identify questions and answers.
After QnA Maker successfully creates the knowledge base, the Knowledge base page opens. You can edit the contents of the knowledge base on this page.
In the QnA Maker portal, on the Edit page, select + Add QnA pair from the context toolbar.
Add the following question:
How many Azure services are used by a knowledge base?
Add the answer formatted with markdown:
* Azure AI QnA Maker service\n* Azure Cognitive Search\n* Azure web app\n* Azure app plan
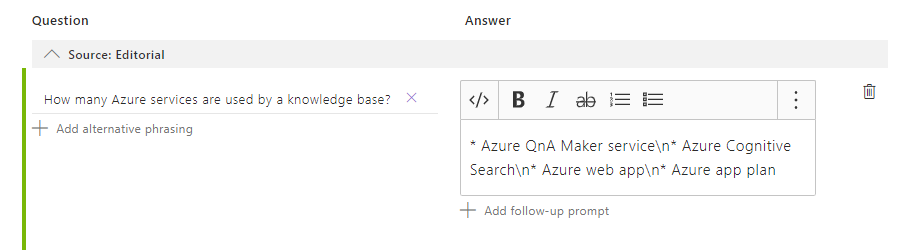
The markdown symbol, *, is used for bullet points. The \n is used for a new line.
The Edit page shows the markdown. When you use the Test panel later, you will see the markdown displayed properly.
In the upper right, select Save and train to save your edits and train QnA Maker. Edits aren't kept unless they're saved.
In the QnA Maker portal, in the upper right, select Test to test that the changes you made took effect.
Enter an example user query in the textbox.
I want to know the difference between 32 bit and 64 bit Windows
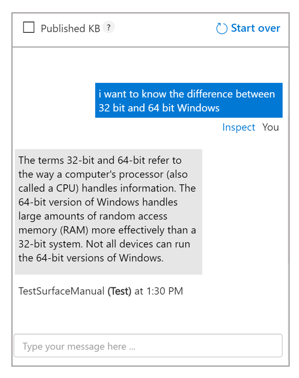
Select Inspect to examine the response in more detail. The test window is used to test your changes to the knowledge base before publishing your knowledge base.
Select Test again to close the Test panel.
When you publish a knowledge base, the contents of your knowledge base move from the test index to a prod index in Azure search.

In the QnA Maker portal, select Publish. Then to confirm, select Publish on the page.
The QnA Maker service is now successfully published. You can use the endpoint in your application or bot code.

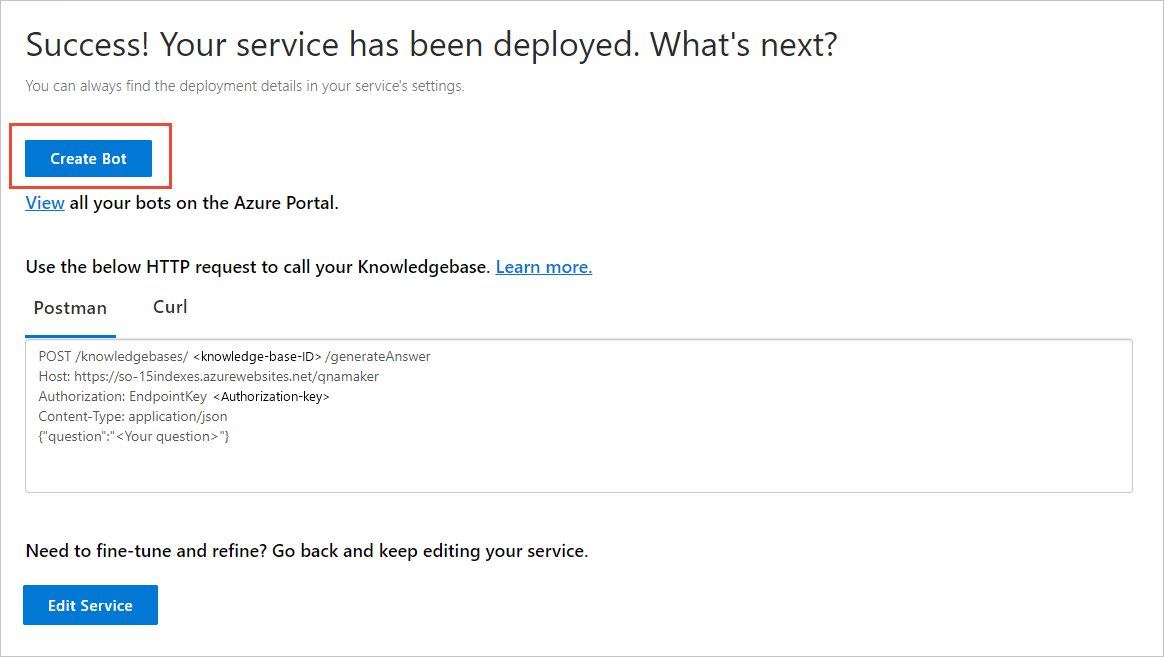
After publishing, you can create a bot from the Publish page:
When you make changes to the knowledge base and republish, you don't need to take further action with the bot. It's already configured to work with the knowledge base, and works with all future changes to the knowledge base. Every time you publish a knowledge base, all the bots connected to it are automatically updated.
In the QnA Maker portal, on the Publish page, select Create bot. This button appears only after you've published the knowledge base.
A new browser tab opens for the Azure portal, with the Azure AI Bot Service's creation page. Configure the Azure AI Bot Service. The bot and QnA Maker can share the web app service plan, but can't share the web app. This means the app name for the bot must be different from the app name for the QnA Maker service.
After the bot is created, open the Bot service resource.
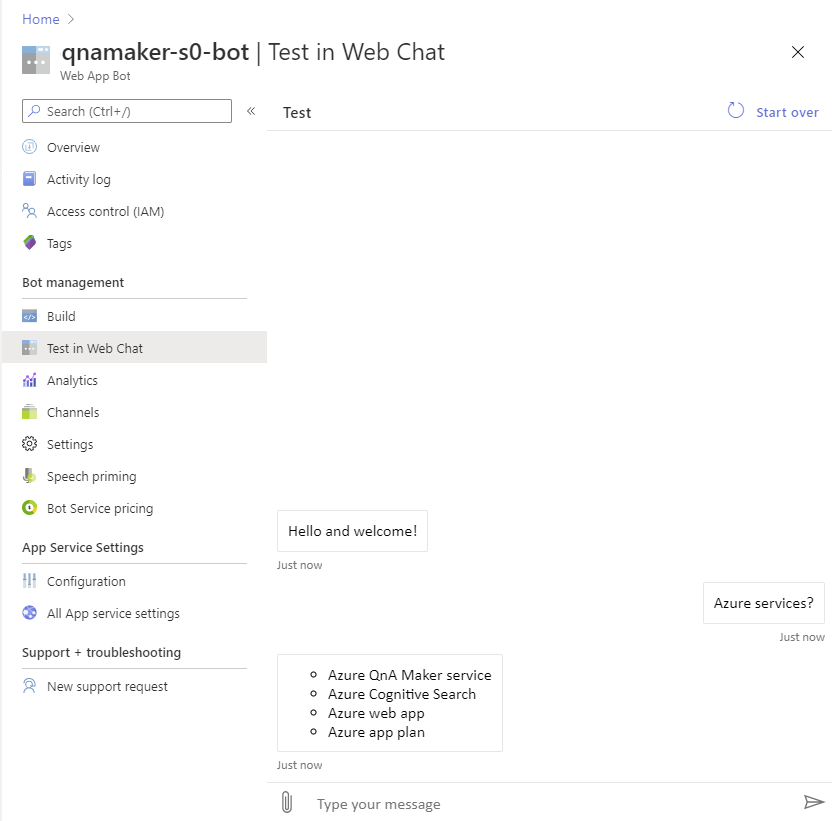
Under Bot Management, select Test in Web Chat.
At the chat prompt of Type your message, enter:
Azure services?
The chat bot responds with an answer from your knowledge base.
You created a new knowledge base, added a public URL to the knowledge base, added your own QnA pair, trained, tested, and published the knowledge base.
After publishing the knowledge base, you created a bot, and tested the bot.
This was all accomplished in a few minutes without having to write any code or clean the content.
If you are not continuing to the next quickstart, delete the QnA Maker and Bot framework resources in the Azure portal.
For more information:
Events
Mar 17, 9 PM - Mar 21, 10 AM
Join the meetup series to build scalable AI solutions based on real-world use cases with fellow developers and experts.
Register now