Events
Mar 31, 11 PM - Apr 2, 11 PM
The biggest Fabric, Power BI, and SQL learning event. March 31 – April 2. Use code FABINSIDER to save $400.
Register todayThis browser is no longer supported.
Upgrade to Microsoft Edge to take advantage of the latest features, security updates, and technical support.
APPLIES TO:  Azure Data Factory
  Azure Synapse Analytics
Tip
Try out Data Factory in Microsoft Fabric, an all-in-one analytics solution for enterprises. Microsoft Fabric covers everything from data movement to data science, real-time analytics, business intelligence, and reporting. Learn how to start a new trial for free!
In this quick start, you will use the Copy Data tool to create a pipeline that copies data from the source folder in Azure Blob storage to target folder.
If you don't have an Azure subscription, create a free account before you begin.
Select the button below to try it out!

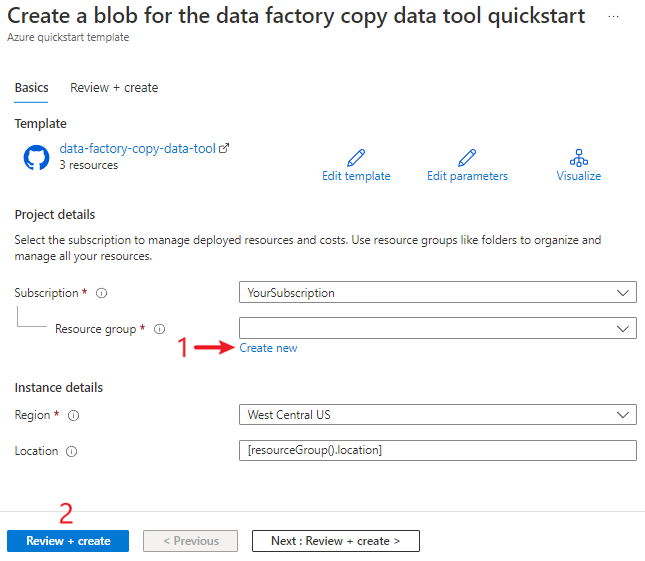
You will be redirected to the configuration page shown in the image below to deploy the template. Here, you only need to create a new resource group. (You can leave all the other values with their defaults.) Then click Review + create and click Create to deploy the resources.
Note
The user deploying the template needs to assign a role to a managed identity. This requires permissions that can be granted through the Owner, User Access Administrator or Managed Identity Operator roles.
A new blob storage account will be created in the new resource group, and the moviesDB2.csv file will be stored in a folder called input in the blob storage.
You can use your existing data factory or create a new one as described in Quickstart: Create a data factory by using the Azure portal.
The steps below will walk you through how to easily copy data with the copy data tool in Azure Data Factory.
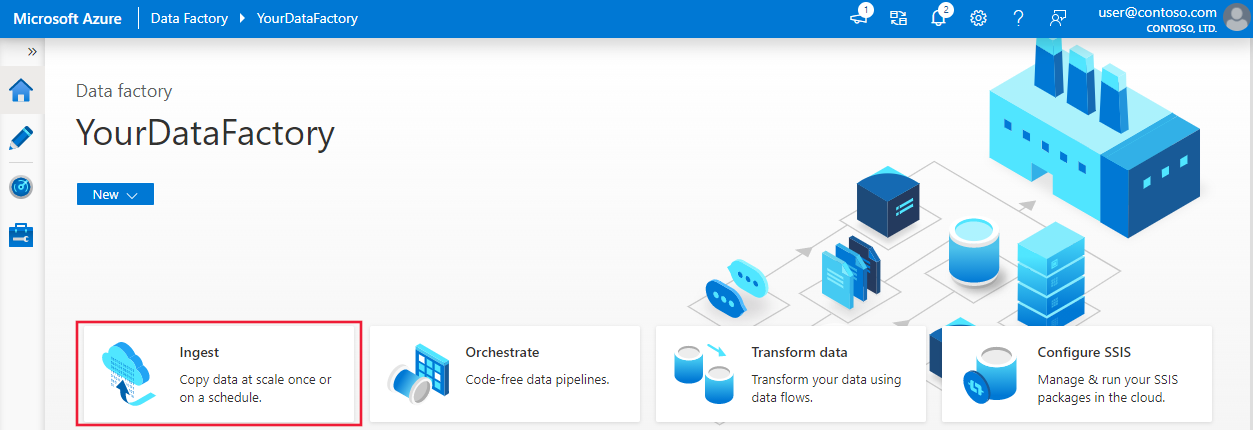
On the home page of Azure Data Factory, select the Ingest tile to start the Copy Data tool.
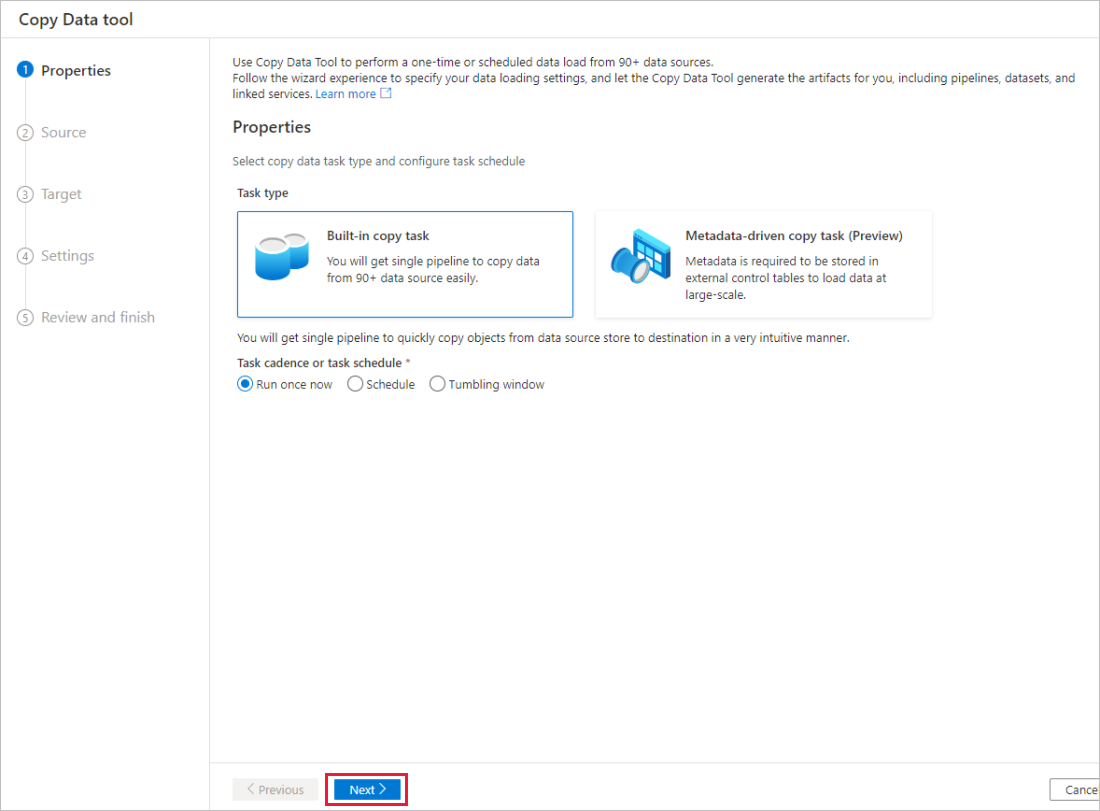
On the Properties page of the Copy Data tool, choose Built-in copy task under Task type, then select Next.
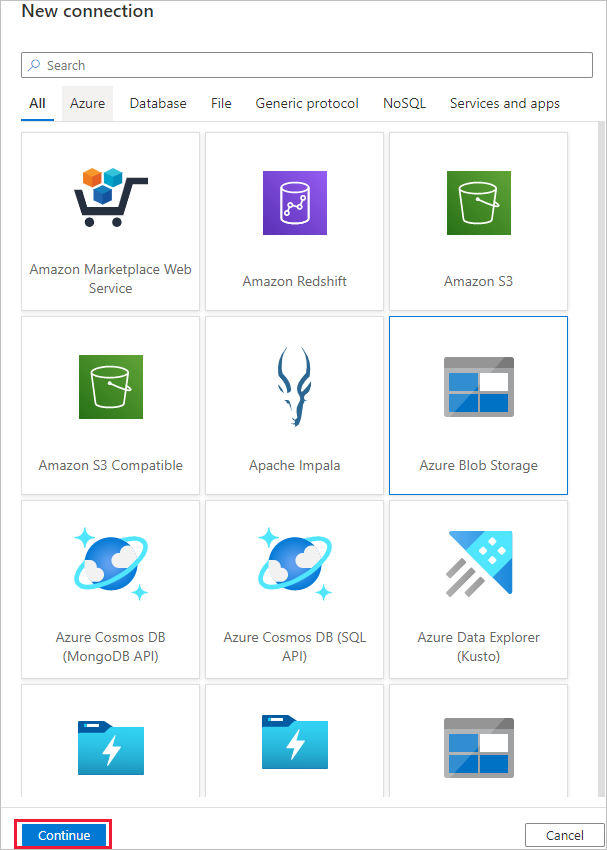
Click + Create new connection to add a connection.
Select the linked service type that you want to create for the source connection. In this tutorial, we use Azure Blob Storage. Select it from the gallery, and then select Continue.
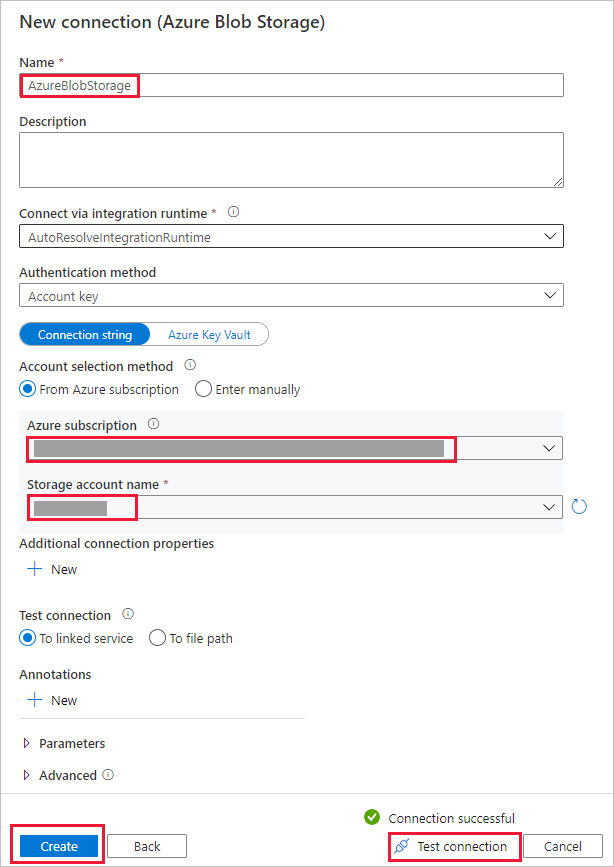
On the New connection (Azure Blob Storage) page, specify a name for your connection. Select your Azure subscription from the Azure subscription list and your storage account from the Storage account name list, test connection, and then select Create.
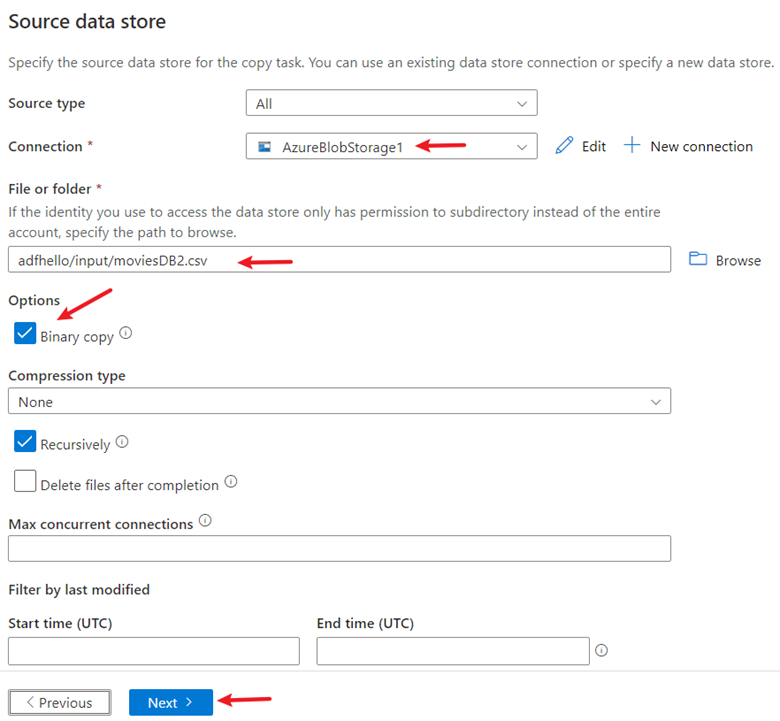
Select the newly created connection in the Connection block.
In the File or folder section, select Browse to navigate to the adftutorial/input folder, select the emp.txt file, and then click OK.
Select the Binary copy checkbox to copy file as-is, and then select Next.
Select the AzureBlobStorage connection that you created in the Connection block.
In the Folder path section, enter adftutorial/output for the folder path.
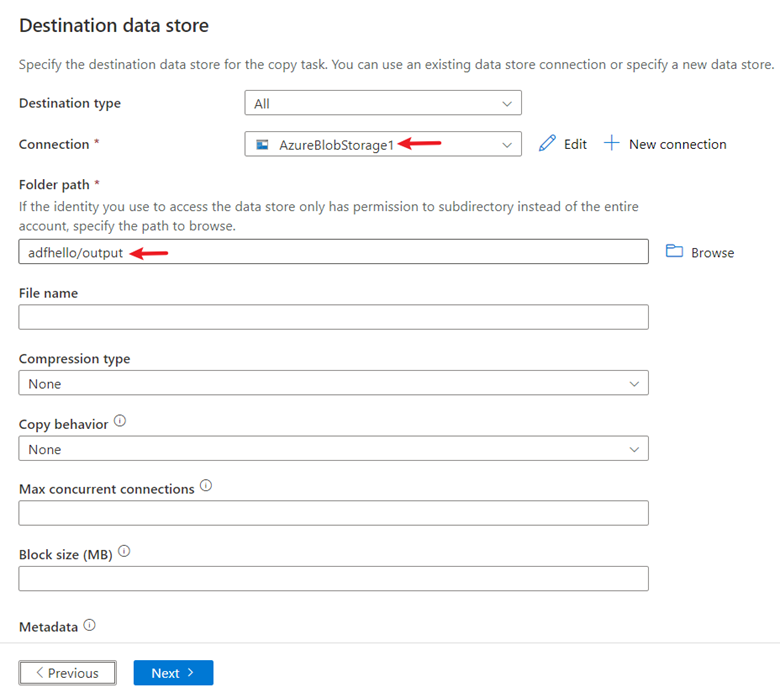
Leave other settings as default and then select Next.
On the Settings page, specify a name for the pipeline and its description, then select Next to use other default configurations.

On the Summary page, review all settings, and select Next.
On the Deployment complete page, select Monitor to monitor the pipeline that you created.

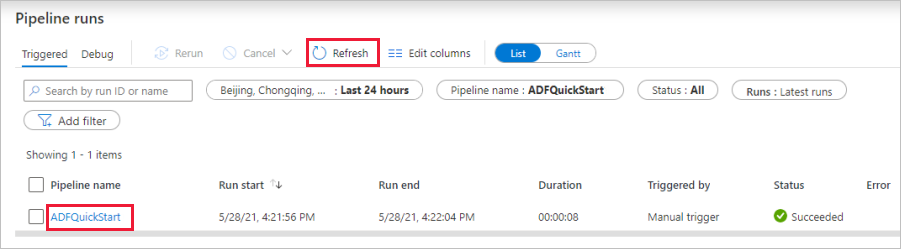
The application switches to the Monitor tab. You see the status of the pipeline on this tab. Select Refresh to refresh the list. Click the link under Pipeline name to view activity run details or rerun the pipeline.
On the Activity runs page, select the Details link (eyeglasses icon) under the Activity name column for more details about copy operation. For details about the properties, see Copy Activity overview.
The pipeline in this sample copies data from one location to another location in Azure Blob storage. To learn about using Data Factory in more scenarios, go through the tutorials.
Events
Mar 31, 11 PM - Apr 2, 11 PM
The biggest Fabric, Power BI, and SQL learning event. March 31 – April 2. Use code FABINSIDER to save $400.
Register todayTraining
Module
Orchestrate processes and data movement with Microsoft Fabric - Training
Use Data Factory pipelines in Microsoft Fabric
Certification
Microsoft Certified: Azure Data Engineer Associate - Certifications
Demonstrate understanding of common data engineering tasks to implement and manage data engineering workloads on Microsoft Azure, using a number of Azure services.