On the Azure homepage, select the + Create a resource button.
From the Categories menu, select Internet of Things, and then select IoT Hub.
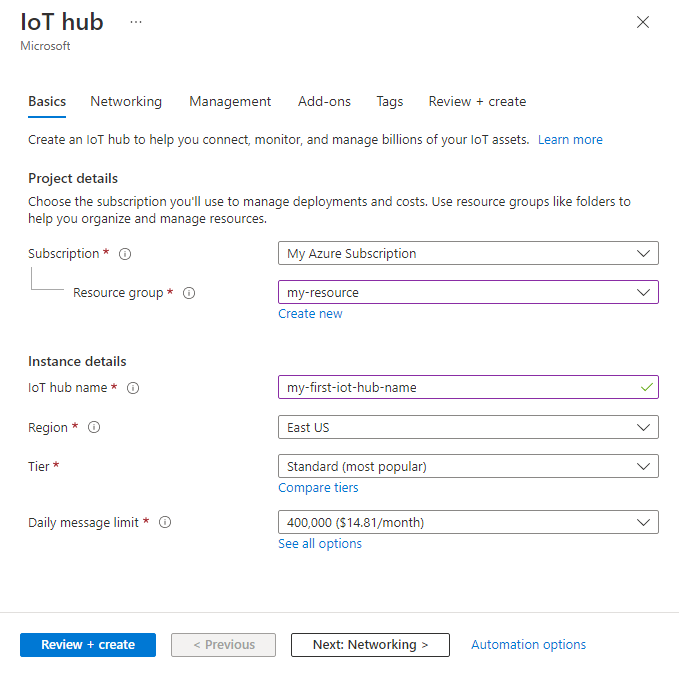
On the Basics tab, complete the fields as follows:
Important
Because the IoT hub will be publicly discoverable as a DNS endpoint, be sure to avoid entering any sensitive or personally identifiable information when you name it.
Property
Value
Subscription
Select the subscription to use for your hub.
Resource group
Select a resource group or create a new one. To create a new one, select Create new and fill in the name you want to use.
IoT hub name
Enter a name for your hub. This name must be globally unique, with a length between 3 and 50 alphanumeric characters. The name can also include the dash ('-') character.
Region
Select the region, closest to you, where you want your hub to be located. Some features, such as IoT Hub device streams, are only available in specific regions. For these limited features, you must select one of the supported regions.
Tier
Select the tier that you want to use for your hub. Tier selection depends on how many features you want and how many messages you send through your solution per day.
The free tier is intended for testing and evaluation. The free tier allows 500 devices to be connected to the hub and up to 8,000 messages per day. Each Azure subscription can create one IoT hub in the free tier.
Select the maximum daily quota of messages for your hub. The available options depend on the tier you've selected for your hub. To see the available messaging and pricing options, select See all options and select the option that best matches the needs of your hub. For more information, see IoT Hub quotas and throttling.
Note
Prices shown are for example purposes only.
Select Next: Networking to continue creating your hub.
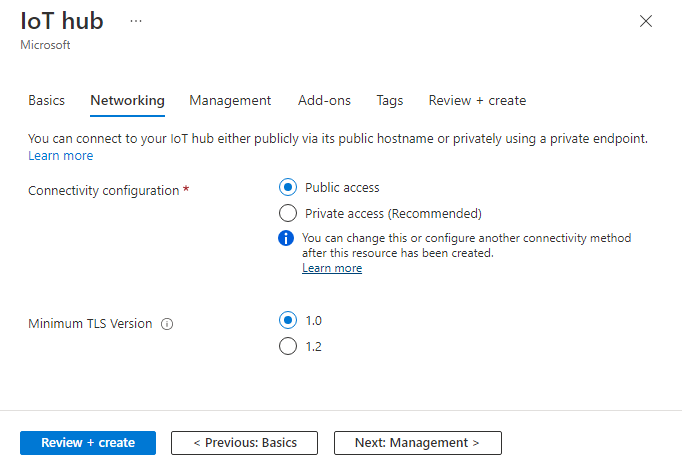
On the Networking tab, complete the fields as follows:
Property
Value
Connectivity configuration
Choose the endpoints that devices can use to connect to your IoT hub. Accept the default setting, Public access, for this example. You can change this setting after the IoT hub is created. For more information, see Managing public network access for your IoT hub.
Minimum TLS Version
Select the minimum TLS version to be supported by your IoT hub. Once the IoT hub is created, this value can't be changed. Accept the default setting, 1.0, for this example.
Select Next: Management to continue creating your hub.
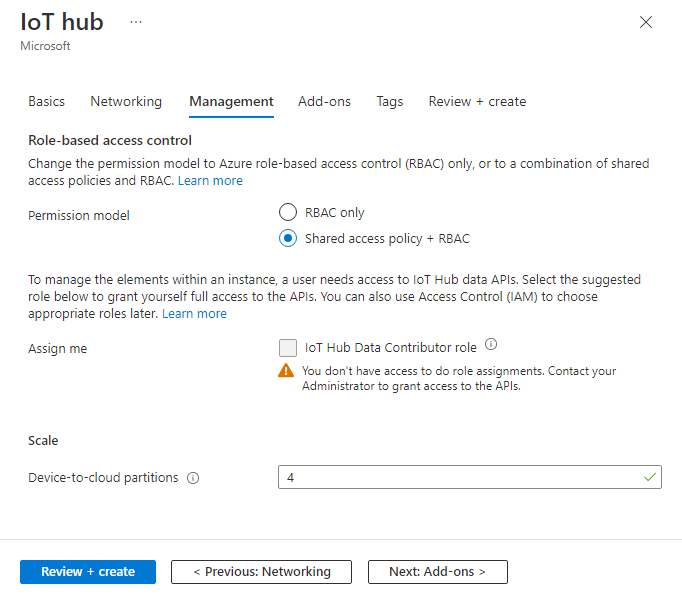
On the Management tab, accept the default settings. If desired, you can modify any of the following fields:
Property
Value
Permission model
Part of role-based access control, this property decides how you manage access to your IoT hub. Allow shared access policies or choose only role-based access control. For more information, see Control access to IoT Hub by using Microsoft Entra ID.
Assign me
You may need access to IoT Hub data APIs to manage elements within an instance. If you have access to role assignments, select IoT Hub Data Contributor role to grant yourself full access to the data APIs.
To assign Azure roles, you must have Microsoft.Authorization/roleAssignments/write permissions, such as User Access Administrator or Owner.
Device-to-cloud partitions
This property relates the device-to-cloud messages to the number of simultaneous readers of the messages. Most IoT hubs need only four partitions.
Select Next: Add-ons to continue to the next screen.
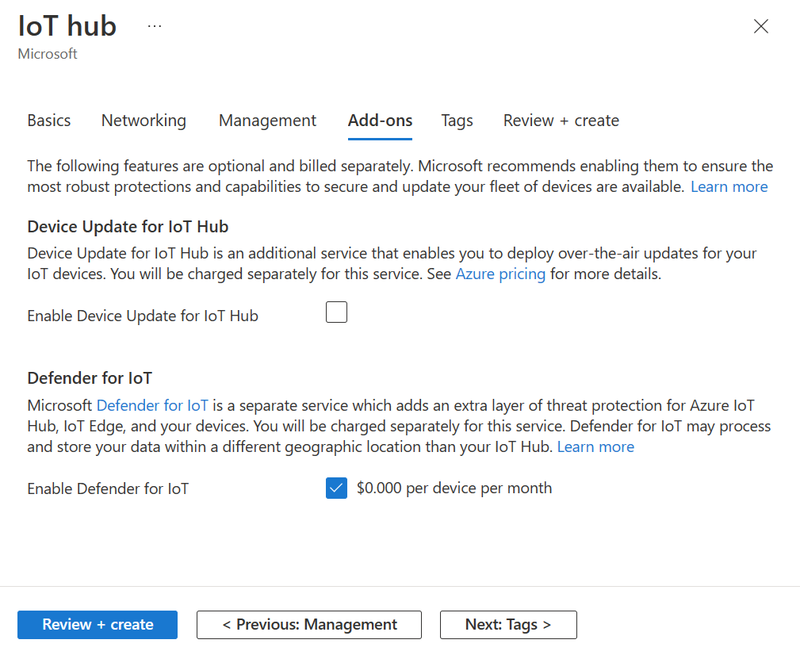
On the Add-ons tab, accept the default settings. If desired, you can modify any of the following fields:
Property
Value
Enable Device Update for IoT Hub
Turn on Device Update for IoT Hub to enable over-the-air updates for your devices. If you select this option, you're prompted to provide information to provision a Device Update for IoT Hub account and instance. For more information, see What is Device Update for IoT Hub?
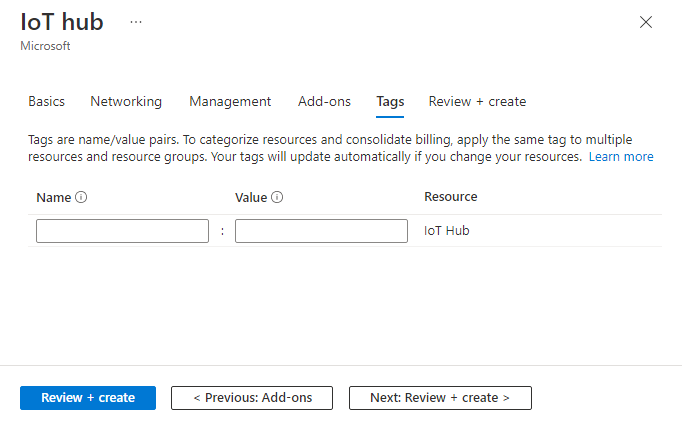
Tags are name/value pairs. You can assign the same tag to multiple resources and resource groups to categorize resources and consolidate billing. In this document, you won't be adding any tags. For more information, see Use tags to organize your Azure resources.
Select Next: Review + create to review your choices.
Select Create to start the deployment of your new hub. Your deployment will be in progress a few minutes while the hub is being created. Once the deployment is complete, select Go to resource to open the new hub.
Use the az iot hub create command to create an IoT hub in your resource group, using a globally unique name for your IoT hub. For example:
az iot hub create --name <NEW_NAME_FOR_YOUR_IOT_HUB> --resource-group <RESOURCE_GROUP_NAME> --sku S1
Important
Because the IoT hub will be publicly discoverable as a DNS endpoint, be sure to avoid entering any sensitive or personally identifiable information when you name it.
The previous command creates an IoT hub in the S1 pricing tier. For more information, see Azure IoT Hub pricing.
Use the New-AzIotHub command to create an IoT hub in your resource group. The name of the IoT hub must be globally unique. For example:
Because the IoT hub will be publicly discoverable as a DNS endpoint, be sure to avoid entering any sensitive or personally identifiable information when you name it.
The previous command creates an IoT hub in the S1 pricing tier. For more information, see Azure IoT Hub pricing.
Connect to an IoT hub
Provide access permissions to applications and services that use IoT Hub functionality.
Connect with a connection string
Connection strings are tokens that grant devices and services permissions to connect to IoT Hub based on shared access policies. Connection strings are an easy way to get started with IoT Hub, and are used in many samples and tutorials, but aren't recommended for production scenarios.
For most sample scenarios, the service policy is sufficient. The service policy grants Service Connect permissions to access service endpoints. For more information about the other built-in shared access policies, see IoT Hub permissions.
To get the IoT Hub connection string for the service policy, follow these steps:
Authenticating access by using Microsoft Entra ID and controlling permissions by using Azure role-based access control (RBAC) provides improved security and ease of use over security tokens. To minimize potential security issues inherent in security tokens, we recommend that you enforce Microsoft Entra authentication whenever possible. For more information, see Control access to IoT Hub by using Microsoft Entra ID.
Delete an IoT hub
When you delete an IoT hub, you lose the associated device identity registry. If you want to move or upgrade an IoT hub, or delete an IoT hub but keep the devices, consider migrating an IoT hub using the Azure CLI.
Azure HPC is a purpose-built cloud capability for HPC & AI workload, using leading-edge processors and HPC-class InfiniBand interconnect, to deliver the best application performance, scalability, and value. Azure HPC enables users to unlock innovation, productivity, and business agility, through a highly available range of HPC & AI technologies that can be dynamically allocated as your business and technical needs change. This learning path is a series of modules that help you get started on Azure HPC - you