Tutorial: Deploy a Java application to a Service Fabric cluster in Azure
This tutorial is part three of a series and shows you how to deploy a Service Fabric application to a cluster in Azure.
In part three of the series, you learn how to:
- Create a secure Linux cluster in Azure
- Deploy an application to the cluster
In this tutorial series you learn how to:
Before you begin this tutorial:
- If you don't have an Azure subscription, create a free account
- Install the Azure CLI
- Install the Service Fabric SDK for Mac or Linux
- Install Python 3
The following steps create the necessary resources required to deploy your application to a Service Fabric cluster. Additionally, resources necessary to monitor the health of your solution using the ELK (Elasticsearch, Logstash, Kibana) stack are set up. Specifically, Event Hubs is used as a sink for logs from Service Fabric. It is configured to send logs from the Service Fabric cluster to your Logstash instance.
Open a terminal and download the following package that contains necessary helper scripts and the templates to create the resources in Azure
git clone https://github.com/Azure-Samples/service-fabric-java-quickstart.gitSign in to your Azure account
az loginSet your Azure subscription that you want to use to create the resources
az account set --subscription [SUBSCRIPTION-ID]From the service-fabric-java-quickstart/AzureCluster folder, run the following command to create a cluster certificate in Key Vault. This certificate is used to secure your Service Fabric cluster. Provide the region (must be the same as your Service Fabric cluster), key vault resource group name, key vault name, certificate password, and cluster DNS name.
./new-service-fabric-cluster-certificate.sh [REGION] [KEY-VAULT-RESOURCE-GROUP] [KEY-VAULT-NAME] [CERTIFICATE-PASSWORD] [CLUSTER-DNS-NAME-FOR-CERTIFICATE]

Example: ./new-service-fabric-cluster-certificate.sh 'westus' 'testkeyvaultrg' 'testkeyvault' '<password>' 'testservicefabric.westus.cloudapp.azure.com'
The preceding command returns the following information that should be noted for use later.
Source Vault Resource Id: /subscriptions/<subscription_id>/resourceGroups/testkeyvaultrg/providers/Microsoft.KeyVault/vaults/<name>
Certificate URL: https://<name>.vault.azure.net/secrets/<cluster-dns-name-for-certificate>/<guid>
Certificate Thumbprint: <THUMBPRINT>
Create a resource group for the storage account that stores your logs
az group create --location [REGION] --name [RESOURCE-GROUP-NAME]

Example: az group create --location westus --name teststorageaccountrg
Create a storage account which will be used to store the logs that will be produced
az storage account create -g [RESOURCE-GROUP-NAME] -l [REGION] --name [STORAGE-ACCOUNT-NAME] --kind Storage

Example: az storage account create -g teststorageaccountrg -l westus --name teststorageaccount --kind Storage
Access the Azure portal and navigate to the Shared Access Signature tab for your Storage account. Generate the SAS token as follows.

Copy the account SAS URL and set it aside for use when creating your Service Fabric cluster. It resembles the following URL:
?sv=2017-04-17&ss=bfqt&srt=sco&sp=rwdlacup&se=2018-01-31T03:24:04Z&st=2018-01-30T19:24:04Z&spr=https,http&sig=IrkO1bVQCHcaKaTiJ5gilLSC5Wxtghu%2FJAeeY5HR%2BPU%3DCreate a resource group that contains the Event Hub resources. Event Hubs is used to send messages from Service Fabric to the server running the ELK resources.
az group create --location [REGION] --name [RESOURCE-GROUP-NAME]

Example: az group create --location westus --name testeventhubsrg
Create an Event Hubs resource using the following command. Follow the prompts to enter details for the namespaceName, eventHubName, consumerGroupName, sendAuthorizationRule, and receiveAuthorizationRule.
az deployment group create -g [RESOURCE-GROUP-NAME] --template-file eventhubsdeploy.json

Example:
az deployment group create -g testeventhubsrg --template-file eventhubsdeploy.json
Please provide string value for 'namespaceName' (? for help): testeventhubnamespace
Please provide string value for 'eventHubName' (? for help): testeventhub
Please provide string value for 'consumerGroupName' (? for help): testeventhubconsumergroup
Please provide string value for 'sendAuthorizationRuleName' (? for help): sender
Please provide string value for 'receiveAuthorizationRuleName' (? for help): receiver
Copy the contents of the output field in the JSON output of the preceding command. The sender information is used when the Service Fabric cluster is created. The receiver name and key should be saved for use in the next tutorial when the Logstash service is configured to receive messages from Event Hub. The following blob is an example JSON output:
"outputs": {
    "receiver Key": {
        "type": "String",
        "value": "[KEY]"
    },
    "receiver Name": {
        "type": "String",
        "value": "receiver"
    },
    "sender Key": {
        "type": "String",
        "value": "[KEY]"
    },
    "sender Name": {
        "type": "String",
        "value": "sender"
    }
}
Run the eventhubssastoken.py script to generate the SAS url for the EventHubs resource you created. This SAS URL is used by the Service Fabric cluster to send logs to Event Hubs. As a result, the sender policy is used to generate the URL. The script returns the SAS URL for the Event Hubs resource that is used in the following step:
python3 eventhubssastoken.py 'testeventhubs' 'testeventhubs' 'sender' '[PRIMARY-KEY]'Copy the value of the sr field in the JSON returned. The sr field value is the SAS token for EventHubs. The following URL is an example of the sr field:
https%3A%2F%testeventhub.servicebus.windows.net%testeventhub&sig=7AlFYnbvEm%2Bat8ALi54JqHU4i6imoFxkjKHS0zI8z8I%3D&se=1517354876&skn=senderYour SAS URL for the EventHubs follows the structure:
https://<namespacename>.servicebus.windows.net/<eventhubsname>?sr=<sastoken>. For example,https://testeventhubnamespace.servicebus.windows.net/testeventhub?sr=https%3A%2F%testeventhub.servicebus.windows.net%testeventhub&sig=7AlFYnbvEm%2Bat8ALi54JqHU4i6imoFxkjKHS0zI8z8I%3D&se=1517354876&skn=senderOpen the sfdeploy.parameters.json file and replace the following contents from the preceding steps. [SAS-URL-STORAGE-ACCOUNT] was noted in step 8. [SAS-URL-EVENT-HUBS] was noted in step 11.
"applicationDiagnosticsStorageAccountName": {
    "value": "teststorageaccount"
},
"applicationDiagnosticsStorageAccountSasToken": {
    "value": "[SAS-URL-STORAGE-ACCOUNT]"
},
"loggingEventHubSAS": {
    "value": "[SAS-URL-EVENT-HUBS]"
}
Opens sfdeploy.parameters.json. Change the following parameters and then save the file.
- clusterName. Use only lower-case letters and numerals.
- adminUserName (to a value other than blank)
- adminPassword (to a value other than blank)
Run the following command to create your Service Fabric cluster
az sf cluster create --location 'westus' --resource-group 'testlinux' --template-file sfdeploy.json --parameter-file sfdeploy.parameters.json --secret-identifier <certificate_url_from_step4>
Before deploying your application, you need to add the following snippet to the Voting/VotingApplication/ApplicationManifest.xml file. The X509FindValue field is the thumbprint returned from Step 4 of the Create a Service Fabric cluster in Azure section. This snippet is nested under the ApplicationManifest field (the root field).
<Certificates>
      <SecretsCertificate X509FindType="FindByThumbprint" X509FindValue="[CERTIFICATE-THUMBPRINT]" />
</Certificates>
To deploy your application to this cluster, you must use SFCTL to establish a connection to the cluster. SFCTL requires a PEM file with both the public and private key to connect to the cluster. Run the following command to produce a PEM file with both the public and private key.
openssl pkcs12 -in <clustername>.<region>.cloudapp.azure.com.pfx -out sfctlconnection.pem -nodes -passin pass:<password>Run the following command to connect to the cluster.
sfctl cluster select --endpoint https://<clustername>.<region>.cloudapp.azure.com:19080 --pem sfctlconnection.pem --no-verifyTo deploy your application, navigate to the Voting/Scripts folder and run the install.sh script.
./install.shTo access Service Fabric Explorer, open your favorite browser and type in
https://testlinuxcluster.westus.cloudapp.azure.com:19080. Choose the certificate from the certificate store that you want to use to connect to this endpoint. If you are using a Linux machine, the certificates that were generated by the new-service-fabric-cluster-certificate.sh script has to be imported into Chrome to view Service Fabric Explorer. If you are using a Mac, you have to install the PFX file into your Keychain. You notice your application has been installed on the cluster.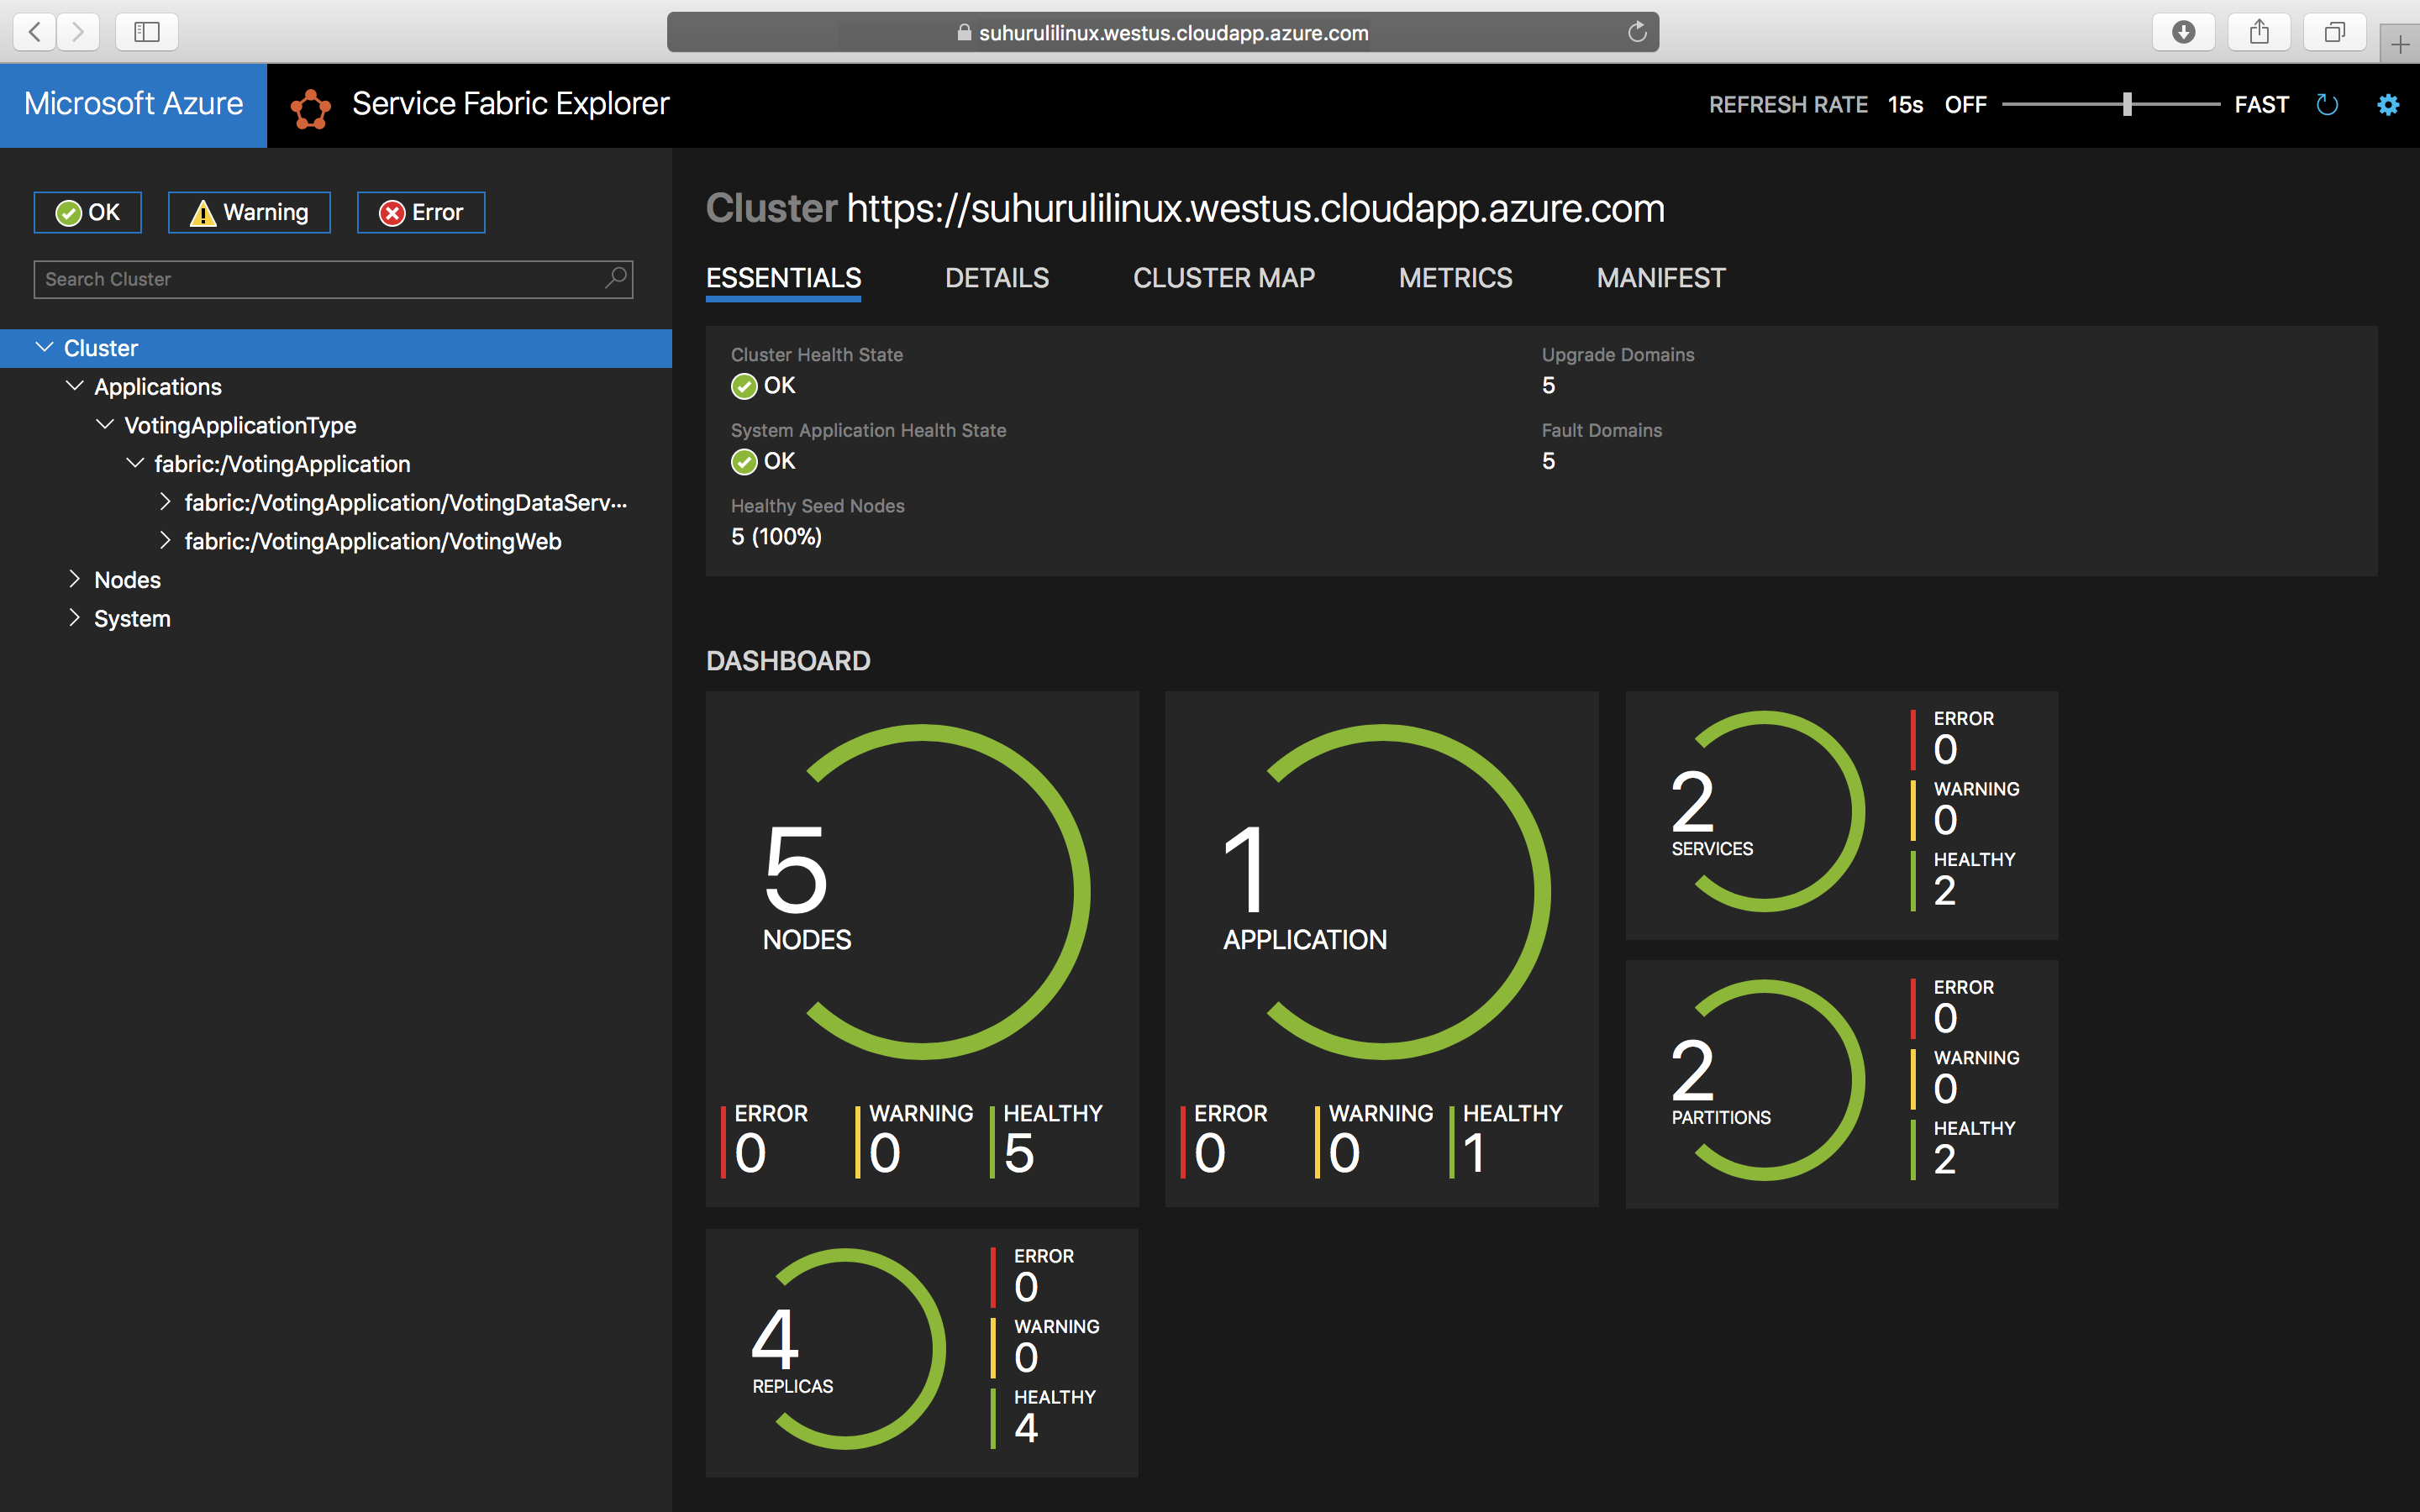
To access your application, type in
https://testlinuxcluster.westus.cloudapp.azure.com:8080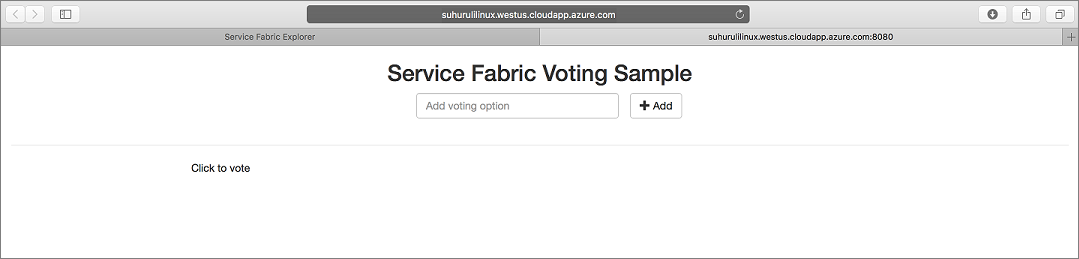
To uninstall your application from the cluster, run the uninstall.sh script in the Scripts folder
./uninstall.sh
In this tutorial, you learned how to:
- Create a secure Linux cluster in Azure
- Create resources necessary for monitoring with ELK
Advance to the next tutorial: