Events
May 19, 6 PM - May 23, 12 AM
Calling all developers, creators, and AI innovators to join us in Seattle @Microsoft Build May 19-22.
Register todayThis browser is no longer supported.
Upgrade to Microsoft Edge to take advantage of the latest features, security updates, and technical support.
Prepare your environment for working with Bicep files. To author and deploy Bicep files, we recommend any of the following options:
| Tasks | Options | Bicep CLI installation |
|---|---|---|
| Author | Visual Studio Code and Bicep extension | automatic |
| Visual Studio and Bicep extension | automatic | |
| Deploy | Azure CLI | automatic |
| Azure PowerShell | manual | |
| Visual Studio Code and Bicep extension | manual | |
| Air-gapped cloud | download |
Warning
The Bicep CLI's stability in emulated environments isn't guaranteed, as emulation tools like Rosetta2 and QEMU typically don't perfectly emulate the architecture.
To create Bicep files, you need a good Bicep editor. We recommend:
Visual Studio Code - If you don't already have Visual Studio Code, install it.
Bicep extension for Visual Studio Code. Visual Studio Code with the Bicep extension provides language support and resource autocompletion. The extension helps you create and validate Bicep files.
To install the extension, search for bicep in the Extensions tab or in the Visual Studio marketplace.
Select Install.
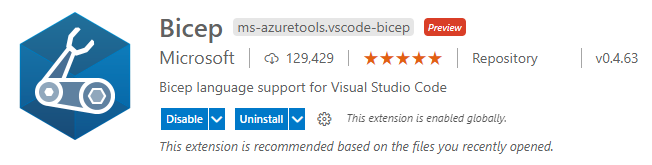
To verify you've installed the extension, open any file with the .bicep file extension. You should see the language mode in the lower-right corner change to Bicep.

If you get an error during installation, see Troubleshoot Bicep installation.
You can deploy your Bicep files directly from the Visual Studio Code editor. For more information, see Deploy Bicep files with Visual Studio Code.
To see the settings:
From the View menu, select Extensions.
Select Bicep from the list of extensions.
Select the FEATURE CONTRIBUTIONS tab:
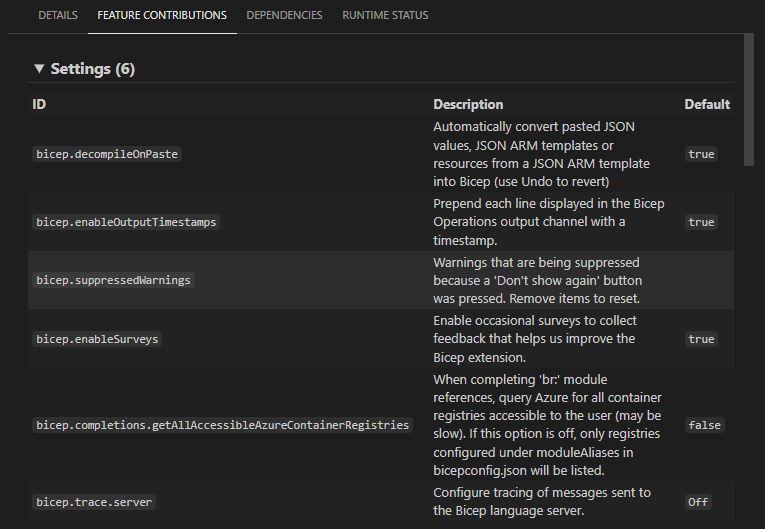
The Bicep extension has these settings and default values:
| ID | Default value | Description |
|---|---|---|
| bicep.decompileOnPaste | true | Automatically convert pasted JSON values, Azure Resource Manager JSON templates (ARM templates,) or resources from an ARM template into Bicep (use Undo to revert). For more information, see the Paste JSON as Bicep command. |
| bicep.enableOutputTimestamps | true | Prepend each line displayed in the Bicep Operations output channel with a timestamp. |
| bicep.suppressedWarnings | Warnings that are being suppressed because a 'Don't show again' button was pressed. Remove items to reset. | |
| bicep.enableSurveys | true | Enable occasional surveys to collect feedback that helps us improve the Bicep extension. |
| bicep.completions.getAllAccessibleAzureContainerRegistries | false | When completing 'br:' module references, query Azure for all container registries accessible to the user (might be slow). If this option is off, only registries configured under moduleAliases in bicepconfig.json files will be listed. |
| bicep.trace.server | off | Configure tracing of messages sent to the Bicep language server. |
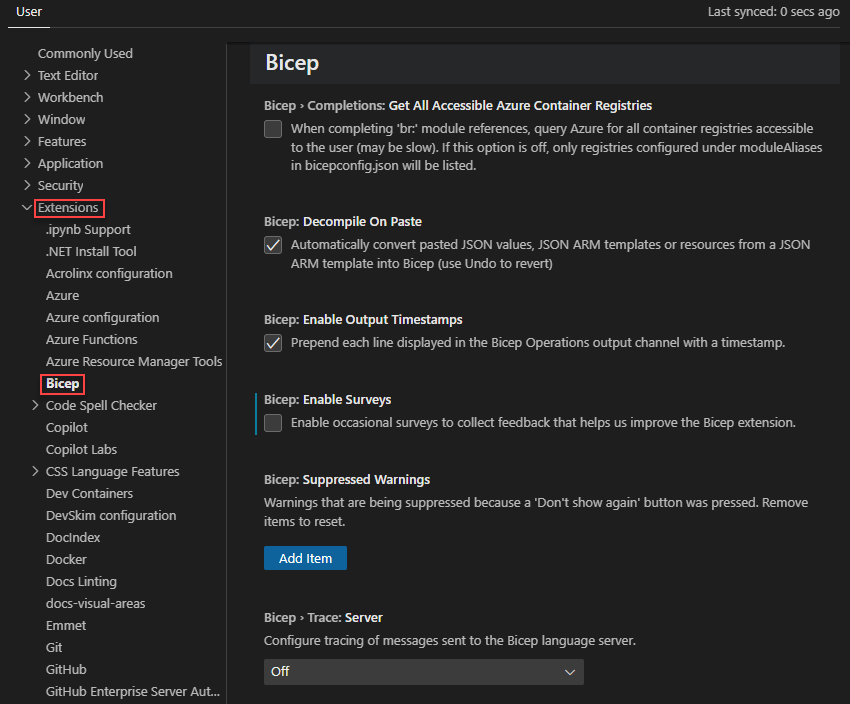
To configure the settings:
From the File menu, select Preferences and then Settings.
Expand Extensions to select Bicep:
To author Bicep file from Visual Studio, you need:
To walk through a tutorial, see Quickstart: Create Bicep files with Visual Studio.
When you use Azure CLI with Bicep, you have everything you need to deploy and decompile Bicep files. Azure CLI automatically installs the Bicep CLI when a command is executed that needs it.
You must have Azure CLI version 2.20.0 or later installed. To install or update the Azure CLI on different operating systems, see:
To verify your current version, run:
az --version
To validate your Bicep CLI installation, use:
az bicep version
To upgrade to the latest version, use:
az bicep upgrade
For more commands, see Bicep CLI.
Important
The Azure CLI installs a self-contained instance of the Bicep CLI. This instance doesn't conflict with any versions that you might have installed manually. The Azure CLI doesn't add Bicep CLI to your PATH.
You're done with setting up your Bicep environment. The rest of this article describes installation steps that you don't need when using the Azure CLI.
You must have Azure PowerShell version 5.6.0 or later installed. To update or install, see Install Azure PowerShell.
Azure PowerShell doesn't automatically install the Bicep CLI. Instead, you must install the Bicep CLI manually.
Important
The self-contained instance of the Bicep CLI installed by the Azure CLI isn't available for PowerShell commands. Azure PowerShell deployments fail if you haven't manually installed the Bicep CLI.
When you manually install the Bicep CLI, run the Bicep commands with the bicep syntax instead of the az bicep syntax for Azure CLI.
To check your Bicep CLI version, run:
bicep --version
The following methods install the Bicep CLI and add it to your PATH. You must manually install for any use other than the Azure CLI.
When installing manually, select a location that's different from the one managed by the Azure CLI. All of the following examples use a location named bicep or .bicep. This location won't conflict with the location managed by the Azure CLI, which uses .azure.
# Fetch the latest Bicep CLI binary
curl -Lo bicep https://github.com/Azure/bicep/releases/latest/download/bicep-linux-x64
# Mark it as executable
chmod +x ./bicep
# Add bicep to your PATH (requires admin)
sudo mv ./bicep /usr/local/bin/bicep
# Verify you can now access the 'bicep' command
bicep --help
# Done!
Note
For lightweight Linux distributions like Alpine, use bicep-linux-musl-x64 instead of bicep-linux-x64 in the preceding script.
# Add the tap for bicep
brew tap azure/bicep

# Install the tool
brew install bicep
# Fetch the latest Bicep CLI binary
curl -Lo bicep https://github.com/Azure/bicep/releases/latest/download/bicep-osx-x64
# Mark it as executable
chmod +x ./bicep
# Add Gatekeeper exception (requires admin)
sudo spctl --add ./bicep
# Add bicep to your PATH (requires admin)
sudo mv ./bicep /usr/local/bin/bicep
# Verify you can now access the 'bicep' command
bicep --help
# Done!
Note
A Bicep CLI version 0.16.X or later installation doesn't need a Gatekeeper exception. However, nightly builds of the Bicep CLI still require the exception.
Download and run the latest Windows installer. The installer doesn't require administrative privileges. After the installation, the Bicep CLI is added to your user PATH. Close and reopen any open command shell windows for the PATH change to take effect.
choco install bicep
winget install -e --id Microsoft.Bicep
# Create the install folder
$installPath = "$env:USERPROFILE\.bicep"
$installDir = New-Item -ItemType Directory -Path $installPath -Force
$installDir.Attributes += 'Hidden'
# Fetch the latest Bicep CLI binary
(New-Object Net.WebClient).DownloadFile("https://github.com/Azure/bicep/releases/latest/download/bicep-win-x64.exe", "$installPath\bicep.exe")
# Add bicep to your PATH
$currentPath = (Get-Item -path "HKCU:\Environment" ).GetValue('Path', '', 'DoNotExpandEnvironmentNames')
if (-not $currentPath.Contains("%USERPROFILE%\.bicep")) { setx PATH ($currentPath + ";%USERPROFILE%\.bicep") }
if (-not $env:path.Contains($installPath)) { $env:path += ";$installPath" }
# Verify you can now access the 'bicep' command.
bicep --help
# Done!
The bicep install and bicep upgrade commands don't work in an air-gapped environment. To install Bicep CLI in an air-gapped environment, you need to download the Bicep CLI executable manually and save it to .azure/bin. This location is where the instance managed by Azure CLI is installed.
Linux
macOS
Windows
When using the Azure CLI task on air-gapped cloud, you must set the useGlobalConfig property of the task to true. The default value is false. See CI/CD with Azure Pipelines and Bicep files for an example.
If you'd like to try the latest pre-release bits of Bicep before they're released, see Install nightly builds.
Warning
These pre-release builds are much more likely to have known or unknown bugs.
The Bicep team has made the Azure.Bicep.Core NuGet package publicly available on nuget.org. While it's public, it isn't a supported package. Any dependency you take on this package will be done at your own risk, and Microsoft reserves the right to push breaking changes to this package at any time.
For more information about installing and consuming NuGet packages, see Package consumption workflow.
Events
May 19, 6 PM - May 23, 12 AM
Calling all developers, creators, and AI innovators to join us in Seattle @Microsoft Build May 19-22.
Register todayTraining
Certification
Microsoft Certified: Azure Developer Associate - Certifications
Build end-to-end solutions in Microsoft Azure to create Azure Functions, implement and manage web apps, develop solutions utilizing Azure storage, and more.