This tutorial shows how to create a Rules engine configuration and your first rule in both Azure portal and CLI.
In this tutorial, you learn how to:
Configure Rules Engine using the portal.
Configure Rules Engine using Azure CLI.
Prerequisites
Before you can complete the steps in this tutorial, you must first create an Azure Front Door (classic). For more information, see Create an Azure Front Door (classic).
Configure Rules Engine in Azure portal
Within your Azure Front Door (classic) resource, select Rule Engine configuration from under Settings on the left side menu pane. Select + Add, give your configuration a name, and start creating your first Rules Engine configuration.
Enter a name for your first rule. Then select + Add condition or + Add action to define your rule.
Note
To delete a condition or action from a rule, use the trash can icon on the right-hand side of the specific condition or action.
To create a rule that applies to all incoming traffic, do not specify any conditions.
To stop evaluating rules once the first match condition is met, check Stop evaluating remaining rule. If this is checked and all of the match conditions of a particular rule are met, then the remaining rules in the configuration will not be executed.
All paths in the rules engine configuration are case sensitive.
Determine the priority of the rules within your configuration by using the Move up, Move down, and Move to top buttons. The priority is in ascending order, meaning the rule first listed is the most important rule.
Tip
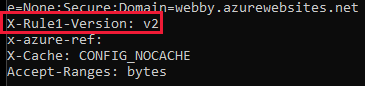
If you want to verify when the changes are propagated to Azure Front Door (classic), you can create a custom response header in the rule using the the following example. You can add a response header _X-<RuleName>-Version_ and change the value each time the rule is updated.
After the changes are updated, you can go to the URL to confirm the rule version being invoked:
Once you create one or more rules, select Save. This action creates your rules engine configuration.
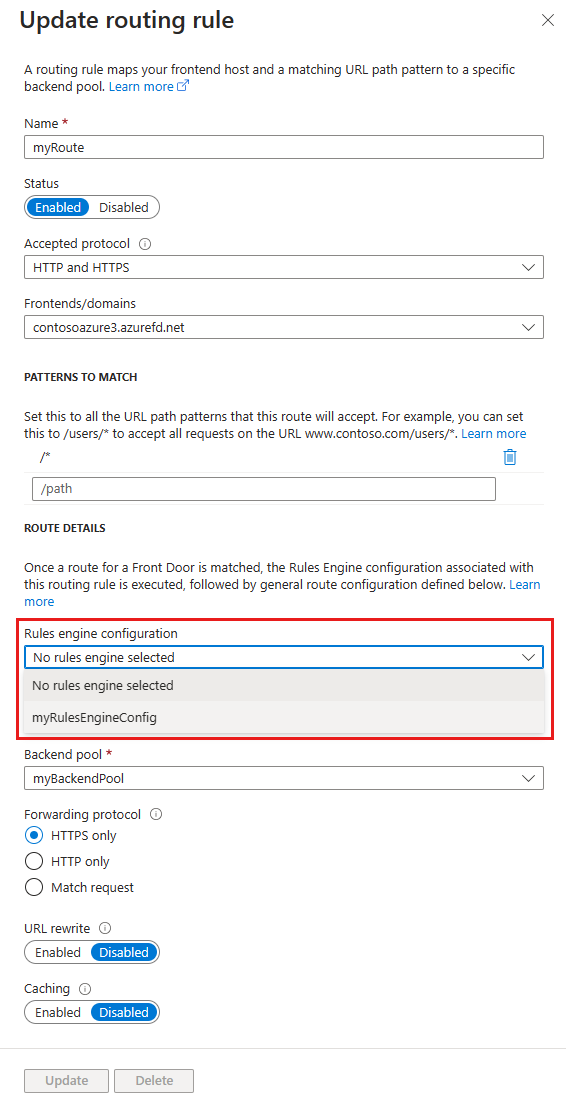
Once you create a rules engine configuration, you can associate the configuration with a routing rule. A single configuration can be applied to multiple routing rules, but a routing rule can only have one rules engine configuration. To associate the configuration, go to the Azure Front Door (classic) designer and select a Route. Then select the Rules engine configuration to associate with the routing rule.
Configure Rules Engine in Azure CLI
Install the Azure CLI and add the "front-door" extension:
az extension add --name front-door
Sign in and switch to your subscription:
az account set --subscription <name_or_Id>
Create a Rules Engine with one rule, including a header-based action and a match condition:
To remove the Rules Engine configuration from your Front Door (classic):
Disassociate any routing rules from the rule engine configuration by selecting the three dots next to the rule engine name and selecting Associate routing rule:
Uncheck all routing rules associated with this Rule Engine configuration and select Save:
Delete the Rule Engine configuration from your Front Door:
Next steps
In this tutorial, you learned how to:
Create a Rule engine configuration
Associate a configuration to a routing rule.
To learn how to add security headers with Rule engine, continue to the next tutorial.
Build end-to-end solutions in Microsoft Azure to create Azure Functions, implement and manage web apps, develop solutions utilizing Azure storage, and more.