This article provides direct links to download AdventureWorks sample databases, and instructions for restoring them to SQL Server, Azure SQL Database, and Azure SQL Managed Instance.
If you're not familiar using SQL Server Management Studio (SSMS), you can see connect & query to get started.
To restore your database in SSMS, follow these steps:
Download the appropriate .bak file from one of links provided in the download backup files section.
Move the .bak file to your SQL Server backup location. This location varies depending on your installation location, instance name, and version of SQL Server. For example, the default location for a default instance of SQL Server 2022 (16.x) is:
Open SSMS and connect to your SQL Server instance.
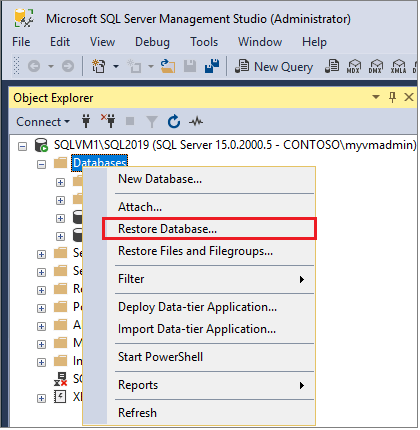
Right-click Databases in Object Explorer > Restore Database... to launch the Restore Database wizard.
Select Device and then select the ellipses (...) to choose a device.
Select Add and then choose the .bak file you recently moved to the backup location. If you moved your file to this location but you're not able to see it in the wizard, SQL Server or the user signed into SQL Server doesn't have permission to this file in this folder.
Select OK to confirm your database backup selection and close the Select backup devices window.
Check the Files tab to confirm the Restore as location and file names match your intended location and file names in the Restore Database wizard.
You can restore your sample database using Transact-SQL (T-SQL). An example to restore AdventureWorks2022 is provided in the following example, but the database name and installation file path can vary depending on your environment.
To restore AdventureWorks2022 on Windows, modify values as appropriate to your environment and then run the following Transact-SQL (T-SQL) command:
USE [master];
GO
RESTORE DATABASE [AdventureWorks2022]
FROM DISK = N'C:\Program Files\Microsoft SQL Server\MSSQL16.MSSQLSERVER\MSSQL\Backup\AdventureWorks2022.bak'
WITH
    FILE = 1,
    NOUNLOAD,
    STATS = 5;
GO
To restore AdventureWorks2022 on Linux, change the Windows filesystem path to Linux, and then run the following Transact-SQL (T-SQL) command:
USE [master];
GO
RESTORE DATABASE [AdventureWorks2022]
FROM DISK = '/var/opt/mssql/backup/AdventureWorks2022.bak'
WITH
    MOVE 'AdventureWorks2022' TO '/var/opt/mssql/data/AdventureWorks2022_Data.mdf',
    MOVE 'AdventureWorks2022_log' TO '/var/opt/mssql/data/AdventureWorks2022_log.ldf',
    FILE = 1,
    NOUNLOAD,
    STATS = 5;
GO
To restore your database in Azure Data Studio, follow these steps:
Download the appropriate .bak file from one of links provided in the download backup files section.
Move the .bak file to your SQL Server backup location. This location varies depending on your installation location, instance name, and version of SQL Server. For example, the default location for a default instance of SQL Server 2022 (16.x) is:
Open Azure Data Studio and connect to your SQL Server instance.
Right-click on your server and select Manage.
Select Restore
On the General tab, fill in the values listed under Source.
Under Restore from, select Backup file.
Under Backup file path, select the location you stored the .bak file.
This step autopopulates the rest of the fields such as Database, Target database and Restore to.
Select Restore to restore your database.
Deploy to Azure SQL Database
You have two options to view sample Azure SQL Database data. You can use a sample when you create a new database, or you can deploy a database from SQL Server directly to Azure using SSMS.
When you create a new database in Azure SQL Database, you can create a blank database, restore from a backup, or select sample data to populate your new database.
Follow these steps to add a sample data to your new database:
Connect to your Azure portal.
Select Create a resource in the top left of the navigation pane.
Select Databases and then select SQL Database.
Fill in the requested information to create your database.
On the Additional settings tab, choose Sample as the existing data under Data source:
Select Create to create your new SQL Database, which is the restored copy of the AdventureWorksLT database.
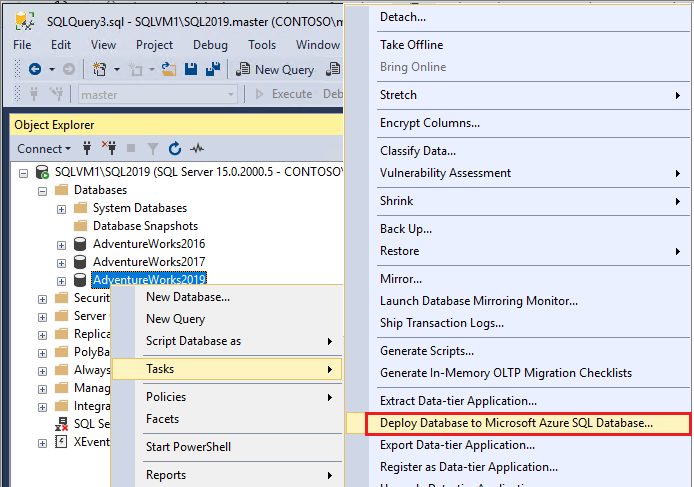
Deploy database from SQL Server
SSMS allows you to deploy a database directly to Azure SQL Database. This method doesn't currently provide data validation so is intended for development and testing and shouldn't be used for production.
To deploy a sample database from SQL Server to Azure SQL Database, follow these steps:
Administer an SQL Server database infrastructure for cloud, on-premises and hybrid relational databases using the Microsoft PaaS relational database offerings.